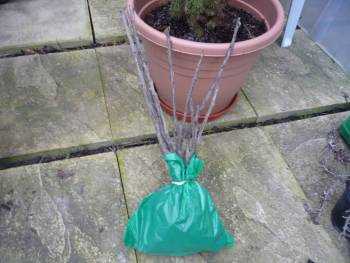
- What Are Grape Cuttings?
- Benefits of Rooting Grape Cuttings
- Technique 1: Cane Cuttings
- Step-by-Step Guide to Taking Cane Cuttings
- Materials Needed:
- Step 1: Selecting and Preparing the Cutting
- Step 2: Preparing the Rooting Medium
- Step 3: Applying Rooting Hormone (optional)
- Step 4: Planting the Cutting
- Step 5: Providing the Right Environment
- Step 6: Monitoring and Caring for the Cutting
- Step 7: Transplanting the Rooted Cutting
- Advantages and Disadvantages of Cane Cuttings
- Advantages:
- Disadvantages:
- Technique 2: Hardwood Cuttings
- Step-by-Step Guide to Taking Hardwood Cuttings
- Advantages and Disadvantages of Hardwood Cuttings
- Advantages:
- Disadvantages:
- Technique 3: Greenwood Cuttings
- Step-by-Step Guide to Taking Greenwood Cuttings
- Question-answer:
- What are the three effective ways to cut grape cuttings for rooting?
- How do I perform the winter hardwood cutting technique for grape cuttings?
- What is the summer greenwood cutting technique for grape cuttings?
- What is the dormant cutting technique for grape cuttings?
- Which technique is most suitable for rooting grape cuttings?
- Can I use a different type of soil mix for rooting grape cuttings?
- How long does it take for grape cuttings to develop roots?
- Video: Root Grapevines in Water! (With Results!)
Grapes are one of the most popular fruits in the world, known for their delicious taste and numerous health benefits. If you are a grape lover and want to grow your own grapevines, you may be wondering how to propagate them successfully. One of the most effective ways to do this is by cutting grape cuttings for rooting. This article will explore three different techniques for cutting grape cuttings and compare their effectiveness.
1. Hardwood Cuttings: Hardwood cuttings are taken from mature grapevines during the dormant season, typically in late winter or early spring. These cuttings are thick and woody, with no green growth. To prepare a hardwood cutting, choose a healthy, disease-free vine and cut a 6-8 inch section just below a node. Remove any leaves or buds from the lower half of the cutting, and dip the bottom end in rooting hormone. Plant the cutting in a well-draining soil mix, burying at least half of it, and keep it in a warm, humid environment until roots form.
“Hardwood cuttings are a popular choice for propagating grapevines,” says gardening expert Jane Smith.
“They have a high success rate and can be easy to manage. Just make sure to choose a healthy, well-established vine and provide the right growing conditions for optimum root development.”
2. Softwood Cuttings: Softwood cuttings are taken from young, green growth on grapevines during the spring or early summer. These cuttings are flexible and still have leaves. To prepare a softwood cutting, choose a vigorous shoot and cut a 6-8 inch section just below a node. Remove any leaves from the lower half of the cutting, and dip the bottom end in rooting hormone. Plant the cutting in a well-draining soil mix, burying at least half of it, and keep it in a warm, humid environment until roots form.
“Softwood cuttings are a great option for those who want to propagate their grapevines quickly,” recommends horticulturist John Davis.
“They root faster than hardwood cuttings and allow you to create multiple plants from a single vine. However, they are more delicate and require extra care to prevent dehydration.”
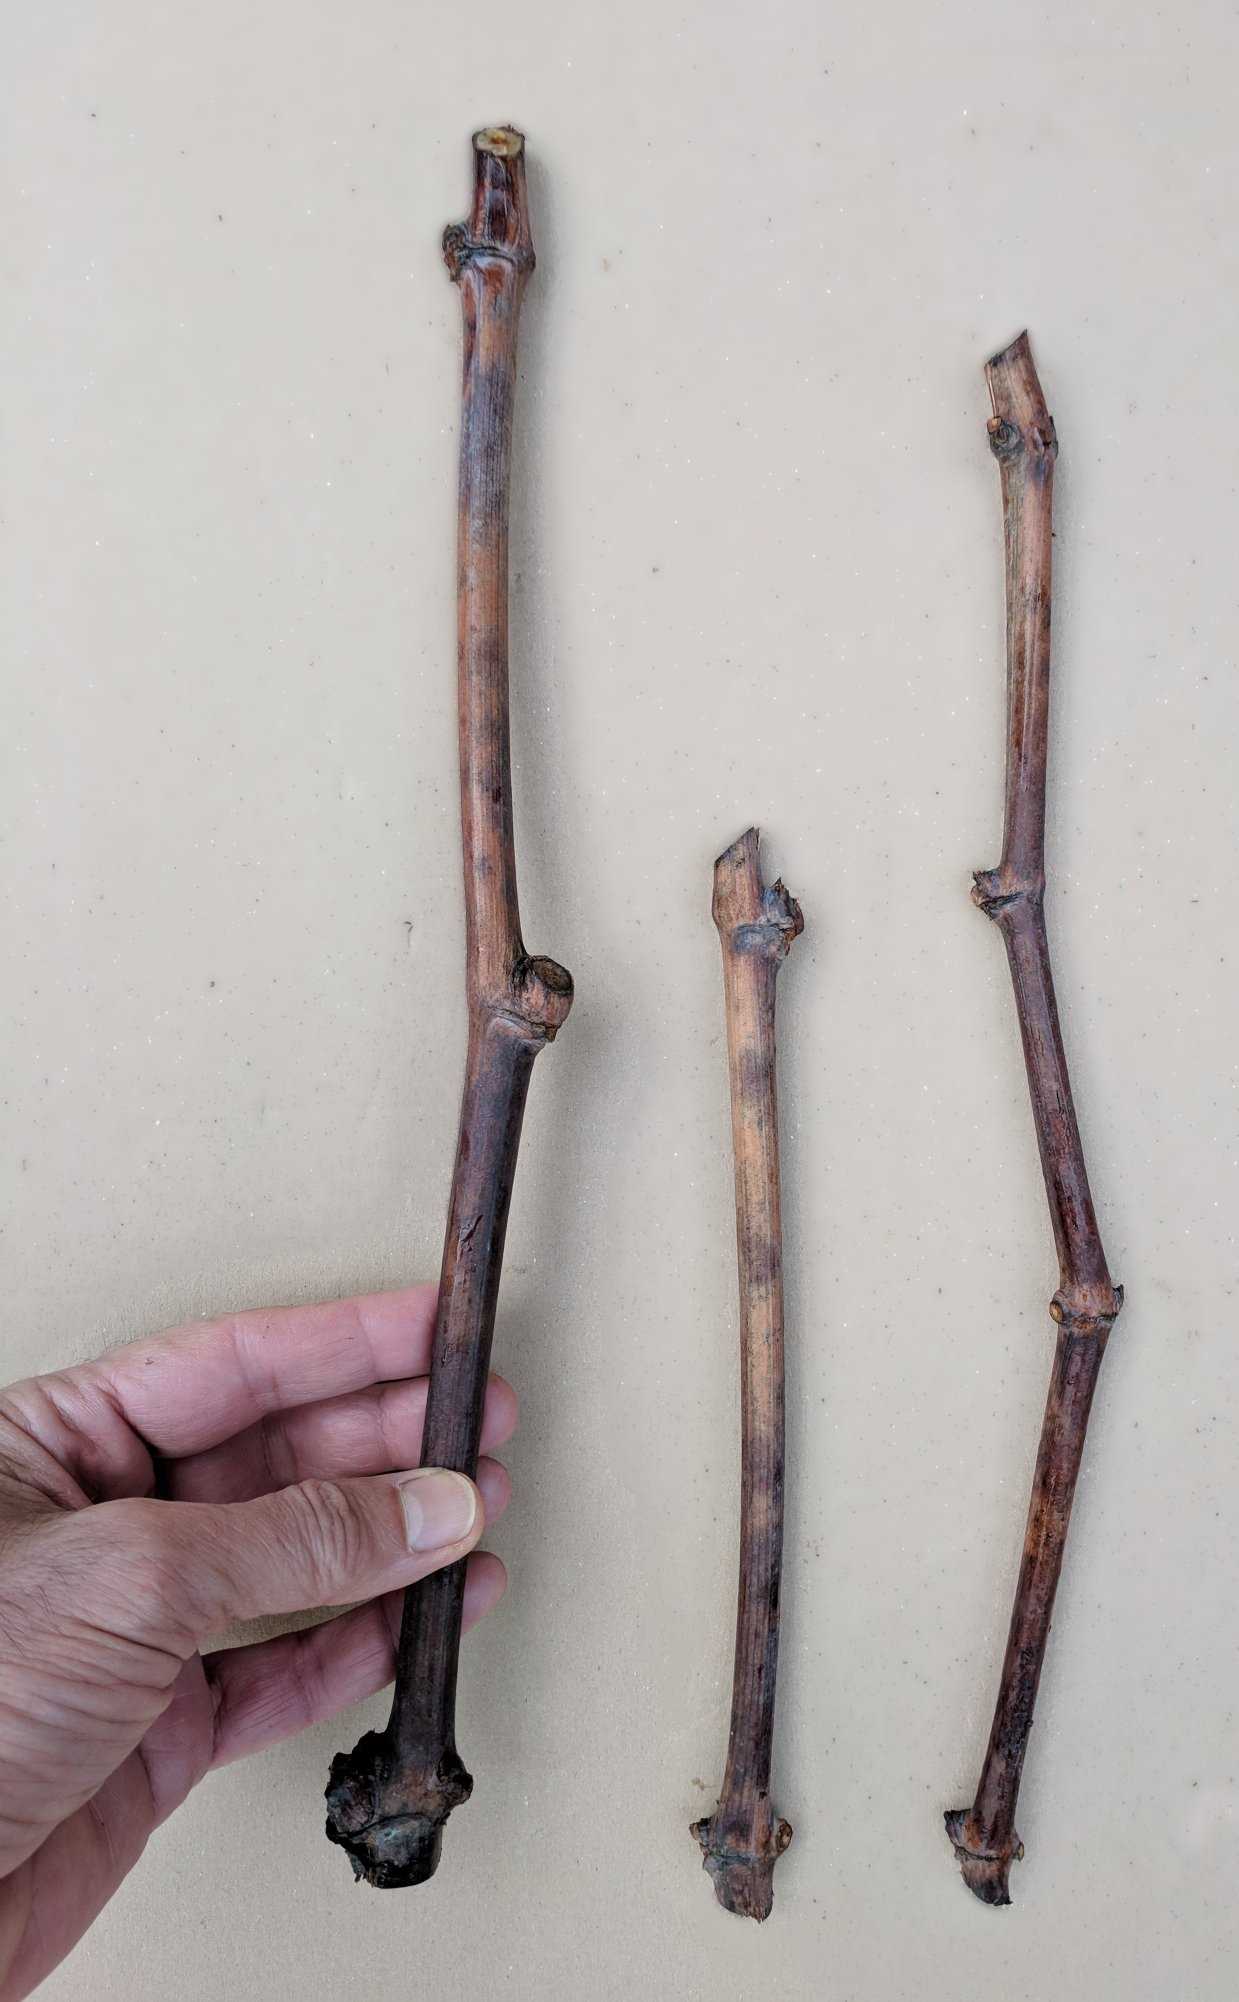
3. Cane Cuttings: Cane cuttings are taken from the previous season’s growth on grapevines during the winter. These cuttings should be about pencil-thickness and have several nodes. To prepare a cane cutting, choose a healthy, well-ripened cane and cut it into 6-8 inch sections just below each node. Make sure to make a slanting cut at the top end to indicate the correct orientation. Plant the cutting in a well-draining soil mix, burying at least half of it, and keep it in a cool, moist environment until roots form.
“Cane cuttings are a traditional method of propagating grapevines and can be quite successful,” advises grape grower Tom Johnson.
“They are a good option for those who have access to well-ripened canes and prefer a more straightforward approach to propagation. Just make sure to provide regular misting or cover them with a plastic bag to maintain the necessary moisture.”
By comparing these three techniques for cutting grape cuttings, you can choose the one that best suits your needs and preferences. Whichever method you choose, remember to be patient and provide proper care to your cuttings until they develop into healthy, thriving grapevines.
What Are Grape Cuttings?
Grape cuttings are portions of grapevine stems that are taken and used to propagate new grape plants. They are a common method of starting new grape vines as they allow for the replication of desired grape varieties.
Grape cuttings can be taken from dormant grapevines during the winter or from actively growing vines during the spring and summer. The cuttings are typically taken from healthy and disease-free grape vines.
There are several reasons why grape cuttings are used for propagation:
- Preservation of Grape Variety: Grape cuttings are used to preserve and propagate specific grape varieties that have desirable traits, such as flavor, color, or disease resistance. This allows growers to maintain consistency in their vineyards and produce high-quality grapes.
- Efficient and Cost-effective Method: Using grape cuttings is a relatively simple and cost-effective method of propagation compared to other techniques, such as grafting or tissue culture. It allows for the rapid production of new grape plants.
- Genetic Diversity: By taking cuttings from different grapevines and propagating them, growers can increase the genetic diversity in their vineyards. This can lead to more resilience against diseases and pests and can also result in the discovery of new and unique grape varieties.
Grape cuttings require specific conditions and techniques to ensure successful rooting and growth. The choice of technique for cutting and preparing grape cuttings can greatly influence their viability and success rates.
Benefits of Rooting Grape Cuttings
Rooting grape cuttings can provide several benefits for grape growers. Here are some of the key advantages:
- Cost-effective propagation: Rooting grape cuttings allows growers to propagate new grapevines without the need for expensive nursery plants or seeds. This can significantly reduce the cost of establishing a new vineyard or expanding an existing one.
- Preservation of desirable traits: Rooting cuttings from established grapevines allows growers to preserve the desirable traits of those vines. This includes characteristics such as disease resistance, high yield, berry size, and flavor profile. By selecting the healthiest and most productive vines for cutting propagation, growers can maintain and improve the quality of their grape varieties over time.
- Varietal purity: Rooting grape cuttings ensures the preservation of varietal purity. This means that the new vines produced from cuttings will be genetically identical to the parent plant, ensuring consistency in grape characteristics and flavors.
- Control over rootstock: Rooting grape cuttings allows growers to select the rootstock that best suits their needs. Different rootstocks can provide specific advantages, such as resistance to soil diseases, tolerance to drought or cold conditions, or improved compatibility with certain soil types. By rooting their own cuttings, growers can choose the rootstock that will optimize the growth and health of their vines.
- Increased productivity: Rooting grape cuttings from high-quality vines can result in increased productivity. By carefully selecting vines with desirable traits and rooting their cuttings, growers can establish new vines that have the potential to produce higher yields of grapes, leading to increased profits.
In conclusion, rooting grape cuttings offers grape growers a cost-effective method of propagation that preserves desirable traits, maintains varietal purity, provides control over rootstock, and can lead to increased productivity. By mastering the techniques of cutting preparation and rooting, growers can successfully propagate new grapevines and optimize their vineyard’s performance.
Technique 1: Cane Cuttings
- Step 1: Select a healthy grapevine cane. Look for a cane that is about pencil thickness, with no signs of disease or damage.
- Step 2: Using clean pruning shears, cut a section of the cane that is about 12 to 18 inches long. Make a clean, diagonal cut just below a bud.
- Step 3: Remove any leaves or lateral shoots from the bottom half of the cutting, leaving only a couple of leaves at the top.
- Step 4: Dip the bottom end of the cutting in a rooting hormone to encourage root development.
- Step 5: Fill a small pot with a well-draining rooting medium, such as a mixture of perlite and peat moss.
- Step 6: Make a hole in the rooting medium and carefully insert the bottom end of the cutting into the hole.
- Step 7: Gently firm the rooting medium around the cutting to hold it in place.
- Step 8: Place the pot in a warm, bright location, but out of direct sunlight.
- Step 9: Keep the rooting medium moist, but not overly wet. Check the moisture level regularly and water as needed.
- Step 10: After several weeks, gently tug on the cutting to check for root development. If there is resistance, it means roots have formed.
- Step 11: Once roots have formed, transplant the rooted cutting into a larger pot or directly into the ground.
Step-by-Step Guide to Taking Cane Cuttings
Materials Needed:
- Sharp pruning shears or scissors
- Clean, sterile planting medium (such as perlite or vermiculite)
- Clean, sharp knife
- Rooting hormone (optional)
- Plastic bag or plastic wrap
- Mist sprayer or water bottle
Step 1: Selecting and Preparing the Cutting
Choose a healthy grapevine that has new, green canes. Cuttings can be taken in early spring or in late fall when the plant is dormant. Look for canes that are about the thickness of a pencil and have multiple nodes.
Using sharp pruning shears or scissors, cut a 6- to 12-inch-long piece of cane. Make the cut just above a node (where a leaf or bud was attached). Remove any leaves or buds from the lower 2/3 of the cutting, as these can interfere with root development.
Step 2: Preparing the Rooting Medium
Fill a clean container or planting tray with a sterile, well-draining planting medium. This can be a commercial mix specifically designed for rooting cuttings, or you can make your own mix using perlite or vermiculite.
Step 3: Applying Rooting Hormone (optional)
If desired, dip the cut end of the grapevine cutting into rooting hormone powder or gel. This can help stimulate root growth and increase the success rate of rooting. Shake off any excess hormone before proceeding.
Step 4: Planting the Cutting
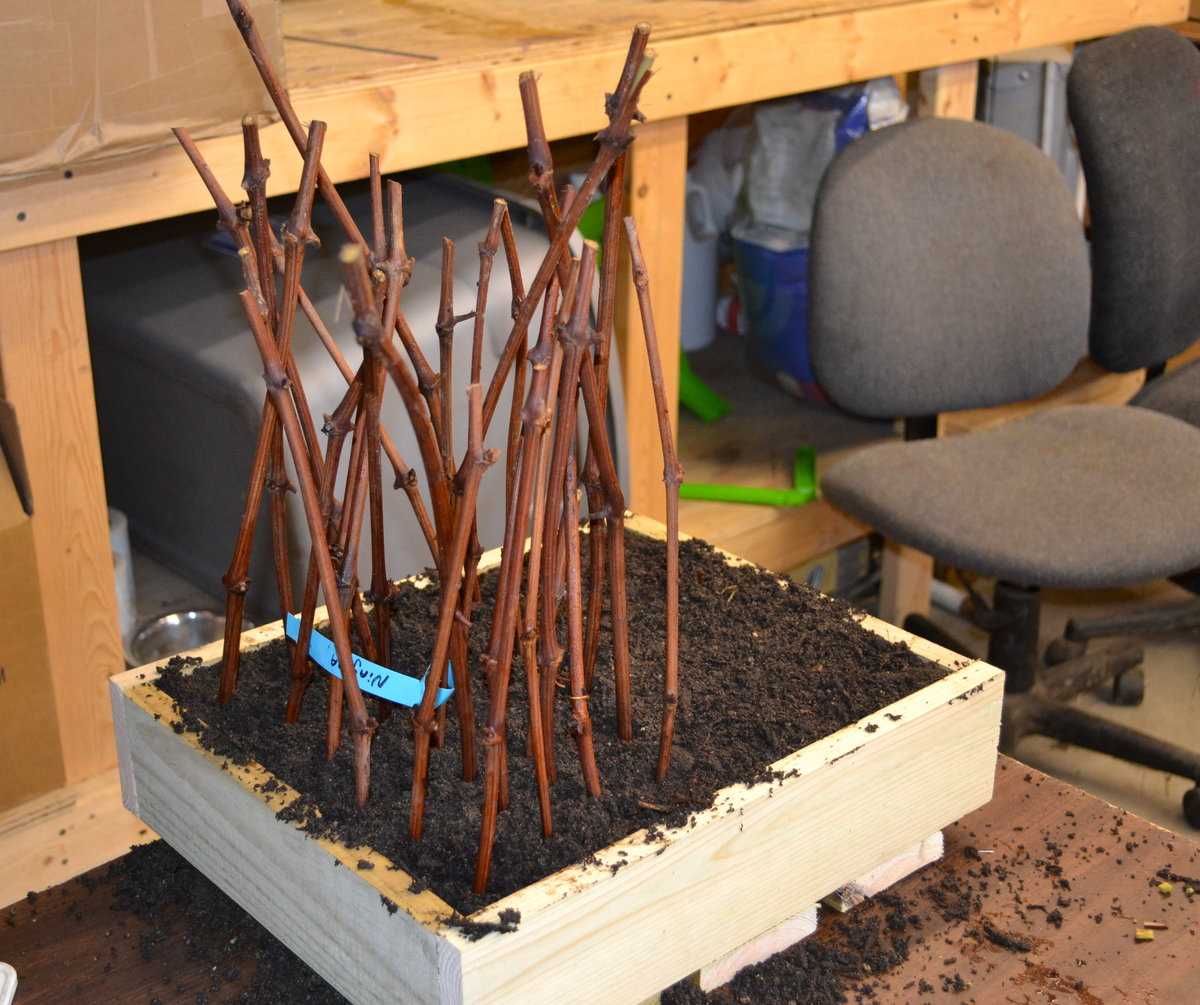
Using a clean, sharp knife, make a small hole in the planting medium. Insert the grapevine cutting into the hole, ensuring that at least two nodes are buried in the medium. Gently firm the medium around the cutting to provide stability.
If planting multiple cuttings in the same container, space them at least 2 inches apart to allow room for root development.
Step 5: Providing the Right Environment
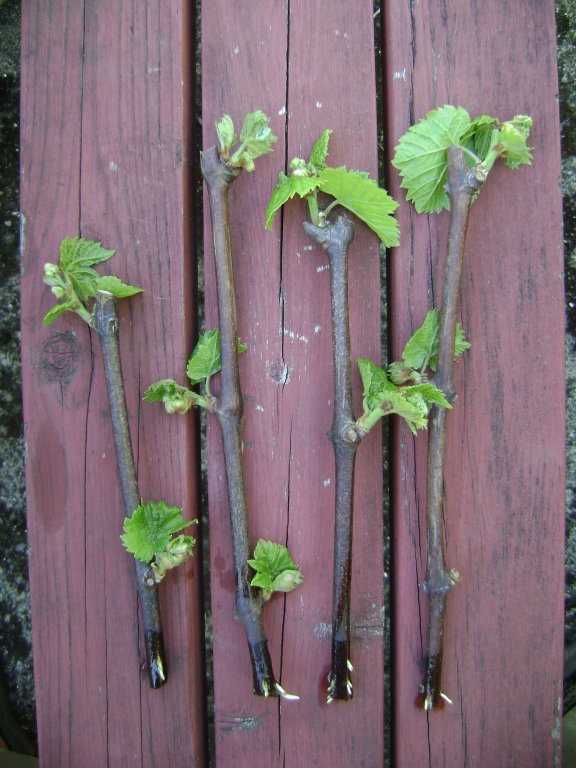
Cover the container or tray with a clear plastic bag or plastic wrap to create a mini greenhouse effect. Place the container in a warm location with indirect sunlight. Avoid direct sunlight, as it can cause the cutting to overheat and dry out.
Regularly mist the cutting and the inside of the bag or wrap with water to maintain humidity. This will help prevent the cutting from drying out.
Step 6: Monitoring and Caring for the Cutting
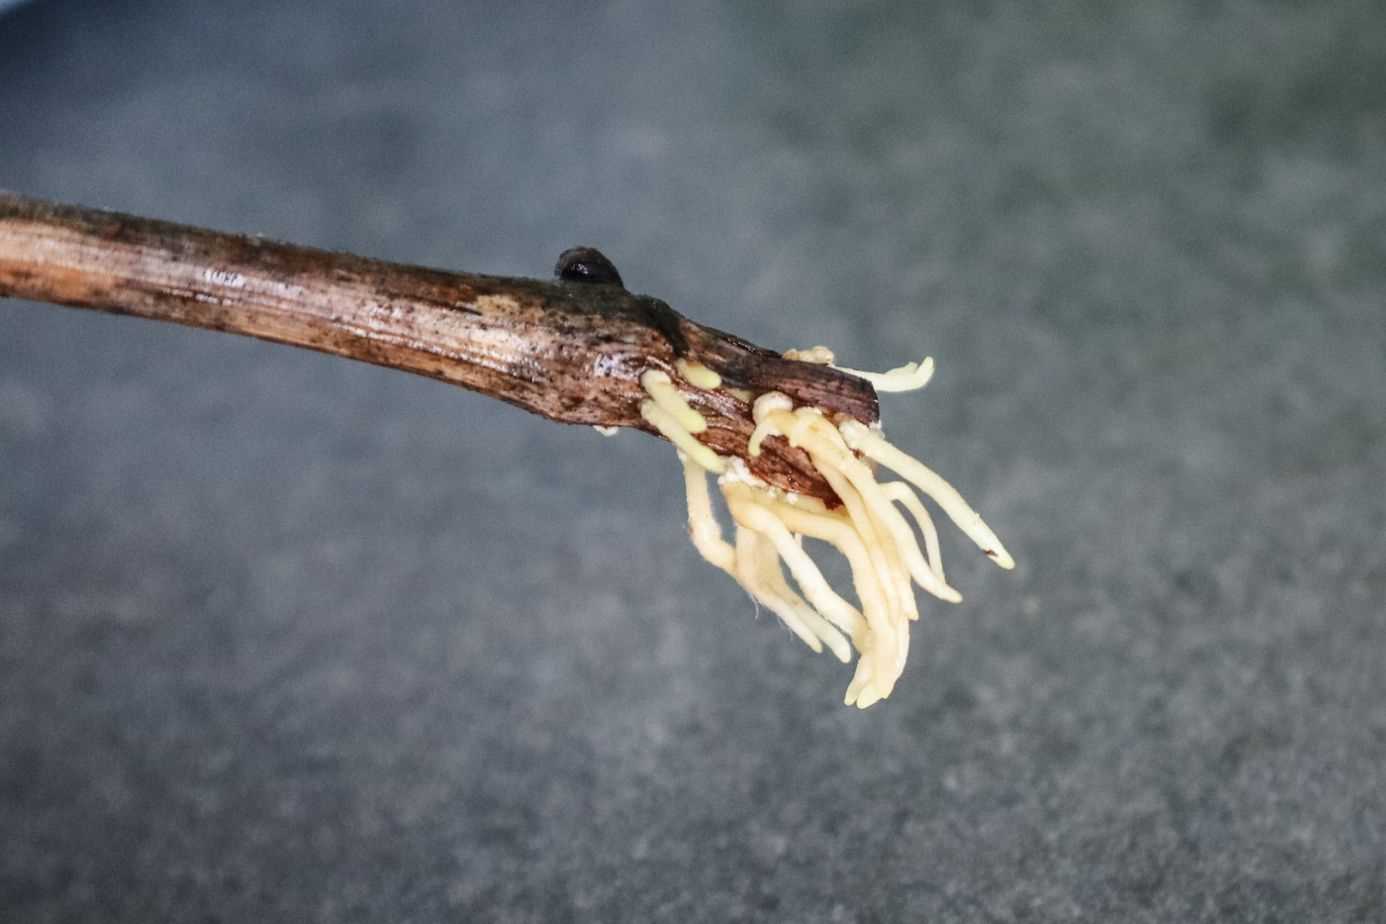
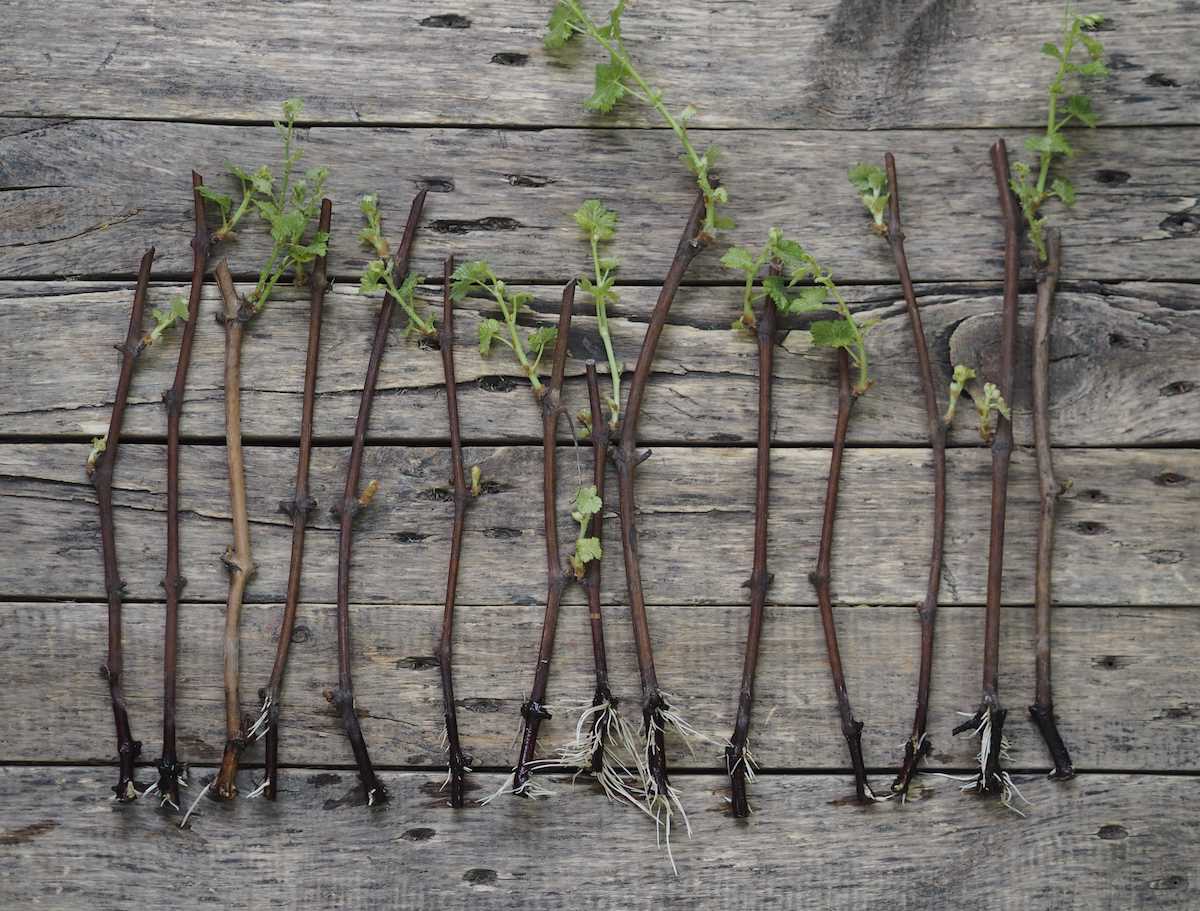
Check the cutting regularly for signs of rooting, such as new growth or resistance when gently tugged. This can take anywhere from a few weeks to a few months.
Keep the planting medium moist but not overly wet. Too much moisture can lead to rot, while too little moisture can cause the cutting to dry out. Check the moisture level by gently touching the top layer of the medium.
Step 7: Transplanting the Rooted Cutting
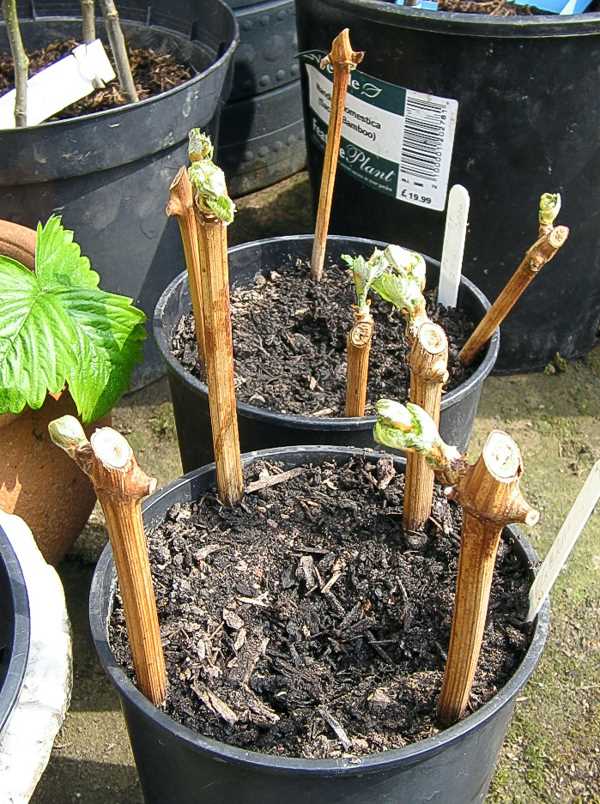
Once the grapevine cutting has developed a strong root system, it can be transplanted into a larger container or directly into the ground. Gradually acclimate the cutting to outdoor conditions by increasing its exposure to sunlight and reducing humidity over the course of several days.
Be patient and give the cutting time to establish itself in its new home. With proper care, the grapevine cutting will grow into a healthy, productive plant.
Advantages and Disadvantages of Cane Cuttings
Cane cuttings are one of the techniques used for rooting grape cuttings. This method involves taking a section of the mature woody cane and using it to propagate a new grape plant. While cane cuttings can be successful in some situations, they also come with their own set of advantages and disadvantages. Here are the main ones:
Advantages:
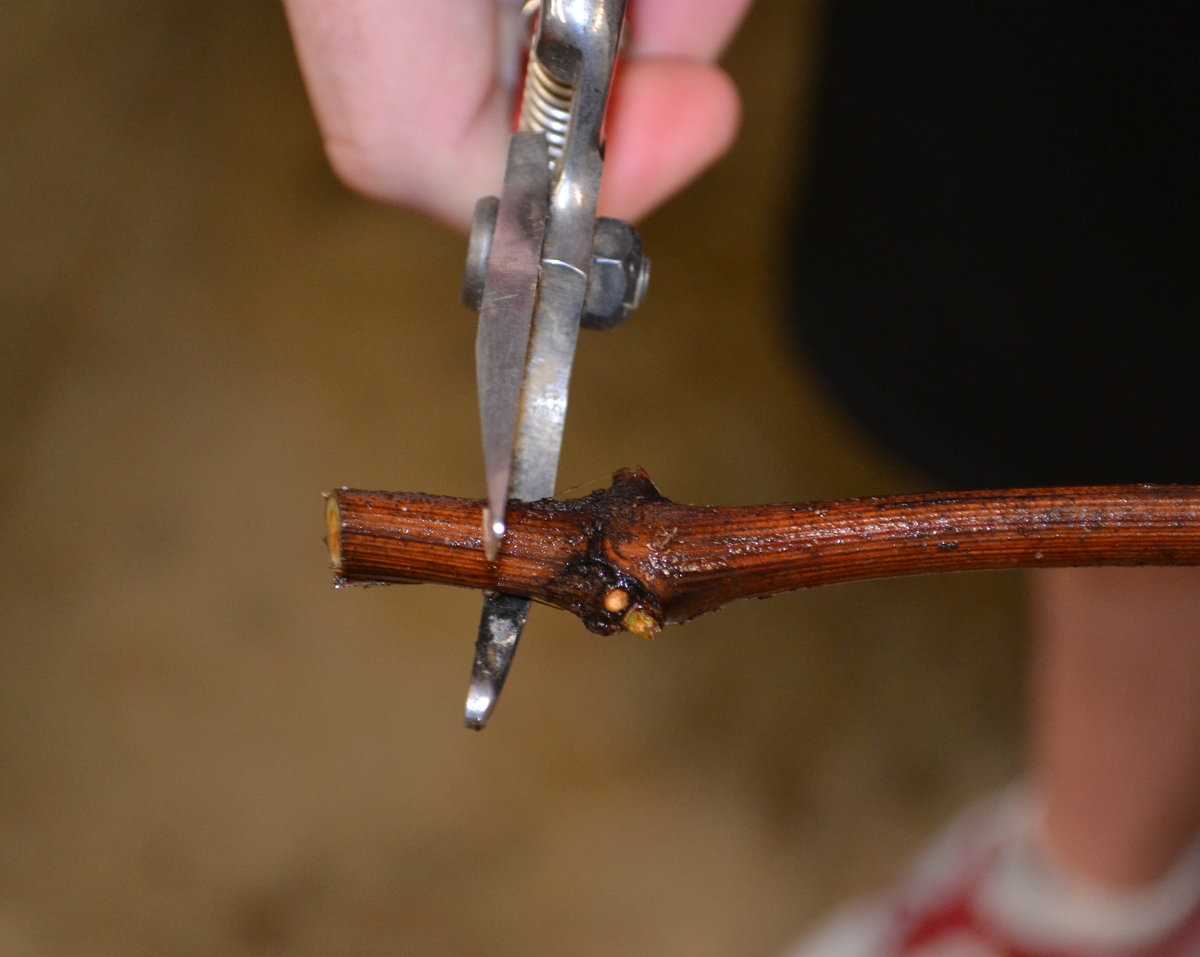
- Ease of identification: Cane cuttings are relatively easy to identify and select from the parent plant. This makes it convenient for growers to choose the healthiest and most suitable canes for propagation.
- Higher chances of survival: Cane cuttings have a higher chance of survival compared to other types of grape cuttings. This is because they are taken from a mature and established vine, which increases their potential to develop roots and grow into a healthy plant.
- Good success rate: With proper care and attention, cane cuttings can have a good success rate when it comes to rooting. This makes them a desirable option for grape growers looking to expand their vineyard.
Disadvantages:
- Prone to disease transmission: Cane cuttings have a higher risk of transmitting diseases from the parent plant to the new plant. This is especially true if the parent vine has any underlying diseases or infections. Growers need to ensure they select healthy canes to minimize this risk.
- Requires more time to establish: Cane cuttings generally require more time to establish compared to other propagation methods like hardwood cuttings. They need a longer period of root development before they can be transplanted into the field or container.
- Dependent on favorable weather conditions: Cane cuttings are more dependent on favorable weather conditions for successful rooting. They require consistent moisture, warmth, and protection from extreme temperatures to develop roots properly. This can be a challenge in certain climates or seasons.
Overall, cane cuttings can be a viable option for propagating grape plants, but they come with their own advantages and disadvantages. Growers should carefully evaluate these factors and choose the method that best suits their specific circumstances and goals.
Technique 2: Hardwood Cuttings
Hardwood cuttings are a popular technique for propagating grapevines, especially in colder climates. This method involves taking cuttings from mature, dormant grape vines during the winter months when the plant is in its dormant phase.
The following steps outline the process of using hardwood cuttings to propagate grape vines:
- Prepare the cuttings: Select healthy, disease-free hardwood stems that are about pencil-thick in diameter. Cut the stem into sections that are around 12-18 inches long, making sure to include at least two buds on each cutting. Remove any leaves from the lower half of the cutting.
- Treat the cuttings: To further improve the chances of successful root formation, you can dip the bottom ends of the cuttings in a rooting hormone powder before planting them. This will help stimulate root growth.
- Plant the cuttings: Insert the bottom end of each cutting into a prepared container or directly into the ground outdoors. Make sure to plant the cuttings vertically and bury them to a depth of about 2-4 inches, leaving the top bud exposed.
- Provide proper care: Water the cuttings thoroughly after planting to settle the soil around them. Throughout the rooting process, provide regular watering to keep the soil moist, but not waterlogged. Maintain a moist and well-drained environment by mulching around the cuttings.
- Monitor progress: It may take several weeks for the cuttings to develop roots. Monitor the cuttings closely for signs of new growth or root development. Once the cuttings have successfully rooted, you can transplant them into larger pots or directly into the garden.
Advantages of using hardwood cuttings:
- This technique can be done during the winter months when the grapevine is dormant, making it suitable for colder climates.
- The cuttings are taken from mature plants, increasing the chances of successful root formation.
- Hardwood cuttings usually have a high success rate, making it an effective and reliable propagation technique.
- It is a cost-effective method as it requires minimal equipment and materials.
In conclusion, using hardwood cuttings is an effective way to propagate grapevines, especially in colder climates. By following the steps outlined above, you can successfully root grape cuttings and expand your grapevine collection.
Step-by-Step Guide to Taking Hardwood Cuttings
Hardwood cuttings refer to the practice of propagating plants from mature, woody stems. This technique is commonly used for propagating grape vines. Follow these steps to take hardwood cuttings successfully:
- Select the right time: The best time to take hardwood cuttings is during late winter or early spring, when the plant is dormant. This ensures that the cuttings have stored enough energy to develop roots.
- Choose healthy stems: Select stems that are at least 1-2 years old and free from disease or damage. Look for stems that are firm and have a smooth, healthy appearance.
- Prepare the cuttings: Using a clean, sharp pruning tool, make a slanted cut at the base of the selected stem, just below a bud. The cutting should be about 8-12 inches long.
- Remove leaves and buds: Remove any leaves or buds from the lower half of the cutting. This will prevent the cutting from losing excessive moisture and divert energy to root development.
- Treat with rooting hormone: If desired, you can dip the cut end of the hardwood cutting into a rooting hormone powder or gel. This helps promote root growth.
- Plant the cuttings: Fill a container or a prepared nursery bed with well-draining soil. Insert the cuttings about halfway into the soil, ensuring that at least two buds are above the surface.
- Water and cover: Water the cuttings thoroughly to settle the soil. Cover the container with a clear plastic bag or a plastic dome to create a humid environment that will encourage root development.
- Monitor and care: Regularly check the moisture level in the soil and water as needed. Keep the cuttings in a sheltered location with indirect sunlight. After a few weeks, you should start to see signs of new growth.
- Transplanting: Once the cuttings have developed a strong root system, they can be transplanted into their permanent location. This is typically done in the following growing season.
Using hardwood cuttings is an effective and economical way to propagate plants like grapes. By following these steps and providing proper care, you can increase your chances of successful rooting and establish new plants.
Advantages and Disadvantages of Hardwood Cuttings
Advantages:
- Higher success rate: Hardwood cuttings tend to have a higher success rate compared to other types of cuttings, such as softwood or semi-hardwood. This is because hardwood cuttings have a higher concentration of stored carbohydrates, which provide the necessary energy for root development.
- Ability to propagate difficult-to-root plants: Some plant species are known to be challenging to propagate, but hardwood cuttings offer a viable method for successfully rooting these plants. The mature and hardened nature of hardwood cuttings allows for better root development in these plants.
- Economical: Hardwood cuttings are a cost-effective method of plant propagation. They require minimal equipment and resources, making them accessible to home gardeners and small-scale nurseries.
- Year-round availability: Hardwood cuttings can be taken from dormant plants during the winter season, allowing for year-round propagation opportunities. This makes it convenient to propagate plants at any time of the year.
Disadvantages:
- Longer rooting time: Compared to other types of cuttings, hardwood cuttings generally take longer to root. It can take several months for roots to develop and the cutting to establish itself as a new plant.
- Requirement for special treatments: Some hardwood cuttings require special treatments, such as soaking in rooting hormones or scarification, in order to enhance the rooting process. This additional step adds complexity and time to the propagation process.
- Greater susceptibility to diseases: Hardwood cuttings, especially those taken from mature plants, can be more susceptible to diseases and infections. Proper care and hygiene measures should be taken to prevent the spread of diseases during the rooting process.
- Limited genetic diversity: Hardwood cuttings produce clones of the parent plant, resulting in limited genetic diversity. This can be a disadvantage if genetic variability is desired for breeding or other purposes.
Technique 3: Greenwood Cuttings
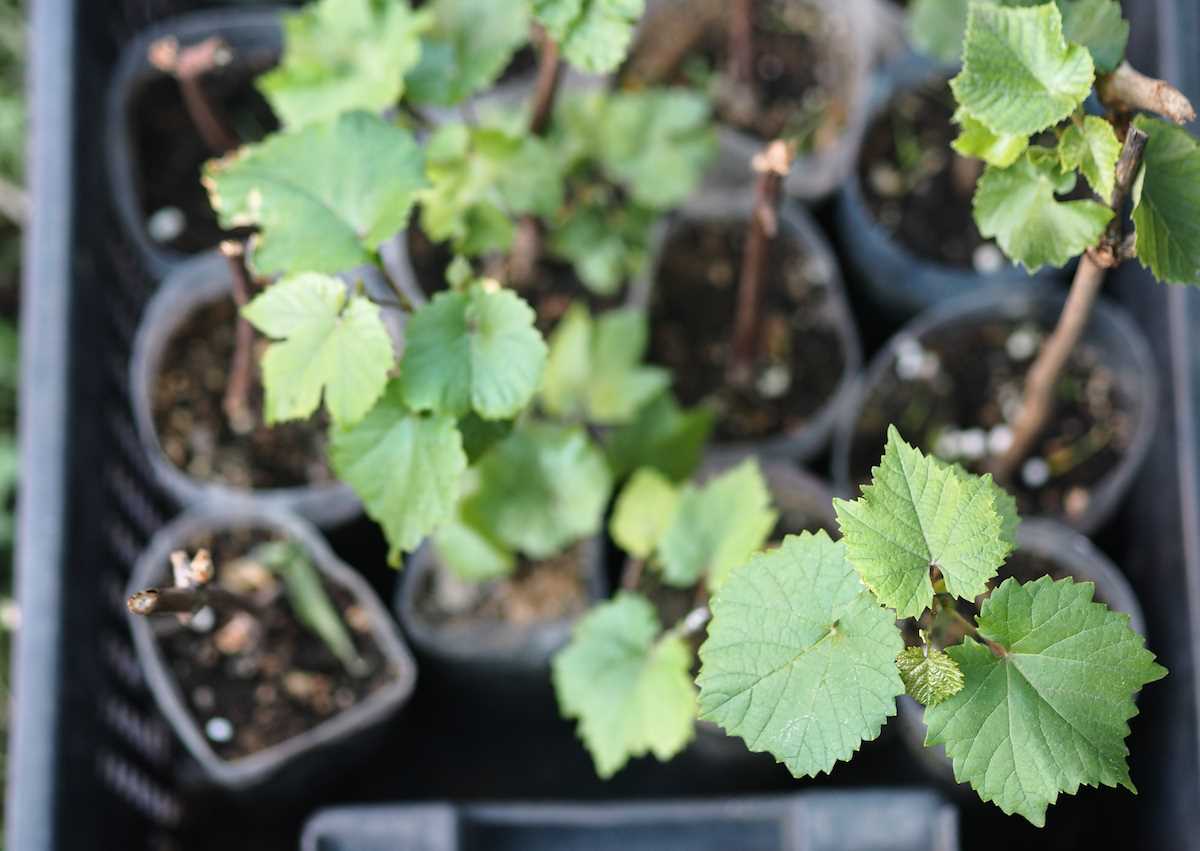
Greenwood cuttings are taken from soft, flexible, new growth on the grape vine. This technique is typically used in the late spring or early summer when the vines are actively growing.
To take greenwood cuttings:
- Choose healthy, disease-free vines that have grown at least 6 inches long.
- Make a clean, diagonal cut at the bottom of each cutting, just below a node.
- Remove any leaves from the bottom two-thirds of the cutting.
- Dip the bottom end of each cutting in rooting hormone to promote root development.
- Place the cuttings in a container filled with a well-draining rooting medium, such as perlite or vermiculite.
- Water the cuttings until the rooting medium feels consistently moist but not waterlogged.
- Cover the container with a plastic bag or place it in a propagator to create a humid environment.
- Place the container in a warm, bright location, but out of direct sunlight.
- Check the cuttings regularly for signs of growth and root development.
- After a few weeks, gently tug on the cuttings to check for resistance, indicating that roots have formed.
- Once the cuttings have rooted, carefully transplant them into individual pots or directly into the ground.
Greenwood cuttings generally have a higher success rate than other methods, but they require more attention and care to ensure successful rooting. It’s important to monitor the moisture levels and provide the cuttings with proper light and temperature conditions.
| Advantages | Disadvantages |
|---|---|
|
|
Step-by-Step Guide to Taking Greenwood Cuttings
Greenwood cuttings are a common method used to propagate grapevines. This technique involves taking cuttings from the current season’s growth, which is still green and flexible. Follow these steps to successfully take greenwood cuttings from your grapevines:
- Select a healthy grapevine: Choose a grapevine that is free from disease and pests. Look for a vine that has strong growth and good overall vigor.
- Gather your tools: Collect a sharp pair of pruning shears, a clean container for placing the cuttings, a rooting hormone (optional but recommended), and a growing medium such as perlite or vermiculite.
- Take the cuttings: Take cuttings that are approximately 8 to 12 inches long, preferably from the middle section of the vine. Make a clean, angled cut just below a leaf node. Remove any leaves from the lower half of the cutting.
- Prepare the cuttings: If using rooting hormone, dip the cuttings into the hormone powder, tapping off any excess. Place the cuttings in a container filled with water to prevent them from drying out.
- Prepare the growing medium: Fill a clean container with a well-draining growing medium such as perlite or vermiculite. Moisten the medium slightly so that it is uniformly damp but not soaking wet.
- Plant the cuttings: Make a hole in the growing medium using a pencil or your finger. Insert the base of each cutting into the hole, ensuring that at least two leaf nodes are buried in the medium. Gently firm the medium around the cutting to hold it in place.
- Maintain the cuttings: Place the container in a warm, bright location but out of direct sunlight. Mist the cuttings regularly to keep the growing medium moist but not waterlogged. Avoid overwatering as this can lead to rot.
- Monitor the progress: After a few weeks, you should start to see new growth emerging from the leaf nodes of the cuttings. This indicates that rooting has occurred. Continue to monitor and care for the cuttings until they are well-established.
- Transplant the rooted cuttings: Once the cuttings have developed a strong root system, they can be carefully transplanted into individual pots or directly into the ground. Provide them with appropriate support and continue to care for them as they establish.
Following these steps will help increase your chances of success when taking greenwood cuttings from your grapevines. It is a rewarding and cost-effective way to propagate new plants and expand your grapevine collection.
Question-answer:
What are the three effective ways to cut grape cuttings for rooting?
The three effective ways to cut grape cuttings for rooting are the winter hardwood cutting technique, the summer greenwood cutting technique, and the dormant cutting technique.
How do I perform the winter hardwood cutting technique for grape cuttings?
To perform the winter hardwood cutting technique for grape cuttings, you need to take the cuttings in late winter when the plant is dormant. Cut a 12-inch long section of a stem, making sure to have at least three buds. Remove any leaves from the stem, leaving only the topmost bud. Plant the cutting in a container with sterile soil mix and water it thoroughly. Place the container in a warm location with indirect sunlight and keep the soil moist. After a few weeks, roots should start to develop.
What is the summer greenwood cutting technique for grape cuttings?
The summer greenwood cutting technique for grape cuttings involves taking the cuttings during the summer when the plant is actively growing. Cut a 6 to 8-inch long section of a stem, making sure to include a few leaves. Remove any flowers or buds from the cutting. Dip the cut end of the cutting in rooting hormone powder and plant it in a container with moist soil mix. Place the container in a warm location with indirect sunlight and keep the soil moist. Roots should start to develop within a few weeks.
What is the dormant cutting technique for grape cuttings?
The dormant cutting technique for grape cuttings is performed during the late winter or early spring when the plant is still dormant. Take a 12 to 18-inch long section of a stem, making sure to have at least three buds. Remove any leaves from the stem, leaving only the topmost bud. Dip the cut end of the cutting in rooting hormone powder and plant it in a container with sterile soil mix. Place the container in a cool location with indirect sunlight and keep the soil moist. Roots should start to develop within a few weeks.
Which technique is most suitable for rooting grape cuttings?
The most suitable technique for rooting grape cuttings depends on the time of year and the condition of the plant. The winter hardwood cutting technique is ideal for late winter when the plant is dormant, while the summer greenwood cutting technique is suitable for the summer when the plant is actively growing. The dormant cutting technique can be used in late winter or early spring. It is important to choose the right technique based on the plant’s growth stage.
Can I use a different type of soil mix for rooting grape cuttings?
While it is recommended to use a sterile soil mix for rooting grape cuttings, you can experiment with different types of soil mixes. Some gardeners have had success with a mix of peat moss, perlite, and vermiculite, while others prefer a mix of sand, compost, and garden soil. It is important to ensure that the soil mix is well-draining and provides enough moisture for the cuttings to develop roots.
How long does it take for grape cuttings to develop roots?
The time it takes for grape cuttings to develop roots can vary depending on the technique used and the conditions provided. In general, roots should start to develop within a few weeks. However, it can take several months for the cuttings to fully establish roots and be ready for transplanting into the ground. It is important to be patient and provide the cuttings with the necessary care and conditions for successful root development.
