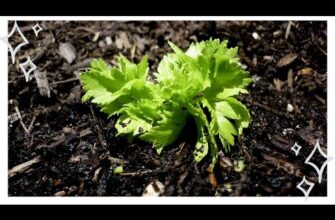
- Подготовка к посадке луковиц лилий
- Выбор подходящего места
- Подготовка почвы для саженцев луковиц лилий
- Правильная техника посадки луковиц лилий
- Выбор времени для посадки
- Глубина посадки
- Расстояние между растениями
- Уход за лилиями после посадки
- Полив и влажность почвы
- Удобрение и подкормка
- Борьба с вредителями и болезнями
- Уход за лилиями в зимний период
- Мульчирование
- Вопрос-ответ:
- Как правильно сажать луковицы лилий?
- Как выбрать подходящее место для посадки луковиц лилий?
- Как подготовить грунт для посадки луковиц лилий?
- Зачем нужно проращивать луковицы перед посадкой?
- На какую глубину следует сажать луковицы лилий?
- Видео:
- НЕ САЖАЙТЕ ЛИЛИИ РЯДОМ С ТЮЛЬПАНАМИ! И другие важные моменты при посадке лилий осенью
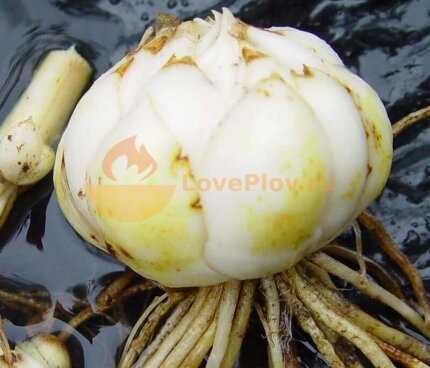
Луковицы лилий являются питательным и важным компонентом для выращивания этих красивых цветов. В садоводстве лилии считаются одними из самых прекрасных и великолепных растений, которые способны украсить любой участок. Однако, чтобы достичь превосходного цветения, необходимо правильно посадить лилии и обеспечить им соответствующий уход.
Луковица, являющаяся основой лилии, представляет собой подземный орган, который содержит запас питательных веществ. Именно из этой луковицы выращивается новое растение. Правильное размножение лилий осуществляется через их луковицы, которые можно приобрести в специализированных магазинах или получить от других садоводов.
Сажать лилии рекомендуется на питательном и хорошо дренированном грунте, чтобы растение могло получать достаточное количество питательных веществ и не задерживать лишнюю влагу. При посадке лилий важно учесть глубину их закопывания, чтобы луковицы были достаточно защищены от внешних факторов. После посадки необходимо обеспечить растению умеренный полив и регулярное удобрение, чтобы лилии росли и развивались в полную силу.
Уход за лилиями также включает регулярное пропалывание сорняков и контроль за вредителями и болезнями. Для защиты лилий от грызунов можно использовать специальные средства или установить сетки и ограды. Кроме того, необходимо удалить увядшие цветы и обрезать стебли после цветения, чтобы обеспечить растению здоровый рост и подготовку к новому сезону.
Подготовка к посадке луковиц лилий
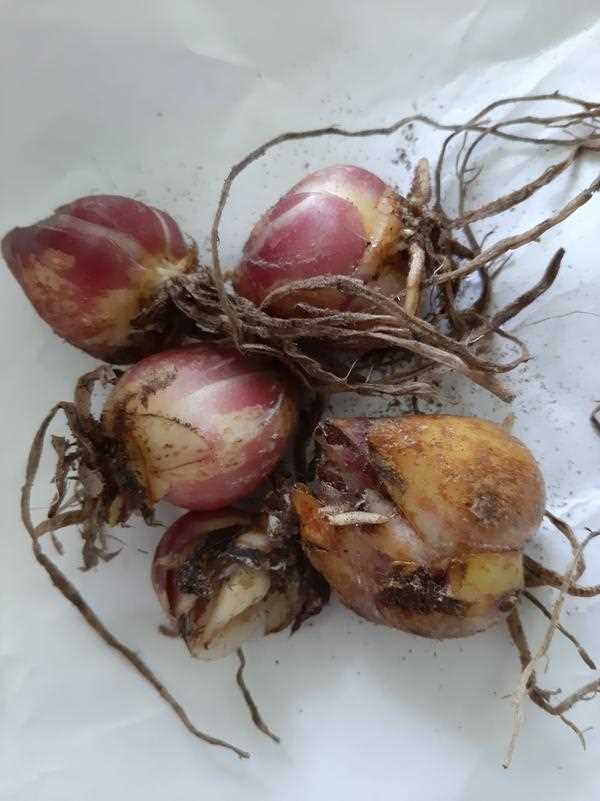
Луковицы лилий – это питательный источник для растения, который содержит необходимые вещества для его развития. Поэтому перед посадкой необходимо правильно подготовить луковицы.
Перед посадкой луковицы лилий должны быть здоровыми и без видимых повреждений. Если луковица повреждена или имеет гнилостные участки, ее следует отбросить. Чтобы защитить луковицы от тлора, их можно обработать специальным раствором антисептика.
Для успешного размножения и роста лилий важно подготовить почву. Она должна быть питательной, рыхлой и хорошо дренированной. Рекомендуется добавить в почву органическое удобрение, чтобы обеспечить растению достаточное количество питательных веществ.
Перед посадкой луковиц лилий следует выбрать подходящее место. Лилии предпочитают солнечные места, хотя некоторые сорта могут расти и в полутени. Важно учитывать, что лилии нуждаются в хорошей вентиляции, поэтому место не должно быть слишком затененным или близким к другим высоким растениям.
Важно помнить, что посадка луковиц лилий – это долгосрочное вложение, которое принесет красивые цветы и украсит ваш сад на долгие годы. Правильная подготовка и ухаживание за луковицами лилий поможет добиться их успешного роста и цветения.
Выбор подходящего места
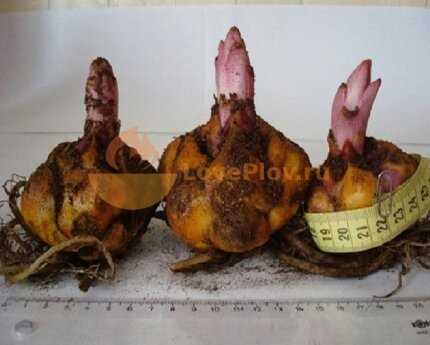
Один из важных факторов, который следует учесть при выборе места для посадки луковиц лилий, — это доступность питательного почвенного слоя. Цветок лилии нуждается в питательных веществах для своего здорового роста и развития. Поэтому важно выбрать место, где почва богата органическим веществом и имеет хорошую дренажную способность.
Луковицы лилий также нуждаются в достаточном количестве солнечного света для своего полноценного фотосинтеза. Поэтому выберите место, где растение будет получать минимум 6-8 часов солнечного света в день. Также учитывайте, что лилии не переносят застоя воды, поэтому исключите места с повышенной влажностью или с образованием луж.
И еще один важный аспект — это выбор места, где растение будет защищено от сильных ветров. Сильные ветры могут повреждать цветы и стебли лилий, поэтому предпочтительно выбирать места с естественной или искусственной защитой от ветра, например, рядом с забором или стеной.
Таким образом, при выборе места для посадки луковиц лилий необходимо обратить внимание на питательность почвы, доступность солнечного света и защиту от ветров. Учитывая эти факторы, вы создадите оптимальные условия для размножения и процветания лилий в вашем саду.
Подготовка почвы для саженцев луковиц лилий
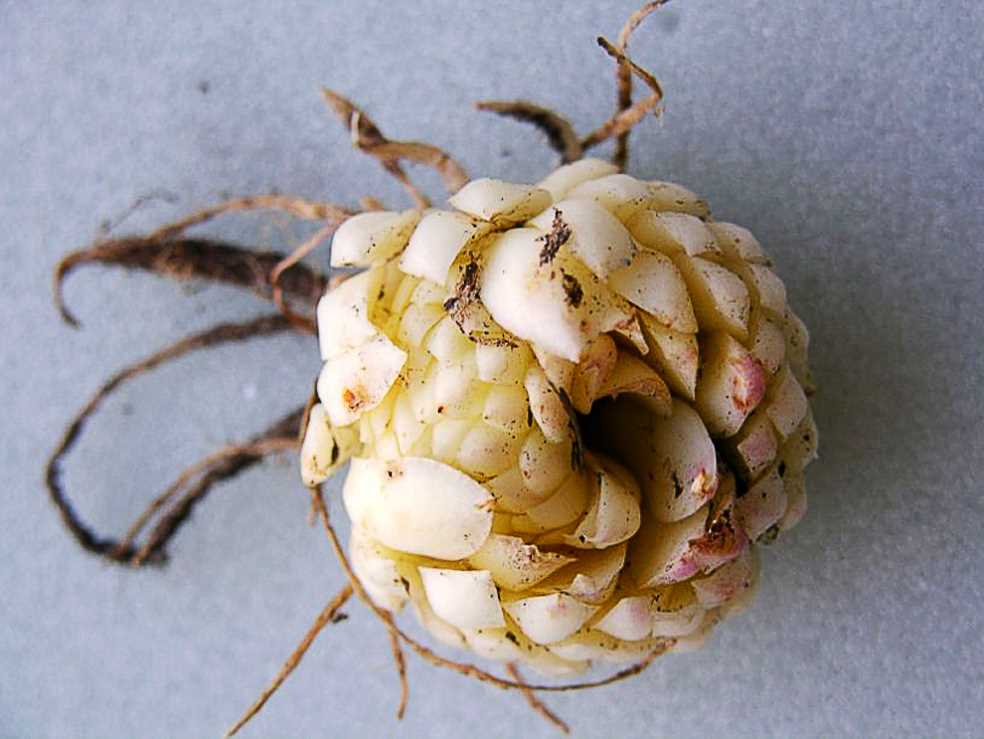
Правильная подготовка почвы для саженцев луковиц лилий играет важную роль в их успешном размножении и росте. Питательный состав почвы является одним из ключевых факторов, определяющих здоровье и красоту цветка.
Для посадки лилий рекомендуется выбирать солнечное место в саду с хорошим тлором. Подготовка почвы начинается с удаления сорняков и камней. Затем необходимо внести органическое удобрение, такое как перегной или компост, чтобы обогатить почву необходимыми питательными веществами. Это позволит луковицам получить достаточное количество питательных веществ для их полноценного развития.
Следующим шагом является прополка почвы и рыхление ее на глубину около 15-20 сантиметров. Это позволит корням луковиц проникнуть в почву и получить необходимое количество кислорода. При посадке саженцев луковиц лилий в почву необходимо обеспечить оптимальную влажность, поэтому перед посадкой рекомендуется полить землю.
Правильная подготовка почвы для саженцев луковиц лилий является важным этапом в садоводстве. Обеспечивая оптимальные условия для развития растения, можно получить красивые и здоровые цветы, которые будут радовать глаз в течение всего сезона.
Правильная техника посадки луковиц лилий
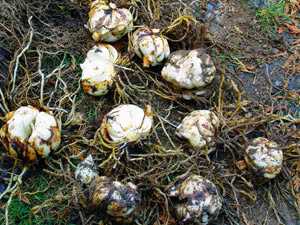
Посадка луковиц лилий — важный этап возделывания этих пышных цветов. Чтобы получить красивые и здоровые растения, необходимо правильно подготовить почву и выбрать оптимальное время для посадки.
Перед посадкой луковицы лилий рекомендуется промыть водой и обработать специальным раствором для дезинфекции. После этого следует выбрать питательный грунт, который обеспечит растению все необходимые вещества для роста и развития.
Важно учесть, что луковицы лилий следует посадить на определенную глубину. Обычно рекомендуется сажать их на глубину примерно в два раза больше их размера. Также стоит учесть, что расстояние между луковицами должно быть достаточным для нормального роста и развития цветка.
Правильная техника посадки луковиц лилий включает также умеренный полив и регулярный уход за растением. Необходимо следить за влажностью почвы и подкармливать растение специальными удобрениями для лилий. Также рекомендуется удалить сорняки и подмульчировать грунт вокруг растения, чтобы сохранить его влажность и защитить от сорняков.
Выбор времени для посадки
Для успешного садоводства и получения красивого цветка лилии, необходимо правильно выбрать время для посадки луковиц. Это важный этап в размножении и уходе за цветком.
Оптимальное время для посадки лилий — осень или ранняя весна. В это время года почва обычно имеет достаточно питательных веществ и влаги, что способствует успешному развитию корней и формированию новых побегов.
Если вы собираетесь посадить лилии осенью, то рекомендуется делать это за 2-3 недели до наступления заморозков. Таким образом, цветок будет иметь достаточно времени для укоренения и подготовки к зиме.
Если же вы предпочитаете посадить лилии весной, то лучшее время для этого — начало апреля. В это время почва уже прогрелась, а погода стабилизировалась. Важно знать, что поздняя посадка луковиц весной может привести к позднему и слабому цветению.
Правильный выбор времени для посадки лилий — залог успешного размножения и ухода за этим великолепным цветком.
Глубина посадки
Глубина посадки луковицы лилии играет важную роль в успешном размножении и росте этого красивого цветка. Правильное определение оптимальной глубины позволяет обеспечить растению необходимые питательные вещества и достаточное количество влаги.
Посадка луковицы лилии в садоводстве требует некоторых знаний и навыков. При определении глубины посадки необходимо учитывать размеры луковицы и условия роста. В общем случае, глубина посадки должна составлять примерно 2-3 раза высоты луковицы.
Глубина посадки влияет на развитие корневой системы и возможность возникновения цветоноса. Слишком глубокая посадка может привести к затяжному развитию растения, а слишком поверхностная — к повреждению луковицы в результате неблагоприятных погодных условий.
Для определения оптимальной глубины посадки луковицы лилии можно использовать следующий метод: измерьте высоту луковицы и умножьте ее на 2 или 3, в зависимости от условий роста. Результатом будет рекомендованная глубина посадки. Не забывайте обеспечить луковице достаточное количество питательных веществ и влаги для успешного роста и цветения.
Расстояние между растениями
Для успешного выращивания лилий и сохранения их здоровья и красоты, садоводам необходимо учесть правильное расстояние между растениями. Это важно для обеспечения достаточного доступа к питательным веществам, влаге и солнечному свету.
При посадке луковиц лилий необходимо соблюдать определенные интервалы. Растения должны быть размещены на расстоянии 15-20 см друг от друга. Это позволит каждому растению получить достаточное количество питательных веществ из почвы и не конкурировать с соседними растениями.
Уход за лилиями включает в себя регулярное поливание, подкормку, удаление сорняков и засохших цветков. Правильное расстояние между растениями также облегчает проведение этих процедур. Садоводам будет легче поддерживать оптимальную влажность почвы, насыщать ее питательными веществами и осуществлять уход.
Кроме того, правильное расстояние между растениями влияет на размножение лилий. При достаточном пространстве между растениями, лилии будут иметь возможность формировать новые луковицы и размножаться. Это позволит садоводам получить больше цветов и украсить свой сад прекрасными лилиями.
Так стоп!!! Вы всё ещё не подписаны на наши каналы в Телеграмм и Дзен? Посмотрите: ТГ - (@historyfantasydetectivechat) и Дзен (https://dzen.ru/myshortsstorys)
Уход за лилиями после посадки
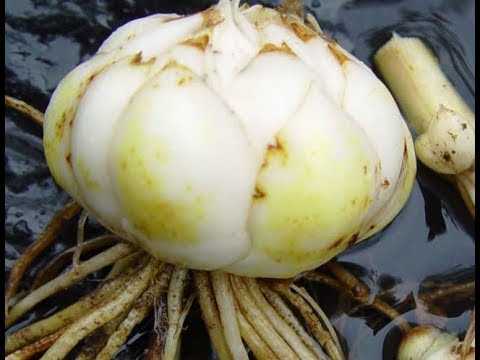
Лилии – это изысканные цветы, которые придают особую красоту саду. Правильный уход за лилиями после посадки поможет растению прекрасно развиваться и цвести. В этом процессе важно обеспечить лилиям оптимальные условия для роста и достаточное количество питательных веществ.
Уход за лилиями после посадки включает в себя регулярный полив и подкормку. Лилии нуждаются в достаточном количестве влаги, особенно в период активного роста. Поливайте растения регулярно, следите, чтобы почва вокруг луковицы была влажной, но не переувлажненной.
Помимо полива, растения нуждаются в питательном тле, чтобы развиваться и цвести в полную силу. После посадки и в период активного роста рекомендуется провести подкормку лилий. Для этого используйте специальные удобрения, содержащие необходимые элементы питания.
Уход за лилиями после посадки также включает удаление сорняков и отмерших листьев. Сорняки конкурируют с лилиями за питательные вещества и воду, поэтому их следует удалять своевременно. Также удаляйте отмершие листья, чтобы предотвратить возможное заражение растения болезнями и вредителями.
Следуя рекомендациям по уходу за лилиями после посадки, вы обеспечите растениям оптимальные условия для роста и развития. Не забывайте также о правильной рассадке лилий и выборе подходящего места для посадки, чтобы создать красивый и ухоженный сад с этими прекрасными цветами.
Полив и влажность почвы
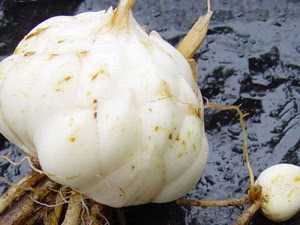
Правильный полив является важным аспектом ухода за луковицами лилий. Растение нуждается в умеренном поливе, чтобы сохранить оптимальный уровень влажности почвы.
Лилии предпочитают влажную почву, но не переносят затопления. Переувлажненная почва может привести к гниению луковиц и росту грибковых инфекций. Поэтому важно следить за уровнем влажности и не допускать застоя воды.
Оптимальное время для полива лилий — это утро или вечер, когда солнце уже не так активно. Вы можете использовать тлор для удержания влаги в почве, это поможет избежать пересыхания и сохранить необходимую влажность.
При размножении лилий через луковицы важно помнить, что новые побеги нуждаются в достаточном количестве влаги для правильного роста. Для этого можно использовать систему капельного полива или поливать растение регулярно, поддерживая уровень влажности.
Удобрение и подкормка

Размножение лилий осуществляется в основном через луковицы. Для обеспечения хорошего роста и развития лилии, важно правильно подкормить растение. Луковицы лилий нуждаются в питательном грунте, который обеспечит им все необходимые элементы для активного роста и цветения.
Подкормка лилий проводится в несколько этапов. Весной, перед началом активного роста, рекомендуется внести органическое удобрение в почву. Оно будет служить источником питательных веществ для молодых побегов и луковиц. Для этого можно использовать перегноя, компост или специальные органические удобрения для лилий.
Важно помнить, что лилии не переносят свежий навоз и перегной – их использование может привести к гниению корней и луковиц.
В период активного роста и цветения, лилии нуждаются в регулярном подкармливании. Для этого можно использовать специализированные минеральные удобрения, богатые азотом, фосфором и калием. Рекомендуется применять удобрения с частотой раз в 2-3 недели. Подкормка выполняется путем растворения удобрения в воде и полива растений полученным раствором.
Не забывайте о том, что избыток удобрений может привести к перегрузке растения питательными веществами и негативно сказаться на его здоровье. Поэтому важно соблюдать рекомендуемые дозы и частоту подкормки.
Борьба с вредителями и болезнями
В процессе размножения лилии, растение может столкнуться с различными вредителями и болезнями, которые могут нанести вред его здоровью и уронить его питательный режим. Чтобы сохранить красоту и здоровье цветка, необходимо проводить регулярные профилактические мероприятия и уход.
Одним из наиболее распространенных вредителей лилий является тлор. Это мелкий насекомое, которое питается соками растения, оставляя на листьях и стеблях липкую секрецию. Для борьбы с тлом можно использовать хозяйственное мыло, разбавленное в воде. Распылите раствор на пораженные участки растения и повторяйте процедуру через несколько дней.
Кроме тла, лилии могут подвергаться атакам различных болезней, таких как бактериальные и грибковые инфекции. Для профилактики и лечения болезней рекомендуется использовать специальные фунгициды, которые помогут уничтожить патогены и восстановить здоровье растения. Также важно следить за состоянием почвы и обеспечивать достаточное освещение и вентиляцию, чтобы предотвратить развитие грибковых инфекций.
Садоводство и уход за лилиями требуют постоянного контроля за вредителями и болезнями. Регулярный осмотр растений, своевременная обработка химическими препаратами и соблюдение правил посадки и ухода помогут сохранить здоровье и красоту ваших лилий.
Уход за лилиями в зимний период
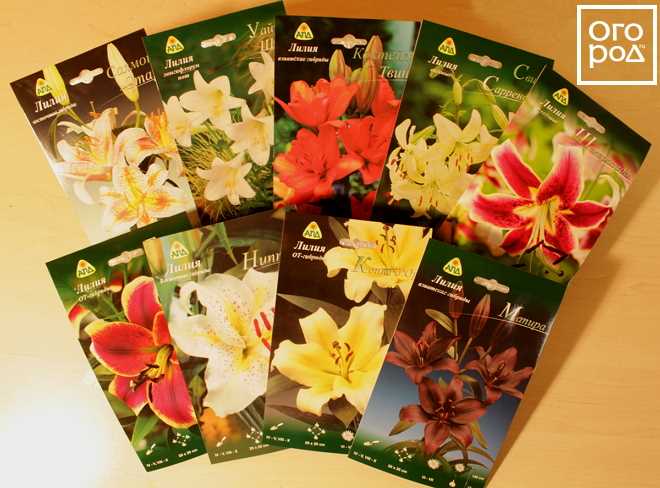
Лилии – это красивые и элегантные цветы, которые обладают невероятной красотой и ароматом. Чтобы растение радовало своими яркими цветами и здоровьем, необходимо правильно ухаживать за ним в зимний период.
Зимой лилии находятся в состоянии покоя, их рост и развитие приостанавливаются. В этот период основное внимание садовода должно быть сосредоточено на защите лилий от холода и осадков.
Важной задачей зимнего ухода за лилиями является защита луковиц от морозов. Для этого рекомендуется использовать тлор или другие покрытия, которые помогут сохранить оптимальную температуру для растения.
Также в зимний период можно заниматься размножением лилий. Для этого необходимо выкапывать и делить лилии, чтобы получить новые экземпляры цветка. Это поможет увеличить количества лилий в саду и создать красивые цветочные композиции.
Однако необходимо помнить о питательных веществах, которые нужны лилиям даже в зимний период. Поэтому рекомендуется регулярно проводить подкормку растений, используя специальные удобрения для лилий. Это поможет поддерживать их здоровье и силу.
Мульчирование
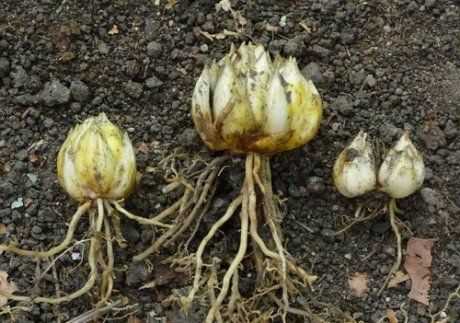
Мульчирование — это важный аспект ухода за луковицами лилий. Оно помогает сохранить почву влажной и питательной, защищает корни растения от перегревания и переохлаждения, а также предотвращает рост сорняков.
Выбор материала для мульчирования
Для мульчирования лилий можно использовать различные материалы, такие как солома, опилки, торф, сухие листья, хвоя, камни и другие органические или неорганические вещества. Важно выбрать материал, который будет хорошо пропускать воздух и воду, а также не создавать условий для развития грибковых заболеваний.
Правила мульчирования
- Перед мульчированием растения нужно полить, чтобы почва была влажной.
- Мульчу следует распределить на поверхности почвы вокруг луковиц с толщиной слоя около 5-7 см.
- Нужно оставить небольшой пространство вокруг стеблей, чтобы обеспечить доступ воздуха и света.
- Регулярно проверяйте слой мульчи и добавляйте новый материал при необходимости.
Мульчирование является эффективным способом улучшения условий выращивания лилий и способствует их здоровому росту и развитию. Правильный уход за лилиями с использованием мульчи поможет вам получить красивые и здоровые цветы в вашем саду.
Вопрос-ответ:
Как правильно сажать луковицы лилий?
Для посадки луковиц лилий необходимо выбрать подходящее место, подготовить грунт, заранее прорастить луковицы и сажать их на определенную глубину.
Как выбрать подходящее место для посадки луковиц лилий?
Подходящее место для посадки луковиц лилий должно быть хорошо освещенным, защищенным от сильных ветров и иметь хорошую дренажную систему. Луковицы также лучше сажать на подготовленные клумбы или в горшки.
Как подготовить грунт для посадки луковиц лилий?
Грунт для посадки луковиц лилий должен быть рыхлым, плодородным и хорошо дренированным. Его можно улучшить, добавив песок, перегнои или компост. Также рекомендуется провести предварительную обработку грунта против сорняков и вредителей.
Зачем нужно проращивать луковицы перед посадкой?
Проращивание луковиц перед посадкой позволяет ускорить начало цветения растений. Для этого луковицы помещают в теплое и светлое место на несколько недель до посадки. Это позволяет активизировать образование корней и побегов.
На какую глубину следует сажать луковицы лилий?
Луковицы лилий следует сажать на глубину, равную двойному размеру луковицы. Например, если луковица имеет диаметр 5 см, то ее следует сажать на глубину примерно 10 см.


