- Важность удобрений для клематиса
- Почему удобрения важны для клематиса
- Как выбрать правильное удобрение
- Выбирайте органические удобрения
- Учитывайте потребности клематиса
- Определение потребностей вашего клематиса
- Удобрения для растений с кислыми почвами
- Удобрения для растений с щелочными почвами
- Выбирайте удобрения, богатые азотом
- Удобрения с богатым содержанием калия
- Определение типа почвы в вашем саду
- Удобрения для улучшения почвы
- Органические удобрения для клематиса
- Компост
- Перегной
- Чайный осадок
- Минеральные удобрения для клематиса
- Как правильно применять удобрения для клематиса
- Выбирайте подходящее удобрение
- Правильно применяйте удобрение
- Вопрос-ответ:
- Какое удобрение лучше всего подходит для клематиса?
- Как часто нужно удобрять клематис?
- Можно ли использовать органическое удобрение для клематиса?
- Какое время года лучше всего для удобрения клематиса?
- Можно ли переборщить с удобрениями для клематиса?
- Видео:
- КЛЕМАТИСЫ ПРЕОБРАЗЯТСЯ И СТАНУТ ГУСТЫМИ И КРЕПКИМИ. ВЫПОЛНИТЕ 5 ПРОСТЫХ ПРАВИЛ

Клематис — это эффектное растение, которое способно украсить любой сад или садовый участок своими яркими и крупными цветами. Чтобы клематис обильно цвел и радовал глаз своими прекрасными бутонами, необходимо выбрать правильное удобрение. Ведь удобрение играет важную роль в росте и развитии растения, а также в его цветении.
При выборе удобрения для клематиса следует учитывать его основные потребности. Во-первых, обратите внимание на состав удобрения. Оно должно содержать достаточное количество азота, фосфора и калия, так как эти элементы являются основными питательными веществами для растения. Во-вторых, выбирайте удобрение, которое способствует образованию и развитию цветочных почек. Такое удобрение поможет клематису обильно цвести и радовать вас своими яркими цветами.
Одним из лучших вариантов удобрения для клематиса является органическое удобрение. Оно содержит не только основные питательные вещества, но и органические компоненты, которые позитивно влияют на здоровье растения. Органическое удобрение способствует улучшению почвы, сохраняет влагу и улучшает водоудерживающую способность почвы. Благодаря этому, клематису будет достаточно питательных веществ для обильного цветения и роста.
Выбирая удобрение для клематиса, помните, что важно правильно подобрать его состав и форму выпуска. Обратите внимание на инструкции производителя и рекомендации по применению. Правильное удобрение поможет вашему клематису обильно цвести и радовать вас своими прекрасными цветами.
Важность удобрений для клематиса

Клематис — это красивое, стойкое растение, которое способно радовать глаз цветущими цветами на протяжении долгого времени. Однако, чтобы клематис обильно цвел и имел красивую зеленую листву, необходимо выбрать правильное удобрение.
Выбирайте удобрение для клематиса с учетом его потребностей. Растение требует определенного соотношения питательных веществ, включая азот, фосфор и калий. Азот способствует развитию зеленой массы растения, фосфор способствует формированию корневой системы и укреплению стеблей, а калий обеспечивает устойчивость клематиса к болезням и стрессовым условиям.
Правильно подобранное удобрение для клематиса поможет развить его в полную красоту и здоровье. Оно должно содержать не только основные макроэлементы (азот, фосфор, калий), но и микроэлементы, такие как магний, железо, марганец и др. Эти микроэлементы необходимы для нормального обмена веществ в растении и его полноценного развития.
Клематису требуются удобрения не только во время активного роста, но и во время цветения. От правильного удобрения зависит насыщенность и яркость цветов. Используйте специальные удобрения для цветущих растений, которые содержат больше фосфора и калия. Это поможет клематису образовать больше цветков и продлить их цветение на длительный период.
Почему удобрения важны для клематиса

Удобрения играют важную роль в обильном цветении клематиса. Правильно подобранные и примененные удобрения способствуют активному росту растения и обеспечивают его питательными веществами, необходимыми для формирования красивых и ярких цветков.
Выбирайте удобрения с учетом потребностей клематиса. Различные сорта клематиса могут иметь различные потребности в питательных веществах, поэтому важно выбирать удобрение, которое подойдет конкретному виду или сорту растения. Например, для обильного цветения клематисов синего цвета рекомендуется использовать удобрения, содержащие алюминий, который способствует сохранению яркости цвета.
Правильное применение удобрений позволяет клематису цвести обильно. Удобрения следует применять в соответствии с рекомендациями производителя и учитывать особенности культуры клематиса. Частота и количество удобрений зависят от состояния почвы, фазы роста растения и его потребностей в питательных веществах. Регулярное и правильное применение удобрений позволяет клематису развиваться и формировать обильное цветение.
- Ознакомьтесь с составом удобрений перед их применением. Некоторые удобрения могут содержать не только основные питательные вещества, но и микроэлементы, которые также важны для развития клематиса. Изучите состав удобрения и убедитесь, что оно обеспечит растение всеми необходимыми компонентами.
- Удобрения могут применяться как корневое подкормочное средство, так и в виде внесения в почву. Корневая подкормка обеспечивает прямое попадание питательных веществ в корневую систему клематиса, а внесение удобрений в почву позволяет имеющимся там веществам проникнуть в корни растения. Оба способа применения удобрений могут быть эффективными в зависимости от состояния почвы и потребностей клематиса.
Выводя в почву необходимые питательные вещества, удобрения способствуют активному росту и обильному цветению клематиса. Правильный выбор и применение удобрений играют важную роль в формировании красивых цветков и здорового развития растения.
Как выбрать правильное удобрение

Для того чтобы клематис обильно цвел и радовал глаз своими яркими и красивыми цветами, необходимо правильно подобрать удобрение. Удобрение играет важную роль в развитии и росте растения, поэтому выбирайте его с умом.
Выбирайте органические удобрения
Органические удобрения являются наиболее подходящими для клематиса. Они позволяют растению получить все необходимые питательные вещества, способствуют его здоровому росту и обильному цветению. В качестве органических удобрений можно использовать перегной, компост или гумус.
Учитывайте потребности клематиса
Клематис предпочитает кислую почву, поэтому удобрения с нейтральной или слегка кислой реакцией будут наиболее подходящими. Также стоит обратить внимание на содержание азота, фосфора и калия в удобрении. Растение нуждается в них для нормального развития и обильного цветения. Лучше выбирать удобрение с равным содержанием этих элементов или с небольшим преобладанием фосфора и калия.
Итак, чтобы клематис обильно цвел и радовал вас своей красотой, правильно выбирайте удобрение. Органические удобрения, учитывающие потребности растения, будут наилучшим выбором. Помните, что удобрение играет важную роль в развитии и росте клематиса, поэтому не стоит пренебрегать его выбором.
Определение потребностей вашего клематиса

Клематис – это красивое и популярное растение с обильным и ярким цветением. Чтобы ваш клематис обильно цвел, необходимо правильно подобрать удобрение и удовлетворить его потребности.
Первоначально стоит определить, какой вид клематиса вы имеете. Каждый вид имеет свои особенности и требования к удобрению. Некоторым нужна более кислая почва, другим – более щелочная. Необходимо узнать, какой уровень влажности и освещения предпочитает ваш клематис.
Определите также, какими веществами ваш клематис нуждается. Важно, чтобы удобрение содержало все необходимые элементы питания для нормального роста и развития растения. Обратите внимание на содержание азота, фосфора и калия в удобрении – это основные макроэлементы, необходимые для обильного цветения клематиса.
Помимо макроэлементов, не забудьте о микроэлементах. Они также важны для здоровья растения и его способности обильно цвести. Удобрение должно содержать такие микроэлементы, как железо, марганец, цинк, медь и бор.
Запомните, что каждый клематис уникален и его потребности могут отличаться от других сортов. Постоянно наблюдайте за своим растением, ведь оно само говорит, что ему нужно. Используя правильное удобрение, вы сможете обеспечить вашему клематису обильное и красивое цветение.
Удобрения для растений с кислыми почвами
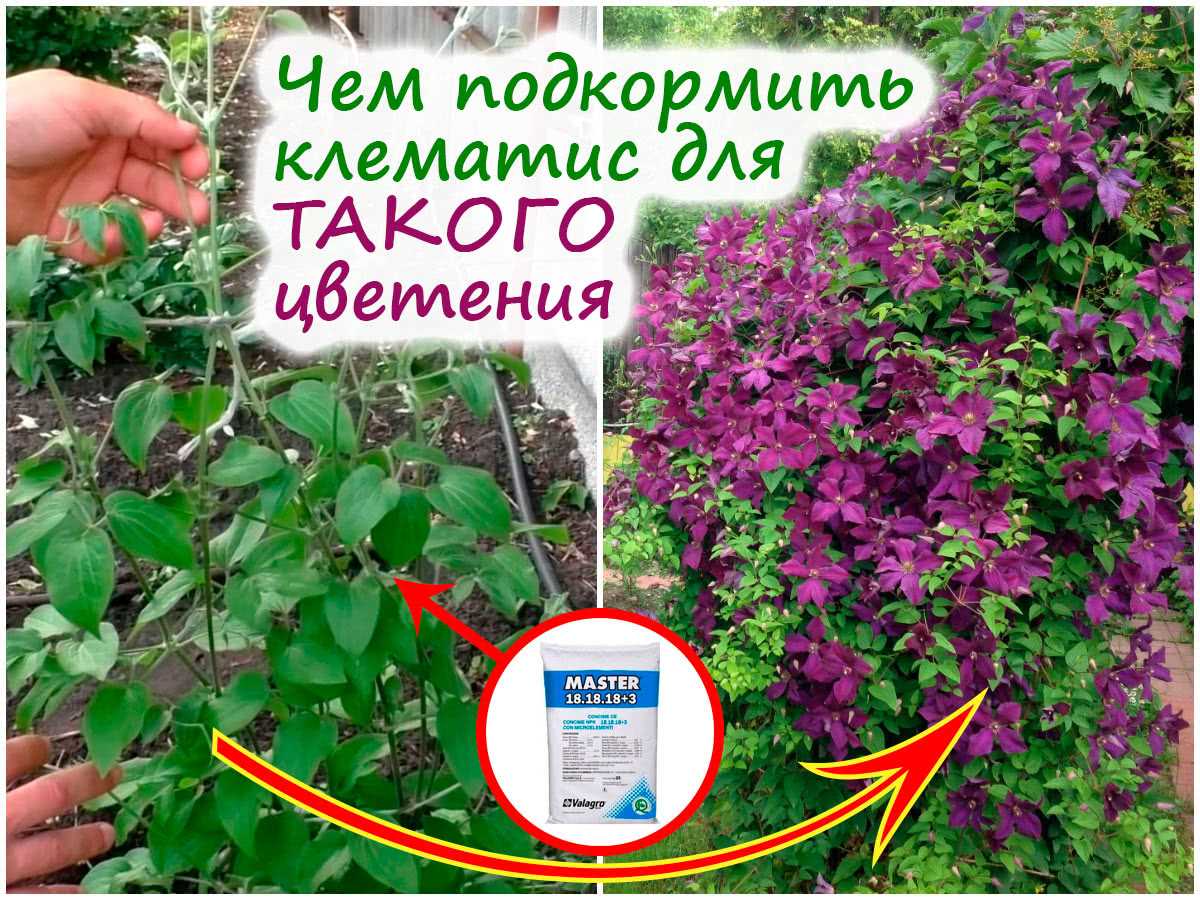
Правильно подобранное удобрение — залог обильного цветения клематиса на кислой почве. Выбирайте удобрения, специально разработанные для растений, предпочитающих кислую среду.
Клематис — одно из таких растений. Для его успешного роста и цветения необходимо обеспечить ему кислую почву. Для этого используйте удобрения, которые помогут поддерживать оптимальный уровень кислотности в почве.
Выбирайте удобрение, содержащее серу. Сера — один из важных элементов, которые помогают снизить щелочность почвы и создать условия для развития клематиса. Она способствует увеличению кислотности и улучшает почвенную структуру.
Оптимальное удобрение для клематиса — смесь с элементами, такими как аммиачная селитра, аммонийная селитра и аммофос. Эти компоненты обеспечивают растение необходимыми питательными веществами и помогают ему расти и цвести обильно.
Не забывайте, что удобрение — это всего лишь дополнение к правильному уходу за растением. Помимо удобрения, обеспечьте клематису достаточное количество света, влаги и защиту от вредителей. Только вместе все эти факторы помогут вашему клематису цвести великолепно на кислой почве.
Удобрения для растений с щелочными почвами
Если вы имеете щелочную почву в своем саду, то правильное выбор удобрения для ваших растений является важным шагом для обеспечения их обильного цветения. Щелочная почва характеризуется высоким уровнем pH, что может привести к недостатку некоторых необходимых питательных веществ.
Выбирайте удобрения, богатые азотом
Азот является одним из основных питательных веществ, необходимых для роста и развития растений. В щелочных почвах азот может быстро вымываться, поэтому растения нуждаются в дополнительном его питании. При выборе удобрения для растений с щелочными почвами, обратите внимание на его содержание азота. Оптимальное соотношение азота к другим питательным веществам поможет вашим растениям цвести обильно и правильно.
Так стоп!!! Вы всё ещё не подписаны на наши каналы в Телеграмм и Дзен? Посмотрите: ТГ - (@historyfantasydetectivechat) и Дзен (https://dzen.ru/myshortsstorys)
Удобрения с богатым содержанием калия
Калий является еще одним важным питательным веществом для растений с щелочными почвами. Он улучшает устойчивость растений к стрессу, способствует хорошему развитию корневой системы и обеспечивает обильное цветение. При выборе удобрения, обратите внимание на содержание калия. Удобрения с высоким содержанием калия помогут вашим растениям процветать даже на щелочных почвах.
Определение типа почвы в вашем саду

Для того чтобы ваш клематис обильно цвел, необходимо выбрать правильное удобрение, учитывая тип почвы в вашем саду. Клематис предпочитает рыхлые, плодородные почвы, с хорошим дренажем.
Перед тем как выбирать удобрение для клематиса, важно определить тип почвы в вашем саду. Например, если у вас глинистая почва, то клематису могут не хватать питательных веществ, и вам потребуется добавить комплексное удобрение, богатое азотом, фосфором и калием.
Если в вашем саду песчаная почва, то удобрение должно содержать больше органических веществ, чтобы удерживать влагу и питательные вещества. Также стоит обратить внимание на уровень кислотности почвы и при необходимости использовать кислото-любящие удобрения.
Рекомендуется также провести анализ почвы в лаборатории, чтобы точно определить состав и необходимые питательные вещества для клематиса. Это позволит выбрать удобрение, которое наиболее подходит для вашей почвы и обеспечит обильное цветение клематиса.
Удобрения для улучшения почвы

Правильный выбор удобрений — важный шаг к обильному цветению клематиса. Удобрение помогает улучшить плодородие почвы и обеспечить растение необходимыми питательными веществами.
Выбирайте удобрение, которое содержит все необходимые макро- и микроэлементы для здорового роста и цветения клематиса. Основные элементы, которые должны присутствовать в удобрении, это азот, фосфор и калий. Азот способствует росту зеленой массы, фосфор улучшает цветение, а калий укрепляет растение и повышает его устойчивость к болезням.
Для улучшения почвы также полезно использовать органическое удобрение, такое как перегной или компост. Они помогут удерживать влагу в почве, улучшать ее структуру и обогащать ее питательными веществами.
Помимо основных элементов, удобрение для улучшения почвы может содержать и другие полезные вещества, такие как микроэлементы, гумусные вещества, аминокислоты и витамины. Они помогут укрепить растение, повысить его иммунитет и способность расти и цвести обильно.
Органические удобрения для клематиса

Для того чтобы клематис обильно и правильно цвел, необходимо использовать подходящие органические удобрения. Они помогут поддержать здоровье растения и обеспечить плодородие почвы.
Компост

Один из лучших вариантов органического удобрения для клематиса — это компост. Он содержит разнообразные питательные вещества и органические вещества, которые помогают клематису цвести обильно. Компост можно использовать как внесение в почву при посадке растения, так и в качестве подкормки в течение сезона.
Перегной
Перегной также является отличным органическим удобрением для клематиса. Он богат нитратами, фосфатами и другими питательными веществами, которые способствуют развитию корневой системы и обильному цветению растения. Перегной можно внести в почву перед посадкой клематиса или использовать его в качестве подкормки в течение года.
Чайный осадок
Чайный осадок — это еще одно органическое удобрение, которое может быть полезным для клематиса. Он содержит множество микроэлементов, которые помогают укрепить растение и стимулируют его цветение. Чайный осадок можно размещать вокруг клематиса в виде мульчи или использовать его для приготовления раствора для подкормки.
Выбирая органические удобрения для клематиса, важно помнить о необходимости соблюдать правильные дозировки и регулярность подкормок. Это поможет достичь прекрасного цветения и здоровья растения.
Минеральные удобрения для клематиса
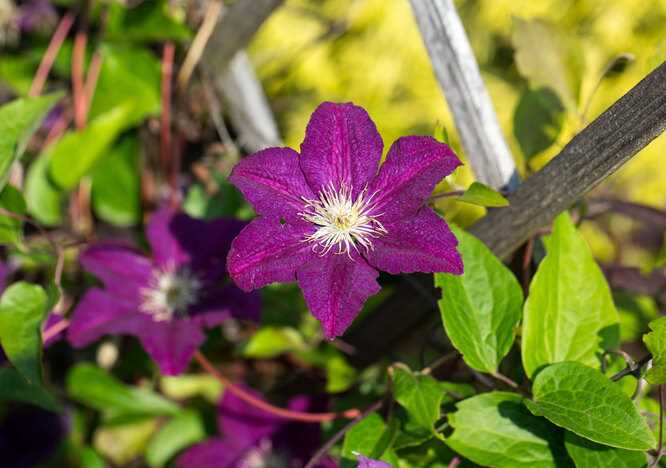
Клематисы — это прекрасные растения, которые могут обильно цвести и радовать глаз своими красочными цветами. Для того чтобы ваш клематис радовал вас своими яркими и красивыми цветами, необходимо правильно подобрать удобрение.
Для обильного цветения клематиса рекомендуется использовать минеральные удобрения. Они содержат все необходимые микроэлементы, которые способствуют развитию растения и формированию бутона. Например, удобрения с высоким содержанием фосфора и калия будут идеальными для клематиса.
При выборе удобрения для клематиса обратите внимание на его состав. Важно, чтобы удобрение содержало достаточное количество азота для стимулирования роста и зеленой массы растения. Также, удобрение должно содержать фосфор и калий для обильного цветения и укрепления стеблей и корней клематиса.
Выбирая удобрение для клематиса, рекомендуется обратить внимание на производителя и доверять проверенным брендам. Это гарантирует качество продукта и его эффективность. Не забывайте соблюдать рекомендации по дозировке удобрения и регулярно подкармливайте клематис, чтобы он радовал вас своими яркими и обильными цветами.
Как правильно применять удобрения для клематиса

Удобрения играют важную роль в росте и развитии клематиса, позволяя ему обильно цвести. Однако, чтобы достичь оптимального эффекта, необходимо выбирать и применять удобрения правильно.
Выбирайте подходящее удобрение

Для клематиса рекомендуется использовать удобрения, богатые азотом, фосфором и калием. Они помогут стимулировать рост и цветение растения. Важно выбирать удобрение, специально предназначенное для цветущих растений или роз, так как они содержат необходимые микроэлементы и питательные вещества.
Правильно применяйте удобрение
Удобрение нужно использовать с умом, чтобы не переборщить. Следуйте инструкциям на упаковке и придерживайтесь рекомендуемых дозировок. Обычно удобрение для клематиса рекомендуется наносить весной перед началом активного роста и в период бутонизации. Распределите удобрение равномерно по почве, избегая попадания на листву и стебли клематиса.
Если вы хотите достичь обильного цветения, регулярно подкармливайте клематис. Но помните, что избыток удобрений может быть вреден для растения и привести к его перегрузке. Следуйте рекомендациям по количеству и частоте применения удобрений, чтобы создать оптимальные условия для роста и развития вашего клематиса.
Вопрос-ответ:
Какое удобрение лучше всего подходит для клематиса?
Для клематиса рекомендуется использовать удобрения, содержащие азот, фосфор и калий. Например, удобрения с соотношением 10-10-10 или 20-20-20. Они способствуют активному росту растения и обильному цветению.
Как часто нужно удобрять клематис?
Клематис нужно удобрять регулярно в течение вегетационного периода, примерно раз в 2-3 недели. В начале сезона удобрение следует наносить чуть реже, а ближе к середине и концу сезона – чаще, чтобы поддерживать активный рост и цветение.
Можно ли использовать органическое удобрение для клематиса?
Да, органические удобрения также подходят для клематиса. Например, можно использовать компост или перегной, которые обогатят почву полезными веществами и помогут растению расти и цвести более обильно.
Какое время года лучше всего для удобрения клематиса?
Лучшее время для удобрения клематиса – весна и раннее лето, когда растение активно растет и развивается. В это время оно особенно нуждается в питательных веществах для образования новых побегов и цветочных почек.
Можно ли переборщить с удобрениями для клематиса?
Да, можно переборщить с удобрениями для клематиса. Чрезмерное количество питательных веществ может привести к сгоранию корней и повреждению растения. Поэтому важно соблюдать рекомендуемую дозировку удобрений и не превышать их количество.


