- Choosing the Right Senpolia Cuttings
- Preparing the Hydrogel Solution
- Soaking the Senpolia Cuttings in the Hydrogel Solution
- Preparing the Planting Pot
- Planting the Senpolia Cuttings in the Pot
- Summary
- Watering and Caring for the Newly Planted Senpolia Cuttings
- 1. Watering
- 2. Light and Temperature
- 3. Fertilizing
- 4. Pruning and Pinching
- 5. Humidity
- Monitoring and Adjusting the Hydrogel Moisture Level
- Pruning and Nurturing the Senpolia Cuttings for Healthy Growth
- Pruning
- Nurturing
- Q&A:
- What is Senpolia?
- What is a hydrogel?
- Why is hydrogel beneficial for planting Senpolia cuttings?
- How do you prepare the hydrogel for planting Senpolia cuttings?
- Can Senpolia cuttings be planted directly in hydrogel without soil?
- Video: STEP BY STEP TUTORIAL on how to Harvest an AFRICAN VIOLET seed pod
Growing senpolia (African violets) from cuttings can be a rewarding experience for any plant enthusiast. Whether you’re a beginner or an experienced gardener, using hydrogel can greatly improve the success rate of your cuttings. Hydrogel is a water-absorbing polymer that helps to retain moisture and provide a stable environment for your plants to grow.
Before you begin, gather all the necessary materials. You’ll need senpolia cuttings, hydrogel crystals, a small container or pot, and potting soil. Make sure your container has drainage holes to prevent waterlogging.
Start by hydrating the hydrogel crystals. Fill a separate container with water and add the crystals. Wait for them to absorb the water and swell up. Once they have reached their full size, drain any excess water.
Next, prepare your potting soil. Senpolia prefers a well-draining soil mix. You can add perlite or coarse sand to improve drainage. Fill your container with the potting soil, leaving some space at the top for your cuttings.
Take your senpolia cuttings and remove any lower leaves or flowers. Dip the cut end of the stem into a rooting hormone powder to encourage root development. Insert the cuttings into the potting soil, making sure they are secure and upright.
Now, carefully place the hydrated hydrogel crystals around the base of the cuttings. The hydrogel will slowly release moisture to the roots, reducing the need for frequent watering. Cover the hydrogel with a thin layer of potting soil to create a uniform surface.
Finally, water the cuttings gently to settle the soil and activate the hydrogel. Avoid overwatering, as this can lead to root rot. Place your container in a warm and brightly lit location, but away from direct sunlight.
With regular care and proper watering, you should start to see new growth within a few weeks. Enjoy the process of watching your senpolia cuttings flourish thanks to the added benefits of hydrogel!
Choosing the Right Senpolia Cuttings

Before planting senpolia cuttings with hydrogel, it is important to choose the right cuttings to ensure successful growth and development. Here are some factors to consider when selecting senpolia cuttings:
- Source: Obtain the senpolia cuttings from a reliable and reputable source. This will help ensure that the cuttings are healthy and free from diseases or pests.
- Size: Look for well-developed senpolia cuttings that have at least two to three leaves. Smaller cuttings may have a lower chance of survival.
- Roots: Ideally, select cuttings that have already developed some roots. This will make it easier for the cuttings to establish themselves when planting with hydrogel.
- Variety: Consider the variety or cultivar of senpolia that you want to grow. Each variety may have specific care requirements, so choose a cutting that matches your preferences and expertise.
It is also important to inspect the cuttings for any signs of damage, disease, or pest infestation. Avoid using cuttings with yellow leaves, spots, or any other abnormalities, as these may indicate underlying issues that could affect the plant’s growth.
By selecting healthy and well-developed senpolia cuttings, you increase the chances of successfully establishing and growing the plant with hydrogel.
Preparing the Hydrogel Solution
The hydrogel solution is an important component for planting senpolia cuttings. Hydrogel is a water-absorbing polymer that can retain moisture and provide a stable environment for the roots to grow. Follow these steps to prepare the hydrogel solution:
- Measure the appropriate amount of hydrogel crystals based on the instructions provided.
- Add the hydrogel crystals to a clean container.
- Pour distilled water into the container at the recommended ratio according to the instructions.
- Stir the mixture well until the hydrogel crystals are fully hydrated and the solution thickens.
- Allow the hydrogel solution to sit for a few hours to ensure complete hydration.
It is important to note that the hydrogel crystals should not be overhydrated, as this can lead to a too-wet environment for the senpolia cuttings. The consistency should be gel-like and moist, but not dripping with excess water.
Pro Tip: If you are unsure about the proper ratio of hydrogel crystals to water, refer to the instructions provided by the manufacturer or consult with a gardening expert.
Soaking the Senpolia Cuttings in the Hydrogel Solution
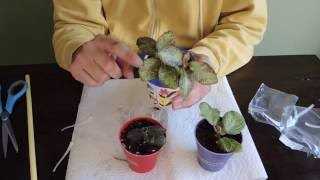
Before planting senpolia cuttings, it is important to soak them in a hydrogel solution. Hydrogel is a water-absorbing polymer that helps retain moisture and provide a favorable environment for the roots to develop.
Follow these steps to soak the senpolia cuttings in the hydrogel solution:
- Prepare the hydrogel solution by combining the recommended dosage of hydrogel powder with distilled water in a clean container.
- Stir the mixture well until the hydrogel powder is completely dissolved.
- Place the senpolia cuttings into the hydrogel solution, ensuring that they are fully submerged.
- Allow the cuttings to soak in the hydrogel solution for the specified amount of time, usually around 1-2 hours. This will give the hydrogel enough time to absorb water and expand.
- After the soaking time, carefully remove the cuttings from the hydrogel solution.
It is important to note that hydrogel can sometimes be irritating to the skin, so it is recommended to wear gloves when handling the solution. Additionally, make sure to follow the manufacturer’s instructions and dosage recommendations for the hydrogel powder.
Soaking the senpolia cuttings in the hydrogel solution before planting provides them with the necessary moisture and support for root development. This step will increase the chances of successful growth and establishment of the plant.
Preparing the Planting Pot
Before planting senpolia cuttings with hydrogel, it is important to prepare the planting pot. Follow these steps to ensure proper preparation:
- Select a suitable pot: Choose a pot with drainage holes at the bottom to prevent water accumulation. The size of the pot should be appropriate for the number of cuttings you are planting.
- Clean the pot: Thoroughly clean the pot to remove any dirt or residues from previous plants. This helps prevent the spread of diseases and ensures a healthy environment for the senpolia cuttings.
- Add some drainage material: Place a layer of small stones or broken pottery at the bottom of the pot. This helps improve drainage and prevents waterlogging.
- Prepare the potting mix: Use a well-draining potting mix suitable for senpolia plants. You can either buy a commercial mix or prepare your own by combining equal parts of peat moss, perlite, and vermiculite.
- Fill the pot: Fill the pot with the potting mix, leaving enough space for the cuttings. Gently press down the mixture to ensure it is evenly distributed.
Once the pot is prepared, you can proceed to plant the senpolia cuttings with hydrogel.
Planting the Senpolia Cuttings in the Pot
Once your senpolia cuttings are ready to be planted, you will need a pot with drainage holes to ensure proper water flow. Follow these steps to plant your senpolia cuttings in the pot:
- Choose a pot that is slightly larger than the size of the rootball of your senpolia cuttings.
- Fill the pot with well-draining soil mixture, such as a combination of peat moss, perlite, and vermiculite.
- Make a hole in the soil mixture using your finger or a small tool, ensuring it is deep enough to accommodate the rootball of the cuttings.
- Gently place the rootball of the senpolia cuttings into the hole, ensuring that the roots are well-covered with soil.
- Pack the soil lightly around the base of the cuttings to secure them in place.
- Water the soil thoroughly, ensuring that it is evenly moist but not waterlogged.
- Place the pot in a location with bright, indirect sunlight, as senpolia cuttings thrive in such conditions.
It is important to monitor the moisture level of the soil and water the plants when it feels dry to the touch. Overwatering can lead to root rot, so it is crucial to maintain a good balance of moisture.
Once the roots have established and new growth appears, you can start fertilizing the senpolia cuttings to promote healthy growth. Follow the recommended dosage on the fertilizer packaging and apply it to the soil every 2-4 weeks during the growing season.
Summary
Planting senpolia cuttings in a pot involves choosing the right size pot, preparing a well-draining soil mixture, making a hole for the rootball of the cuttings, securing them in place, watering the soil thoroughly, and providing bright, indirect sunlight. Monitoring the moisture level and fertilizing the plants when necessary will ensure their healthy growth.
Watering and Caring for the Newly Planted Senpolia Cuttings

Proper watering and care are vital for the successful establishment and growth of newly planted senpolia cuttings. Follow these steps to ensure your senpolia plants thrive:
1. Watering
Water the newly planted senpolia cuttings immediately after planting to provide moisture and help settle the roots into the soil. Use a watering can or spray bottle to gently moisten the soil around the cuttings.
After the initial watering, monitor the soil moisture level regularly. Senpolia cuttings prefer slightly moist soil, so avoid overwatering or allowing the soil to become dry for long periods. Check the moisture level by inserting your finger into the soil up to the first joint. If the soil feels dry, it’s time to water.
Ensure that water is evenly distributed to all areas of the pot by watering around the base of the plants. Avoid getting water on the leaves to prevent the development of rot and disease.
2. Light and Temperature
Place the newly planted senpolia cuttings in a location with bright, indirect light. Avoid placing them in direct sunlight, as this can cause leaf burn. A north-facing window with filtered light is an ideal location.
Maintain a stable temperature range of 65-75 degrees Fahrenheit (18-24 degrees Celsius) for optimal growth. Avoid exposing the plants to sudden temperature changes or drafts, as they can cause stress and leaf damage.
3. Fertilizing
Wait for approximately 4-6 weeks after planting before applying any fertilizer to the senpolia cuttings. Once they have become established, use a balanced liquid fertilizer diluted to half strength, applied every 2-4 weeks during the growing season.
Follow the package instructions for the correct dilution rate and application method. Overfertilizing can damage the plants, so it’s best to err on the side of caution and use a weaker solution.
4. Pruning and Pinching
Regularly pinch back the growing tips of the senpolia plants to promote bushier growth and more abundant flowering. Use clean, sharp scissors or pruning shears to remove the top set of leaves and pinch off the tip of each stem.
Pruning can be done every 4-6 weeks or as needed to maintain the desired shape and size of the plants. Remove any yellowing or diseased leaves promptly to prevent the spread of disease.
5. Humidity
Senpolia cuttings thrive in a humid environment, so it’s important to maintain adequate humidity levels. You can increase humidity by placing a tray filled with water near the plants or using a humidifier.
Avoid misting the leaves directly, as this can lead to fungal diseases. Instead, mist the air around the plants to increase humidity.
By following these watering and care guidelines, your newly planted senpolia cuttings will have the best chance of thriving and growing into healthy, beautiful plants.
Monitoring and Adjusting the Hydrogel Moisture Level
Proper monitoring and adjustment of the hydrogel moisture level is crucial for the successful growth of senpolia cuttings. Here are some steps to help you maintain the ideal moisture level:
- Initial Hydration: Before planting the senpolia cuttings, hydrate the hydrogel according to the manufacturer’s instructions. This will ensure that the hydrogel is fully saturated with water.
- Regular Inspection: Regularly inspect the hydrogel to monitor its moisture level. You can do this by visually checking the hydrogel beads or by touching them to feel the moisture content. The hydrogel should feel moist but not soaking wet.
- Adjusting the Moisture Level: If the hydrogel feels dry, it is time to add more water. Slowly pour water onto the hydrogel beads, allowing them to absorb the moisture. Be careful not to overwater, as this can lead to root rot and other issues.
- Preventing Overwatering: On the other hand, if the hydrogel feels too wet, you can reduce the moisture level by removing some of the water. Gently squeeze the hydrogel beads to release excess water. Make sure not to squeeze too hard, as this can damage the hydrogel.
It is important to maintain a balanced moisture level in the hydrogel to provide the senpolia cuttings with the necessary hydration without causing waterlogging or dehydration. Regularly monitoring and adjusting the moisture level will help ensure the successful growth and development of the senpolia cuttings.
Pruning and Nurturing the Senpolia Cuttings for Healthy Growth
Pruning and nurturing are essential steps in ensuring the healthy growth of senpolia cuttings. By pruning, you can shape the plant and promote bushier growth. Nurturing involves providing the right conditions and care for the cuttings to thrive.
Pruning
Pruning plays a crucial role in maintaining the shape and size of your senpolia plant. Here are some steps to follow:
- Use clean and sharp pruning shears to avoid damaging the plant.
- Start by removing any dead or yellowing leaves to improve overall appearance.
- Look for any long stems that are causing the plant to become leggy or unbalanced.
- Cut back these stems to a point where there are healthy leaves or leaf nodes.
- Make angled cuts just above a leaf node to encourage branching.
- Regularly prune your senpolia plant to maintain its shape and prevent overcrowding.
Nurturing
Providing the right conditions and care is essential for the healthy growth of senpolia cuttings. Here are some tips:
- Choose a suitable location with bright, indirect light for your senpolia plant.
- Maintain a consistent temperature between 65-75°F (18-24°C), avoiding drastic fluctuations.
- Keep the humidity levels high by placing the plant on a tray filled with water and pebbles.
- Water the plant regularly to keep the soil slightly moist but not soggy.
- Avoid overwatering, as it can lead to root rot and other issues.
- Feed the senpolia plant with a balanced fertilizer every 2-4 weeks during the growing season.
- Monitor the plant for any signs of pests or diseases and take appropriate measures if needed.
By following these pruning and nurturing practices, you can ensure the healthy growth of your senpolia cuttings and enjoy a beautiful and vibrant plant.
Q&A:
What is Senpolia?
Senpolia is a type of plant commonly known as African violet.
What is a hydrogel?
A hydrogel is a water-absorbing polymer that can hold water and release it gradually over time.
Why is hydrogel beneficial for planting Senpolia cuttings?
Hydrogel can provide a constant source of moisture to the plant roots, helping them to grow and establish more quickly.
How do you prepare the hydrogel for planting Senpolia cuttings?
To prepare the hydrogel, you need to soak it in water for a few hours until it swells up and becomes gel-like.
Can Senpolia cuttings be planted directly in hydrogel without soil?
Yes, Senpolia cuttings can be planted directly in hydrogel without soil, as long as the hydrogel provides sufficient moisture and nutrients for the plant to grow.
Video:
STEP BY STEP TUTORIAL on how to Harvest an AFRICAN VIOLET seed pod

