- Tillandsia Care Guide: How to Care for Tillandsia at Home
- Light
- Water
- Air Circulation
- Fertilizer
- Temperature
- Display
- Tillandsia Types and Varieties
- Choosing the Right Tillandsia Varieties
- Light Requirements
- Size
- Watering Frequency
- Care Complexity
- Light Requirements for Tillandsia
- Types of Light
- Providing Adequate Light
- Conclusion
- Watering Tillandsia: Dos and Don’ts
- Do:
- Don’t:
- Humidity and Temperature for Tillandsia
- Humidity
- Temperature
- Fertilizing Tillandsia: Tips and Recommendations
- 1. Choose the Right Fertilizer
- 2. Dilute the Fertilizer
- 3. Use a Spray Bottle
- 4. Fertilize Regularly
- 5. Avoid Over-fertilization
- 6. Consider Alternate Fertilizer Options
- 7. Rinse the Plants
- Mounting and Displaying Tillandsia
- 1. Mounting Options
- 2. Displaying Options
- 3. Care and Maintenance
- Common Pests and Diseases of Tillandsia: Prevention and Treatment
- Pests
- Diseases
- Q&A:
- What is Tillandsia?
- What are the different types of Tillandsia?
- How do you care for Tillandsia at home?
- Can Tillandsia be grown indoors?
- How often should I water my Tillandsia?
- What are some common problems with Tillandsia?
- Can Tillandsia bloom?
- Video: Air Plants for Beginners + Tips!
Tillandsia, commonly known as air plants, are a unique and fascinating group of plants that belong to the Bromeliaceae family. These plants are known for their ability to survive without soil and can be a great addition to any indoor space. Despite their name, air plants still require some care to thrive and flourish in your home. In this article, we will provide you with tips on how to care for Tillandsia at home, as well as highlight some of the most popular types and varieties.
When it comes to caring for Tillandsia, one of the most important factors to consider is their water requirements. Unlike most plants, air plants do not rely on their roots to absorb water from the soil. Instead, they absorb moisture and nutrients through their leaves from the air. To ensure that your Tillandsia stays healthy, it is recommended to mist them with water once or twice a week. You can also soak the plant in water for about 30 minutes every two weeks. It’s important to let them dry completely after watering to prevent rotting.
In addition to water, air plants also require proper lighting to thrive. Ideally, Tillandsia should be placed in bright indirect light. Direct sunlight can scorch their leaves, while too little light can cause them to become weak and leggy. If you don’t have a brightly lit area in your home, you can use artificial grow lights to provide the necessary amount of light for your air plants. Just make sure to keep them at a distance from the light source to avoid overheating.
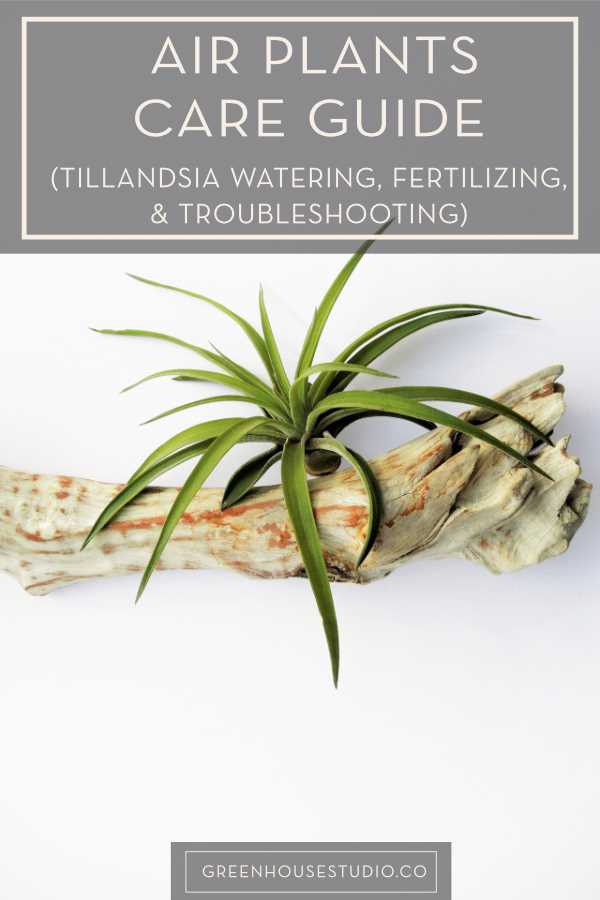
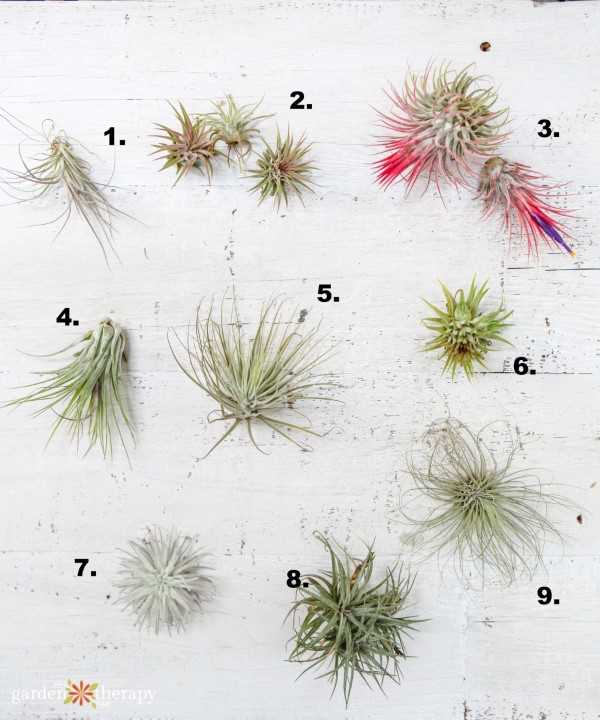
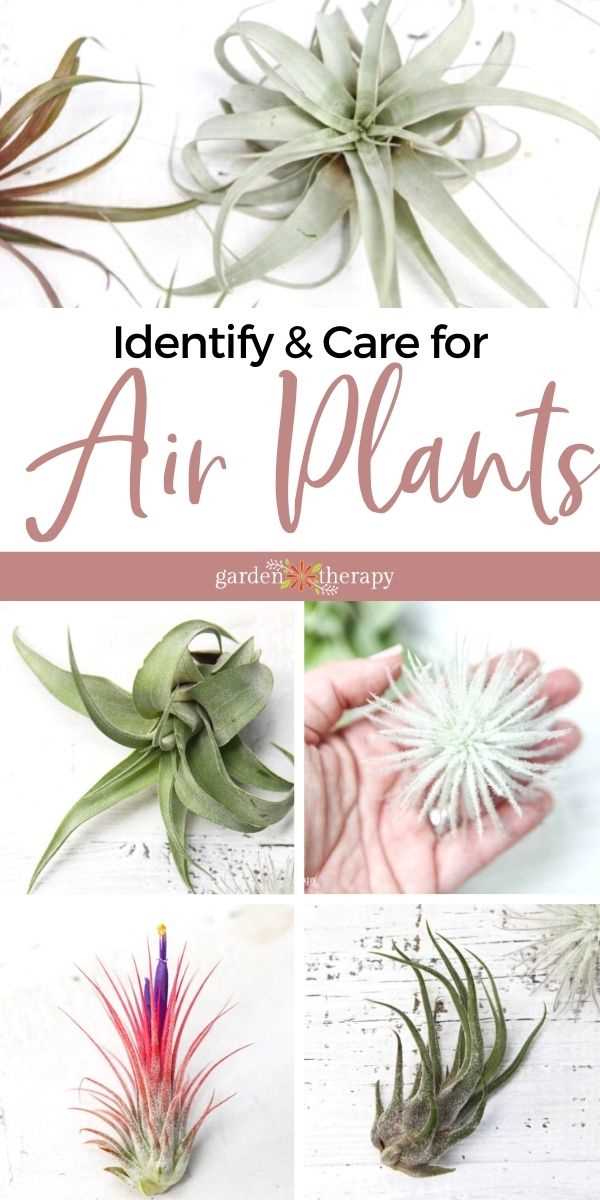
Tillandsia come in a wide variety of shapes, sizes, and colors, making them a popular choice among plant enthusiasts. Some of the most common types of Tillandsia include Tillandsia ionantha, Tillandsia xerographica, and Tillandsia capitata. Tillandsia ionantha is a small air plant with vibrant red or green leaves, while Tillandsia xerographica has larger, silvery-gray leaves that curl inward. Tillandsia capitata, on the other hand, features fuzzy gray leaves that form a rosette shape.
In conclusion, Tillandsia, or air plants, are a unique and beautiful addition to any indoor space. By following the tips mentioned in this article, you can ensure that your Tillandsia thrives and continues to add beauty to your home. Whether you choose the popular Tillandsia ionantha, Tillandsia xerographica, or Tillandsia capitata, these air plants are sure to impress with their fascinating shapes and colors.
Tillandsia Care Guide: How to Care for Tillandsia at Home
Tillandsias, also known as air plants, are unique and low-maintenance plants that can thrive without soil. They are perfect for those who want to add a touch of greenery to their homes but don’t have a green thumb. Here is a comprehensive guide on how to care for Tillandsias at home.
Light
Tillandsias prefer bright, indirect light. Place them near a window with filtered sunlight or provide them with artificial light such as fluorescent or grow lights. Avoid direct sunlight as it can scorch the leaves.
Water
Unlike traditional plants, Tillandsias absorb water and nutrients through their leaves. There are several ways to water Tillandsias:
- Misting: Mist your Tillandsias with water once or twice a week, ensuring that the entire plant is moist but not soaking wet.
- Soaking: Submerge your Tillandsias in a bowl of water for 20-30 minutes once a week. After soaking, let them dry upside down to prevent water from pooling in the leaves.
- Drying: After watering, make sure to allow Tillandsias to dry completely within 4 hours. Avoid leaving them in a closed container or in a location with poor air circulation.
Air Circulation
Tillandsias need good air circulation to prevent rot. Avoid placing them in enclosed terrariums or areas with stagnant air. It’s best to provide proper ventilation by placing them near a fan or an open window.
Fertilizer
Tillandsias require minimal fertilization. You can mist them with a weak, water-soluble fertilizer once a month. Use a fertilizer specifically formulated for Tillandsias or bromeliads and follow the instructions on the label carefully.
Temperature
Tillandsias thrive in temperatures between 50°F (10°C) and 90°F (32°C). Avoid exposing them to extreme temperatures or sudden temperature changes. Keep them away from cold drafts and heating vents.
Display
Tillandsias can be displayed in a variety of ways. Here are some ideas:
- Mounted on objects: Attach Tillandsias to driftwood, rocks, or other decorative objects using wire, glue, or fishing line.
- In terrariums: Arrange Tillandsias in an open glass container with proper air circulation.
- In hanging planters: Hang Tillandsias in a bright spot using decorative planters or macrame hangers.
- In glass globes or orbs: Place Tillandsias in glass globes or orbs and display them on a tabletop or suspended from the ceiling.
Tillandsia Types and Varieties
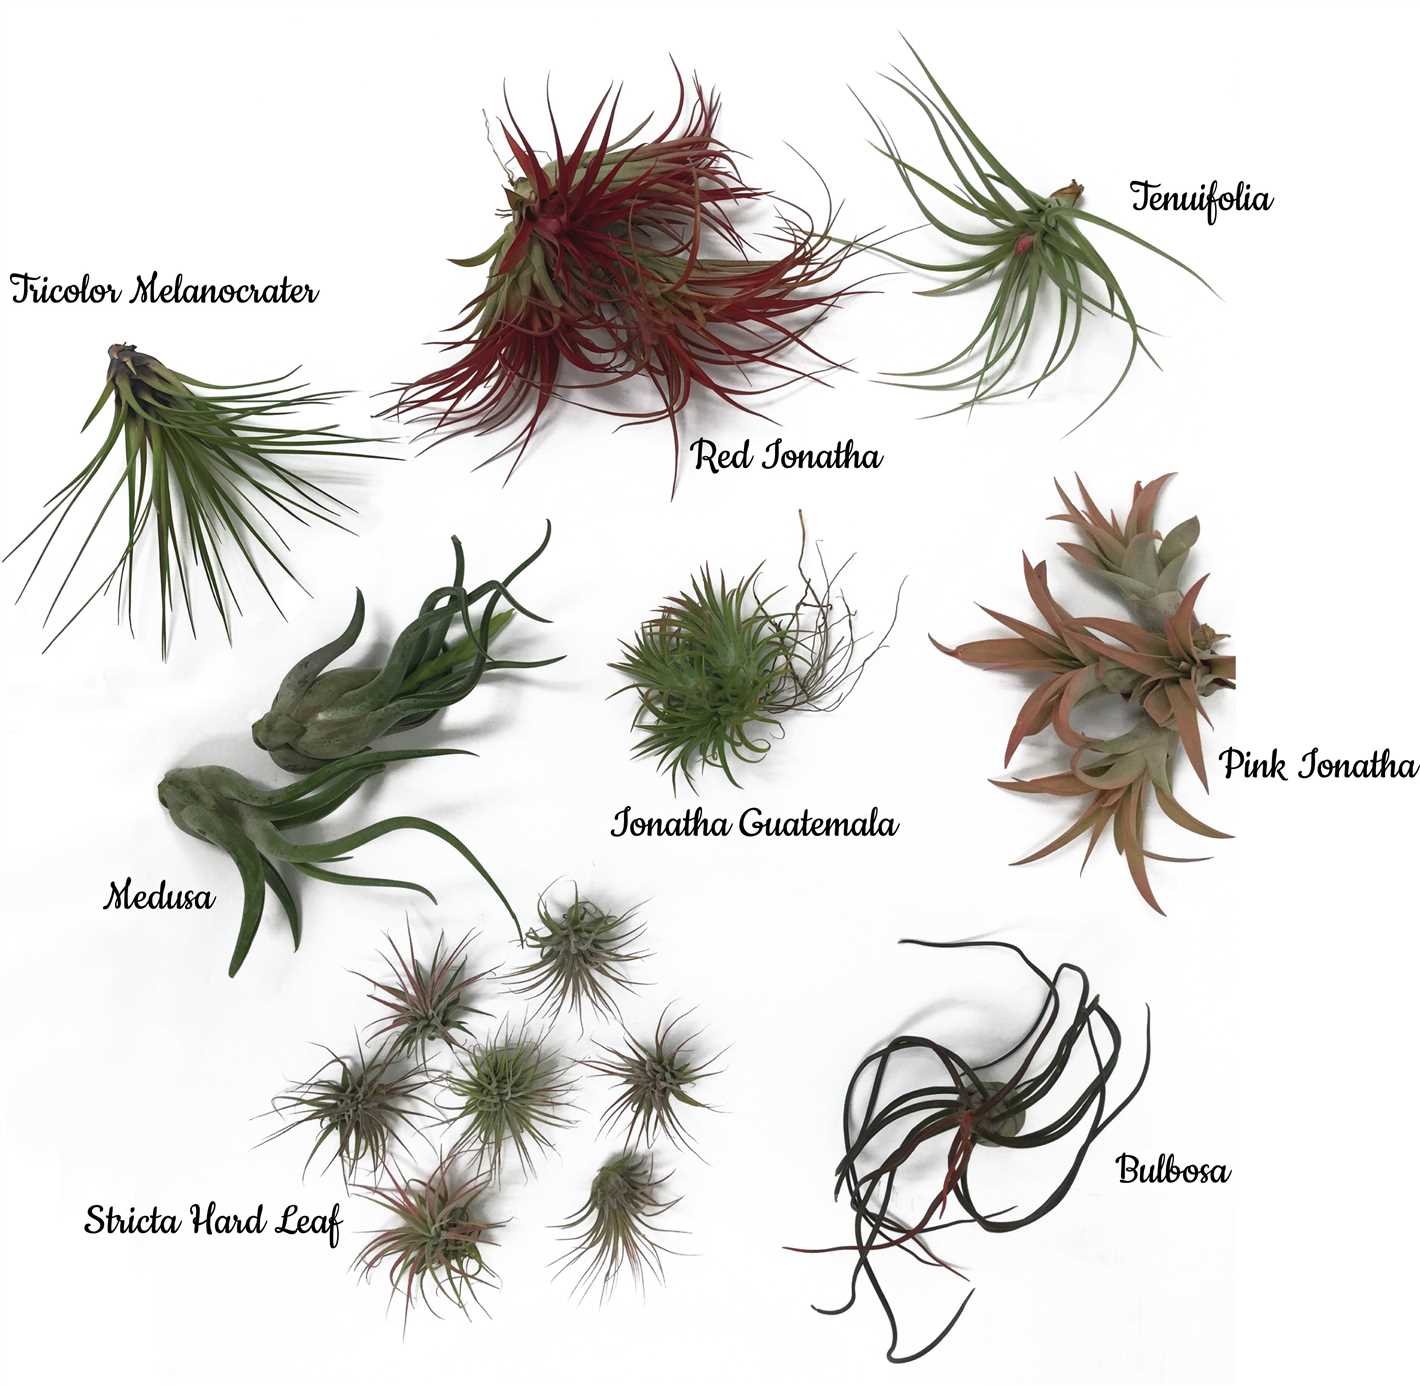
Tillandsias come in a wide range of shapes, sizes, and colors. Some popular varieties include:
| Variety | Description |
|---|---|
| Tillandsia Ionantha | This small air plant has green leaves that turn red when it blooms. |
| Tillandsia Xerographica | Also known as the king of air plants, it has silvery-gray leaves that form a rosette shape. |
| Tillandsia Caput-Medusae | Its curly leaves resemble the head of Medusa, hence the name. |
| Tillandsia Stricta | This variety has stiff, upright leaves that can range from green to red. |
With proper care, Tillandsias can thrive and add a unique touch to your home decor. Remember to provide them with the right amount of light, water, air circulation, and display them in creative ways to enjoy their beauty.
Choosing the Right Tillandsia Varieties
When it comes to choosing the right Tillandsia varieties for your home, there are a few factors to consider. Each variety has its own unique characteristics and care requirements, so it’s important to select varieties that will thrive in your specific environment.
Light Requirements
One of the most important factors to consider when choosing Tillandsia varieties is their light requirements. Some varieties prefer bright, indirect light, while others can tolerate lower light conditions. If you have a well-lit area in your home, you can choose a variety that requires more light. Conversely, if your home doesn’t receive much natural light, it’s best to select a variety that is more tolerant of low-light conditions.
Size
Tillandsia varieties come in various sizes, from small to large. The size of the plant can have an impact on where you choose to display it in your home. Smaller varieties can be placed on shelves, in terrariums, or even incorporated into a hanging display. Larger varieties can make a bold statement as a centerpiece or focal point in a room.
Watering Frequency
Another important factor to consider when choosing Tillandsia varieties is their watering requirements. Some varieties require more frequent watering, while others are more drought-tolerant. If you tend to forget to water your plants regularly, it’s best to choose varieties that can withstand periods of dryness. On the other hand, if you enjoy the ritual of watering your plants and can provide consistent care, you can choose varieties that require more frequent watering.
Care Complexity
Not all Tillandsia varieties require the same level of care. Some varieties are more forgiving and can tolerate slight neglect, while others require more specific care and attention. If you’re new to caring for Tillandsia, it’s a good idea to start with varieties that are known to be easier to care for and gradually work your way up to more challenging varieties as you gain experience.
- Consider the light requirements of the Tillandsia varieties.
- Take into account the size of the plant and where you will display it.
- Think about the watering frequency that you can commit to.
- Assess your level of experience and choose varieties accordingly.
By considering these factors and choosing the right Tillandsia varieties for your home, you can ensure that your air plants will thrive and enhance your indoor space.
Light Requirements for Tillandsia
Tillandsia plants, also known as air plants, have unique light requirements that are important for their growth and overall health. Understanding the light needs of your Tillandsia can help ensure they thrive in your home or garden.
Types of Light
Tillandsia plants generally fall into three categories based on their light requirements:
- Bright Indirect Light: Some Tillandsia varieties, such as Tillandsia ionantha and Tillandsia caput-medusae, prefer bright indirect light. This type of light is bright but filtered, so it doesn’t hit the plants directly. Placing these plants near a bright window or in a room with natural light is ideal.
- Bright Direct Light: Other Tillandsia varieties, including Tillandsia xerographica and Tillandsia stricta, thrive in bright direct light. These plants can handle direct sunlight, but be cautious of intense midday sun, as it can scorch their leaves. Placing them near a south-facing window or in an area with strong natural light is recommended.
- Low to Medium Light: Certain Tillandsia varieties, like Tillandsia bulbosa and Tillandsia brachycaulos, are more tolerant of lower light conditions. These plants can still survive and grow in low to medium light areas, such as an east or west-facing window with filtered light.
Providing Adequate Light
To provide adequate light for your Tillandsia plants:
- Observe the Natural Light: Observe the natural light conditions in your home or garden to determine the best spot for your Tillandsia. Consider factors such as the direction of windows, presence of trees or buildings that may block sunlight, and the intensity and duration of light exposure throughout the day.
- Monitor the Plant’s Response: Pay attention to how your Tillandsia responds to the light it receives. If the leaves become bleached or the plant starts to stretch towards the light source, it may be an indication of too much light. On the other hand, if the leaves turn yellow or the plant appears weak and floppy, it may be getting insufficient light.
- Rotate the Plants: Rotating your Tillandsia plants every few weeks allows all sides to receive a balanced amount of light. This helps prevent one side from receiving excessive light or becoming shaded.
- Supplementing with Artificial Light: If natural light is limited or inconsistent, supplementing with artificial light can help meet the light requirements of your Tillandsias. Use full spectrum grow lights or lights specifically designed for indoor plants and place them at an appropriate distance from the plants.
Conclusion
Providing the right amount and type of light is essential for the growth and well-being of Tillandsia plants. By understanding their light requirements and making adjustments as necessary, you can help your Tillandsias thrive and enjoy their unique beauty.
Watering Tillandsia: Dos and Don’ts
Tillandsia, also known as air plants, are unique plants that do not require soil to grow. Instead, they absorb water and nutrients through their leaves. Proper watering is essential to keep your Tillandsia healthy and thriving. Here are some dos and don’ts to help you water your Tillandsia correctly:
Do:
- Mist your Tillandsia regularly: Air plants should be misted with water 2-3 times a week to keep them hydrated. Use a fine mist to ensure that the water reaches all the leaves.
- Soak your Tillandsia: Once a month, give your Tillandsia a thorough soaking by submerging it in water for about 1-2 hours. This helps to ensure that the plant gets enough water and nutrients.
- Use rain or filtered water: Tillandsia are sensitive to chemicals found in tap water, such as chlorine and fluoride. It is best to use rainwater or filtered water to avoid damaging the plant.
- Allow proper drying: After misting or soaking your Tillandsia, it is crucial to let it dry completely before placing it back in its display. Excess moisture can lead to rot and eventually kill the plant.
- Monitor the surroundings: Consider the humidity level and temperature in your home when watering your Tillandsia. Higher humidity levels may require less frequent watering, while low humidity may necessitate more frequent misting.
Don’t:
- Overwater your Tillandsia: One of the biggest mistakes people make with Tillandsia is overwatering. Allow the plant to dry between watering sessions to prevent rot. If the leaves start turning yellow or brown, it may be a sign of overwatering.
- Use cold or hot water: Extreme temperatures can shock the plant. Always use water that is close to room temperature when misting or soaking your Tillandsia.
- Leave water sitting in the center: Tillandsia should not be left with water pooling in their centers. This can create a breeding ground for bacteria and lead to root rot. Shake off any excess water after misting or soaking.
- Expose Tillandsia to direct sunlight after watering: After watering, it is best to keep your Tillandsia in a shaded area to prevent sunburn. Wait until the plant is completely dry before placing it in direct sunlight.
By following these dos and don’ts, you can ensure that your Tillandsia has the right amount of water to thrive and stay healthy in your home.
Humidity and Temperature for Tillandsia
Tillandsia are epiphytic plants that naturally grow in tropical and subtropical environments. Therefore, it is important to provide them with the right humidity and temperature conditions for optimal growth and health.
Humidity
Tillandsia thrive in high humidity environments, which mimic their natural habitat. The ideal humidity for these plants is around 50-60%.
To increase humidity around your Tillandsia, you can mist them regularly with water using a spray bottle. Another option is to use a pebble tray by placing a layer of pebbles in a tray filled with water and then placing your plants on top of the pebbles. As the water evaporates, it will create a humid microclimate around your plants.
Temperature
Tillandsia prefer warm temperatures ranging from 60 to 80 degrees Fahrenheit (15 to 27 degrees Celsius). They can tolerate higher temperatures for short periods, but extreme heat can cause damage to the plant.
It is important to avoid exposing Tillandsia to temperatures below 50 degrees Fahrenheit (10 degrees Celsius) as they are sensitive to cold and can suffer from frost damage.
When it comes to temperature fluctuations, Tillandsia can handle moderate changes as long as they are not extreme or sudden. Avoid placing them near drafts or air conditioning units that can expose them to rapid temperature changes.
Providing the right humidity and temperature conditions for your Tillandsia will help them thrive and maintain their health and beauty. Keep in mind that different species may have slightly different requirements, so it’s always a good idea to research specific care instructions for the Tillandsia varieties you have.
Fertilizing Tillandsia: Tips and Recommendations
Fertilizing Tillandsia can help provide essential nutrients for the plant’s growth and overall health. Here are some tips and recommendations for fertilizing your Tillandsia at home:
1. Choose the Right Fertilizer
When selecting a fertilizer for your Tillandsia, opt for a balanced, water-soluble fertilizer. Look for a fertilizer with an N-P-K ratio of around 10-10-10 or a similar balanced ratio.
2. Dilute the Fertilizer
Tillandsia plants are sensitive to strong concentrations of fertilizer, so it’s important to dilute the fertilizer before applying it to your plants. Follow the instructions on the fertilizer packaging to ensure you are using the correct dilution ratio.
3. Use a Spray Bottle
One of the easiest ways to apply fertilizer to Tillandsia is by using a spray bottle. Fill the spray bottle with the diluted fertilizer solution and mist the leaves of the plant. Make sure to cover both the top and bottom surfaces of the leaves.
4. Fertilize Regularly
Tillandsia plants benefit from regular fertilization, especially during their active growing season. It’s recommended to fertilize your Tillandsia every 2 to 4 weeks during the spring and summer months. Reduce the frequency to once every 6 to 8 weeks during the fall and winter when the plant is in a dormant state.
5. Avoid Over-fertilization
While fertilizing is important, it’s crucial not to over-fertilize your Tillandsia. Excessive fertilizer can cause damage to the plant and lead to burning of the leaves. Always follow the recommended dilution ratios and frequency of application.
6. Consider Alternate Fertilizer Options
If you prefer to use organic or alternative fertilizers, there are options available for Tillandsia. You can use diluted liquid seaweed or fish emulsion as natural fertilizers. Additionally, you can make your own natural fertilizer by composting organic matter and using the resulting nutrient-rich compost tea.
7. Rinse the Plants
Once every few months, it’s a good idea to rinse your Tillandsia plants with clean, tepid water to remove any built-up salts or residue from fertilizers. Rinsing can help prevent potential damage to the plant and ensure optimal nutrient absorption.
By following these tips and recommendations, you can successfully fertilize your Tillandsia plants and promote their growth and well-being.
Mounting and Displaying Tillandsia
Mounting and displaying Tillandsia can be a creative and fun way to showcase these unique plants in your home. Here are some tips and ideas for how to mount and display your Tillandsia:
1. Mounting Options
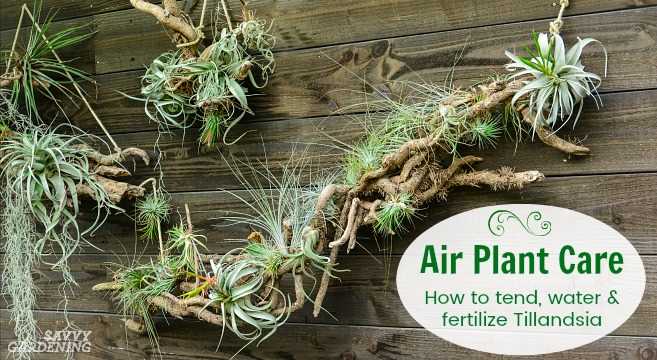
There are several different options for mounting Tillandsia, depending on your preferences and the look you want to achieve:
- Mounting on driftwood or branches: Attach your Tillandsia to a piece of driftwood or branches using a non-toxic adhesive or fishing line. This creates a natural and rustic look.
- Mounting on rocks or stones: Glue or tie your Tillandsia onto a rock or stone to create a unique display. This option works well for smaller Tillandsia varieties.
- Mounting in terrariums or glass containers: Create a mini landscape by placing your Tillandsia in a terrarium or glass container with other decorative items like rocks, sand, or shells.
- Mounting on wire mesh or frames: Attach your Tillandsia to wire mesh or frames to create a more structured and artistic display. This option allows the plants to be easily rearranged or switched out.
2. Displaying Options
Once your Tillandsia is mounted, you can choose how and where to display it. Here are some ideas:
- Hang them: Use fishing line or decorative chains to hang your Tillandsia from the ceiling or a wall hook. This creates a beautiful hanging display.
- Place them on shelves or tables: Arrange your Tillandsia on shelves, tables, or mantels to create a stunning centerpiece or decorative accent.
- Create a living wall: Mount your Tillandsia on a vertical garden or living wall to create a unique and eye-catching display.
- Group them together: Arrange multiple Tillandsia together in a decorative bowl or dish for a striking visual effect.
3. Care and Maintenance
After mounting and displaying your Tillandsia, it’s important to provide the proper care and maintenance to help them thrive. Here are some basic care tips:
- Light: Tillandsia thrive in bright, indirect light. Place them near a window or in a well-lit room, but avoid direct sunlight which can burn the leaves.
- Water: Tillandsia are epiphytic plants that absorb water and nutrients through their leaves. Mist them with water 2-3 times a week or soak them in water for 20-30 minutes every 1-2 weeks.
- Air circulation: Tillandsia need good air circulation to prevent rot and mold. Avoid placing them in enclosed spaces or areas with stagnant air.
- Temperature: Most Tillandsia prefer temperatures between 50-90°F (10-32°C). Avoid exposing them to extreme cold or heat.
By following these tips for mounting, displaying, and caring for your Tillandsia, you can create a beautiful and thriving indoor garden that will bring a touch of nature into your home.
Common Pests and Diseases of Tillandsia: Prevention and Treatment
Tillandsias are generally quite resilient plants, but they can still be susceptible to a few common pests and diseases. Here are some of the most common issues you may encounter when caring for Tillandsia plants and how to prevent or treat them.
Pests
- Mealybugs: These small, white, cottony insects can infest Tillandsia plants, often hiding in the leaf axils or under the leaves. You can physically remove them using a cotton swab dipped in rubbing alcohol or apply an organic insecticide specifically formulated for mealybugs.
- Aphids: These tiny insects can cluster on the leaves of Tillandsias, causing damage by sucking sap from the plant. You can wash them off with a strong stream of water or use an organic insecticidal soap to control their population.
- Scale insects: These tiny, flat insects can be found on the surface of Tillandsia leaves. You can remove them by gently scraping them off with a soft brush or cloth soaked in alcohol. Applying a horticultural oil spray can also be effective in controlling scale insects.
Diseases
- Root rot: Overwatering or poor drainage can lead to root rot in Tillandsia plants. To prevent this, make sure the plants are not sitting in standing water and allow the roots to dry between waterings. If root rot occurs, remove the affected parts and repot the plant in fresh, well-draining soil.
- Leaf spot: Leaf spot diseases can manifest as dark or discolored spots on Tillandsia leaves. To prevent leaf spot, avoid wetting the leaves when watering and provide good air circulation around the plants. If leaf spot occurs, remove the affected leaves and avoid overhead watering in the future.
- Fungal infections: Fungal infections can occur in Tillandsia plants if the humidity levels are too high or if the plants are consistently damp. To prevent fungal infections, ensure good air circulation, avoid misting the leaves excessively, and provide ample space between plants. If a fungal infection occurs, remove the affected parts and improve the air circulation around the plant.
Regularly inspecting your Tillandsia plants and taking prompt action at the first signs of pests or diseases can help keep them healthy and thriving. With proper care and attention, Tillandsias can be stunning additions to your indoor or outdoor space.
Q&A:
What is Tillandsia?
Tillandsia is a type of air plant that belongs to the Bromeliad family. They are native to the Americas and are known for their ability to absorb water and nutrients through their leaves.
What are the different types of Tillandsia?
There are over 650 species of Tillandsia, each with its own unique characteristics. Some popular types include Tillandsia ionantha, Tillandsia stricta, Tillandsia xerographica, and Tillandsia capitata.
How do you care for Tillandsia at home?
Tillandsia are relatively easy to care for. They require bright but filtered light, good air circulation, and periodic misting or soaking. They can also benefit from a monthly fertilizer solution.
Can Tillandsia be grown indoors?
Yes, Tillandsia can be grown indoors as long as they receive sufficient light and air circulation. They are commonly grown in terrariums or placed on decorative mounts or containers.
How often should I water my Tillandsia?
Tillandsia should be watered about once a week by either misting them or soaking them in water for about 20-30 minutes. The exact frequency may vary depending on factors such as temperature and humidity.
What are some common problems with Tillandsia?
Some common problems with Tillandsia include overwatering, underwatering, and lack of air circulation. Overwatering can cause root rot, while underwatering can cause the plants to dry out. Lack of air circulation can lead to the growth of mold or pests.
Can Tillandsia bloom?
Yes, Tillandsia can bloom. The flowers are usually brightly colored and can last for several weeks. However, not all Tillandsia species bloom, and it can take several years for a plant to reach maturity and produce flowers.
Video:
Air Plants for Beginners + Tips!

