- Phalaenopsis Care: Beginner’s Guide to Growing Beautiful Orchids
- Introduction
- Light
- Temperature and Humidity
- Watering and Fertilizing
- Potting and Repotting
- Common Issues
- Conclusion
- Choosing the Right Phalaenopsis Orchid
- Ideal Growing Conditions for Phalaenopsis Orchids
- 1. Light
- 2. Temperature
- 3. Humidity
- 4. Air Circulation
- 5. Watering
- 6. Potting Medium
- 7. Fertilizer
- 8. Repotting
- 9. Pest Control
- Watering and Humidity Requirements
- Watering
- Humidity
- Fertilizing Phalaenopsis Orchids for Healthy Growth
- 1. Choose the Right Fertilizer
- 2. Follow the Recommended Dilution Ratio
- 3. Apply Fertilizer During Active Growth
- 4. Fertilize Regularly but Sparingly
- 5. Apply Fertilizer with Precision
- 6. Water Properly after Fertilizing
- Repotting Phalaenopsis Orchids: When and How to Do It
- When to Repot
- How to Repot
- Aftercare
- Pruning and Maintenance Tips for Phalaenopsis Orchids
- Common Pests and Diseases: How to Identify and Treat Them
- Pests
- Diseases
- Conclusion
- Propagating Phalaenopsis Orchids: Step-by-Step Guide
- 1. Selecting the Parent Plant
- 2. Gathering the Required Materials
- 3. Preparing the Parent Plant
- 4. Dividing the Plant
- 5. Potting the New Plant
- 6. Providing the Right Conditions
- 7. Caring for the New Plant
- 8. Monitoring Progress
- 9. Transferring to a Permanent Pot
- Q&A:
- How often should I water my Phalaenopsis?
- Should I fertilize my Phalaenopsis?
- Can I place my Phalaenopsis outside?
- How do I propagate my Phalaenopsis?
- What should I do if my Phalaenopsis stops blooming?
- Video: Knowing this secret, you can propagate from any orchid
Phalaenopsis, also known as moth orchids, are one of the most popular and widely cultivated orchids in the world. With their delicate flowers and long-lasting blooms, they have become a favorite among both beginner and experienced gardeners alike. This expert guide will provide you with all the information you need to successfully care for, cultivate, and propagate your own Phalaenopsis orchids. Whether you’re a seasoned orchid enthusiast or just starting out, this guide will help you create a stunning display of these beautiful plants in your home or garden.
Caring for Phalaenopsis orchids is relatively easy, making them a great choice for beginners. These orchids prefer bright, indirect light, so placing them near a north or east-facing window is ideal. They should be kept in a warm and humid environment, with temperatures between 65-75 degrees Fahrenheit (18-24 degrees Celsius). It’s important to provide them with proper air circulation, as excessive moisture can lead to rotting roots and fungal diseases. Regular watering is necessary, but be careful not to over-water as this can also cause root rot. A well-draining potting mix specifically designed for orchids is recommended, as it allows for proper drainage and aeration.
Cultivating Phalaenopsis orchids can be a rewarding experience. These orchids can be propagated through various methods, such as division, stem cuttings, or tissue culture. Division involves separating a mature plant into smaller sections, each with its own roots and leaves. Stem cuttings can be taken from healthy plants and placed in a suitable rooting medium. Tissue culture is a more advanced technique that involves growing orchids from tiny pieces of plant tissue in a sterile laboratory environment. Whichever method you choose, it’s important to provide the proper care and conditions for the new plants to thrive.
In conclusion, Phalaenopsis orchids are a beautiful addition to any home or garden. With their stunning flowers and easy care requirements, they are perfect for both beginner and experienced gardeners. By following the advice and tips in this expert guide, you can successfully care for, cultivate, and propagate your own Phalaenopsis orchids, creating a stunning display that will bring joy and beauty to your space.
Phalaenopsis Care: Beginner’s Guide to Growing Beautiful Orchids
Introduction
Welcome to the beginner’s guide to growing beautiful Phalaenopsis orchids. Phalaenopsis, often referred to as moth orchids, are one of the most popular orchid genera among beginners and experienced growers alike. Known for their stunning and long-lasting flowers, these orchids can thrive in a variety of growing conditions.
Light
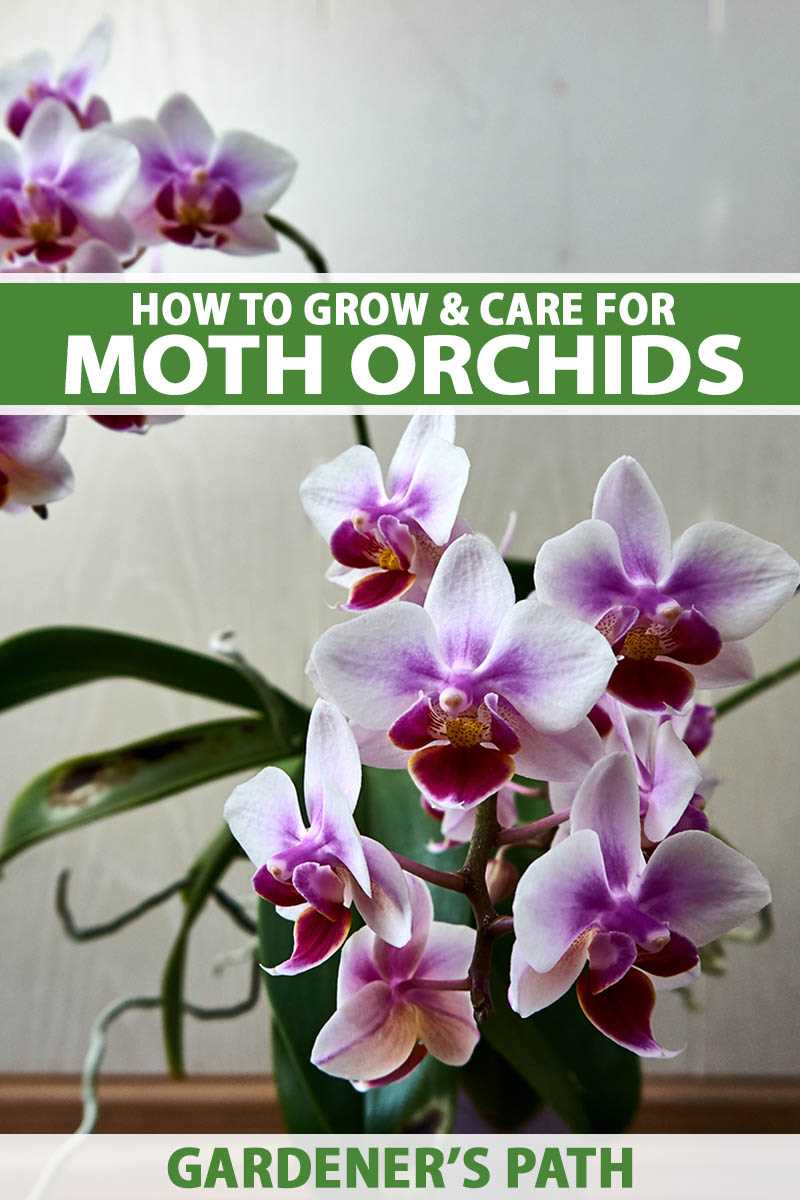
Phalaenopsis orchids require bright but indirect light. Place your orchid near a window or in a well-lit room, but avoid direct sunlight as it can scorch the leaves. If your orchid is not receiving enough light, it may not bloom or grow properly. Consider using artificial grow lights if natural light is limited.
Temperature and Humidity
Phalaenopsis orchids prefer temperatures between 60-75°F (15-24°C) during the day and slightly cooler temperatures at night. They also thrive in moderate to high humidity levels, around 50-70%. To increase humidity, you can place your orchid on a humidity tray, use a room humidifier, or mist the leaves with water regularly.
Watering and Fertilizing
Water your Phalaenopsis orchid when the potting medium feels dry to the touch. Avoid overwatering, as this can lead to root rot. It’s better to underwater than to overwater your orchid. Use room temperature or lukewarm water and allow it to drain completely after watering. Fertilize your orchid every 2-4 weeks during the growing season with a balanced orchid fertilizer diluted to half-strength.
Potting and Repotting
Phalaenopsis orchids are typically potted in a well-draining medium, such as bark or sphagnum moss. It’s important to repot your orchid every 1-2 years or when the potting medium starts to decompose. When repotting, carefully remove the orchid from its old pot, trim any dead roots, and place it in a slightly larger pot with fresh potting medium.
Common Issues
Phalaenopsis orchids are generally easy to care for, but they can encounter a few common issues. Overwatering, underwatering, and improper light levels are the most common culprits. Keep an eye out for pests such as scale insects and mealybugs, and treat them promptly with appropriate insecticides. If your orchid’s leaves turn yellow or black, it could be a sign of root rot, which requires immediate attention.
Conclusion
Growing beautiful Phalaenopsis orchids can be a rewarding experience for beginners. With the right care, these stunning orchids can thrive and bloom year after year. Remember to provide them with bright but indirect light, maintain proper temperature and humidity levels, water and fertilize them appropriately, repot when necessary, and address any common issues promptly. Enjoy the beauty of these exquisite orchids in your own home or garden.
Choosing the Right Phalaenopsis Orchid
- Consider the Color: Phalaenopsis orchids come in a wide range of colors, including white, pink, purple, and yellow. When choosing a Phalaenopsis orchid, consider which colors will complement your home or office decor.
- Check the Health: Inspect the leaves and roots of the orchid to ensure they are healthy and free from any signs of disease or damage. Look for firm, green leaves and plump roots. Avoid orchids with discolored or yellowing leaves, as this may indicate a problem.
- Consider the Size: Phalaenopsis orchids can vary in size, with some varieties growing larger than others. Consider the space you have available for the orchid and choose a size that suits your needs. Smaller orchids are more suitable for limited space areas, while larger ones can make a bold statement.
- Research the Variety: There are many different varieties of Phalaenopsis orchids, each with its own unique characteristics. Some varieties may require specific care or have different blooming patterns. Take some time to research the different varieties and choose one that matches your preferences and skill level.
- Consider the Blooming Stage: If you want an orchid that is about to bloom or already in bloom, check for buds or open flowers. This way, you can enjoy the beauty of the orchid immediately and potentially extend the bloom period with proper care.
- Understand Light and Temperature Requirements: Different varieties of Phalaenopsis orchids have different light and temperature requirements. Some thrive in bright, indirect light, while others prefer lower light conditions. Consider the lighting conditions in your home or office and choose an orchid that will thrive in that environment.
- Ask for Expert Advice: If you are unsure about which Phalaenopsis orchid to choose, seek advice from a knowledgeable orchid grower or supplier. They can provide guidance based on your specific needs and preferences.
By considering these factors, you can choose the right Phalaenopsis orchid that will thrive and bring beauty to your home or office.
Ideal Growing Conditions for Phalaenopsis Orchids
Phalaenopsis orchids, also known as moth orchids, are popular houseplants due to their beautiful flowers and relatively easy care requirements. To provide the ideal growing conditions for Phalaenopsis orchids, consider the following factors:
1. Light
Phalaenopsis orchids prefer bright, indirect light. Place them near a window where they can receive filtered sunlight or in an area with bright, but indirect artificial light. Avoid direct sunlight, as it can cause the leaves to burn.
2. Temperature
Phalaenopsis orchids thrive in temperatures between 65°F (18°C) and 80°F (27°C) during the day and a slightly cooler temperature of 60°F (15°C) to 70°F (21°C) at night. Avoid exposing the orchids to extreme temperature fluctuations.
3. Humidity
Phalaenopsis orchids require high humidity levels, ideally around 50% to 70%. To increase humidity, place the orchids on a humidity tray filled with water or use a humidifier. Misting the leaves and placing the orchids near other plants can also help maintain humidity.
4. Air Circulation
Good air circulation is essential for Phalaenopsis orchids to prevent fungal and bacterial infections. Place the orchids in a well-ventilated area and avoid overcrowding them with other plants.
5. Watering
Phalaenopsis orchids prefer to be watered thoroughly, allowing the potting medium to dry slightly between waterings. Water the orchids early in the morning, using room temperature or tepid water. Avoid overwatering, as it can lead to root rot.
6. Potting Medium
Phalaenopsis orchids are typically potted in a well-draining medium, such as sphagnum moss, bark, or a mixture of the two. Ensure the potting medium retains some moisture while allowing excess water to drain away.
7. Fertilizer
Regular fertilization is necessary to provide Phalaenopsis orchids with essential nutrients. Use a balanced orchid fertilizer diluted to half strength and apply it every two weeks during the growing season. During the dormant period, reduce fertilizer application to once a month.
8. Repotting
Phalaenopsis orchids usually require repotting every 1-2 years to refresh the potting medium and provide adequate space for root growth. Repotting should be done during the orchid’s active growing season.
9. Pest Control
Monitor Phalaenopsis orchids regularly for common pests, such as aphids, scale insects, and mealybugs. Use appropriate organic or chemical pest control methods to keep the orchids pest-free.
By ensuring the proper light, temperature, humidity, watering, and care, you can create the ideal growing conditions for your Phalaenopsis orchids and enjoy their beauty for years to come.
Watering and Humidity Requirements
Proper watering is essential for the health and vitality of Phalaenopsis orchids. These plants require a careful balance of moisture to prevent both under-watering and over-watering.
Watering
Phalaenopsis orchids prefer to be watered in the morning to allow for proper drying throughout the day. It is important to water thoroughly, ensuring that the water penetrates all the way through the potting medium and drains out the bottom.
The frequency of watering will depend on various factors such as the size of the pot, the size of the plant, and the ambient humidity. In general, orchids should be watered when the top inch of the potting medium feels dry to the touch. Avoid letting the orchid sit in standing water, as this can lead to root rot.
Humidity
Phalaenopsis orchids thrive in environments with moderate to high humidity. The ideal humidity range for these plants is between 50% and 70%. In dry climates or heated indoor environments, it may be necessary to increase humidity levels by using a humidifier or placing the orchid on a tray filled with pebbles and water. Misting the leaves and surrounding air can also help increase humidity.
Avoid placing Phalaenopsis orchids near drafts or in areas with low humidity, such as near air conditioning vents or open windows. This can lead to moisture loss and cause the orchid to dry out quickly.
By providing the right amount of water and maintaining appropriate humidity levels, you can ensure that your Phalaenopsis orchid remains healthy and beautiful for years to come.
Fertilizing Phalaenopsis Orchids for Healthy Growth
Proper fertilization is essential for the healthy growth of Phalaenopsis orchids. These flowering plants require certain nutrients to thrive and produce beautiful blooms. Here are some tips on how to fertilize your Phalaenopsis orchids for optimal growth:
1. Choose the Right Fertilizer
When selecting a fertilizer for your Phalaenopsis orchids, it’s important to choose one specifically formulated for orchids. Look for a balanced fertilizer with a ratio of nitrogen (N), phosphorus (P), and potassium (K), such as 20-20-20 or 10-10-10. Additionally, it’s beneficial to use a fertilizer that contains trace elements like iron, magnesium, and manganese.
2. Follow the Recommended Dilution Ratio
Always follow the recommended dilution ratio provided by the fertilizer manufacturer. Orchids are sensitive to excessive fertilization, so it’s crucial to use the fertilizer in the correct concentrations. Overfertilizing can lead to salt build-up, which can damage the orchid’s roots.
3. Apply Fertilizer During Active Growth
Phalaenopsis orchids generally have two main growth phases: the active growth phase and the resting phase. During the active growth phase, which usually occurs during spring and summer, orchids have an increased nutrient demand. This is the ideal time to apply fertilizer to support healthy growth and flower development. Cease fertilization during the resting phase to allow the orchid to enter its natural dormancy period.
4. Fertilize Regularly but Sparingly
It’s important to fertilize Phalaenopsis orchids regularly but sparingly. A general guideline is to fertilize every two weeks during the active growth phase. However, it’s crucial not to exceed the recommended frequency and concentration to prevent fertilizer burn. Remember, less is more when it comes to fertilizing orchids.
5. Apply Fertilizer with Precision
When applying fertilizer, it’s important to target the root zone of the orchid. Carefully pour the diluted fertilizer solution onto the potting medium, avoiding any contact with the leaves or flowers. This helps prevent damage or burning of the foliage. Take care not to spill the fertilizer solution onto the surrounding surface or floor, as it may cause staining or damage.
6. Water Properly after Fertilizing
After applying fertilizer, it’s crucial to water the orchid thoroughly. This helps flush out any excess salts and prevent salt build-up in the potting medium. Proper watering techniques include watering until water drains out of the bottom of the pot, ensuring that the roots receive sufficient moisture.
By following these fertilization tips, you can help ensure the healthy growth and beautiful blooms of your Phalaenopsis orchids. Remember to always read the instructions provided by the fertilizer manufacturer and adjust your fertilization practices accordingly.
Repotting Phalaenopsis Orchids: When and How to Do It
Repotting is an essential part of caring for Phalaenopsis orchids. It allows the plants to grow and thrive by providing them with fresh, nutrient-rich growing media and proper drainage. In this guide, we will discuss when and how to repot your Phalaenopsis orchids to ensure their health and longevity.
When to Repot
Phalaenopsis orchids typically need to be repotted every 1-2 years, or when you notice one or more of the following conditions:
- The potting medium has broken down and become compacted
- The roots have overgrown the pot and are protruding from the drainage holes
- The plant is not thriving or producing new growth
It’s best to repot Phalaenopsis orchids in the spring or early summer, just after they have finished blooming. This will give the plants plenty of time to establish themselves before the next blooming season.
How to Repot
Follow these steps to repot your Phalaenopsis orchids:
- Carefully remove the orchid from its current pot, gently loosening the roots from the old potting medium.
- Inspect the roots for any signs of damage, disease, or rot. Trim off any dead or decaying roots with clean, sterilized pruning shears.
- Select a new pot that is slightly larger than the current one and has drainage holes.
- Place a layer of fresh orchid bark or a well-draining orchid potting mix in the bottom of the new pot.
- Position the orchid in the new pot, making sure the roots are spread out and facing downward. Fill in the gaps with additional potting mix, gently pressing it down to secure the orchid.
- Water the newly repotted orchid thoroughly, allowing any excess water to drain away.
- Place the orchid in a warm, bright location, avoiding direct sunlight. Resume regular watering and fertilizing routine.
Aftercare
After repotting, monitor your Phalaenopsis orchid closely for the next few weeks. Ensure that the potting medium is neither too dry nor too wet, as this can stress the plant. Adjust your watering schedule accordingly.
In the weeks following repotting, avoid fertilizing your Phalaenopsis orchid to give it time to acclimate to its new environment. Once the plant has fully settled in, resume your regular fertilizing routine.
With proper repotting and care, your Phalaenopsis orchid will continue to bloom and flourish for years to come.
Pruning and Maintenance Tips for Phalaenopsis Orchids
Proper pruning and maintenance are essential for the health and beauty of your Phalaenopsis orchids. Here are some tips to keep your orchids thriving:
- Remove spent blooms: After your Phalaenopsis orchid has finished flowering, it’s important to remove the spent blooms. This can be done by cutting the stem just above the nearest node with a sharp, sterile knife or scissors. This will encourage new growth and future blooms.
- Trim damaged or yellowing leaves: Regularly inspect your orchid for any damaged or yellowing leaves. Trim these leaves carefully, using sterile pruning tools. This will help prevent the spread of any potential diseases or pests.
- Prune overgrown roots: Over time, the roots of your Phalaenopsis orchid may become overgrown and have a tangled appearance. When repotting your orchid, carefully trim any excessive roots to promote healthy growth and prevent root rot.
- Clean leaves: Dust and debris can accumulate on the leaves of your orchid, affecting their ability to photosynthesize. Gently wipe the leaves with a damp cloth or soft brush to keep them clean and healthy.
- Provide proper lighting: Phalaenopsis orchids thrive in bright but indirect light. Place your orchid near a window with filtered sunlight or provide artificial lighting with proper intensity and duration.
- Monitor humidity levels: Phalaenopsis orchids prefer high humidity. To maintain the proper humidity, place a tray of water near the orchid to increase moisture in the air. Alternatively, you can use a humidifier or mist the orchid regularly.
- Watering: Orchids should be watered when the potting medium is dry to the touch. Avoid overwatering, as it can lead to root rot. Use room temperature water and allow any excess water to drain completely.
- Fertilize regularly: Phalaenopsis orchids benefit from regular fertilization during their active growing period. Use a balanced orchid fertilizer and follow the instructions on the label for proper dosage and frequency.
- Keep temperatures stable: Phalaenopsis orchids prefer temperatures between 65°F and 85°F (18°C to 29°C). Avoid placing them in drafty areas or near heating or cooling vents.
By following these pruning and maintenance tips, you can help your Phalaenopsis orchids thrive and enjoy their stunning blooms for years to come.
Common Pests and Diseases: How to Identify and Treat Them
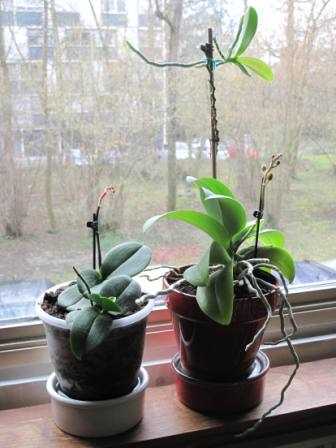
Pests
Aphids: These small, soft-bodied insects can be found on the undersides of the leaves. They suck the sap from the plant, causing the leaves to curl and distort. To treat aphids, you can wash them off with a strong spray of water or use insecticidal soap.
Mealybugs: These white, cotton-like insects can appear on the leaves and stems. They also feed on the sap of the plant and can cause yellowing and stunted growth. Mealybugs can be treated with insecticidal soap or by rubbing alcohol on a cotton swab.
Scale insects: These pests attach themselves to the stems and leaves of the plant, forming hard, shell-like coverings. They feed on the sap and can cause leaf drop and yellowing. Scale insects can be removed by scraping them off with a fingernail or by using insecticidal soap.
Spider mites: These tiny pests can be identified by the fine webbing they produce on the leaves. They feed on the plant sap and can cause yellowing and leaf drop. Spider mites can be controlled by regularly spraying the leaves with water or using a miticide.
Diseases
Root rot: This disease is caused by overwatering or poor drainage, leading to the roots becoming waterlogged and rotting. To treat root rot, it is important to improve drainage and reduce watering frequency. If the infection is severe, you may need to repot the plant using fresh, well-draining potting mix.
Leaf spots: Leaf spots can be caused by fungal or bacterial infections. They appear as small, dark-colored spots on the leaves. To prevent leaf spots, it is important to avoid getting water on the leaves and to provide good air circulation around the plant. Infected leaves should be removed and destroyed.
Botrytis blight: Also known as gray mold, this fungal disease causes brown spots on the flowers and leaves. The affected parts should be removed and destroyed. Good air circulation and avoiding overwatering can help prevent botrytis blight.
Viral infections: Viral infections can cause various symptoms, including mottled or streaked leaves and stunted growth. There is no cure for viral infections, so infected plants should be isolated and discarded to prevent the spread of the virus to other plants.
Conclusion
Regular monitoring of your Phalaenopsis orchid is essential to identify and treat pests and diseases promptly. By taking proactive measures and implementing proper care practices, you can ensure a healthy and thriving orchid plant.
Propagating Phalaenopsis Orchids: Step-by-Step Guide
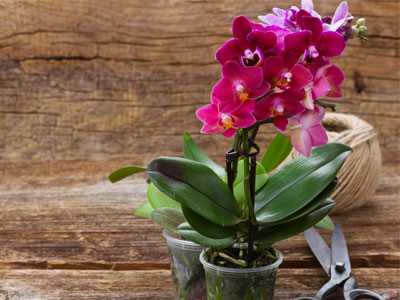
If you’re a fan of Phalaenopsis orchids and want to expand your collection, propagating your own plants is a great way to do it. With a little patience and the right techniques, you can easily propagate new Phalaenopsis orchids from existing plants. Here is a step-by-step guide to help you get started.
1. Selecting the Parent Plant
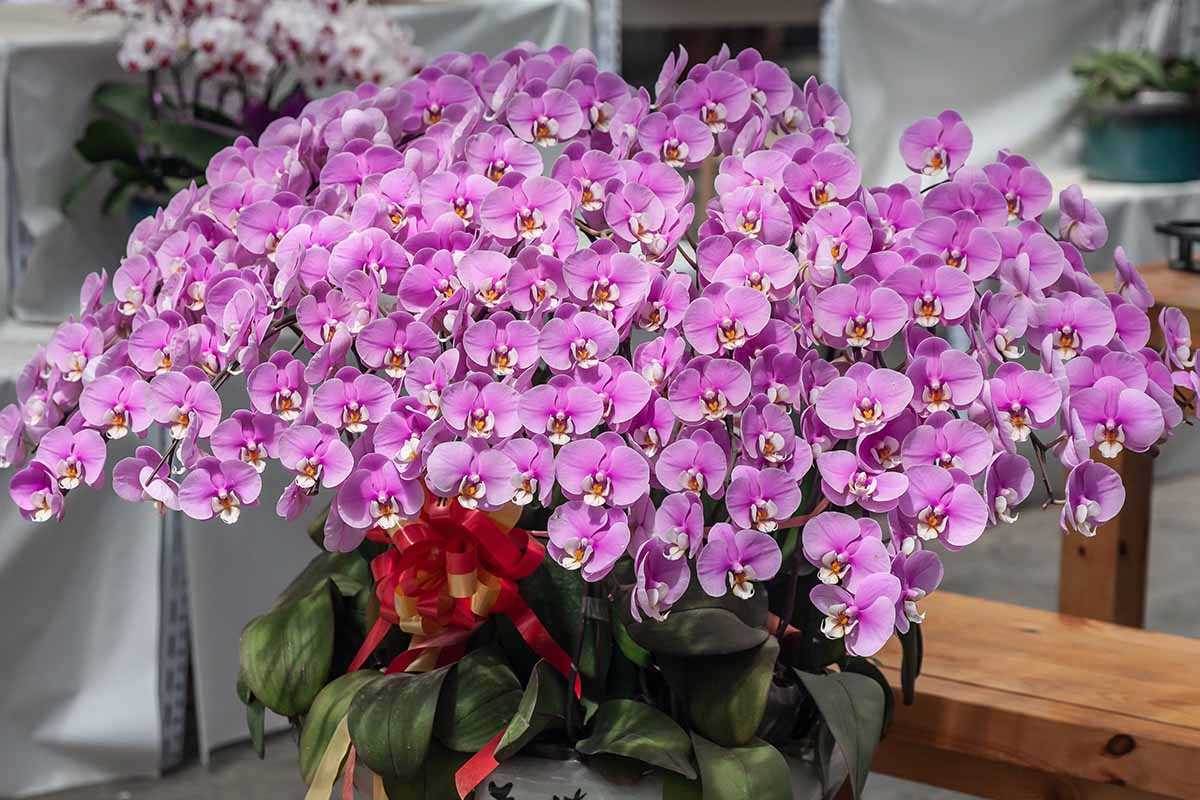
Choose a healthy and mature Phalaenopsis orchid plant as the parent plant for propagation. Look for a plant with strong roots, vibrant leaves, and at least three mature pseudobulbs.
2. Gathering the Required Materials
You will need the following materials:
- Sharp and sterile scissors or garden shears
- A clean container for the new plant
- Sphagnum moss or a well-draining orchid potting mix
- Rooting hormone (optional)
- Clear plastic bag or a humidity dome
3. Preparing the Parent Plant
Start by sterilizing your tools with rubbing alcohol to prevent the spread of diseases. Carefully remove the Phalaenopsis orchid from its pot, gently separating it from the root medium. Trim any dead or damaged roots using the sterile scissors.
4. Dividing the Plant
Divide the parent plant by separating the pseudobulbs. Each division should have at least three mature pseudobulbs and a portion of the root system.
5. Potting the New Plant
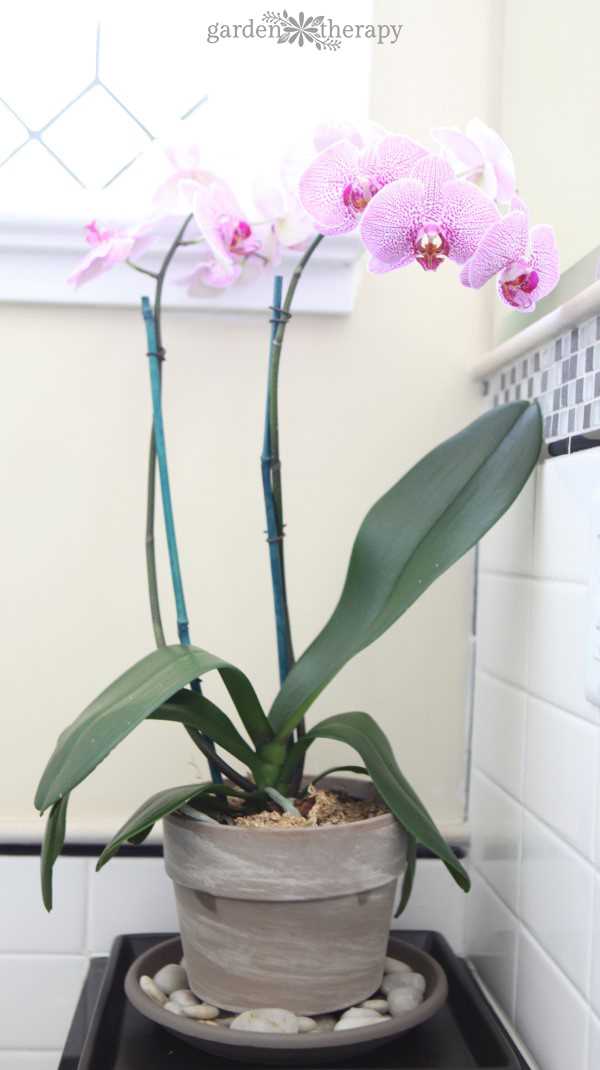
Fill the clean container with sphagnum moss or a well-draining orchid potting mix. Place the divided plant in the container, making sure the roots are spread out evenly. You can optionally dip the cut ends in rooting hormone to promote root growth.
6. Providing the Right Conditions
Cover the newly potted plant with a clear plastic bag or a humidity dome to create a humid environment. Place it in a warm and bright location, away from direct sunlight. Maintain high humidity by misting the plant or using a humidity tray.
7. Caring for the New Plant
Water the new plant sparingly, allowing the potting medium to dry slightly between waterings. Avoid overwatering, as it can lead to root rot. Provide indirect light and maintain a temperature range of 60-80°F (15-27°C).
8. Monitoring Progress
Monitor the new plant closely for signs of growth and root development. It may take several months for the new plant to establish roots and begin growing new leaves.
9. Transferring to a Permanent Pot
Once the new plant has developed a healthy root system and several new leaves, it can be transferred to a permanent pot with orchid-specific potting mix. Follow the usual care guidelines for Phalaenopsis orchids.
By following these steps, you can successfully propagate Phalaenopsis orchids and enjoy the satisfaction of growing your own plants. Remember to be patient and provide the right care for the new plant as it establishes itself.
Q&A:
How often should I water my Phalaenopsis?
You should water your Phalaenopsis once a week. Ensure that the water drains properly from the pot after watering to avoid rotting the roots.
Should I fertilize my Phalaenopsis?
Yes, you should fertilize your Phalaenopsis once a month during the growing season. Use a balanced orchid fertilizer diluted to half strength.
Can I place my Phalaenopsis outside?
Phalaenopsis prefer indirect light and warm temperatures, so it’s best to keep them indoors where the conditions can be controlled. Placing them outside can expose them to too much direct sunlight or extreme temperatures, which can harm the plant.
How do I propagate my Phalaenopsis?
Phalaenopsis can be propagated by dividing the plant. Wait until the plant has finished flowering and the stem starts to turn brown. Carefully remove the plant from the pot and separate the roots and stems into smaller sections using sterilized cutting tools. Plant the new sections in separate pots with fresh orchid mix and keep them in a warm and humid environment until they establish roots.
What should I do if my Phalaenopsis stops blooming?
If your Phalaenopsis stops blooming, it could be due to several factors. Make sure it is receiving enough light, but not direct sunlight. Check the temperature and humidity levels, as they can also affect blooming. Additionally, ensure that you are providing regular and proper care including watering, fertilizing, and repotting when necessary.
Video:
Knowing this secret, you can propagate from any orchid

