
- Уход за хойей в домашних условиях
- Освещение
- Температура и влажность
- Полив
- Удобрение
- Пересадка
- Как выбрать подходящую хойю для дома
- 1. Определите место размещения
- 2. Учитывайте условия помещения
- 3. Выбирайте вид хойи
- Как размножать хойю в домашних условиях
- 1. Размножение хойи черенками
- 2. Размножение хойи с помощью листов
- 3. Размножение хойи с помощью воздушных корней
- Фото красивых видов хойи
- На что обратить внимание при покупке хойи
- 1. Состояние листьев
- 2. Корневая система
- 3. Уровень здоровья растения
- Украшение интерьера с помощью хойи
- Преимущества хойи как декоративного растения:
- Как устроить оптимальные условия для хойи
- Как часто поливать хойю и подкормки
- Полив хойи
- Подкормка хойи
- Особенности ухода за хойей в период цветения
- Полив
- Освещение
- Удобрение
- Удаление отцветших цветов
- Как обрезать хойю для формирования куста
- Выберите правильное время для обрезки
- Удалите старые, поврежденные и болезненные побеги
- Обрежьте верх части побегов
- Настройте форму куста
- Почему листья хойи желтеют и как это исправить
- Уникальные свойства хойи для здоровья
- Очищение воздуха
- Улучшение сна
- Улучшение настроения
- Увлажнение кожи
- Снижение риска заболеваний
- Вопрос-ответ:
- Какой уход требуется для растения хойя?
- Как часто нужно поливать хойю?
- Как обеспечить правильный уровень влажности для хойи?
- Какие виды хойи наиболее популярны для выращивания?
- Можно ли размножать хойю?
Хойя (Hoya) — это род растений семейства молочайных. Они являются популярными комнатными растениями благодаря своей экзотической красоте и неприхотливости в уходе. В природе их можно встретить в различных тропических регионах Азии и Австралии. В культуре широкую популярность получили некоторые виды хойи, которые идеально подходят для выращивания внутри помещения.
Хойи отличаются необычными листьями, которые имеют толстую кожу и своеобразную форму. Они могут быть маленькими и крупными, цельными или раздробленными на лопасти. Некоторые виды хойи имеют красивую текстуру и окраску листьев, например, белые пятна или полосы на зеленом фоне. Это делает растение очень декоративным и привлекательным для цветоводов.
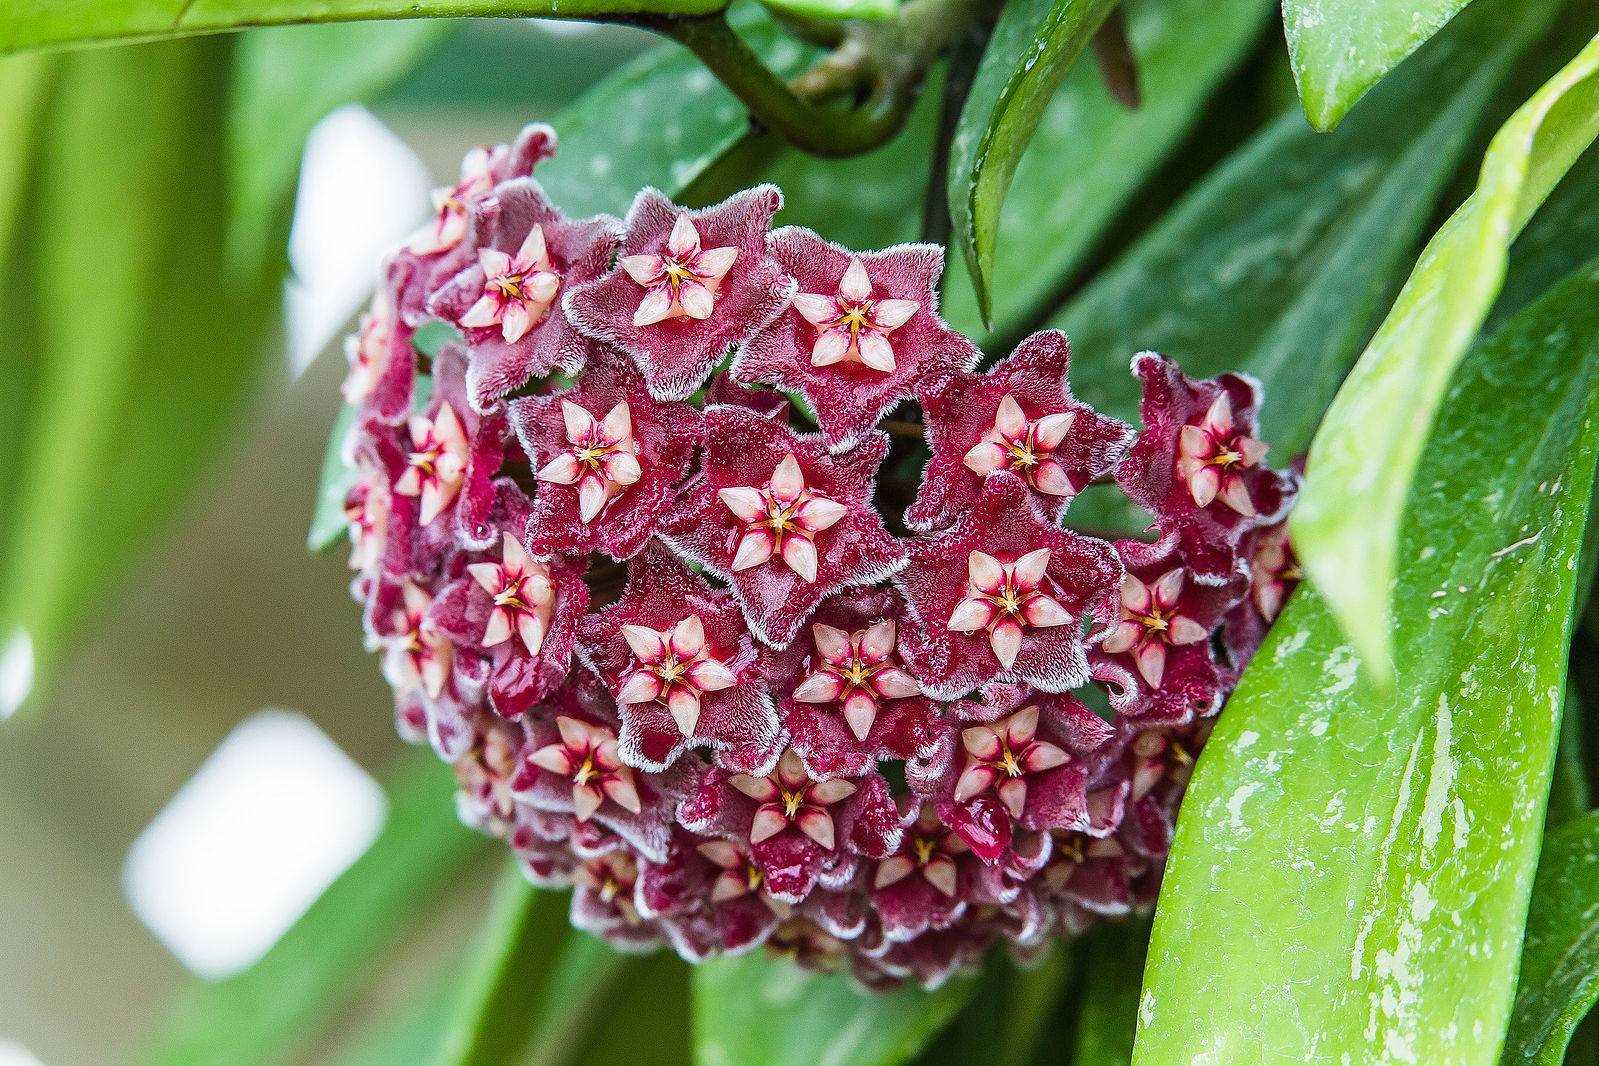
Хойя известна также своими ароматными цветками, которые собраны в соцветия или зонтики. Цветы могут быть разной формы и окраски, от белого до фиолетового. Некоторые виды хойи имеют очень крупные цветы, которые могут заполнить комнату своим благоуханием. Цветение хойи обычно происходит весной или летом, и в течение нескольких недель цветы радуют глаз своей красотой.
Уход за хойей в домашних условиях
Освещение
Для хорошего роста хойи важно обеспечить ей яркое, но рассеянное освещение. Растение нужно держать на светлом месте, но прямые солнечные лучи следует избегать, чтобы не вызвать ожоги на листьях.
Если на окнах нет достаточного освещения, рекомендуется использовать дополнительное искусственное освещение с помощью фитоламп или светодиодных ламп с цветовой температурой около 4000-5000K.
Температура и влажность
Хойя предпочитает умеренную температуру воздуха, от 18 до 24 градусов Цельсия. Важно избегать больших перепадов температуры и сквозняков, так как это может негативно сказаться на здоровье растения.
Поддерживайте уровень влажности воздуха, опрыскивая листья хойи мягкой водой или используя увлажнители воздуха. Также полезно разместить растение на поддоне с влажными камнями или влажным мхом.
Полив
Хойя не требовательна к поливу, растению достаточно 1-2 полива в неделю в летний период и 1 полива в 2-3 недели в зимний период. Важно дать почве просохнуть между поливами, чтобы не вызывать гниение корней.
Поливайте хойю прохладной или комнатной водой, подливая воду в поддон и удаляя остатки воды через 30-60 минут после полива.
Удобрение
Удобряйте хою в период активного роста с весны до осени раз в 2-3 недели универсальным или специальным для цветущих комнатных растений удобрением.
Разводите удобрение согласно инструкции на упаковке, чтобы не переборщить с концентрацией. От удобрения слишком сильного роста и разбухания нежелательно. Перед удобрением поливайте растение обильно водой, чтобы избежать ожогов корней.
Пересадка
Пересаживайте хойу при необходимости каждые 1-2 года в горшок более емкостного размера. Земля для посадки должна быть питательной и хорошо дренированной.
Не рекомендуется сильно утрамбовывать землю при пересадке, чтобы сохранить доступ кислорода к корням.
Также важно пересаживать хойю аккуратно, чтобы не повредить корни и листья растения.
Как выбрать подходящую хойю для дома
Хойя является популярным растением для домашнего украшения благодаря своим эффектным цветкам и неприхотливости в уходе. Однако перед покупкой хойи важно учитывать несколько факторов, чтобы выбрать наиболее подходящую растение для своего дома.
1. Определите место размещения
Хойя предпочитает яркий, но разбросанный свет, поэтому выберите место, где растение будет получать достаточно света, но не будет подвергаться прямому солнечному свету. Оптимально будет разместить хойю у окна с восточной или западной ориентацией.
2. Учитывайте условия помещения
Хойя отлично приспосабливается к различным условиям, однако имейте в виду, что слишком низкая температура или сквозняки могут негативно сказаться на здоровье растения. Поддерживайте комфортные условия в помещении для хойи — температура около 20-25 градусов и отсутствие резких перепадов.
3. Выбирайте вид хойи
На рынке представлено множество видов хойи, отличающихся формой и цветом листвы, а также формой и ароматом цветков. Выберите вид, который наиболее подходит вам по внешнему виду и аромату.
Следуя этим рекомендациям, вы сможете выбрать подходящую хойю для своего дома и создать яркий, уютный интерьер с этим прекрасным растением.
Как размножать хойю в домашних условиях
Хоя (Hoya) – это красивое и популярное комнатное растение, которое можно размножать разными способами. Разведение хойи дома доступно даже для новичков садоводов, так как это растение достаточно неприхотливое и может легко приспособиться к разным условиям.
1. Размножение хойи черенками
Наиболее распространенным способом размножения хойи является черенкование. Для этого необходимо отрезать здоровый, зрелый побег длиной около 10 см, удалив при этом самый нижний лист. Затем черенок нужно поместить в стакан с водой или заложить его в субстрат из песка и торфа. Для увеличения шансов на успешное приживление, можно накрыть черенок пластиковым пакетом или использовать теплицу.
2. Размножение хойи с помощью листов
Хойю также можно размножать с помощью листьев. Для этого необходимо отрезать здоровый и мясистый лист с растения, предварительно сделав на нем надрезы. После этого лист следует посадить в субстрат из песка и торфа, оставив его в теплом и влажном месте. Через несколько недель появятся новые ростки, которые будут служить началом новых растений.
3. Размножение хойи с помощью воздушных корней
Еще один способ размножения хойи – использование воздушных корней. Если на растении уже есть воздушные корни, их можно прикопать или прикрепить к субстрату, например, с помощью заземлителя. Воздушные корни быстро приживаются в новом месте и начинают развиваться в полноценные побеги, которые можно отделить от основного растения и размножать отдельно.
При размножении хойи важно помнить, что растению требуется тепло, свет и умеренное поливание. Также стоит учесть, что хоя – вьющееся растение, поэтому необходимо обеспечить ей поддержку, на которую она сможет расти.
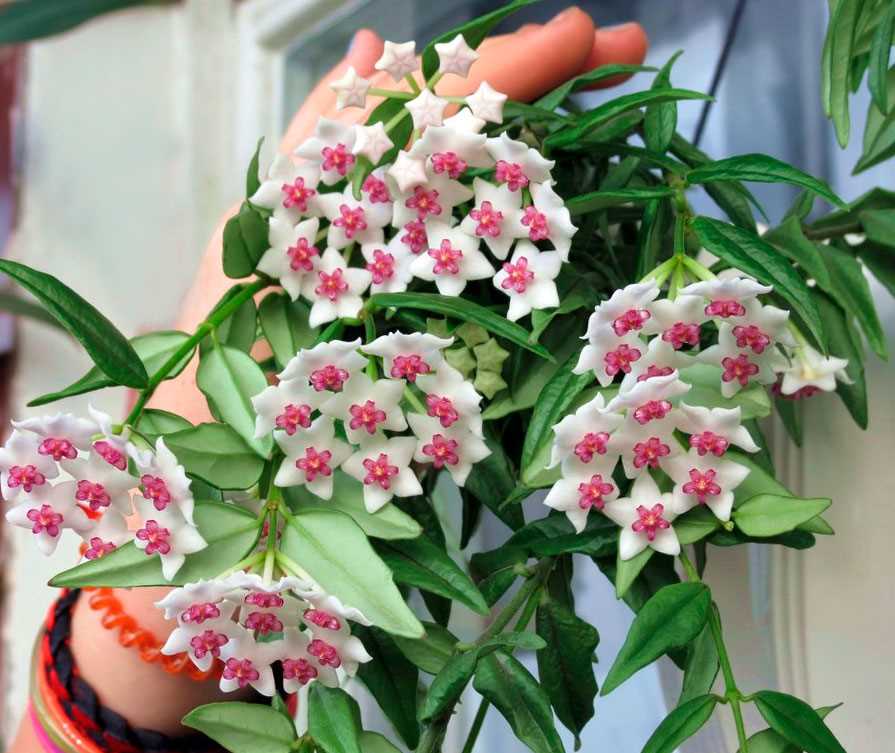
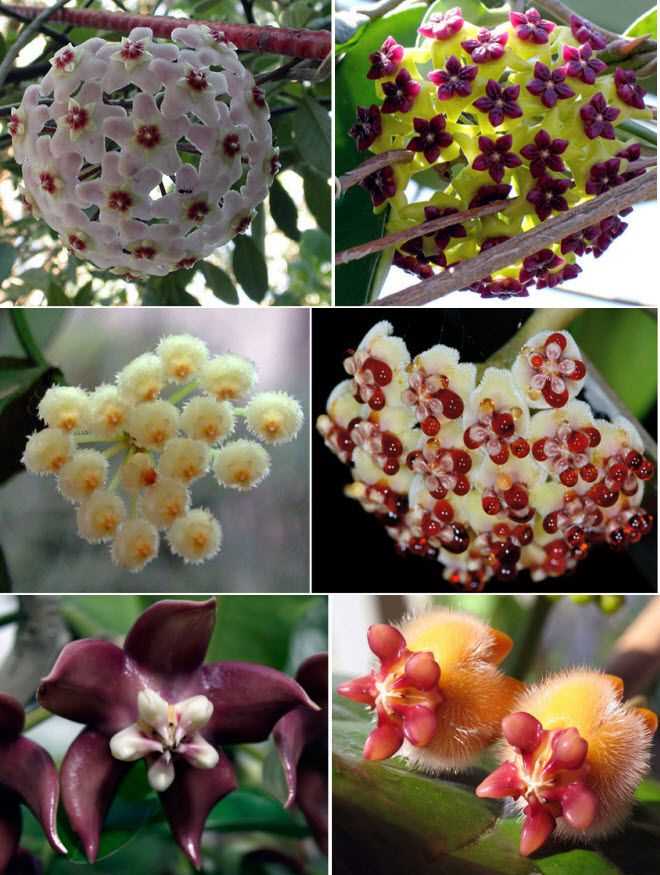
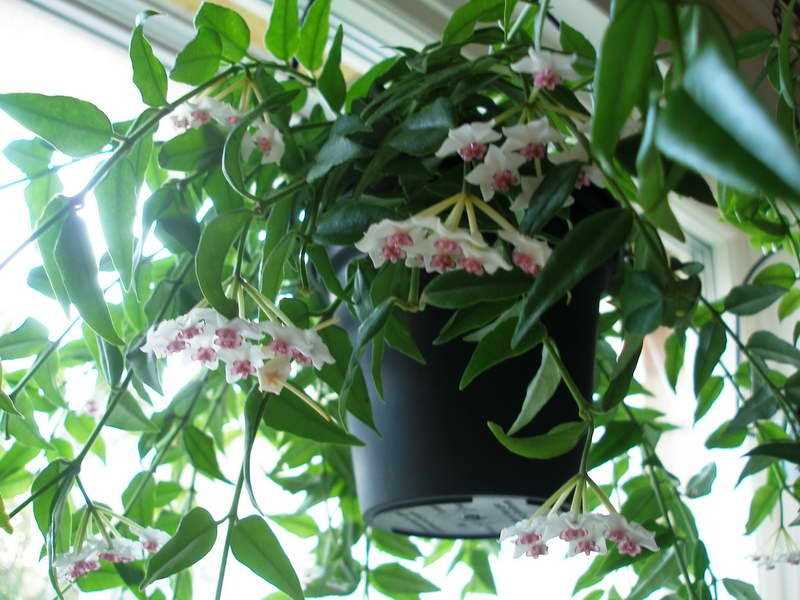
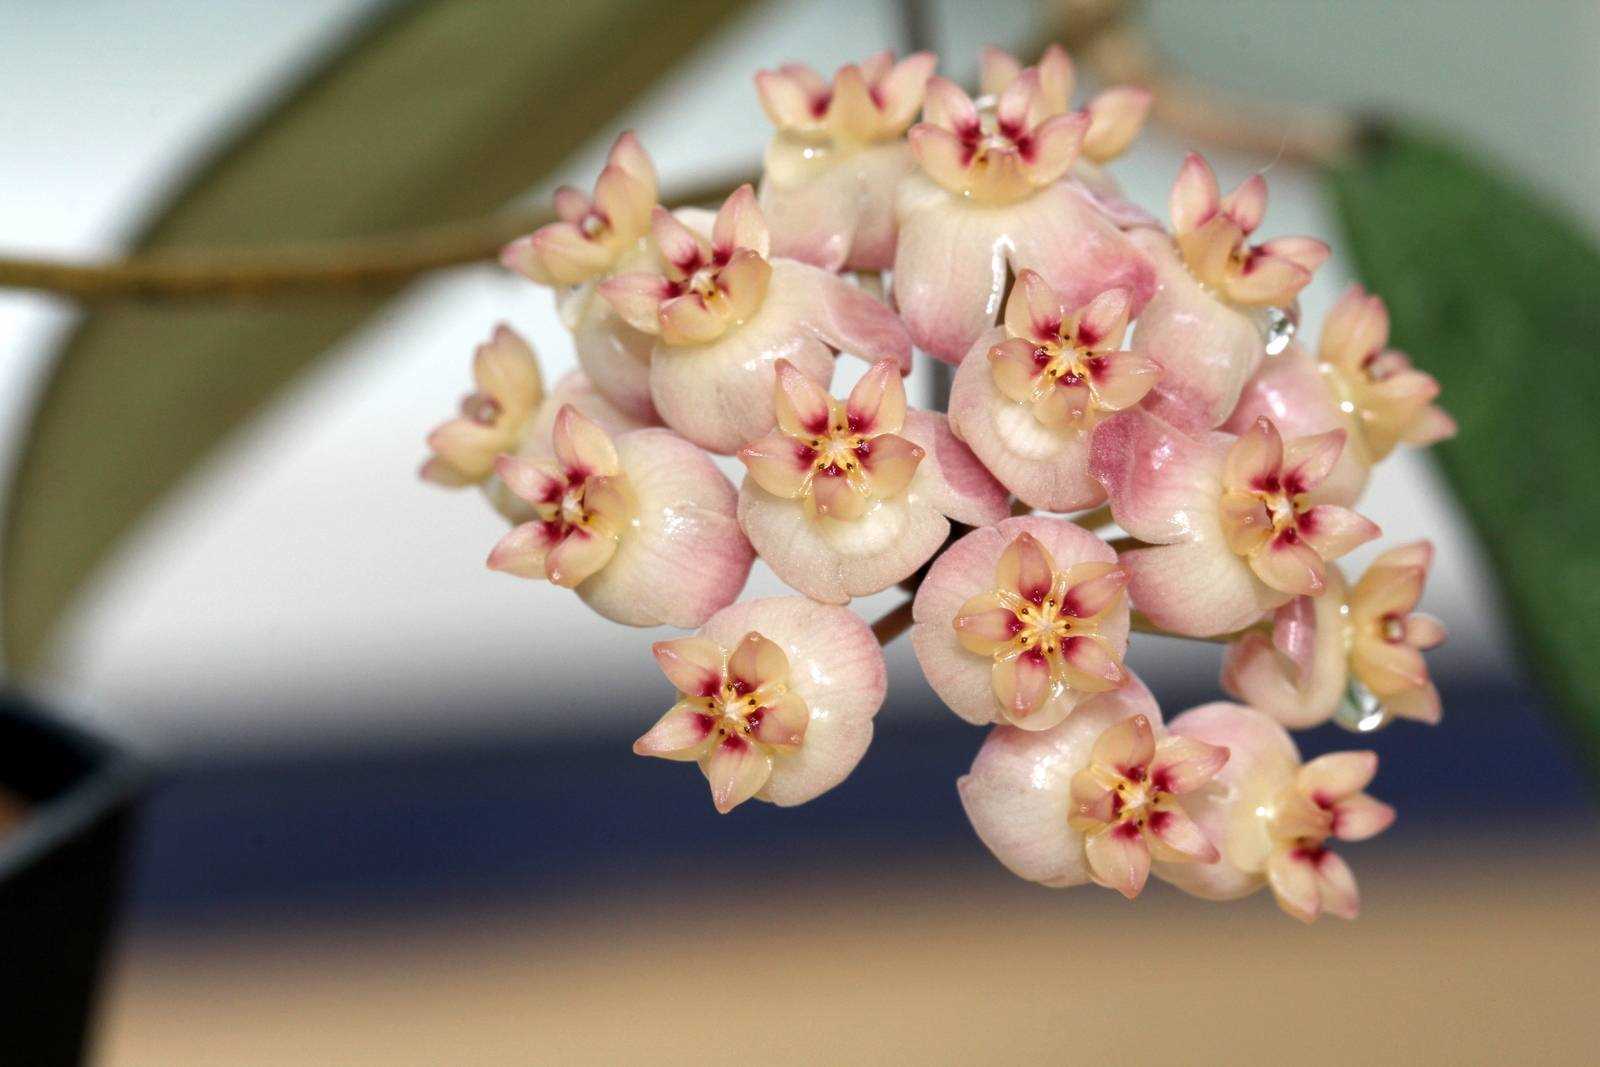
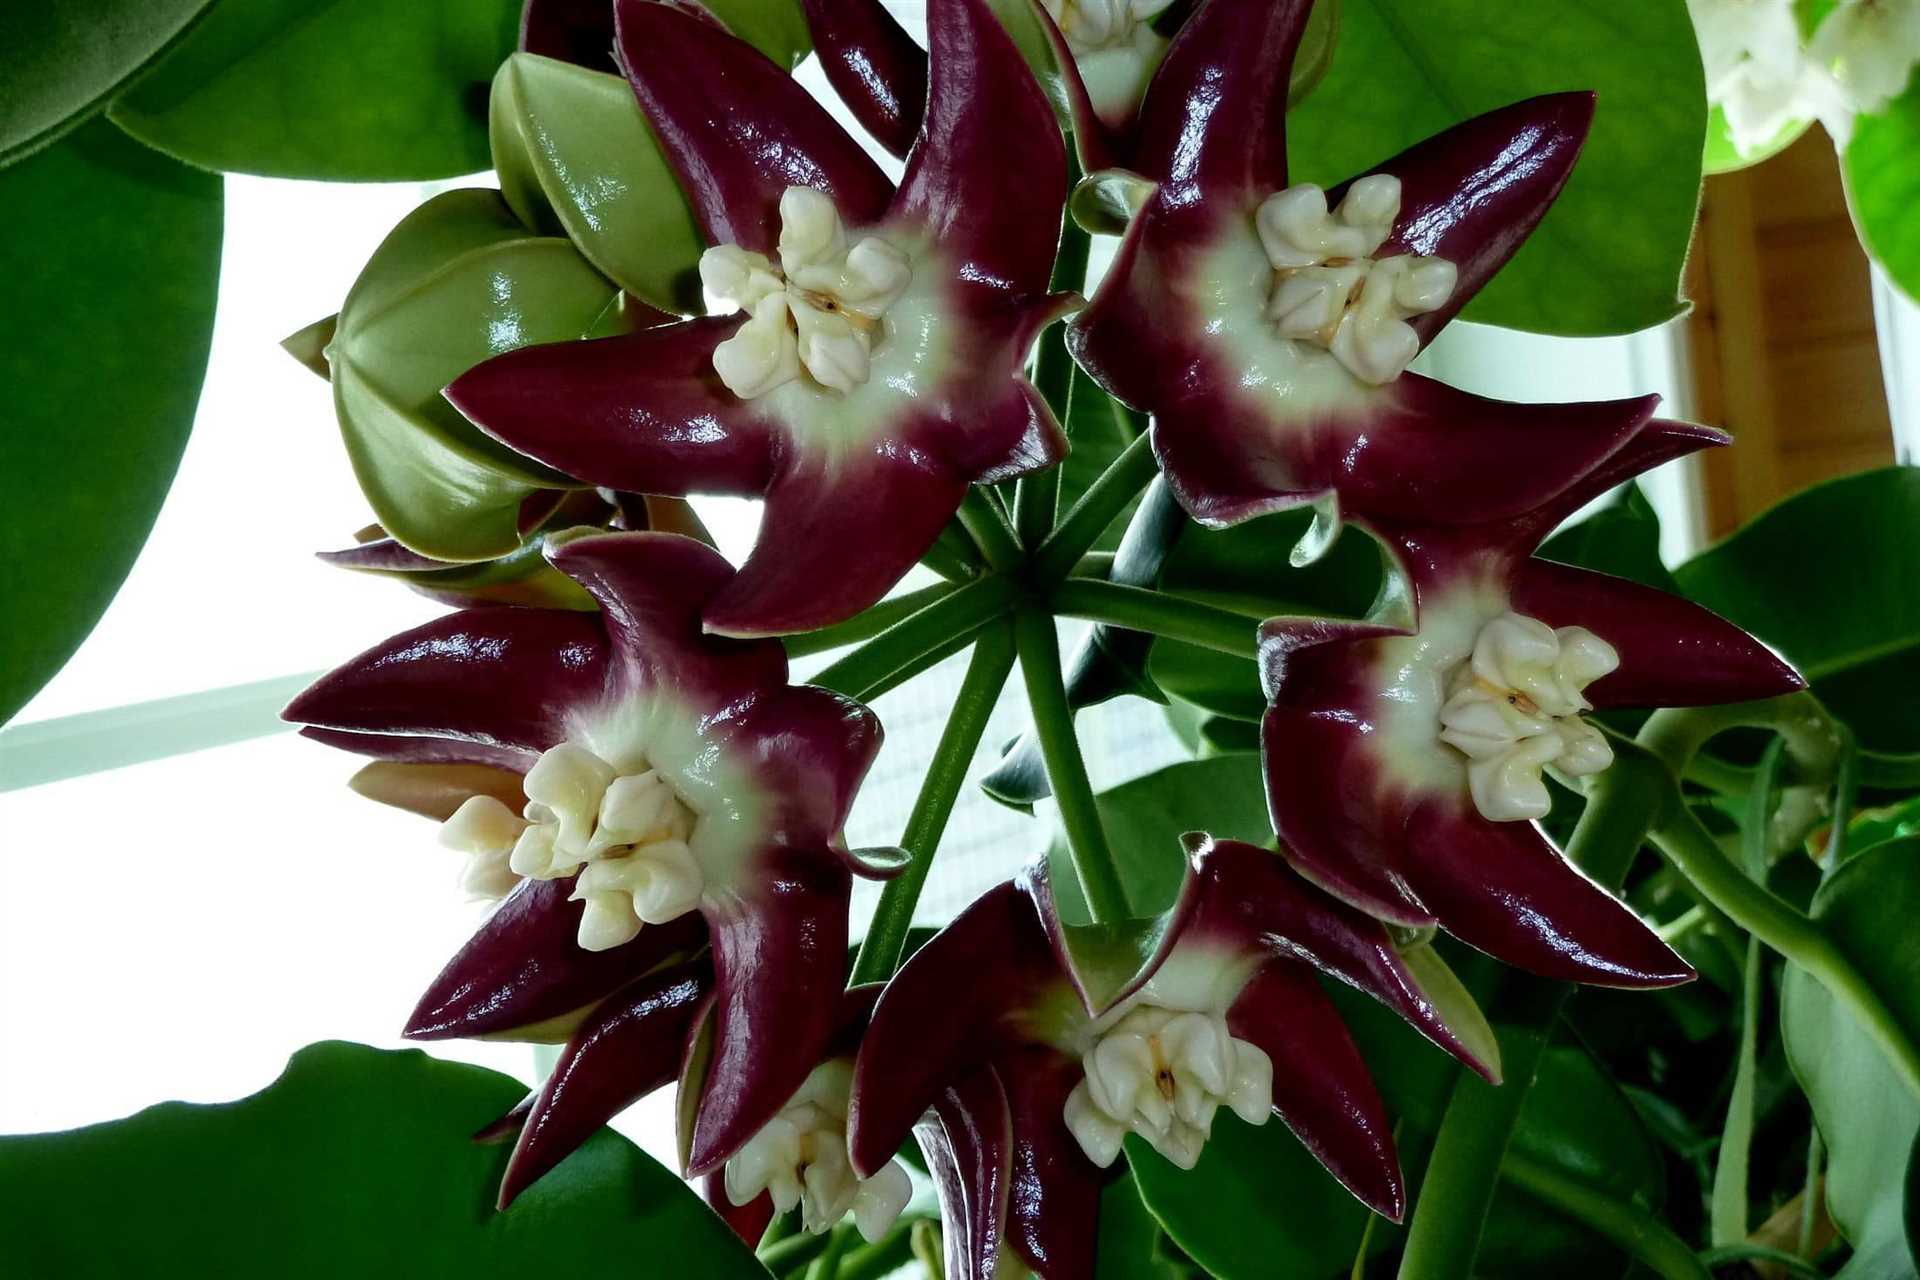
Фото красивых видов хойи
Хойя – это замечательное растение, которое обладает не только прекрасными цветами, но и разнообразными формами листьев. Они могут быть округлыми, овальными, сердцевидными или даже с белыми краями. На фото вы сможете увидеть несколько видов хойи с различными формами листьев.
1. Хойя керри (Hoya kerrii)

Этот вид хойи имеет сердцевидные листья, которые выглядят очень привлекательно. Они имеют ярко-зеленый цвет и глянцевую поверхность. Такой вид хойи часто называют растением-долларом из-за формы его листьев.
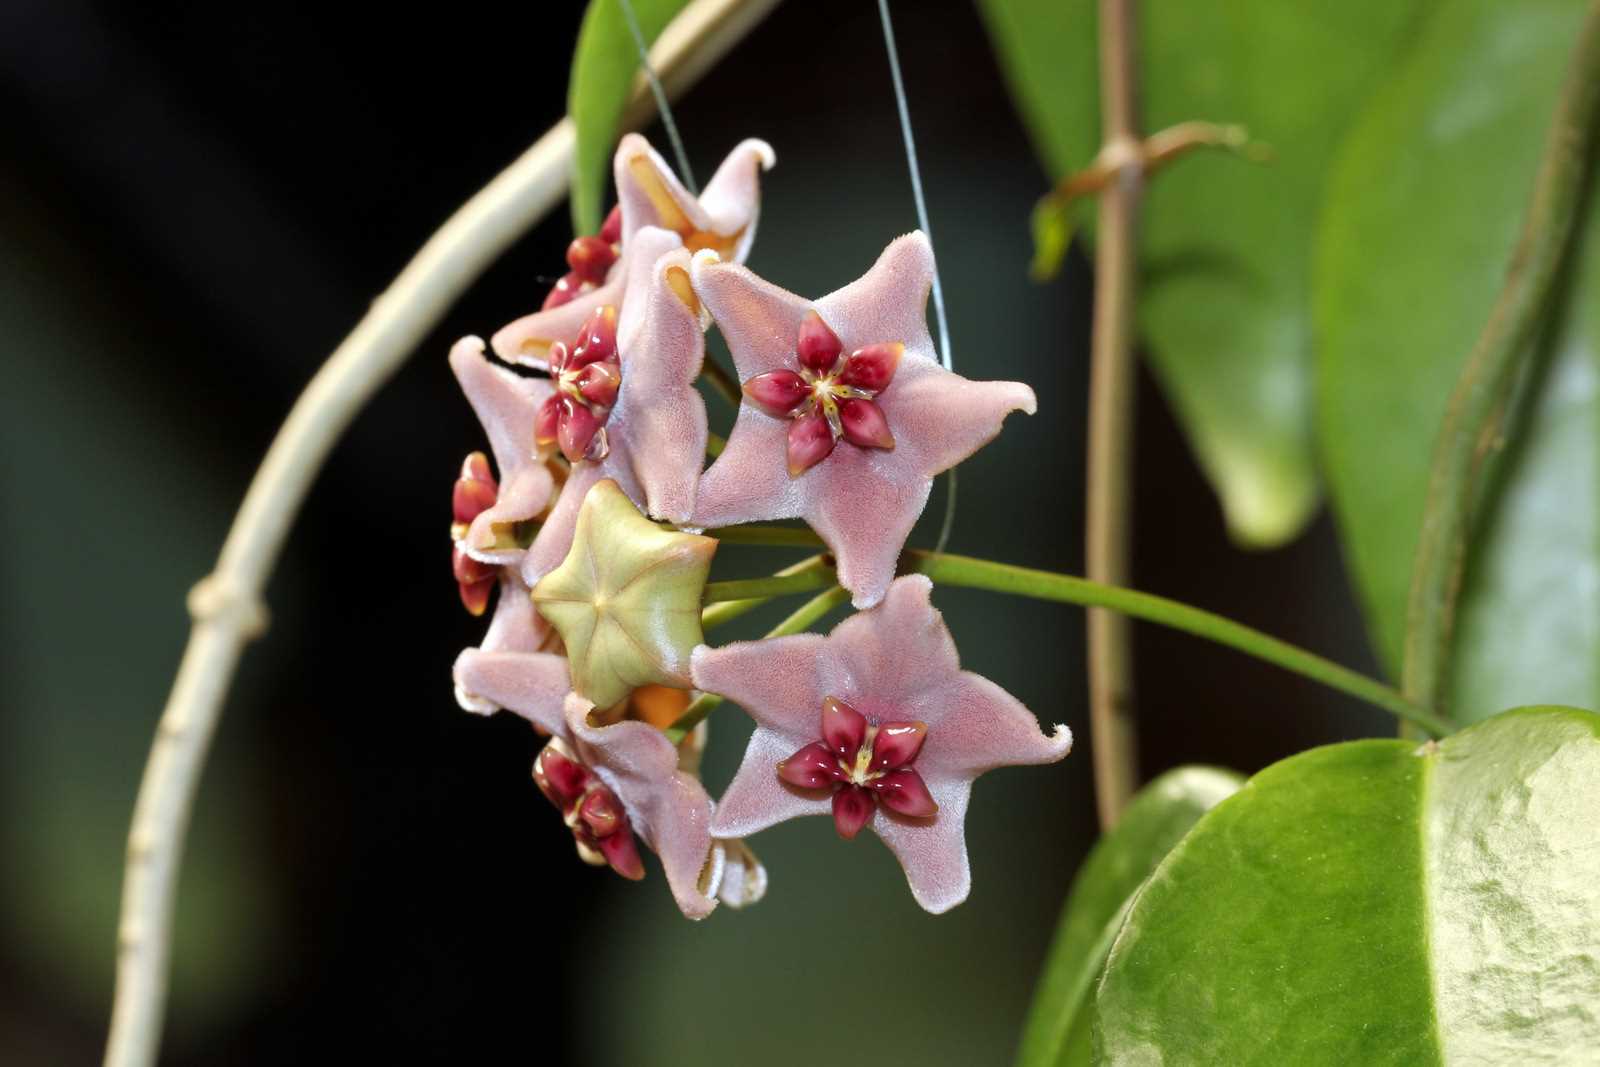
2. Хойя карноса (Hoya carnosa)

Листья хойи карноса имеют овальную форму и гладкую поверхность. Они зеленые с темными крапинками и выглядят очень элегантно. Этот вид хойи известен своими прекрасными цветами, которые похожи на звезды.
3. Хойя кумуликата (Hoya cumulicola)

У хойи кумуликата листья имеют необычную форму с вырезами, которые придают им интересный вид. Они зеленые и очень густо расположены на растении. Этот вид хойи отлично смотрится в любом интерьере.
На фотографиях представлены только некоторые виды хойи, и каждый из них имеет свою уникальную красоту. Надеюсь, что эти фото дают вам представление о том, какие виды хойи существуют и как они могут украсить ваш дом.
На что обратить внимание при покупке хойи
Хойя (Hoya) — это красивое и популярное растение среди цветоводов. При выборе хойи для покупки, необходимо обратить внимание на несколько важных моментов.
1. Состояние листьев
Оцените состояние листьев хойи. Они должны быть здоровыми, без пятен, желтения или других видимых повреждений. Избегайте растений с поврежденными или иссушенными листьями, так как это может свидетельствовать о проблемах в уходе или болезни.
2. Корневая система
Также обратите внимание на состояние корней хойи. Они должны быть здоровыми, без плесени или гниения. Проверьте корневую систему на наличие сильно переплетенных корней, так как это может указывать на неправильный уход или самый верхний слой земли, который необходимо заменить.
3. Уровень здоровья растения
Посмотрите на всю хойю в целом. Оцените уровень здоровья растения. Хойя должна выглядеть здоровой, с хорошо развитыми листьями и пышным ростом. Избегайте растений с маленьким числом листьев или с ослабленным ростом, так как это может указывать на неправильный уход или проблемы с растением в целом.
Не забудьте обратить внимание на эти важные моменты при покупке хойи. Правильно выбранное и здоровое растение будет радовать вас своей красотой много лет.
Украшение интерьера с помощью хойи
Хойя – это красивое и неприхотливое растение, которое может стать настоящим украшением вашего интерьера. Оно привлекает внимание своими густыми зелеными листьями и яркими цветками, которые могут быть различных оттенков – от белого до фиолетового.
Преимущества хойи как декоративного растения:
- Хойя очень легко ухаживать. Ей не требуется особенно частый полив и она может выносить длительные периоды засухи. Также она обладает высокими адаптивными возможностями.
- Растение является эффектным акцентом в интерьере благодаря своим обвисающим стеблям и густому лиственному покрову.
- Хойя очень долго цветет – его цветущие клубочки могут радовать вас до нескольких месяцев. Время цветения зависит от вида хойи и условий содержания.
Если вы хотите создать комфортный и стильный интерьер, хойя – отличное решение. Она подходит для различных стилей оформления – от классического до современного. Можно разместить хойу на полке, висящей корзинке или даже на окне, так как она отлично переносит разные условия содержания.
Выберите свой идеальный вид хойи и добавьте в свой интерьер нотку свежести и живости с этим красивым растением!
Так стоп!!! Вы всё ещё не подписаны на наши каналы в Телеграмм и Дзен? Посмотрите: ТГ - (@historyfantasydetectivechat) и Дзен (https://dzen.ru/myshortsstorys)
Как устроить оптимальные условия для хойи
Освещение: Хойя любит яркое и рассеянное освещение. Расположите растение на светлом месте без прямых солнечных лучей. Убедитесь, что хойя получает достаточно света, особенно зимой.
Температура: Хойя предпочитает умеренные температуры от 18 до 24 градусов Цельсия. Постарайтесь избегать резких перепадов температур.
Влажность: Хойя требует средней влажности. Регулярно опрыскивайте листья водой, особенно в жаркую погоду или в зимний период отопления.
Полив: Хойя предпочитает умеренный полив. Подождите, пока верхний слой почвы высохнет, перед тем как полить растение. Образуйте водный зазор в горшке, чтобы избежать застоя воды.
Почва: Используйте легкую и хорошо дренированную почву для хойи. Добавьте песок или перлит для улучшения дренажа, если почва слишком плотная.
Удобрение: Хойя нуждается в регулярном удобрении в период активного роста (весной и летом). Используйте универсальное удобрение для комнатных растений раз в две недели, следуя инструкциям на упаковке.
Обрезка: Если хойя становится слишком длинной или некрасивой, можно провести обрезку. Укоротите стебли или удалите поврежденные листья для поддержания компактной формы растения.
Уход за листьями: Регулярно протирайте листья хойи влажной мягкой тряпкой. Это поможет сохранить их красоту и предотвратить появление пыли.
Поддержка: Хойя часто нуждается в поддержке для своих плетей. Используйте шпалеру или другие опоры, чтобы растение имело оптимальную форму и не повреждалось.
Проверка на вредителей: Регулярно осматривайте хойю на наличие вредителей, таких как тля или пауки-прядильщики. Если обнаружены вредители, обработайте растение соответствующим инсектицидом.
Пересадка: Пересаживайте хойю только при необходимости, когда корни заполняют горшок. Это обычно происходит раз в 2-3 года. Пересадите растение в слегка больший горшок с новой почвой.
Как часто поливать хойю и подкормки
Полив хойи
Хойя – это растение с восковыми листьями, которые способны сохранять влагу. Однако, несмотря на это, природно растущая хойя не сталкивается с сухостью почвы, и для домашней хойи необходимо следить за регулярным поливом. Как правило, полив хойи летом должен быть более частым, особенно в жаркую погоду. Весной и осенью поливают в меньшем количестве, а зимой можно снизить количество поливов еще более.
Во время полива хойи следует убедиться, что вода проникает в глубину горшка и затопляет все корни, но в то же время не позволяет ей задерживаться и стоять в поддоне. Лучшая тактика – это полить хойю так, чтобы вода в поддоне полностью впиталась к следующему дню.
Подкормка хойи
Хойя — растение, которое не требует обилия питательных веществ, и чрезмерная подкормка может быть для нее вредна. Однако, как и все растения, хоя нуждается в некотором количестве питательных веществ для нормального роста и развития. Хорошие результаты можно достичь, подкармливая хойю раз в месяц в период ее активного роста, который обычно приходится на весну и лето.
Для подкормки хойи подходят универсальные жидкие удобрения для комнатных растений. Их следует использовать в соответствии с инструкцией на упаковке. Однако, помните, что переусердствовать с подкормкой не стоит, так как это может привести к перегрузке растения питательными веществами.
Особенности ухода за хойей в период цветения
Хойя – это красивое и неприхотливое растение, которое может радовать своими цветами в течение нескольких недель в году. В период цветения хойя требует некоторого особого ухода, чтобы обеспечить ей наилучшие условия для развития и сохранения своей красоты.
Полив
Во время цветения хойе нужно обеспечить достаточное количество влаги. Регулярно проверяйте влажность почвы, чтобы избежать пересыхания или переувлажнения грунта. Устарайтесь поддерживать почву влажной, но не мокрой.
Освещение
Хойя цветет лучше всего при ярком, но рассеянном свете. Подберите место для растения, где оно будет получать достаточное количество света, но не будет подвергаться прямому солнечному излучению. Избегайте резкого изменения освещения и не перемещайте хойю во время ее цветения.
Удобрение
Для обеспечения хорошего роста и цветения, регулярно удобряйте хойю в период цветения. Используйте удобрение, содержащее все необходимые питательные вещества для цветущих растений. Следуйте инструкциям на упаковке и не перебарщивайте с дозировкой.
Удаление отцветших цветов
Чтобы стимулировать цветение и сохранить эстетический вид растения, регулярно удаляйте отцветшие цветы. Это также поможет предотвратить развитие гнили и болезней.
Следуя этим рекомендациям по уходу за хойей в период цветения, вы сможете получить непревзойденное наслаждение от ее ярких и ароматных цветов.
Как обрезать хойю для формирования куста
Хойя — это красивое кустарниковое растение, которое можно успешно формировать в кустовую форму. Обрезка хойи не только способствует росту новых побегов, но и придает растению привлекательную форму. Вот несколько простых шагов, которые помогут вам правильно обрезать хойю и сформировать из нее куст.
Выберите правильное время для обрезки
Лучшее время для обрезки хойи — весна или начало лета. В это время растение активно растет и может легко восстановиться после обрезки. Обрезка в осенний или зимний период может повредить растение и замедлить его рост.
Удалите старые, поврежденные и болезненные побеги
Перед тем, как начать формировать куст, удалите все старые, поврежденные и болезненные побеги. Они могут быть слабыми и не способными к дальнейшему росту. Осторожно отрежьте их у основания растения, чтобы не повредить соседние здоровые части.
Обрежьте верх части побегов
Чтобы хойя выглядела кустовой, обрежьте верх части побегов. Оставьте примерно 2-3 пары листьев на каждом побеге. Такое обрезание стимулирует рост новых боковых побегов и придает растению пышную форму.
Настройте форму куста
Если вы хотите добиться определенной формы куста, регулярно обрезайте хойю, срезая верх части побегов. Оставляйте необходимое количество пар листьев на каждом побеге и стригите растение в соответствии с желаемой формой.
Следуя этим простым шагам, вы сможете легко обрезать хойю и сформировать кустовую форму. Постепенно растение будет приобретать привлекательный внешний вид и будет радовать вас своими красивыми цветами и листьями.
Почему листья хойи желтеют и как это исправить
Желтение листьев хойи может быть вызвано несколькими причинами, и важно понять их, чтобы принять соответствующие меры для исправления ситуации. Одной из возможных причин является неправильный полив. Если почва слишком сухая или, наоборот, слишком мокрая, корни растения могут погибнуть, что приводит к желтизне листьев. Регулярное и равномерное поливание поможет решить эту проблему.
Еще одной причиной желтения листьев может быть нехватка света. Хойя предпочитает яркий, но рассеянный свет. Если растение находится в тени или излишне освещается прямыми солнечными лучами, листья могут начать желтеть. Нужно найти оптимальное место для хойи, где она будет получать достаточно света.
Также желтение листьев может быть связано с недостатком питательных веществ в почве. Хойя нуждается в удобрениях, особенно во время активного роста. Если растение не получает достаточно питания, листья могут стать бледными и начать желтеть. Регулярное внесение комплексного удобрения поможет растению получить все необходимые питательные вещества.
Итак, для того чтобы предотвратить желтеющие листья хойи, необходимо:
- Правильно поливать растение, не допуская пересыхания или постоянной влажности почвы.
- Обеспечить растению достаточное количество света, избегая прямых солнечных лучей и теневых мест.
- Вносить удобрения на регулярной основе, особенно в период активного роста.
Следуя этим рекомендациям, вы сможете предотвратить желтеющие листья хойи и сохранить ваше растение здоровым и красивым.
Уникальные свойства хойи для здоровья
Хойя, или восковое плющевидное растение, известна своими уникальными свойствами, которые положительно влияют на здоровье человека.
Очищение воздуха
Хойя является эффективным очистителем воздуха. Ее листья способны удерживать и поглощать вредные вещества, такие как бензол, формальдегид и толуол. Это особенно важно для людей, живущих в городах, где воздух часто загрязнен токсичными веществами.
Улучшение сна
Хойя обладает способностью увеличивать уровень кислорода в помещении ночью, что помогает улучшить качество сна. Она способствует улучшению циркуляции крови и увлажнению воздуха, создавая комфортные условия для сна.
Улучшение настроения
Восковое плющевидное растение имеет способность очищать воздух от токсинов и улучшать его качество. Это в свою очередь положительно влияет на настроение человека, снижая уровень стресса и улучшая его психологическое состояние.
Увлажнение кожи
Хойя способна увлажнять воздух, создавая оптимальные условия для кожи. Она помогает предотвратить сухость и шелушение кожи, что особенно актуально в зимний период или в помещениях с сухим воздухом.
Снижение риска заболеваний
Благодаря своим свойствам очищения воздуха, хойя может помочь снизить риск развития некоторых заболеваний, связанных с загрязненным воздухом. Это включает в себя аллергии, проблемы с дыхательной системой и другие заболевания, вызванные воздействием вредных веществ.
Вопрос-ответ:
Какой уход требуется для растения хойя?
Для хорошего роста и цветения хойя требует яркого, но рассеянного света, умеренного полива, удобрений в период активного роста, регулярного подрезания и обеспечения необходимой влажности.
Как часто нужно поливать хойю?
Частота полива зависит от сезона и условий воздуха, но в целом хойя требует умеренного полива. Весной и летом поливайте растение 1-2 раза в неделю, а осенью и зимой достаточно поливать 1 раз в 2-3 недели. Важно не перенасыщать почву водой, чтобы корни не загнили.
Как обеспечить правильный уровень влажности для хойи?
Хойя произрастает в субтропиках и тропиках, поэтому любит высокую влажность. Чтобы обеспечить необходимый уровень влажности, можно распылять воду непосредственно на листья или использовать увлажнитель воздуха. Также рекомендуется иногда можно вымыть пыль с листьев влажной губкой.
Какие виды хойи наиболее популярны для выращивания?
Среди популярных видов хойи можно выделить следующие: хойя Керри (Hoya kerrii) с сердцевидными листьями, хойя Куминг (Hoya cumingiana) с крупными цветками, хойя Лакуноза (Hoya lacunosa) с ароматными цветками и многие другие.
Можно ли размножать хойю?
Да, хойя можно размножать несколькими способами: черенкованием, апикальными черенками, делением куста и семенами. Но самым распространенным способом является размножение черенками, так как данный метод наиболее простой и эффективный.


: уход, фото, виды 5")
: уход, фото, виды 6")


: уход, фото, видыs 9")