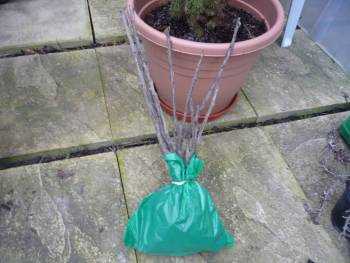
- Step-by-Step Guide on Planting a Seedling in an Emergency Situation
- 1. Assess the Situation
- 2. Prepare the Planting Hole
- 3. Loosen the Soil
- 4. Remove the Seedling from Its Container
- 5. Place the Seedling in the Planting Hole
- 6. Fill the Hole with Soil
- 7. Water the Seedling
- 8. Provide Support if Needed
- 9. Monitor and Care for the Seedling
- 10. Replant in a Suitable Location
- Assess the Situation
- Prepare a Temporary Planting Area
- Digging a Shallow Hole
- Gently Removing the Seedling from its Container
- Placing the Seedling in the Hole
- Backfilling the Hole with Soil
- Watering the Seedling
- 1. Timing
- 2. Amount
- 3. Frequency
- 4. Watering Techniques
- 5. Mulching
- Providing Temporary Support and Protection
- Step 1: Staking
- Step 2: Mulching
- Step 3: Watering
- Step 4: Protection from Animals
- Step 5: Temporary Shade
- Step 6: Monitoring and Care
- Question-answer:
- What should I do if I don’t have a hole ready for a seedling?
- Can I plant a seedling without digging a hole?
- What if I don’t have any containers or pots for planting a seedling?
- How long can a seedling stay in a temporary container?
- Can I transplant a seedling directly from a container to the ground?
- What if I accidentally damage the roots while transplanting a seedling?
- Can I transplant a seedling at any time of the day?
- Video: 7 Solutions For Stunted Seedlings
When it comes to planting seedlings, timing is everything. But what happens when you suddenly find yourself with a seedling in need of planting, but the hole isn’t ready? Don’t panic! There are several steps you can take to ensure the survival and success of your seedling, even in a last-minute planting emergency.
Firstly, assess the situation. Is there any way to quickly prepare the hole? If not, don’t worry. You can still give your seedling a fighting chance by following a few important steps. Start by carefully removing the seedling from its temporary container, being mindful of the delicate roots. Gently loosen any tangled roots with your fingers.
Next, find a suitable temporary spot for your seedling. Look for an area with partial shade to protect the seedling from intense sunlight. Prepare the ground by removing any weeds or large rocks that could impede root growth. Dig a shallow hole that is slightly wider than the roots of your seedling.
Once the temporary spot is prepared, place the seedling in the hole, making sure that the root collar is level with or slightly above the soil surface. Gently backfill the hole with soil, taking care not to compact it too tightly around the roots. Water the seedling thoroughly after planting to help settle the soil and provide much-needed hydration.
Remember, while emergency planting is not ideal, it is possible to give your seedlings a chance to thrive in unfavorable circumstances. Just be sure to monitor your seedling closely in the following days and weeks, providing adequate water and protection from harsh weather conditions. With proper care and attention, your seedling will have a strong chance of survival, even when faced with an unexpected planting situation.
Step-by-Step Guide on Planting a Seedling in an Emergency Situation
1. Assess the Situation
Before you start planting a seedling in an emergency situation, it is important to assess the surroundings and the condition of the seedling. Look for a suitable location with enough sunlight and access to water.
Pro tip: If possible, choose a spot that has been prepared beforehand or where similar plants have been grown before.
2. Prepare the Planting Hole
If there is no prepared hole available, you can quickly dig a hole using any sharp object like a knife or a trowel. Make sure the hole is wide and deep enough to accommodate the seedling’s roots without bending or crowding them.
3. Loosen the Soil
Using your hands or a small gardening tool, loosen the soil around the edges of the planting hole. This will help the roots penetrate the soil easily and establish a strong root system.
4. Remove the Seedling from Its Container
Gently remove the seedling from its container or nursery pot, taking care not to damage the roots. If the roots are tightly bound, you can gently loosen them to encourage proper growth.
5. Place the Seedling in the Planting Hole
Hold the seedling by its stem and carefully place it in the center of the planting hole. Make sure the roots are properly positioned and spread out in the hole.
6. Fill the Hole with Soil
Fill the planting hole with soil, making sure to cover the roots completely. Press the soil gently around the base of the seedling to ensure it is secure and stable.
7. Water the Seedling
After planting, give the seedling a generous amount of water to help it settle in the soil and encourage root growth.
8. Provide Support if Needed
If the seedling is tall or weak, you may need to provide support such as a stake or a plant cage to prevent it from bending or breaking.
9. Monitor and Care for the Seedling
Monitor the seedling regularly and provide appropriate care, including watering, fertilizer, and protection from pests or extreme weather conditions. Keep an eye on its growth and make any necessary adjustments to ensure its healthy development.
10. Replant in a Suitable Location
If the emergency planting location is not ideal for the long-term growth of the seedling, plan to replant it in a more suitable location as soon as possible. This will give the plant the best chance of thriving and reaching its full potential.
By following these steps and providing proper care, you can increase the likelihood of a successful emergency planting and help the seedling thrive in its new environment.
Assess the Situation
When faced with the situation of needing to emergency plant a seedling without a ready hole, it is important to assess the situation and make the best decision possible. Taking stock of the available resources and conditions will help determine the most suitable course of action.
1. Evaluate the Soil
Start by evaluating the soil where the seedling will be planted. Is the soil loose and easy to work with, or is it compacted and hard? Loose soil will make it easier to dig a hole quickly, while compacted soil may require more effort and tools.
2. Examine the Roots
Check the condition of the seedling’s roots. Are they healthy and intact, or are they damaged or dry? Healthy roots will have a light color, while damaged or dry roots may appear brown or withered. If the roots are damaged, it may be necessary to trim them before planting.
3. Consider the Seedling’s Size
Take into account the size of the seedling. Is it a small seedling or a larger plant? Smaller seedlings may be easier to replant quickly, while larger plants may require more time and effort to handle.
4. Assess the Environmental Conditions
Consider the current environmental conditions, such as the temperature, sunlight, and moisture levels. Is it a suitable time and place to plant a seedling? Extreme weather conditions, such as high temperatures or frost, may not be ideal for emergency planting.
5. Determine Available Tools and Resources
Take stock of the tools and resources available. Do you have a shovel or trowel for digging, or will you need to find an alternative tool? Additionally, consider any available materials for creating a temporary protective barrier around the seedling, such as straw or rocks.
By carefully assessing the situation, you can make an informed decision about how to proceed with emergency planting when the hole isn’t ready. It’s essential to consider factors like soil condition, root health, seedling size, environmental conditions, and available resources before taking any action.
Prepare a Temporary Planting Area
If you find yourself in a situation where the hole for planting a seedling is not ready, don’t worry. You can prepare a temporary planting area to keep the seedling safe until you can transfer it to the final location.
Here are some steps to follow:
- Select a suitable location: Look for a spot in your garden or yard that has good sunlight and proper drainage. Avoid areas with excessive shade or waterlogged soil.
- Clear the area: Remove any weeds, grass, or debris from the selected location. Make sure there is enough space for the seedling to grow.
- Prepare the soil: Loosen the soil in the temporary planting area using a garden fork or shovel. Break up any clumps and remove rocks or other obstacles that may hinder root growth.
- Add organic matter: Improve the soil quality by incorporating compost, well-rotted manure, or other organic matter. This will provide essential nutrients to the seedling and promote healthy growth.
- Water the temporary planting area: Before transferring the seedling, water the soil thoroughly to ensure it is moist and ready to receive the young plant.
Once you have prepared the temporary planting area, you can carefully transfer the seedling from its container and place it in the prepared soil. Gently firm the soil around the roots to provide stability and ensure good contact with the surrounding soil.
Remember to monitor the new planting location closely and provide adequate water and care until you are able to transplant the seedling to its permanent spot.
| Advantages | Disadvantages |
|---|---|
|
|
Digging a Shallow Hole
When faced with the dilemma of an emergency planting where the hole isn’t ready, sometimes you may need to dig a shallow hole instead. While it’s not ideal, it can still provide temporary support and protection for the seedling.
Here are the steps to dig a shallow hole:
- Gather the necessary tools: You will need a garden trowel or shovel, a bucket for collecting soil, and water for moistening the hole.
- Choose an appropriate location: Select a spot with enough sunlight and adequate space for the seedling’s roots to spread out.
- Measure the seedling: Determine the depth of the container or root ball of the seedling to ensure the shallow hole is deep enough.
- Mark the spot: Use a stick or garden marker to indicate where the shallow hole will be dug.
- Start digging: Using the garden trowel or shovel, start digging a shallow hole. The depth should be slightly deeper than the depth of the seedling’s container or root ball.
- Collect soil: As you dig, collect the soil in the bucket. This will help prevent a large gap between the surrounding soil and the seedling’s roots.
- Moisten the hole: Before placing the seedling in the hole, moisten the hole with water. This will help promote good contact between the roots and the surrounding soil.
- Remove the seedling from its container: Carefully remove the seedling from its container or root ball, being mindful not to damage the roots.
- Place the seedling in the hole: Gently place the seedling in the shallow hole, ensuring that it is upright and at the correct depth.
- Backfill with soil: Fill the hole with the soil you collected, gently firming it around the seedling’s roots.
- Water the seedling: After backfilling, water the seedling thoroughly to help settle the soil and eliminate any air pockets.
While a shallow hole is not the ideal planting method, it can be a temporary solution in emergency situations. Remember to monitor the seedling closely and provide additional care and attention until you can transplant it into a more suitable location.
Gently Removing the Seedling from its Container
Once you have prepared your emergency planting site, it’s time to carefully remove the seedling from its container. Follow these steps to ensure a successful transplant:
- Water the plant: Before removing the seedling, give it a thorough watering to help loosen the roots and make it easier to remove from the container.
- Prepare the workspace: Find a clean and sturdy surface, such as a gardening bench or table, to work on. Lay down a gardening cloth or newspaper to catch any dirt or debris.
- Hold the seedling’s stem: Gently grasp the stem of the seedling between your thumb and forefinger, being careful not to squeeze or damage the delicate stem.
- Tap the container: Holding the stem, turn the container upside down and gently tap the bottom to help loosen the root ball. You can also give the sides of the container a gentle squeeze to further loosen the roots.
- Remove the seedling: With the container still upside down, carefully slide the seedling out. If it doesn’t come out easily, you can gently squeeze the sides of the container or use a small, thin tool like a popsicle stick to help loosen it.
- Inspect the roots: Once the seedling is out of the container, gently handle the roots to inspect their health. Look for any signs of damage or disease, and if necessary, trim any long or damaged roots.
- Place the seedling in the hole: Immediately place the seedling into the prepared hole in the ground, making sure the roots are spread out and not tightly wrapped around each other.
- Backfill the hole: Gently backfill the hole with soil, patting it down lightly to eliminate air pockets around the roots. Make sure the soil is level with the surrounding ground.
- Water the seedling: Give the newly planted seedling a thorough watering to help settle the soil and provide moisture for the roots.
- Mulch the area: Finally, apply a layer of mulch around the base of the seedling to help retain moisture and suppress weed growth.
By following these steps, you can gently remove the seedling from its container and give it the best chance of thriving in its new emergency planting site.
Placing the Seedling in the Hole
After you have prepared the hole for the seedling, it’s time to carefully place the seedling in the hole. Follow these steps to ensure the seedling is planted properly:
- Gently hold the seedling by the stem: Be careful not to damage the delicate roots or leaves. Hold the seedling close to the base to provide support while placing it in the hole.
- Lower the seedling into the hole: Carefully lower the seedling into the hole, making sure that the roots are fully submerged in the soil. As you lower the seedling, gently spread out the roots to encourage proper growth.
- Position the seedling: Adjust the position of the seedling so that it is upright and centered in the hole. Make sure that the top of the root ball is level with the surrounding soil.
- Backfill the hole: Fill the hole with the remaining soil, using your hands or a gardening tool to gently firm it around the seedling. Avoid compacting the soil too much, as this can hinder root growth.
- Water the seedling: Give the newly planted seedling a thorough watering to settle the soil and provide hydration. Make sure the water reaches the root zone. You can use a watering can or a gentle spray from a hose.
By carefully placing the seedling in the hole, you are setting it up for success. Follow these steps to give your seedling the best chance of thriving in its new environment.
Backfilling the Hole with Soil
Once you have prepared the hole and added fertilizer, it is time to backfill the hole with soil. Here are the steps to follow:
- Start by placing a layer of soil at the bottom of the hole. This will provide a sturdy foundation for the seedling.
- Gently place the seedling in the hole. Ensure that the roots are spread out and not bent or twisted.
- Begin backfilling the hole with soil. Use your hands or a garden trowel to carefully add soil around the seedling, ensuring that it is evenly distributed.
- Press down gently on the soil. This will help remove any air pockets and provide stability to the seedling.
- Continue adding soil until the hole is completely filled. Be careful not to bury the seedling too deep, as this can hinder its growth.
- Use your hands to lightly firm up the soil around the seedling. This will help secure it in place.
It is important to note that the soil used for backfilling should be the same type of soil that was dug out from the hole, as this will ensure compatibility and reduce any shock to the seedling. If the soil is too compacted, you can lightly loosen it with a garden fork or by hand before backfilling.
Remember to water the newly planted seedling thoroughly after backfilling to help settle the soil and provide moisture to the roots. Additionally, consider applying a layer of organic mulch around the base of the seedling to help retain moisture and suppress weed growth.
Watering the Seedling
Water is essential for the survival and healthy growth of seedlings. Proper watering techniques are important to ensure that the seedling gets the right amount of moisture, preventing under and over-watering.
1. Timing
Timing is crucial when it comes to watering the seedling. It is recommended to water the seedling in the early morning or late afternoon, avoiding the hottest part of the day. This allows the plant to take in the water before the heat evaporates it.
2. Amount
The amount of water needed for a seedling depends on its size and the specific plant species. Generally, it is best to water deeply and thoroughly, making sure that the water reaches the root zone. A good rule of thumb is to provide enough water to moisten the top 6-8 inches of soil.
3. Frequency
The frequency of watering will depend on various factors such as the weather, soil type, and plant species. It is important to regularly check the soil moisture level before watering again. Stick your finger about an inch into the soil, if it feels dry, then it is time to water. Avoid over-watering as it can suffocate the roots and lead to root diseases.
4. Watering Techniques
There are different techniques that can be used for watering seedlings:
- Watering Can: Slowly pour water at the base of the seedling, allowing it to soak into the soil.
- Hose or Sprinkler: Use a gentle spray or mist to water the seedling evenly.
- Drip Irrigation: Set up a drip irrigation system to deliver a slow and steady supply of water directly to the root zone.
5. Mulching
After watering, consider adding a layer of mulch around the seedling. Mulch helps to retain moisture in the soil, reducing the need for frequent watering. It also helps to suppress weeds and improve soil quality.
Proper watering is essential for the success of a seedling. By following these guidelines, you can provide your seedling with the right amount of moisture, promoting healthy growth and development.
Providing Temporary Support and Protection
When planting a seedling in an emergency situation, it’s important to provide temporary support and protection to ensure the plant’s survival. Here are some steps to follow:
Step 1: Staking
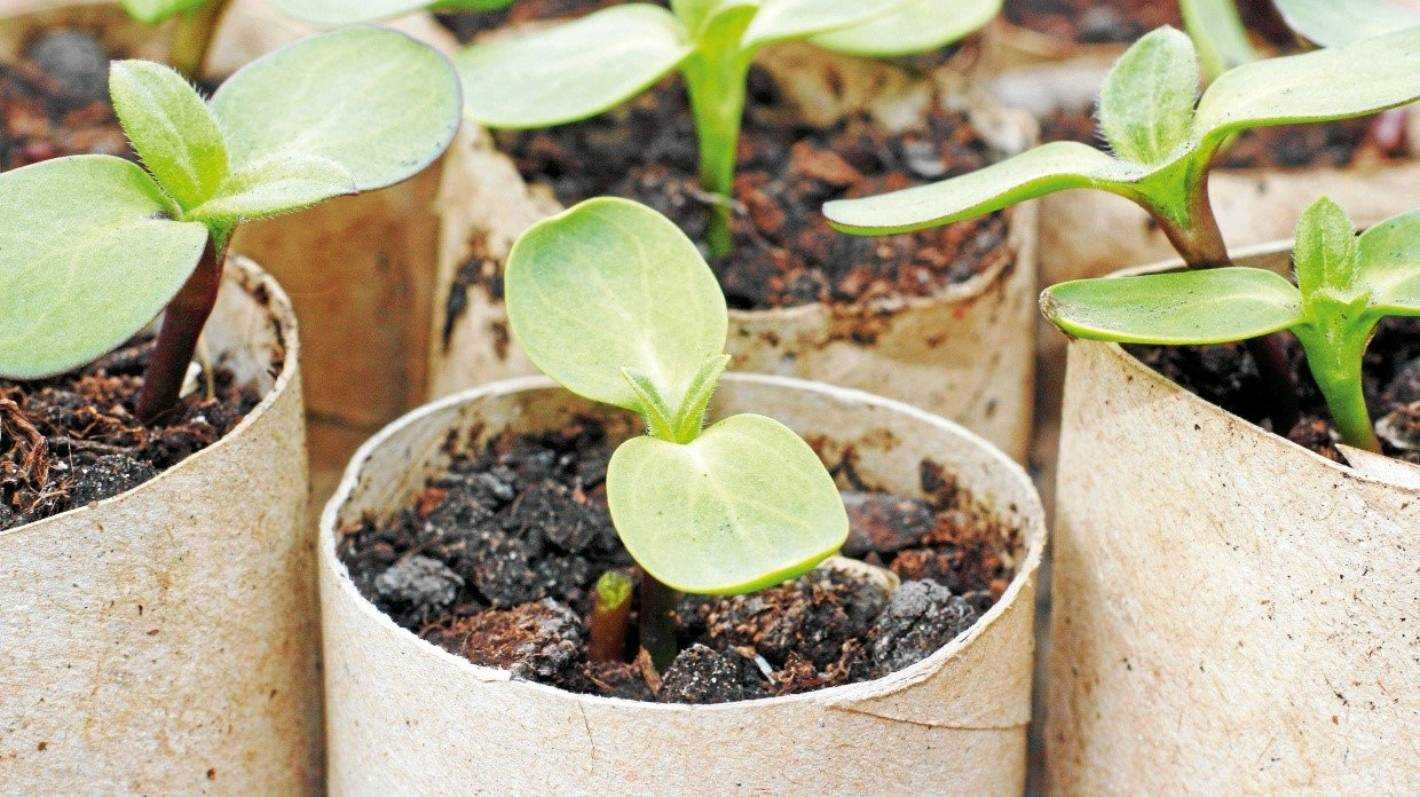
If the seedling is particularly small or weak, it may require staking to provide extra support. Drive a stake into the ground next to the seedling, being careful not to damage the roots. Use soft materials like garden twine or plant ties to secure the seedling to the stake. Make sure the ties are not too tight to allow for growth.
Step 2: Mulching
Mulching is essential for protecting the seedling from extreme weather conditions and preventing weed growth. Apply a layer of organic mulch, such as wood chips or straw, around the base of the plant. This will help retain moisture, regulate temperature, and suppress weed growth.
Step 3: Watering
Water the seedling thoroughly immediately after planting. It’s crucial to provide enough moisture for the plant to establish its roots. After the initial watering, monitor the soil moisture regularly and water as needed.
Step 4: Protection from Animals
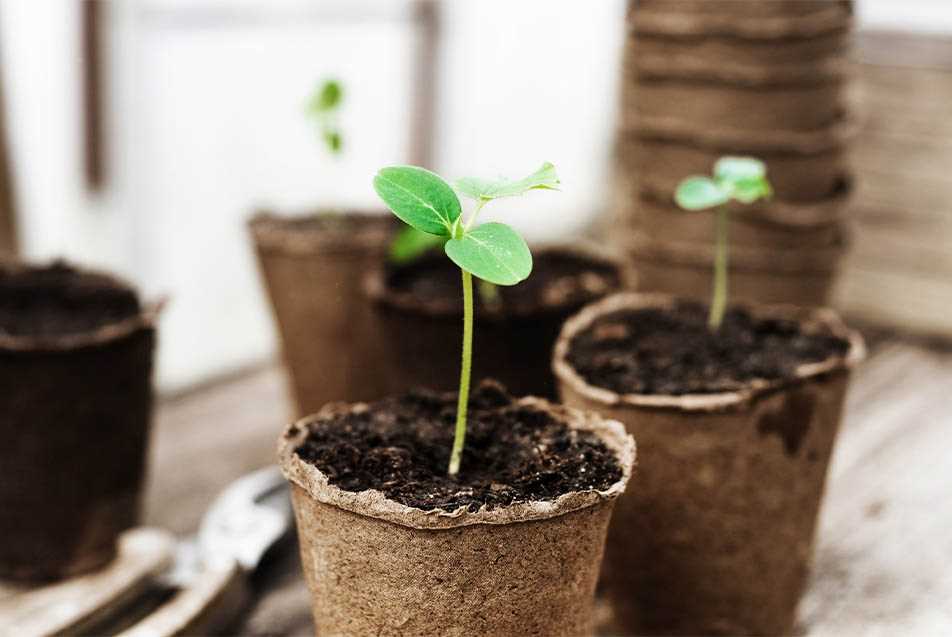
Animals can pose a threat to newly planted seedlings, especially if they are young and vulnerable. To protect the seedling from squirrels, rabbits, or other small animals, you can use wire mesh or plastic netting to create a barrier around the plant. Make sure the barrier is tall enough and securely anchored to the ground to prevent animals from accessing the seedling.
Step 5: Temporary Shade
If the seedling is being planted in hot and sunny conditions, it may benefit from temporary shade to prevent excess stress. You can use shade cloth or place a temporary cover, such as a bucket or piece of cardboard, to protect the plant from direct sunlight. Ensure proper ventilation to prevent overheating.
Step 6: Monitoring and Care
After providing the necessary support and protection, it’s important to regularly monitor the seedling’s progress. Keep an eye out for any signs of stress or issues and address them promptly. Follow regular watering and maintenance practices to ensure the seedling’s healthy growth.
By following these steps, you can help a seedling survive and thrive in an emergency planting situation until a proper hole is ready.
Question-answer:
What should I do if I don’t have a hole ready for a seedling?
If you don’t have a hole ready for a seedling, you can use a temporary container or pot to hold the plant until you are able to dig a proper hole. Make sure to keep the seedling well-watered and provide enough sunlight until you can transfer it to its permanent location.
Can I plant a seedling without digging a hole?
Yes, you can plant a seedling without digging a hole by using a planting bag or a container. Place the seedling in the container with damp soil and gently press the soil around the roots. Be sure to water the seedling regularly and provide it with adequate sunlight.
What if I don’t have any containers or pots for planting a seedling?
If you don’t have any containers or pots, you can improvise by using a plastic bag or even a plastic bottle. Cut off the top of the bottle or make several small holes in the plastic bag for drainage. Fill it with soil, plant the seedling, and water it regularly.
How long can a seedling stay in a temporary container?
A seedling can stay in a temporary container for a few days to a couple of weeks, depending on its size and growth rate. It’s important to monitor the plant and transplant it to its permanent location as soon as possible to prevent root-bound or stunted growth.
Can I transplant a seedling directly from a container to the ground?
Yes, you can transplant a seedling directly from a container to the ground, but it’s important to carefully remove the seedling from the container and loosen the roots before planting it. Make sure to dig a hole that is large enough to accommodate the roots of the seedling and water it thoroughly after planting.
What if I accidentally damage the roots while transplanting a seedling?
If you accidentally damage the roots while transplanting a seedling, it’s important to remove any broken or injured roots and plant the seedling as soon as possible. The plant may experience some shock, but with proper care and watering, it should recover and continue to grow.
Can I transplant a seedling at any time of the day?
It is recommended to transplant a seedling in the early morning or late afternoon when the temperatures are cooler. Transplanting during the hottest part of the day can cause stress to the seedling and increase the chances of transplant shock.
