- Посадка крыжовника осенью
- Выбор места
- Подготовка почвы
- Уход за крыжовником осенью
- Полив
- Удобрение
- Защита от вредителей
- Предупреждение и лечение заболеваний крыжовника
- Защита от вредителей
- Обрезка крыжовника осенью
- Проведение обрезки
- Удаление старых побегов
- Пересадка крыжовника осенью
- Подготовка растения
- Выбор нового места
- Вопрос-ответ:
- Какой сорт крыжовника лучше всего посадить на участке?
- Как правильно посадить крыжовник осенью?
- Как ухаживать за крыжовником осенью?
- Можно ли пересаживать крыжовник осенью?
- Видео:
- Как правильно посадить крыжовник Особенности посадки крыжовника осенью и уход
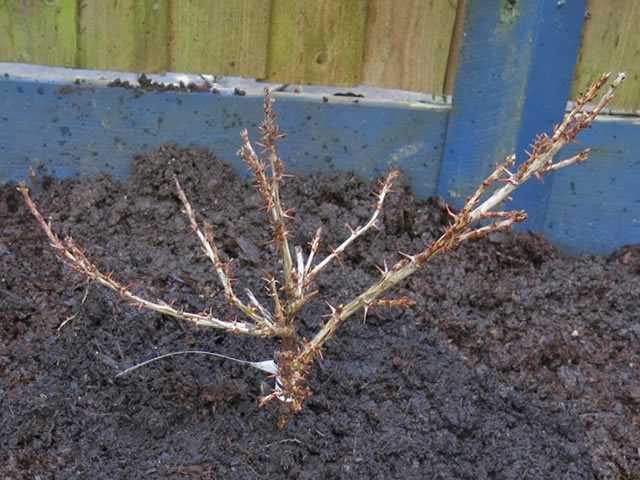
Крыжовник — это популярное растение, которое привлекает внимание своими яркими плодами и декоративной листвой. При правильном уходе и обрезке крыжовник может радовать своими плодами на протяжении многих лет. Осенью — идеальное время для посадки и пересадки крыжовника, так как растение имеет возможность лучше прижиться и подготовиться к зиме.
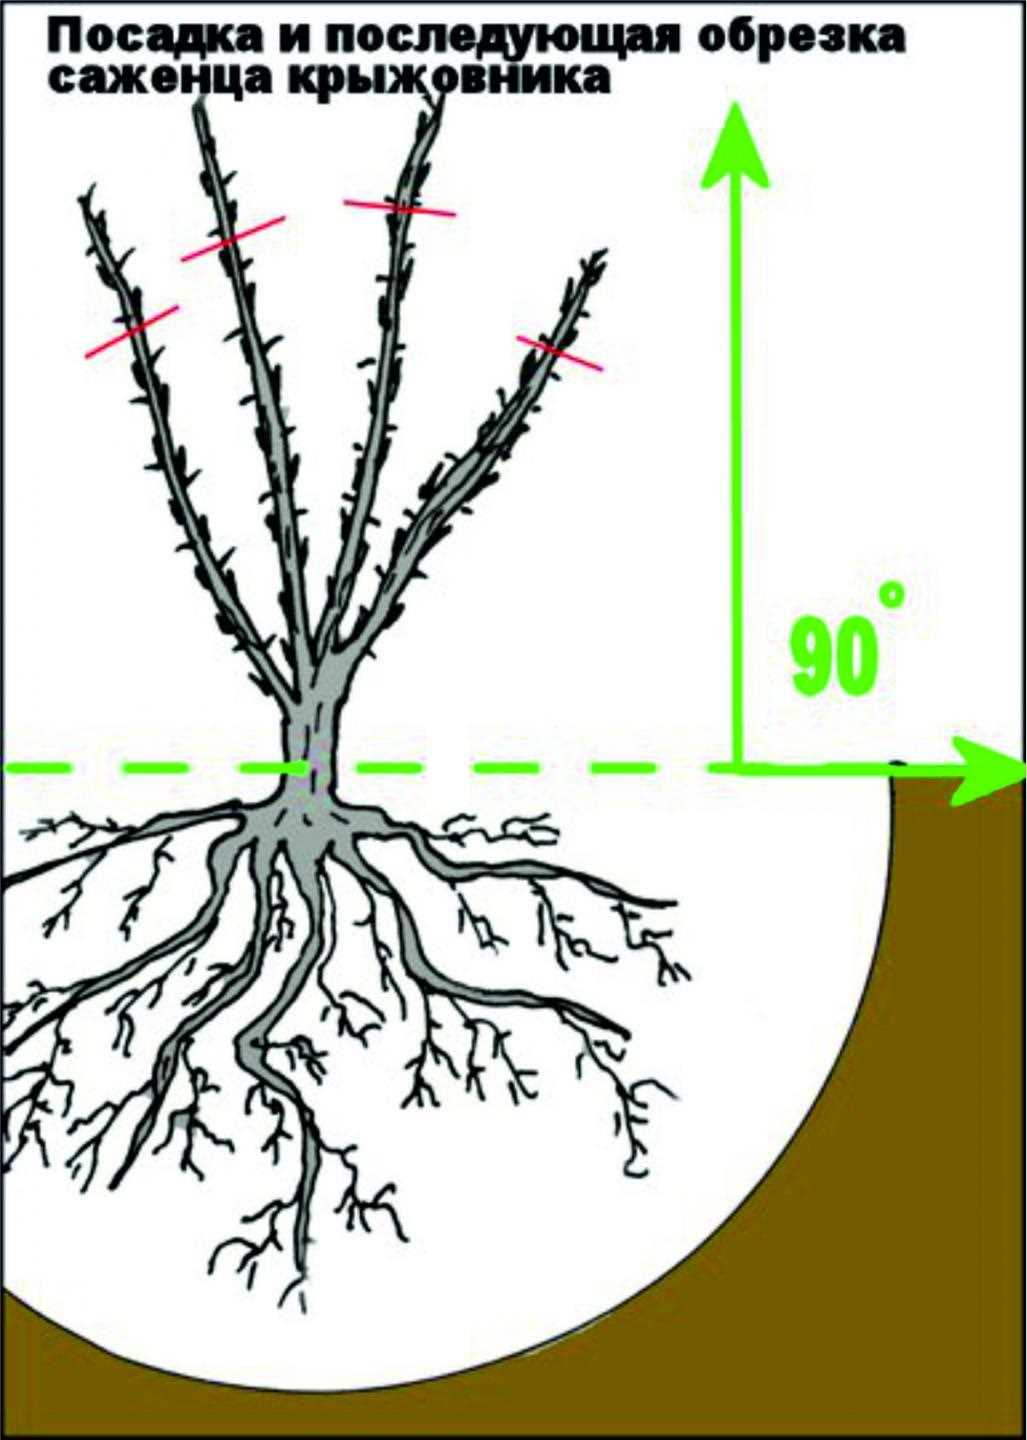
Посадка крыжовника осенью требует определенных навыков и знаний. Важно выбирать место с хорошим солнечным освещением, но при этом защищенное от сильных ветров. Земля должна быть хорошо дренированной, чтобы избежать застоя воды. Перед посадкой рекомендуется подготовить почву, добавив компост или перегной. Крыжовник нужно посадить на глубину, равную его корневой системе, и хорошо утрамбовать почву вокруг корней.
Уход за крыжовником осенью включает полив, подкормку и обрезку. Крыжовник нуждается в регулярном поливе, особенно в периоды сухости. Подкормку следует проводить перед началом зимы, чтобы растение получило все необходимые питательные вещества для хорошего перенесения холодов. Обрезка крыжовника проводится после сбора плодов и состоит в удалении старых и поврежденных побегов для стимуляции роста новых.
Пересадка крыжовника осенью может быть необходима, если растение неудовлетворительно развивается или нужно изменить его местоположение. Перед пересадкой следует внимательно изучить корневую систему растения и подготовить новое место для посадки. Пересаживать крыжовник лучше в сухую и прохладную погоду, чтобы уменьшить стресс для растения.
Посадка крыжовника осенью
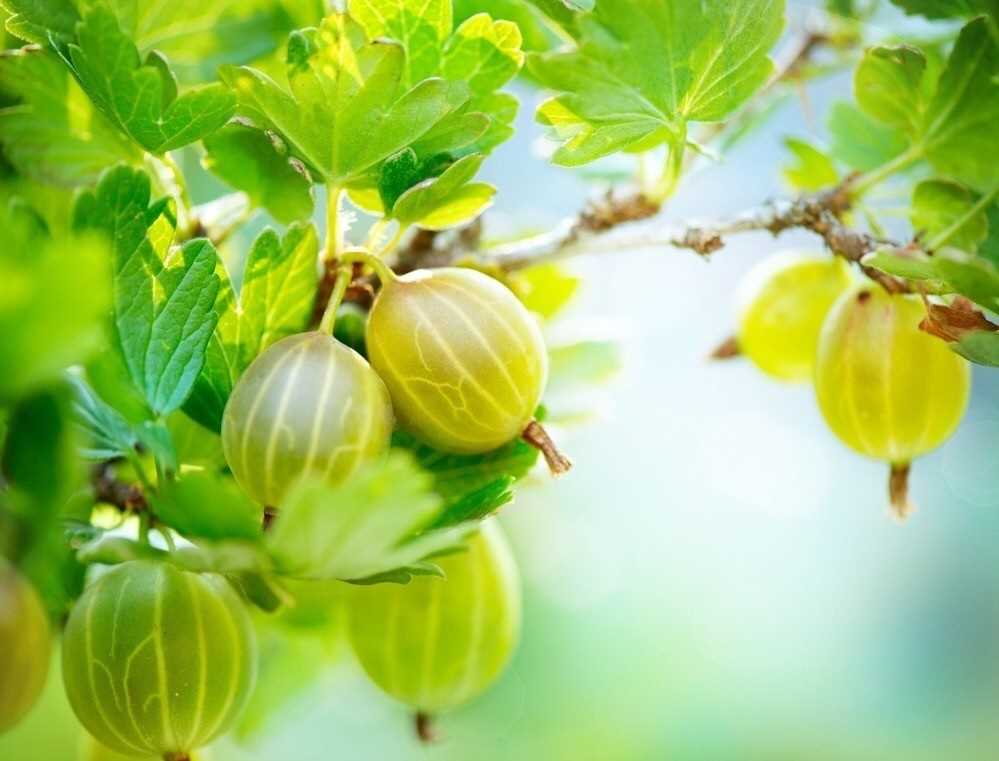
Крыжовник – популярное растение с оригинальными красивыми ягодами, которые особенно яркие на фоне осенней листвы. Посадка крыжовника осенью – отличная идея для тех, кто любит готовить вкусные десерты из свежих ягод.
При посадке крыжовника осенью следует выбирать солнечное место с хорошей дренажной системой. Кусты лучше размещать на небольших холмах для предотвращения переувлажнения корней. Крыжовник предпочитает плодородные почвы, поэтому перед посадкой следует внести органическое удобрение.
Посадка осуществляется в ямы глубиной 40-50 см и диаметром около 60 см. Расстояние между кустами должно быть около 1,5-2 метра. После посадки необходимо обильно полить растение и укрыть его опавшей листвой или мульчей.
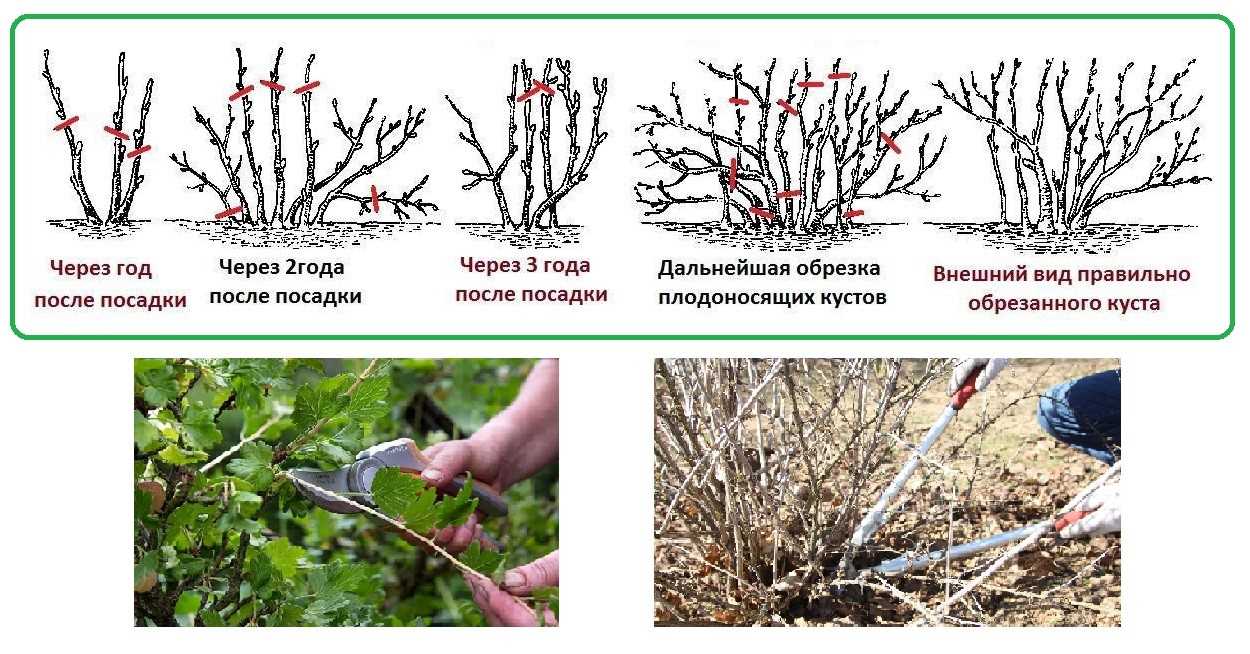
Обрезка крыжовника осенью необходима для формирования куста и улучшения его плодоношения. Удаление слабых и поврежденных побегов, а также отрезка старых ветвей поможет растению развиваться правильно и достигать максимальной урожайности.
Уход за крыжовником осенью включает полив, подкормку и мульчирование. Крыжовник нуждается в регулярном поливе, особенно в период созревания ягод. Подкормка проводится органическими или минеральными удобрениями, которые способствуют развитию растения и повышению урожайности. Мульчирование поможет сохранить влагу в почве и защитить корни от заморозков.
Выбор места
При посадке крыжовника осенью важно учесть особенности выбора места для его размещения. Крыжовник предпочитает солнечные участки, поэтому лучше выбирать открытые, хорошо освещенные места для его посадки.
Пересадка крыжовника осенью также требует правильного выбора места. При выборе нового места для пересадки, учитывайте, что крыжовник любит влажные почвы, поэтому лучше выбрать участок с хорошим дренажом и не стоячей водой.
Обрезка крыжовника также может влиять на выбор места его размещения. Если вы планируете регулярно обрезать крыжовник, выбирайте участок, где будет достаточно места для его распространения и роста.
Осенью крыжовник обычно теряет свою листву, поэтому выбор места для его посадки осенью может быть основан на эстетической составляющей. Выбирайте место, где крыжовник будет выглядеть красиво без листвы, например, в качестве фона для других растений или на фоне декоративных элементов.
Подготовка почвы
Перед посадкой или пересадкой крыжовника необходимо правильно подготовить почву. Это обеспечит хороший старт для растения и поможет ему успешно прижиться и развиваться.
Перед посадкой или пересадкой крыжовника следует выбрать место, которое будет отличаться хорошей освещенностью и защитой от прямых солнечных лучей. Крыжовник предпочитает плодородные почвы с хорошей влагоудерживающей способностью.
Перед посадкой или пересадкой крыжовника необходимо провести мульчирование почвы. Это поможет сохранить влагу, защитит корни от перегрева и переохлаждения, а также снизит количество сорняков.
Перед посадкой или пересадкой крыжовника рекомендуется провести анализ почвы, чтобы определить ее кислотность и состав. По результатам анализа можно скорректировать уровень кислотности и внести необходимые питательные вещества.
Уход за крыжовником осенью
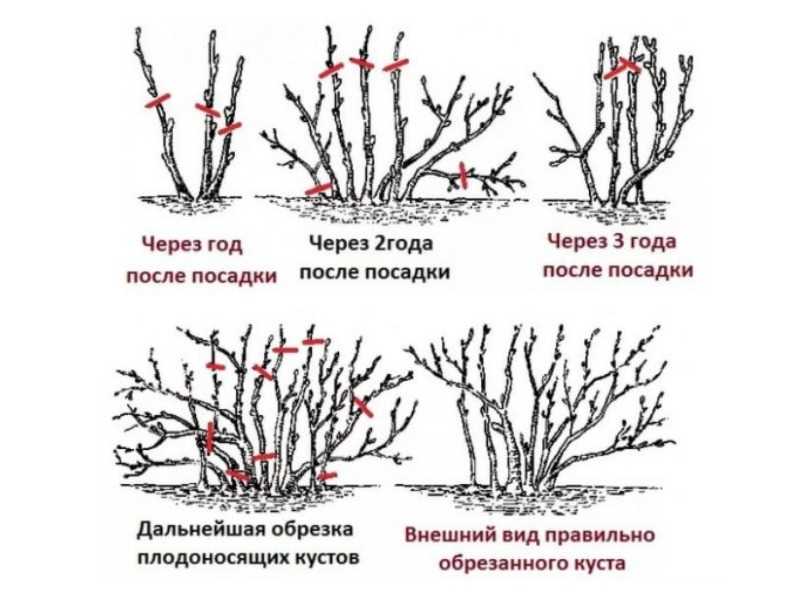
Осенью крыжовник нуждается в особом уходе, чтобы он хорошо перезимовал и дал обильный урожай следующим летом.
Важной частью ухода за крыжовником осенью является правильная посадка. После сбора урожая, рекомендуется провести пересадку молодых растений в подготовленные грядки. Также можно провести укоренение черенков крыжовника, чтобы весной получить новые растения.
Осенью необходимо провести подкормку крыжовника, чтобы он получил необходимые питательные вещества для зимовки. Для этого можно использовать комплексные удобрения, богатые азотом, фосфором и калием.
Также важно обеспечить крыжовнику хороший уход перед зимой. Необходимо обрезать старые и поврежденные ветви, чтобы сохранить растение в хорошем состоянии. Также рекомендуется мульчирование корневой зоны, чтобы предотвратить переохлаждение почвы.
Важно помнить, что уход за крыжовником осенью влияет на его зимостойкость и урожайность в следующем году. Правильное проведение всех этих мероприятий поможет вам получить здоровое и плодоносящее растение.
Полив
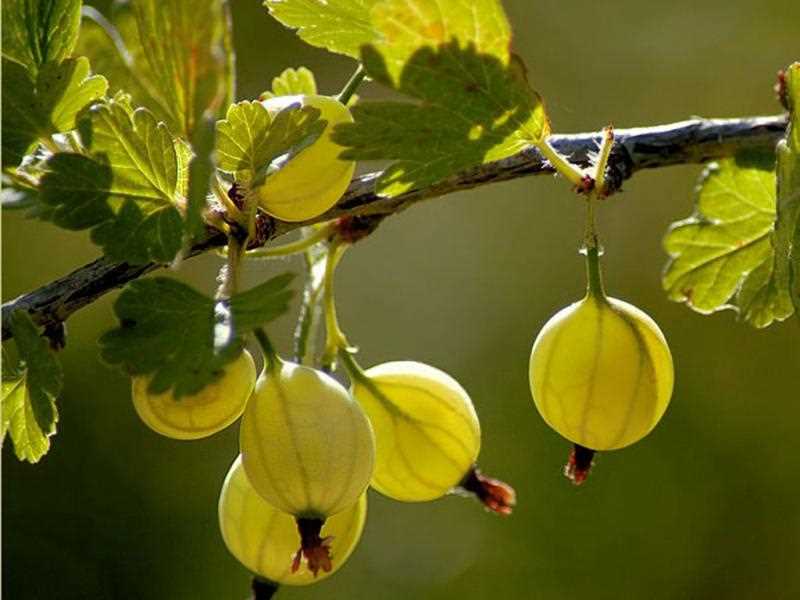
Крыжовник требует достаточного увлажнения почвы, особенно в период активного роста. После посадки растения необходимо обильно полить и далее поддерживать оптимальный уровень влажности. Уход за крыжовником включает регулярный полив, особенно в жаркое время года.
Полив крыжовника следует проводить регулярно, но умеренно. Следует избегать переувлажнения почвы, так как это может привести к гниению корней. Рекомендуется поливать растение утром или вечером, когда солнце не так активно и испарение влаги будет меньше.
При пересадке крыжовника важно обеспечить хороший полив после переноса растения в новое место. Это поможет растению прижиться и быстро восстановиться после стрессового периода.
Для удобства полива крыжовника можно использовать различные способы орошения, такие как капельное орошение или система автоматического полива. Также стоит учесть, что крыжовник любит влажную почву, поэтому можно использовать мульчирование вокруг растения, чтобы сохранять влагу.
Удобрение
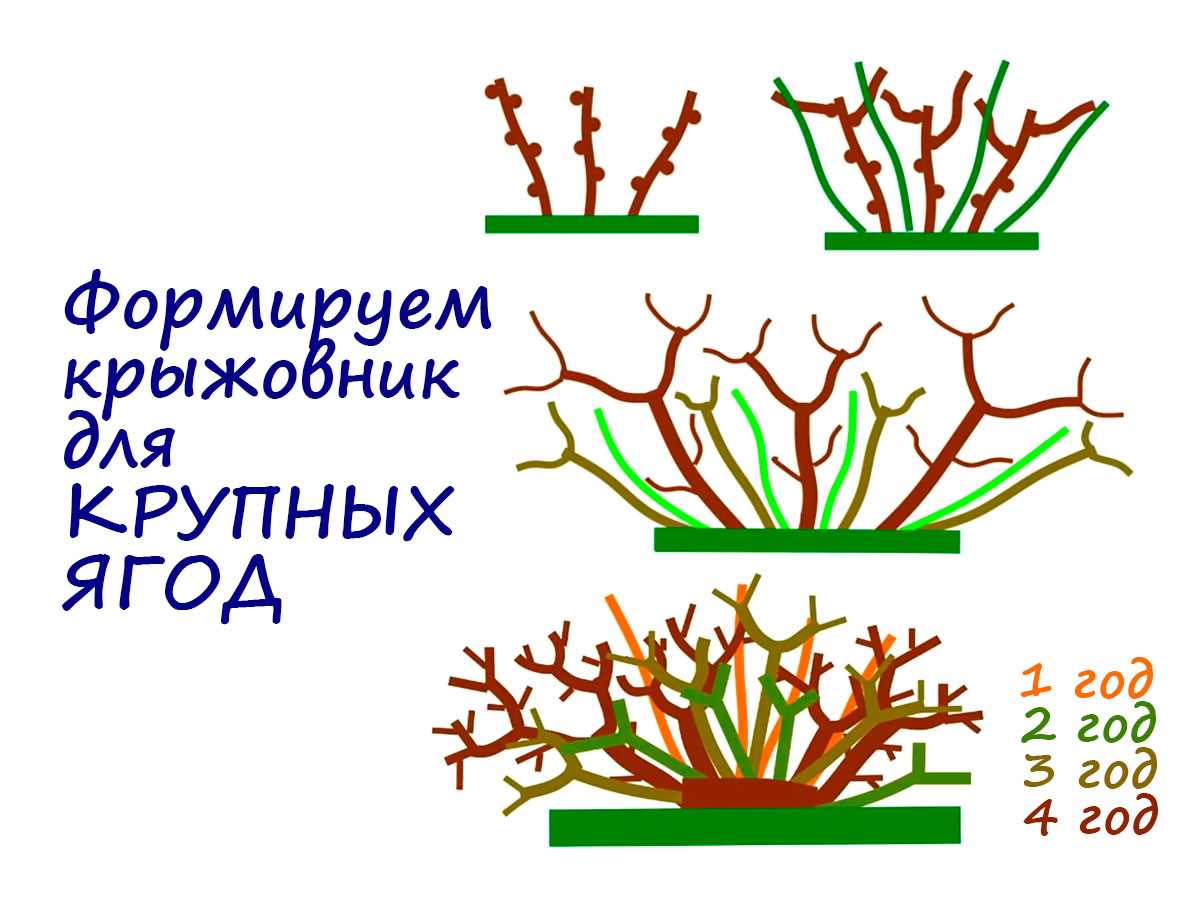
Крыжовник – это растение, которое нуждается в дополнительном питании. Правильное удобрение позволяет растению развиваться и плодоносить на протяжении всего сезона. Осенью, перед наступлением холодов, особенно важно подкормить крыжовник, чтобы он получил достаточное количество питательных веществ для зимовки и подготовки к следующему сезону.
Пересадка крыжовника – еще один случай, когда удобрение играет важную роль. При пересадке растение испытывает стресс и нуждается в дополнительном питании для быстрого приживления. Перед пересадкой рекомендуется подкормить крыжовник органическими удобрениями, такими как перегной или компост.
Еще одним случаем, когда удобрение играет важную роль, является обработка крыжовника осенью. После окончания плодоношения, растение нужно обрезать и удалить все остатки плодов и листьев. После этого, рекомендуется подкормить крыжовник минеральным удобрением. Это поможет растению восстановиться после обрезки и подготовиться к зиме.
Уход за крыжовником включает в себя не только полив и обрезку, но и правильное удобрение. Следуя рекомендациям по пересадке и подкормке, вы сможете обеспечить здоровый рост и обильное плодоношение вашего крыжовника.
Защита от вредителей
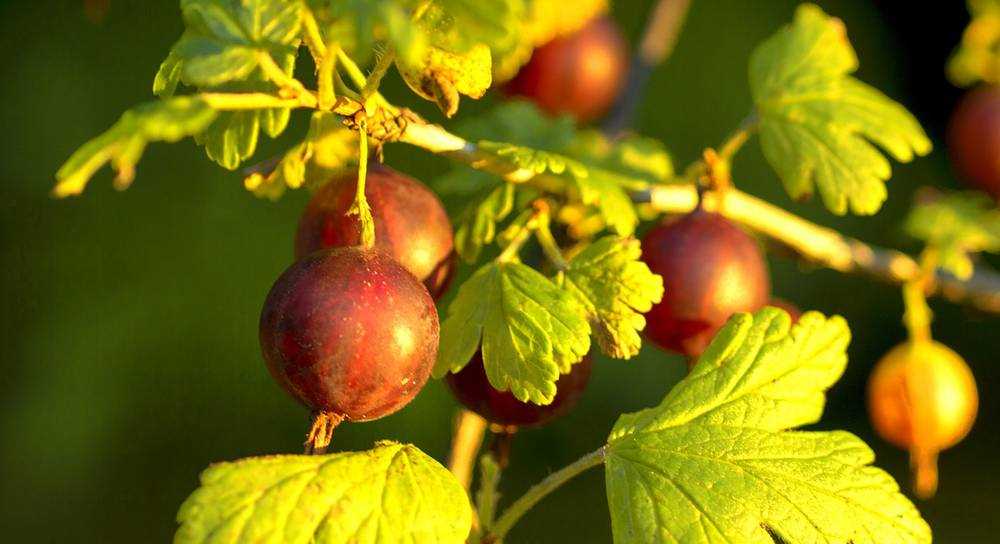
Предупреждение и лечение заболеваний крыжовника
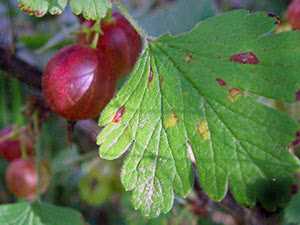
Правильная посадка и уход за крыжовником помогут предотвратить возникновение многих заболеваний, таких как мучнистая роса, антракноз и ржавчина. Однако, в некоторых случаях, несмотря на все предпринятые меры, растение все равно может заболеть.
Так стоп!!! Вы всё ещё не подписаны на наши каналы в Телеграмм и Дзен? Посмотрите: ТГ - (@historyfantasydetectivechat) и Дзен (https://dzen.ru/myshortsstorys)
Для предупреждения заболеваний рекомендуется регулярно проводить обрезку крыжовника. Удаление больных и поврежденных побегов поможет предотвратить распространение инфекции на здоровые части растения. Также важно следить за влажностью почвы и избегать ее переувлажнения, так как это может способствовать развитию грибковых заболеваний.
При первых признаках заболевания необходимо незамедлительно приступить к лечению. Для этого можно использовать специальные препараты, рекомендованные для борьбы с конкретными заболеваниями крыжовника. Важно помнить, что лечение следует проводить в соответствии с инструкцией на упаковке препарата и при необходимости проконсультироваться с специалистом.
Защита от вредителей
Крыжовник может также подвергаться атакам различных вредителей, таких как крыжовниковая моль, листовертка и клещи. Чтобы предотвратить повреждение растения, рекомендуется проводить регулярные осмотры и обрабатывать крыжовник специальными инсектицидами.
Одним из эффективных средств защиты от клещей является обработка растения коллоидной серой или актелликом. Также можно использовать биологические препараты, содержащие полезных насекомых, которые будут сражаться с вредителями.
Для защиты от других вредителей, таких как листовертка и крыжовниковая моль, рекомендуется применять химические препараты, которые рекомендуется использовать в соответствии с инструкцией на упаковке и при необходимости проконсультироваться с специалистом.
Обрезка крыжовника осенью
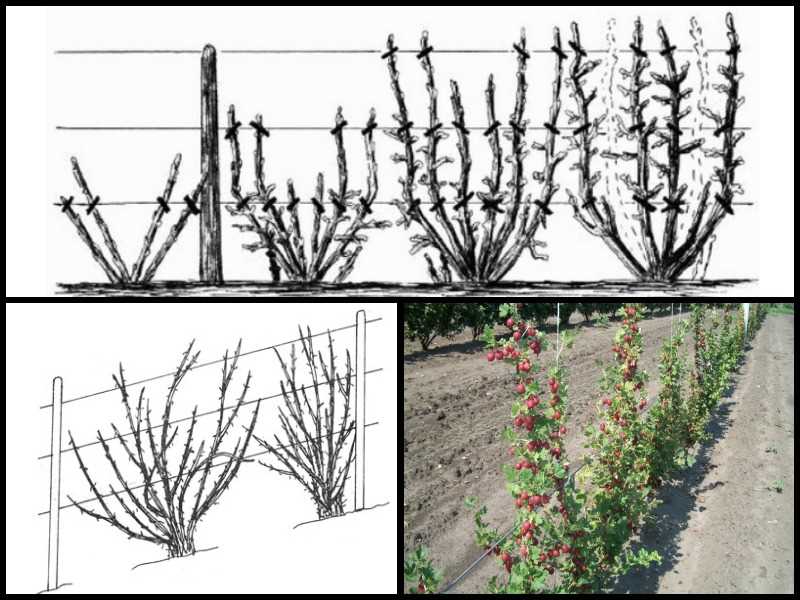
Обрезка крыжовника осенью является важным этапом ухода за растением, который позволяет подготовить его к зимнему периоду и обеспечить регулярное плодоношение в следующем сезоне.
Осенняя обрезка крыжовника проводится после сбора урожая и перед наступлением холодов. Во время обрезки необходимо удалить все засохшие и поврежденные ветки, а также укореневые отростки, которые могут отнять у растения питательные вещества.
Перед обрезкой необходимо подготовить инструменты: острые секаторы или ножницы, чтобы сделать чистые и аккуратные срезы. Важно помнить, что крыжовник обрезается на высоте 10-15 см от земли, чтобы стимулировать рост новых побегов и обеспечить их укоренение.
После осенней обрезки рекомендуется провести подкормку крыжовника органическими удобрениями, чтобы обеспечить растению необходимый запас питательных веществ на зиму. Также стоит учесть, что крыжовник может переносять пересадку, поэтому осенью удобно пересаживать растение на новое место, если это необходимо.
Проведение обрезки
Обрезка крыжовника осенью является важной частью его ухода и позволяет поддерживать растение в хорошем состоянии. Основная цель обрезки — формирование куста и стимуляция роста новых побегов.
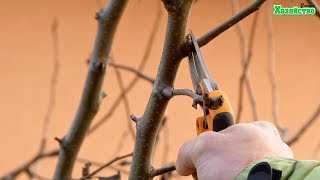
Перед началом обрезки необходимо подготовить инструменты: острые и чистые секаторы или пилу. Важно выбирать здоровые и сильные побеги для обрезки, а также удалять старые и поврежденные ветки.
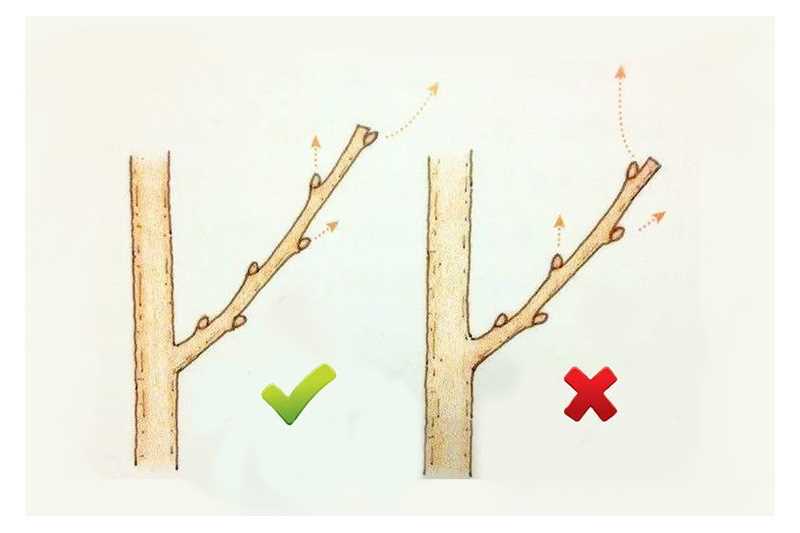
При обрезке крыжовника осенью следует придерживаться следующих правил: обрезать ветки до здоровой почки, срезы делать под углом, чтобы вода не задерживалась на поверхности. Необходимо также удалять все сухие и поврежденные ветки, чтобы предотвратить распространение болезней и вредителей.
После проведения обрезки рекомендуется обработать раны антисептиком или садовым варом. Это поможет предотвратить заражение и ускорить заживление. Обрезку крыжовника осенью следует проводить перед началом холодов, чтобы растение успело восстановиться перед зимой.
Удаление старых побегов
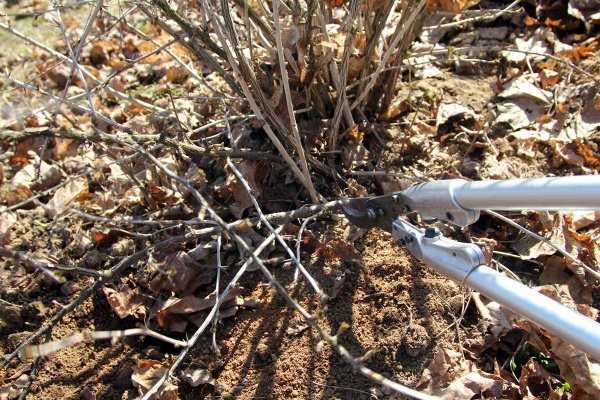
Один из важных аспектов ухода за крыжовником осенью — удаление старых побегов. Это необходимо для поддержания здоровья и формы растения.
Обрезка старых побегов проводится в конце осени, после окончания плодоношения. Старые побеги отличаются темно-коричневым цветом и засохшими листьями. Их следует срезать до основания садовыми ножницами или секатором.
- Важно отметить, что удаление старых побегов необходимо проводить осторожно, чтобы не повредить молодые побеги, которые будут расти в следующем сезоне.
- Удаление старых побегов способствует обновлению растения и стимулирует его рост.
- Кроме того, удаление старых побегов позволяет избавиться от возможных болезней и вредителей, которые могут скрываться на поверхности старых побегов.
Важно помнить, что удаление старых побегов — это необходимая часть ухода за крыжовником осенью. Эта процедура помогает поддерживать растение в хорошей форме и обеспечивает его здоровый рост и развитие.
Пересадка крыжовника осенью
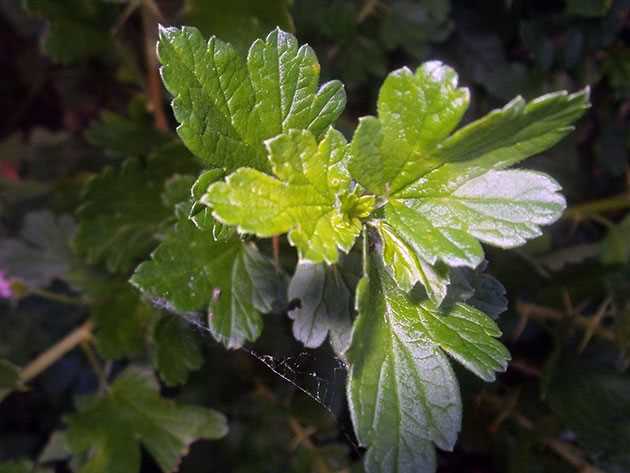
Пересадка крыжовника осенью является одной из оптимальных процедур для обновления растения и улучшения его роста. Она позволяет крыжовнику лучше прижиться в новом месте и подготовиться к зимовке.
Перед пересадкой крыжовника осенью необходимо выбрать подходящее место для посадки. Оно должно быть хорошо освещено солнцем и иметь плодородную почву, богатую органическими веществами.
Перед пересадкой необходимо подготовить почву. Для этого рекомендуется выкопать яму размером 40×40 см и внести в нее перегноя или компоста. После посадки крыжовника в яму необходимо хорошо полить и мульчировать.
Уход за пересаженным крыжовником осенью включает в себя регулярный полив, особенно в период засушливой погоды. Также необходимо подкармливать крыжовник органическими удобрениями и удалять сорняки вокруг растения.
Обрезка крыжовника после пересадки осенью способствует формированию компактного куста и улучшению его плодоношения. Рекомендуется обрезать старые и поврежденные ветви, а также контролировать рост молодых побегов.
Подготовка растения
Осенью крыжовник требует особого внимания и подготовки к зимнему периоду. Для начала необходимо провести обрезку кустов, удалив сухие и поврежденные ветки. Это позволит растению сохранить энергию и силы на зимний период.
Если растение нужно пересадить, осень — лучшее время для этого. В это время крыжовник находится в состоянии покоя, и пересадка будет менее стрессовой для него. Перед пересадкой необходимо подготовить новую посадочную яму, добавив в нее плодородную почву и органические удобрения.
Также важно обеспечить регулярный уход за крыжовником в осенний период. Регулярно поливайте растение, не допуская пересыхания почвы. Удалите все сорняки и мульчируйте почву вокруг куста, чтобы сохранить тепло и влагу.
Подготовка крыжовника к зиме также включает защиту от морозов. Замульчируйте корневую зону сухими листьями или соломой, чтобы предотвратить замерзание корней. Укрыть куст можно специальным материалом или сеткой, чтобы защитить его от сильных морозов и ветров.
Выбор нового места

При выборе места для посадки крыжовника осенью необходимо учитывать его предпочтения к почве и освещению. Крыжовник предпочитает солнечные места или полутени. Он хорошо растет на разных типах почвы, но предпочитает плодородные и хорошо дренированные грунты.
Перед посадкой крыжовника осенью следует проверить кислотность почвы. Оптимальный уровень кислотности для крыжовника составляет 6-7 pH. Если почва слишком кислая, необходимо добавить известь или доломитовую муку для нейтрализации.
При выборе места для крыжовника также следует учитывать его высоту и распространение. Крыжовник может достигать высоты до 2-3 метров и иметь широкую крону. Поэтому необходимо выбрать такое место, чтобы он не загораживал другие растения и не создавал проблем при обрезке и уходе.
Если вы решили пересадить крыжовник, выберите новое место, где он будет хорошо расти и развиваться. Пересадку лучше проводить весной или осенью, когда крыжовник в период покоя. При пересадке необходимо аккуратно выкопать куст, пытаясь сохранить его корневую систему. Посадите крыжовник в новую яму, обеспечив достаточное количество питательной почвы и влаги.
Вопрос-ответ:
Какой сорт крыжовника лучше всего посадить на участке?
Выбор сорта крыжовника зависит от ваших предпочтений и целей. Если вы хотите получить ягоды для приготовления варенья или джема, то лучше выбрать сорт с крупными плодами. Если ваша цель — использование крыжовника в декоративных целях, то можно выбрать сорт с яркими цветами или необычной формой куста. Важно также обратить внимание на климатические условия вашего региона, так как некоторые сорта менее устойчивы к холоду или жаре.
Как правильно посадить крыжовник осенью?
Посадка крыжовника осенью происходит в несколько этапов. Сначала необходимо выбрать подходящее место для посадки — это должно быть солнечное место с плодородной почвой. Затем необходимо подготовить яму размером около 50×50 см и смешать в вырытой яме навоз или компост с почвой. После этого можно посадить растение, укореневший саженец крыжовника нужно поместить в яму и засыпать его землей, слегка утрамбовав. Важно полить посаженное растение и установить опору для поддержки куста.
Как ухаживать за крыжовником осенью?
Уход за крыжовником осенью включает в себя несколько мероприятий. В первую очередь необходимо провести обрезку куста — удалить сухие и поврежденные ветки, а также провести формирующую обрезку для сохранения компактной формы куста. Также важно провести подкормку растения органическими или минеральными удобрениями. В осенний период рекомендуется также провести мульчирование куста, чтобы защитить корни от морозов.
Можно ли пересаживать крыжовник осенью?
Пересадка крыжовника осенью возможна, но не рекомендуется. Осенью растение готовится к зимнему периоду и имеет слабое корневое сцепление с почвой. Поэтому пересадка может привести к повреждению корней и снижению выживаемости растения. Лучше всего пересаживать крыжовник весной или ранней осенью, когда растение еще активно растет и имеет сильные корни.


