- Как восстановить молодость и красоту смородины?
- Подготовка почвы для восстановления куста
- Правильная подкормка смородины для активного роста
- Удаление старых и поврежденных веток
- Шаги для удаления старых и поврежденных веток:
- Обрезка куста для стимуляции роста
- Полив смородины по правилам
- Защита от вредителей и болезней
- Признаки поражения
- Профилактика и лечение
- Прищипывание верхушек для более пышного куста
- Заглубление корней смородины для лучшего питания
- Распределение нагрузки на ветви куста
- Поддержка куста с помощью опор
- Размножение смородины для увеличения числа кустов
- Мульчирование почвы для сохранения влаги и питательных веществ
- Вопрос-ответ:
- Какие существуют способы восстановления запущенного смородинового куста?
- Какие причины могут привести к запущенному состоянию смородинового куста?
- Как часто нужно подкармливать запущенный смородиновый куст?
- Какие инструменты нужны для обрезки запущенного смородинового куста?
- Как защитить запущенный смородиновый куст от сорняков и вредителей?
- Видео:
- Пересадка и деление взрослого куста смородины

Смородина – это плодовое растение, которое не только радует нас вкусными и полезными ягодами, но и служит украшением нашего сада. Однако, если не своевременно заботиться о растении, куст смородины может стать запущенным и перестать приносить нам урожай.
Чтобы спасти запущенную смородину и вернуть ей молодость и красоту, необходимо применить определенные методы восстановления куста. Во-первых, следует аккуратно обрезать все старые и поврежденные ветки, придалив их до здоровой древесины. Таким образом, мы удалим все участки, которые перестали приносить пользу растению и создаем условия для роста новых, здоровых побегов.
Во-вторых, необходимо обеспечить куст смородины питательными веществами и удобрениями. Для этого можно использовать органические удобрения, такие как перегноя или компост. Они помогут восстановить почву и обеспечить необходимые питательные элементы для растения. Кроме того, рекомендуется регулярно поливать куст, особенно в периоды сухости, чтобы обеспечить ему достаточное количество влаги.
Важно помнить, что реанимация запущенной смородины – это процесс, который требует времени и терпения. Однако, если правильно применить все необходимые меры, можно вернуть кусту молодость и красоту, и наслаждаться обильным урожаем вкусных ягод!
Как восстановить молодость и красоту смородины?
Смородина – это вкусный и полезный ягодный куст, который, как и любое растение, нуждается в уходе. Однако, если вы запустили свою смородину и она потеряла свою красоту и плодовитость, не отчаивайтесь – куст всегда можно спасти и омолодить.
Первое, что нужно сделать, это провести обрезку куста. Удалите все сухие и поврежденные ветки, а также те, которые растут внутрь куста или перекрывают другие ветки. Обрезка позволит смородине получить больше света и воздуха, что положительно скажется на ее росте и плодоношении.
Далее, рекомендуется провести подкормку смородины. Для этого можно использовать органические удобрения, например, компост или перегнои. Разбрасывайте удобрение вокруг куста, но не прикасайтесь к самому стволу, чтобы не вызвать его гниение.
Не забывайте также о поливе смородины. Особенно важно поддерживать режим полива во время цветения и созревания ягод. Умеренное поливание поможет улучшить рост и плодоношение куста.
Важно помнить, что восстановление молодости и красоты смородины – это процесс, который требует времени и терпения. Постепенно, с правильным уходом, куст смородины снова оживет и порадует вас сочными и ароматными ягодами.
Подготовка почвы для восстановления куста

Для того чтобы своевременно спасти запущенную смородину и омолодить ее куст, необходимо провести подготовку почвы. Во-первых, необходимо удалить все сорняки и полевые растения, которые могут конкурировать с смородиной за питательные вещества и влагу. Для этого можно применить ручной или механический способ выкапывания сорняков.
Во-вторых, необходимо провести анализ почвы и определить ее кислотность. Смородина предпочитает слабокислую или нейтральную почву, поэтому в случае необходимости следует провести известкование или грунтование для улучшения кислотности почвы.
Далее, рекомендуется провести глубокую рыхлительную обработку почвы для улучшения ее структуры и проницаемости. Это можно сделать путем использования специальных садовых инструментов, таких как лопата или вилы. Также можно добавить органическое удобрение, такое как перегной или компост, для улучшения плодородия почвы.
Важно помнить, что подготовка почвы для восстановления куста смородины – это фундаментальный этап, который будет являться основой для успешного омоложения растения и получения богатого урожая. Правильная подготовка почвы позволит кусту смородины восстановиться, получить необходимые питательные вещества и продолжить свое развитие.
Правильная подкормка смородины для активного роста
Для того чтобы омолодить и спасать запущенный куст смородины, важно правильно подкормить его. Правильное питание обеспечит активный рост растения и восстановление его сил.
Своевременное питание смородины начинается с подкормки азотными удобрениями. Азот способствует развитию зеленой массы и укреплению корневой системы. Рекомендуется использовать органические удобрения, такие как перегной или компост.
Примечание: Не забывайте, что подкормку необходимо проводить после окончания цветения смородины.
Для активного роста и восстановления куста смородины также рекомендуется провести подкормку фосфорно-калийными удобрениями. Фосфор способствует развитию корней и формированию почек, а калий укрепляет иммунитет растения и повышает его устойчивость к болезням.
Оптимальное соотношение азота, фосфора и калия в удобрениях для смородины — 2:1:1. Рекомендуется использовать гранулированные удобрения, которые можно равномерно распределить вокруг куста смородины и затем внести в почву.
Помимо основных питательных веществ, смородину также можно подкормить микроэлементами, такими как железо, магний, марганец. Микроэлементы необходимы для нормального развития растения и улучшения его иммунитета.
Удаление старых и поврежденных веток
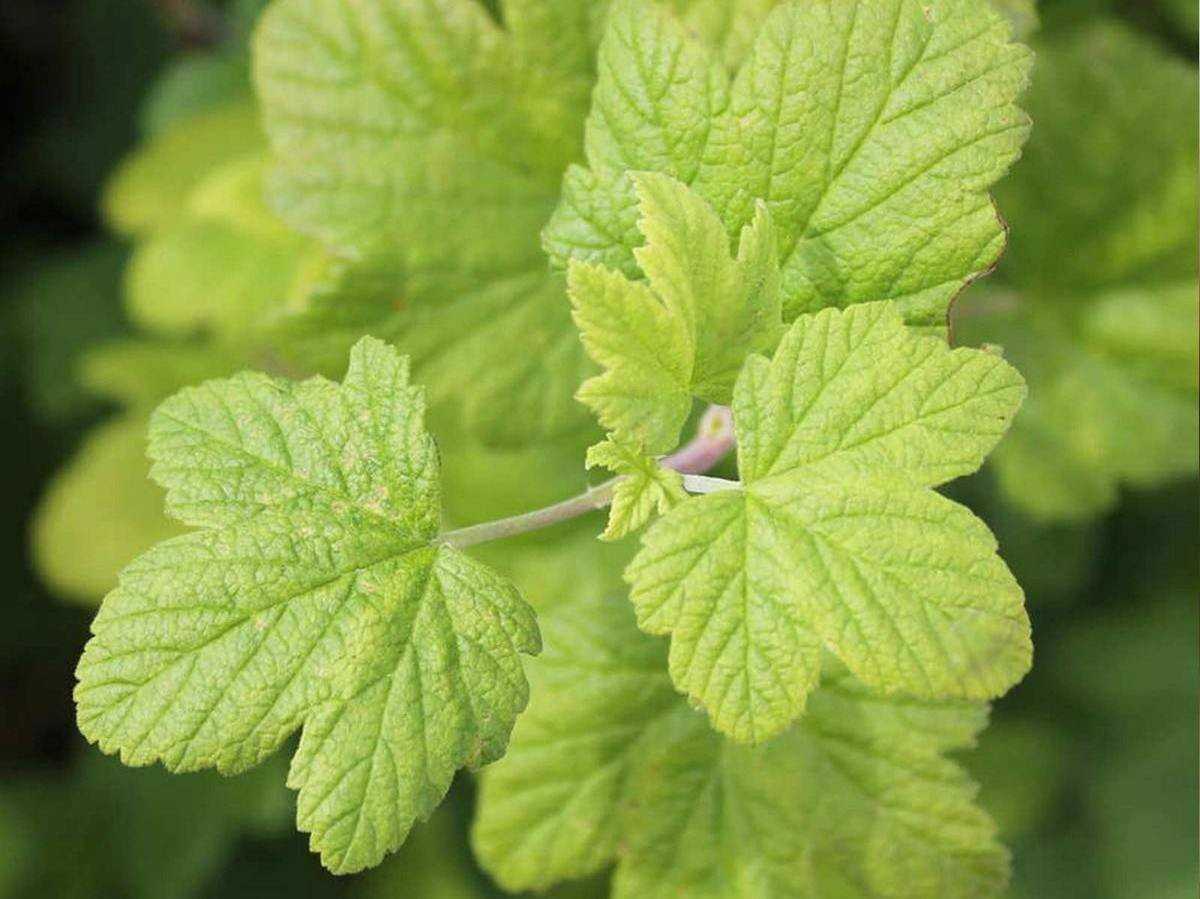
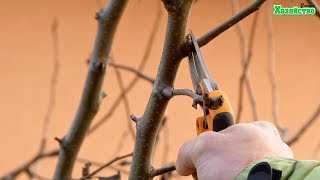
Запущенная смородина требует своевременного обрезания, чтобы омолодить и спасти куст. Одним из важных этапов восстановления является удаление старых и поврежденных веток. Это поможет кусту избавиться от больных и ненужных элементов, а также стимулирует рост новых побегов.
Перед началом работы необходимо подготовить инструменты: секаторы, пилу и садовые перчатки. Рекомендуется проводить обрезку весной или осенью, когда смородина находится в состоянии покоя.
Шаги для удаления старых и поврежденных веток:

- Осмотрите куст и определите старые и поврежденные ветки. Они могут быть сухими, сломанными, поврежденными насекомыми или гнилыми.
- Сначала удалите все сухие и мертвые ветки, которые не приносят пользы кусту. Они могут быть без листьев или иметь коричневый цвет.
- Затем обратите внимание на сломанные и поврежденные ветки. Они могут быть изогнутыми, перекрученными или иметь явные признаки болезней.
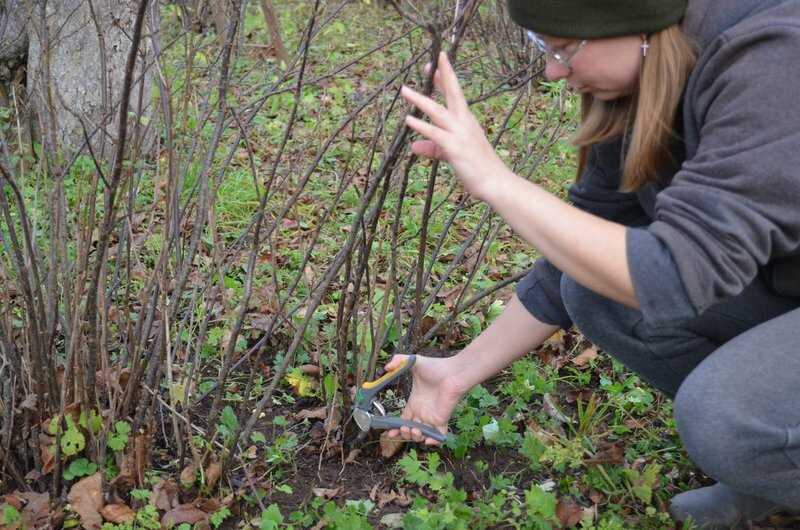
- Используя секаторы или пилу, аккуратно отрежьте старые и поврежденные ветки у основания куста. При этом следите за тем, чтобы не повредить здоровые ветки.
- После удаления всех ненужных веток, обработайте раны антисептиком или садовым варом для профилактики возможных инфекций.
Правильное удаление старых и поврежденных веток позволяет кусту смородины обновиться и восстановить силы. Это способствует здоровому росту и увеличению урожая. Помните, что регулярное обрезание является важным шагом в уходе за смородиной и помогает сохранить ее молодость и красоту.
Обрезка куста для стимуляции роста
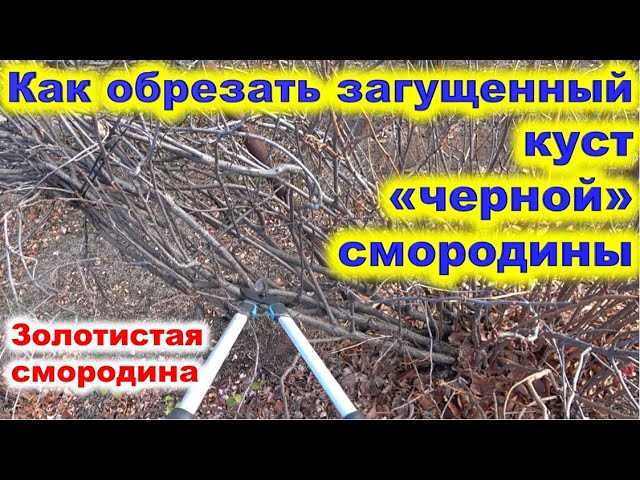
Запущенную смородину можно спасти и вернуть ей молодость и красоту с помощью своевременной обрезки куста. Обрезка является важным аспектом ухода за растением и позволяет стимулировать его рост.
Для начала необходимо удалить все поврежденные и больные ветки. Это позволит кусту сконцентрироваться на восстановлении здоровых частей и укреплении корневой системы.
Важно обратить внимание на плотность посадки кустов смородины. Если они слишком густо расположены, то растения не получают достаточно света и питательных веществ. В таком случае, рекомендуется удалить часть кустов, чтобы оставшиеся могли развиваться лучше.
Также при обрезке куста стоит сделать акцент на удалении старых и устаревших веток. Они не несут пользы растению и только занимают место, мешая развитию новых побегов. Удаление таких веток способствует активации роста и развитию куста смородины.
Полив смородины по правилам
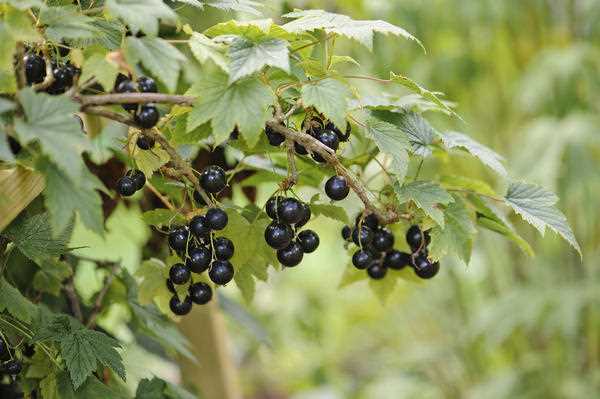
Для спасения и омоложения кустов смородины необходимо правильно организовать полив. Постоянное и своевременное увлажнение почвы является одним из главных факторов, влияющих на здоровье и красоту растения.
Смородина нуждается в достаточном количестве влаги для активного роста и развития. Поэтому полив следует проводить регулярно, особенно в периоды сухости и жары. Однако не стоит злоупотреблять водой, чтобы избежать переувлажнения почвы, которое может негативно сказаться на корнях растения.
При поливе смородины необходимо обратить внимание на качество воды. Оптимальным вариантом является использование дождевой или отстоянной воды. Такая вода более мягкая и не содержит химических добавок, которые могут негативно влиять на растение.
Избегайте полива смородины сверху, так как это может привести к заболеваниям и гниению листьев. Лучше всего поливать растение под корень, причем вода должна поглощаться медленно и равномерно. Для этого можно использовать капельный полив или поливать смородину через лейку с тонким носиком.
Защита от вредителей и болезней
Так стоп!!! Вы всё ещё не подписаны на наши каналы в Телеграмм и Дзен? Посмотрите: ТГ - (@historyfantasydetectivechat) и Дзен (https://dzen.ru/myshortsstorys)
Омолодить запущенную смородину и вернуть ей красоту и здоровье можно только обеспечивая ей надлежащую защиту от вредителей и болезней. Своевременные меры по предотвращению и лечению позволят сохранить и восстановить куст смородины.
Признаки поражения
Первый шаг – определить, что именно мешает растению развиваться. Признаки поражения могут быть разными: желтизна и опадение листьев, пятна на плодах, повреждения на стеблях и ветках.
Профилактика и лечение
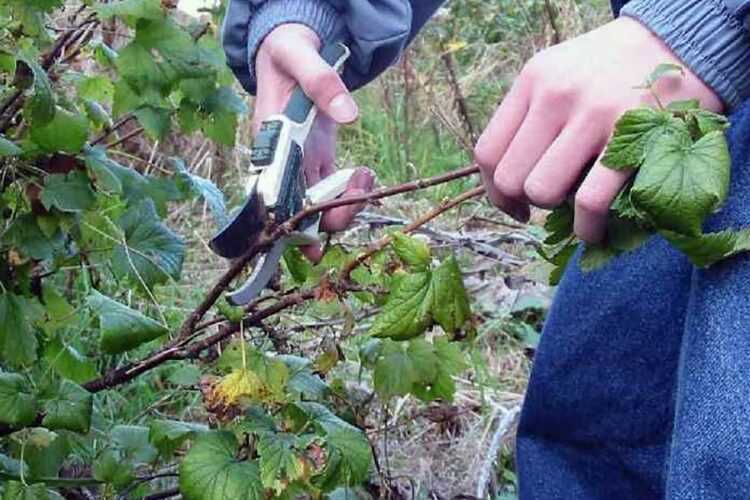
Для защиты от вредителей и болезней смородины необходимо своевременно проводить обработку растений. Это может включать обработку инсектицидами и фунгицидами, удаление пораженных частей растения, подкормку и уход за заболевшими кустами.
- При обнаружении вредителей, таких как тля или клещи, рекомендуется применять специальные препараты, которые эффективно борются с ними.
- Для профилактики болезней растений необходимо регулярно обрабатывать смородину антисептиками и фунгицидами.
Также важно следить за состоянием почвы, обеспечивать растению достаточное питание и полив, чтобы оно было устойчивым к возможным заболеваниям и нападениям вредителей.
Прищипывание верхушек для более пышного куста
Одним из способов спасения запущенной смородины и ее омоложения является прищипывание верхушек. Этот метод позволяет растению обрести новую силу и энергию, что способствует его более пышному росту.
Своевременное прищипывание верхушек куста помогает ускорить рост боковых побегов. При этом, необходимо оставить несколько сильных побегов в основании куста, чтобы не ослабить его. Прищипывание проводится с помощью острого секатора или ножниц, обрезая верхушку на уровне выше бокового побега или по уровню третьего листа.
Очень важно проводить прищипывание верхушек на регулярной основе, чтобы стимулировать рост новых побегов и омолодить куст. Не допускайте, чтобы верхушки куста сильно вытягивались, так как это может привести к его ослаблению и недостатку плодоношения. Регулярное прищипывание верхушек поможет смородине вернуть свою молодость и пышность.
Заглубление корней смородины для лучшего питания
Смородина – это прекрасный куст, который может радовать своим урожаем многие годы. Однако со временем он может начать ослабевать и требовать внимания. Омолодить куст смородины поможет заглубление корней, которое позволит ему получить лучшее питание и восстановить свою силу.
Заглубление корней смородины – это процесс, который следует проводить своевременно, чтобы спасать куст от старения и восстановить его плодоносность. Для этого нужно выбрать место, где растет смородина, и осторожно выполотить землю вокруг куста.
Затем нужно аккуратно заглубить корни смородины, придавая им вертикальное положение. Это позволит растению лучше поглощать влагу и питательные вещества из почвы. Кроме того, заглубление корней поможет укрепить куст и сделать его более устойчивым к ветрам и другим внешним воздействиям.
Для заглубления корней смородины можно использовать компост или перегной, чтобы обогатить почву органическими веществами. Также можно добавить некоторое количество минеральных удобрений для дополнительного питания растения.
После заглубления корней смородины следует хорошо полить куст и укрыть его слоем мульчи, чтобы сохранить влагу и предотвратить соревнование с сорняками. Это поможет кусту быстрее прижиться и восстановить свою силу.
Заглубление корней смородины – это простой и эффективный способ омолодить куст и вернуть ему молодость и красоту. Правильно проведенный процесс заглубления корней позволит смородине получить лучшее питание и стать более устойчивой к внешним факторам. Не забывайте своевременно заботиться о своих растениях и они ответят вам богатым урожаем!
Распределение нагрузки на ветви куста

Для того чтобы омолодить запущенную смородину и вернуть ей красоту и здоровье, необходимо правильно распределить нагрузку на ветви куста. Это поможет укрепить его структуру и способствовать более активному росту и развитию.
Своевременное проведение обрезки и прореживание куста смородины позволяет удалять старые и поврежденные ветви, а также контролировать количество побегов. Это помогает смородине сохранять свою форму и избегать перегрузки ветвей, что может привести к их прогибанию и ломкости.
Особое внимание следует уделить правильному распределению нагрузки на ветви. Наиболее сильные и здоровые ветви следует оставлять без обрезки, они будут основным носителем урожая. При этом необходимо удалять слабые и тонкие ветки, которые не способны выдержать нагрузку ягод и могут сломаться под ее весом.
Для того чтобы равномерно распределить нагрузку на ветви куста смородины, можно использовать подпорки. Они помогут удерживать ветви в вертикальном положении и предотвратить их прогибание под весом ягод. Подпорки можно изготовить из деревянных или металлических конструкций, а также использовать специальные сетки или шпалеры.
Поддержка куста с помощью опор
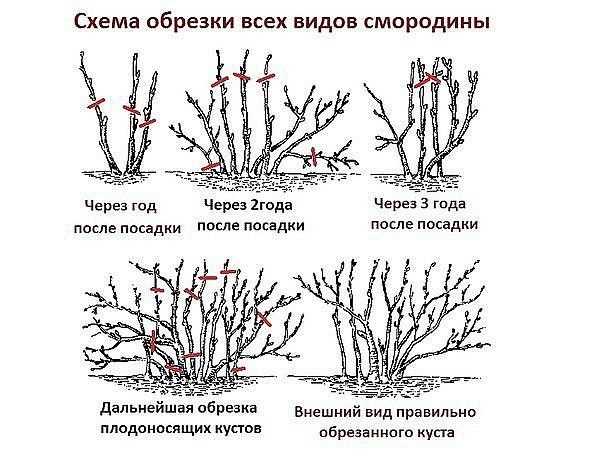
Для того чтобы омолодить запущенную смородину и вернуть ей красоту, необходимо предусмотреть поддержку куста. Опоры являются одним из самых эффективных способов поддержки куста и предотвращения его повреждения.
Одной из распространенных проблем смородины является ее расползание и разрастание во все стороны. Для предотвращения этого необходимо своевременно установить опоры под куст. Они помогут удерживать ветви и предотвратить их падение на землю, что в свою очередь защитит их от повреждений и гниения.
Опоры для смородины могут быть различными: металлическими или деревянными стойками, железными кольями, проволокой или веревкой, а также специальными сетками или тканями. Главное, чтобы опоры были надежными и устойчивыми, чтобы они могли выдерживать ветровые нагрузки и не позволяли кусту расползаться.
При установке опор необходимо учесть размеры и форму куста смородины. Опоры следует устанавливать вокруг куста, охватывая его с разных сторон, чтобы создать надежную опорную конструкцию. При этом необходимо обеспечить достаточное расстояние между опорами, чтобы ветви куста не перекрещивались и имели достаточно места для роста.
Установка опор для смородины – это одна из важных процедур, которая поможет сохранить куст в хорошем состоянии и продлить его срок службы. Правильно выбранные и установленные опоры помогут вернуть молодость и красоту запущенной смородине, обеспечивая ей оптимальные условия для роста и развития.
Размножение смородины для увеличения числа кустов
Своевременное размножение смородины является одним из важных шагов по спасению и восстановлению запущенного куста.
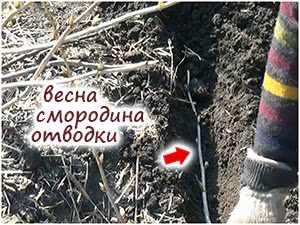
Для размножения смородины можно использовать несколько методов. Один из самых простых и эффективных – черенкование. Для этого выбирается здоровый и сильный побег, который остается от основного куста. Побег загибается к земле и прикрепляется к ней, зарывая в почву, а затем привязывается к опоре. В результате через некоторое время на побеге появятся корни, и он сможет развиваться как самостоятельный куст.
Также для размножения смородины может быть использован метод деления куста. В этом случае куст смородины разрезается на несколько частей, каждая из которых должна иметь корни и побеги. Разделенные части размещаются в отдельные ямы или отдельные участки почвы, где они продолжают расти и развиваться.
При размножении смородины очень важно учитывать ее сортовые особенности. Некоторые сорта могут размножаться лучше черенками, другие – делением куста. При выборе метода размножения необходимо учитывать также состояние и возраст куста смородины.
Мульчирование почвы для сохранения влаги и питательных веществ
Одним из важных методов для восстановления запущенной смородины и омоложения куста является мульчирование почвы. Этот прием позволяет сохранить влагу и питательные вещества, необходимые растению для роста и развития.
Мульчирование заключается в нанесении слоя органического материала на поверхность почвы вокруг куста смородины. Это может быть солома, опилки, торф, компост или другие подобные материалы. Толщина слоя мульчи должна быть около 5-7 см.
Мульча выполняет несколько функций. Во-первых, она помогает сохранить влагу в почве. Органический материал задерживает воду, предотвращая ее испарение и уменьшая необходимость в поливе. Во-вторых, мульча предотвращает рост сорняков, которые конкурируют с смородиной за влагу и питательные вещества. В-третьих, она способствует разложению органического вещества, улучшая структуру почвы и обогащая ее питательными веществами.
Своевременное мульчирование почвы вокруг куста смородины позволяет сохранить оптимальные условия для роста и развития растения. Благодаря этому приему можно омолодить запущенную смородину, улучшить ее урожайность и продолжительность плодоношения. Не забывайте периодически обновлять слой мульчи, чтобы сохранить его эффективность на протяжении всего сезона.
Вопрос-ответ:
Какие существуют способы восстановления запущенного смородинового куста?
Существует несколько способов восстановления запущенного смородинового куста. Один из них — обрезка куста с последующим удалением старых и поврежденных веток. Еще один способ — регулярное подкормка куста органическими удобрениями. Также важно поливать куст смородины во время сухого периода и защищать его от сорняков и вредителей.
Какие причины могут привести к запущенному состоянию смородинового куста?
Запущенное состояние смородинового куста может быть вызвано несколькими причинами. Одна из них — неправильный уход за кустом, включая недостаток подкормки и неправильное обрезание. Также запущенность куста может быть связана с недостаточным поливом и неправильным выбором места для посадки.
Как часто нужно подкармливать запущенный смородиновый куст?
Запущенный смородиновый куст нужно подкармливать регулярно. Наиболее эффективным способом является подкормка органическими удобрениями, такими как перегноя или компост. Рекомендуется проводить подкормку раз в 2-3 недели в течение всего сезона роста.
Какие инструменты нужны для обрезки запущенного смородинового куста?
Для обрезки запущенного смородинового куста потребуются следующие инструменты: секаторы с острыми лезвиями для удаления старых и поврежденных веток, пилка для обрезки более толстых веток и ножницы для обрезки более мелких веточек. Также пригодится садовая пилка для удаления старых корней.
Как защитить запущенный смородиновый куст от сорняков и вредителей?
Для защиты запущенного смородинового куста от сорняков и вредителей рекомендуется проводить регулярную прополку почвы вокруг куста и мульчирование. Мульчирование поможет задержать влагу в почве и предотвратить рост сорняков. Также можно использовать натуральные средства против вредителей, такие как настойки из табака или чеснока.
