- A Special Way of Planting Raspberries in Autumn
- Step 1: Choose a Suitable Location
- Step 2: Digging the Planting Hole
- Step 3: Improving the Soil
- Step 4: Planting the Raspberry
- Step 5: Mulching and Watering
- Step 6: Pruning and Training
- Optimizing the Planting Hole for Success
- Choosing the Right Location:
- Digging the Planting Hole:
- Amending the Soil:
- Planting the Raspberry:
- Watering and Mulching:
- Staking and Support:
- Maintenance and Care:
- Conclusion:
- Choosing the Right Location
- Sunlight
- Soil Quality
- Space
- Protection from Wind
- Accessibility to Water
- Considering Sunlight and Soil Drainage
- Sunlight
- Soil Drainage
- Preparing the Planting Hole
- Measuring and Digging the Hole
- Improving Soil Conditions
- Soil Testing
- Amending the Soil
- Preparing the Planting Hole
- Backfilling and Watering
- Adding Organic Matter and Fertilizer
- Organic Matter
- Fertilizer
- Final Thoughts
- Planting the Raspberry Canes
- Supporting the Raspberry Canes
- Proper Placement and Careful Soil Filling
- Location
- Soil Preparation
- Planting Hole
- Soil Filling
- Question-answer:
- What is the best time to plant raspberries in autumn?
- Why should I plant raspberries in autumn instead of spring?
- What are the benefits of optimizing the planting hole for raspberry plants?
- How should I optimize the planting hole for raspberry plants?
- What is the ideal distance between raspberry plants?
- Can I use cover crops in between raspberry plants?
- Video: How to Grow Blackberries and Raspberries
Autumn is the perfect time to prepare your garden for a successful raspberry harvest in the coming year. While there are several methods for planting raspberries, one special technique that has been gaining popularity is optimizing the planting hole. This method involves creating a carefully crafted hole that provides the ideal conditions for the raspberry plant to thrive.
When it comes to planting raspberries, creating the right environment for the roots to grow is essential. By focusing on the planting hole, you can ensure that the raspberry plant receives the necessary nutrients, water, and space to establish a strong root system. Additionally, optimizing the planting hole can help reduce the risk of disease and improve overall plant health.
The first step in optimizing the planting hole is to choose a suitable location for your raspberries. Raspberries thrive in well-drained soil that receives full sunlight for at least six hours a day. Once you have selected the ideal spot, it’s time to dig the planting hole.
When digging the hole, aim for a depth of around 18 inches and a width of 12 inches. This size allows the raspberry roots to spread out comfortably and ensures adequate drainage. After digging the hole, mix in organic matter such as compost or well-rotted manure to improve the soil’s fertility and structure.
A Special Way of Planting Raspberries in Autumn
Planting raspberries in the autumn can be a great way to ensure a successful harvest the following year. By taking the time to optimize the planting hole, you can give your raspberry plants the best possible start. Here is a special way of planting raspberries in autumn that can increase your chances of success.
Step 1: Choose a Suitable Location
Before planting your raspberries, it’s important to choose a suitable location. Raspberries thrive in full sun, so look for a spot in your garden that receives at least 6 hours of direct sunlight each day. The soil should be well-draining and fertile, with a pH level between 5.5 and 6.5. Avoid areas that are prone to waterlogging, as this can cause root rot.
Step 2: Digging the Planting Hole
The next step is to dig the planting hole. For raspberries, it’s best to dig a hole that is wide and shallow, rather than deep and narrow. A hole with dimensions of 18 inches wide and 12 inches deep is ideal. This wide hole allows the roots to spread out and establish themselves properly.
Step 3: Improving the Soil
To optimize the planting hole, it’s a good idea to improve the soil before planting. Mix in some well-rotted compost or aged manure to enrich the soil with nutrients. This will provide a good foundation for the raspberry plants to grow and thrive.
Step 4: Planting the Raspberry
Place the raspberry plant in the center of the planting hole, ensuring that the roots are spread out and not cramped. The crown of the plant should be level with the soil surface. Backfill the hole with the improved soil, firming it gently around the roots. Water the plant thoroughly after planting to settle the soil.
Step 5: Mulching and Watering
To help retain moisture and suppress weed growth, apply a layer of mulch around the base of the raspberry plant. This can be straw, wood chips, or shredded bark. Water the plant deeply once a week, especially during dry periods, to keep the soil evenly moist.
Step 6: Pruning and Training
During the first year, it’s important to prune and train the raspberry canes to encourage healthy growth. Cut back all canes to around 6 inches above ground level in late winter or early spring. This will promote the development of strong new canes that will bear fruit in the following year.
By following this special way of planting raspberries in autumn, you can give your plants the best possible start and optimize their chances of success. With proper care and attention, you can look forward to a bountiful harvest of juicy raspberries in the years to come.
Optimizing the Planting Hole for Success
Choosing the Right Location:
Before digging the planting hole, it is essential to choose the right location for your raspberry plants. Look for a spot that receives full sun for at least 6-8 hours a day. The soil should be well-drained and rich in organic matter. Avoid areas that are prone to waterlogging or have compacted soil.
Digging the Planting Hole:
The size and depth of the planting hole play a crucial role in the success of your raspberry plants. Dig a hole that is wide and deep enough to accommodate the roots of the plant. A general guideline is to dig a hole that is at least twice as wide and deep as the plant’s root ball.
Amending the Soil:
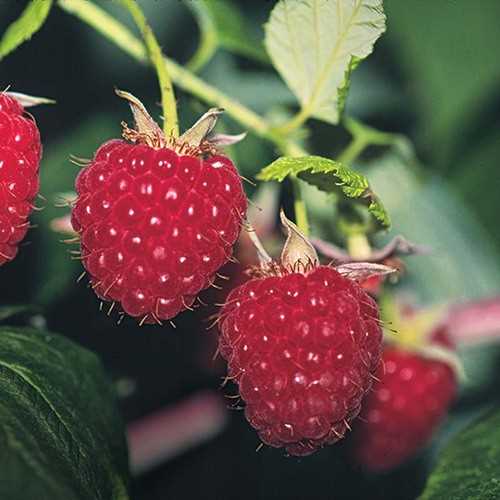
Once the hole is dug, it is important to amend the soil to create optimal growing conditions for the raspberry plants. Mix in compost or well-rotted manure to enrich the soil with organic matter. This will improve drainage and provide essential nutrients for the roots.
Planting the Raspberry:
Place the raspberry plant in the center of the planting hole, making sure that the roots are spread out evenly. Gently backfill the hole with soil, firming it around the roots to eliminate air pockets. Leave a small depression around the plant to help channel water towards the root zone.
Watering and Mulching:
After planting, thoroughly water the raspberry plant to settle the soil and ensure good root-to-soil contact. Apply a layer of organic mulch around the base of the plant to help retain moisture, suppress weeds, and regulate soil temperature.
Staking and Support:
Some varieties of raspberries may require staking or support to prevent the canes from falling over under the weight of the fruit. Install stakes or a trellis system near the plant to provide support. Carefully tie the canes to the stakes or trellis using soft plant ties.
Maintenance and Care:
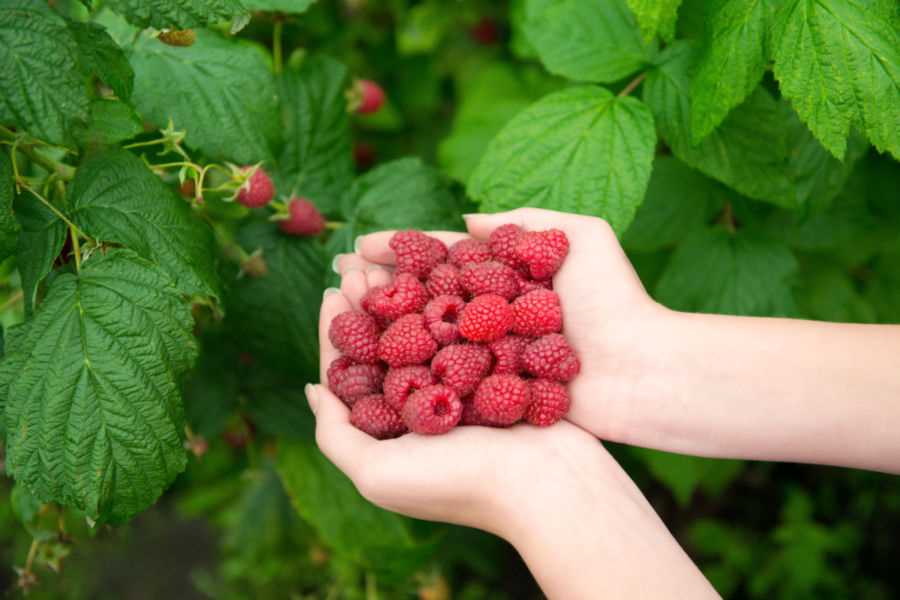
Proper maintenance and care of the raspberry plants will ensure their success. Regularly water the plants, especially during dry periods, and monitor for any signs of pests or diseases. Prune the canes in late winter or early spring to encourage new growth and maintain a manageable size.
Conclusion:
Optimizing the planting hole for your raspberry plants is crucial for their success. By selecting the right location, digging the proper hole, amending the soil, and providing proper support and care, you can create optimal growing conditions and ensure a bountiful harvest of delicious raspberries.
Choosing the Right Location
When it comes to planting raspberries in autumn, choosing the right location is crucial for their success. Here are some factors to consider when selecting the perfect spot:
Sunlight
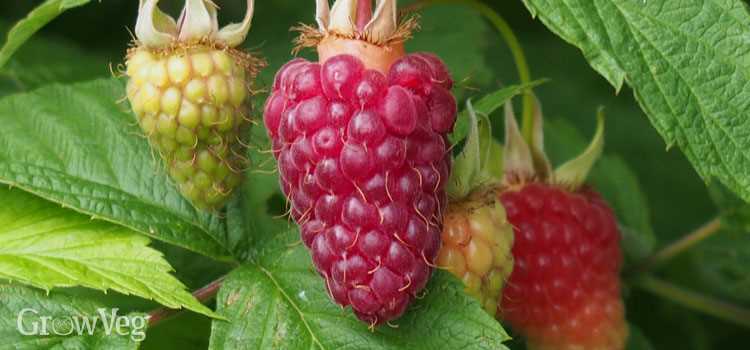
Raspberries thrive in full sun, so it’s important to choose a location that receives at least 6-8 hours of direct sunlight each day. This will ensure that the plants receive enough light to produce healthy and abundant fruit.
Soil Quality
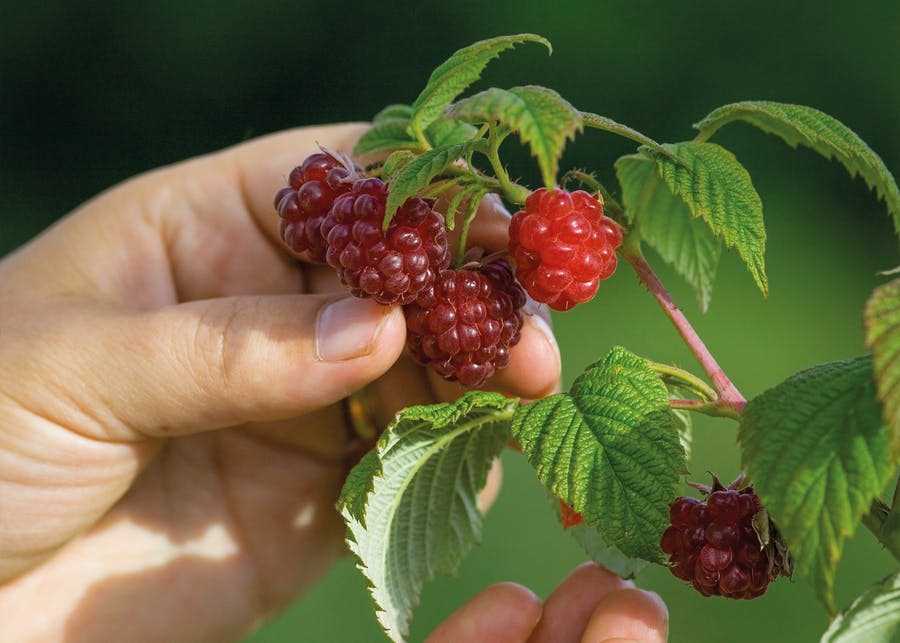
The soil should be well-draining and rich in organic matter. Raspberries prefer a pH level of 5.5-6.5, so it’s a good idea to have your soil tested before planting. If the soil is too acidic, you can add lime to raise the pH, or if it’s too alkaline, you can add sulfur to lower it. Additionally, incorporating compost or well-rotted manure into the soil will improve its fertility and structure.
Space
It’s important to give raspberry plants enough space to grow and spread out. Each raspberry plant should be spaced about 2-3 feet apart in rows that are 6-8 feet apart. This will allow for proper air circulation and help prevent diseases from spreading.
Protection from Wind
Raspberry canes are fragile and can easily be damaged by strong winds. To protect them, choose a location that is sheltered from strong gusts. Planting raspberries near a fence, wall, or other natural windbreak can provide the necessary protection.
Accessibility to Water
Raspberries require consistent moisture, especially during the growing season and when the fruits are forming. Choosing a location that is easily accessible to water sources will make it easier to keep the plants well-hydrated.
By considering these factors and choosing the right location for your autumn raspberry planting, you’ll be setting the stage for a successful harvest in the coming years.
Considering Sunlight and Soil Drainage
When selecting a location for planting raspberries, it is important to consider both sunlight and soil drainage. These factors play a crucial role in the successful growth and development of the plants.
Sunlight
Raspberries thrive in full sunlight, so it is important to choose a location that receives at least 6-8 hours of direct sunlight per day. This will ensure that the plants have enough energy to produce delicious berries. Avoid planting raspberries in shaded areas, as this can result in poor growth and minimal fruiting.
Soil Drainage
Proper soil drainage is essential for the health of raspberry plants. They prefer well-drained soil that does not become waterlogged. If the soil retains too much water, it can lead to root rot and other diseases. To improve soil drainage, consider adding organic matter such as compost or aged manure to the planting hole. This will help to loosen the soil and promote better drainage.
- Choose a location with at least 6-8 hours of direct sunlight per day
- Avoid planting raspberries in shaded areas
- Ensure the soil has proper drainage
- Add organic matter to improve soil drainage
By considering these factors when choosing a location for planting raspberries, you can optimize the planting hole for success. This will result in healthy, productive plants that will provide you with bountiful harvests for years to come.
Preparing the Planting Hole
- Choose a sunny location for planting your raspberries that receives at least six hours of direct sunlight per day.
- Clear away any existing vegetation, such as grass or weeds, from the planting area.
- Measure the recommended spacing for your raspberry variety and mark the planting spots with stakes or a marker.
- Dig a hole that is approximately twice the size of the raspberry plant’s root ball. The hole should be deep enough so that the top of the root ball is level with the surrounding soil.
- Loosen the soil in the bottom of the hole with a fork or shovel to help the roots establish more easily.
- Mix in organic matter, such as compost or well-rotted manure, with the excavated soil to improve the drainage and fertility of the planting hole.
- Backfill the hole with the soil mixture, firming it gently around the root ball to eliminate any air pockets.
- Create a small basin around the plant to help capture water during irrigation.
- Water the newly planted raspberry thoroughly to settle the soil and provide moisture to the roots.
- Apply a layer of mulch, such as straw or wood chips, around the base of the plant to help suppress weeds and retain moisture.
- Label the planted raspberry with the variety name and the planting date for future reference.
Following these steps will ensure that your raspberry plants have a healthy and optimal start in their new location.
Measuring and Digging the Hole
Before you start planting your raspberries in the autumn, it is important to measure and dig proper holes to ensure optimal growth and success. Here is a step-by-step guide on how to measure and dig the hole:
- Measure the space: Start by measuring the area where you plan to plant your raspberries. This will help you determine how many plants you can fit and how far apart they should be spaced.
- Mark the spots: Once you have measured the space, mark the spots where each raspberry plant will be placed. Use stakes or small flags to make the spots clearly visible.
- Dig the hole: Using a shovel or a garden spade, start digging the holes for each raspberry plant. The depth and width of the hole will depend on the size of the root ball of the plant.
- Size of the hole: The general rule for the size of the hole is to make it slightly wider and deeper than the root ball. This will allow enough room for the roots to spread out and establish themselves.
- Soil preparation: While digging the hole, you can also use this opportunity to prepare the soil. Remove any weeds, rocks, or debris from the hole, and loosen the soil with a garden fork or a tiller.
- Planting depth: Once the hole is prepared, place the raspberry plant in the hole, making sure that the soil level of the plant is at the same level or slightly above the surrounding soil.
- Backfill the hole: Gently backfill the hole with the soil, making sure that there are no air pockets around the roots. Press down the soil around the plant to secure it in place.
By following these steps, you can ensure that your raspberries will have a proper and optimized hole for planting in the autumn. This will provide them with the best chance of thriving and producing a bountiful harvest.
Improving Soil Conditions
Planting raspberries in autumn provides an opportunity to improve the soil conditions for optimal growth and development. By preparing the soil before planting, you can create a nutrient-rich environment that promotes healthy root development and vigorous plant growth.
Soil Testing
Before planting raspberries, it is important to conduct a soil test to determine the current pH level and nutrient content of the soil. This will help you identify any deficiencies or imbalances that may affect the growth of the plants. A soil test kit can be purchased from a gardening center or you can send a soil sample to a laboratory for analysis.
Amending the Soil
Based on the results of the soil test, you may need to amend the soil to adjust the pH level and provide necessary nutrients. Common soil amendments for raspberries include:
- Lime: If the soil is too acidic (low pH), adding lime can help raise the pH level and make the soil more alkaline. This is important because raspberries prefer a slightly acidic to neutral pH level, around 6.0-6.5.
- Organic matter: Adding compost, well-rotted manure, or other organic matter to the soil can improve its structure and fertility. Organic matter also helps retain moisture and promotes beneficial microbial activity.
- Fertilizers: Based on the nutrient deficiencies identified in the soil test, you can use organic or synthetic fertilizers to provide the necessary nutrients for raspberry plants. Common fertilizers for raspberries include those high in nitrogen, phosphorus, and potassium.
Preparing the Planting Hole
Once the soil has been amended, it is time to prepare the planting hole. Dig a hole that is wide and deep enough to accommodate the root ball of the raspberry plant. Loosen the soil at the bottom of the hole and remove any rocks, roots, or other debris that may hinder root growth.
Backfilling and Watering
After placing the raspberry plant in the planting hole, backfill it with the amended soil, making sure that the crown of the plant is level with the soil surface. Gently firm the soil around the plant to eliminate any air pockets. Finally, water the newly planted raspberry thoroughly to settle the soil and provide moisture to the roots.
By improving the soil conditions before planting raspberries in autumn, you can ensure that your plants have the best start for successful growth and abundant fruit production.
Adding Organic Matter and Fertilizer
When planting raspberries in autumn, it is important to prepare the soil properly by adding organic matter and fertilizer. This will provide the plants with the nutrients they need to establish healthy roots and thrive in the coming growing season.
Organic Matter
Adding organic matter to the soil is crucial for improving its structure and fertility. Organic matter helps retain moisture, improves drainage, and provides essential nutrients to the plants. Some common types of organic matter that can be added to the planting hole include:
- Compost: Compost is a rich source of organic matter that improves soil structure and adds nutrients. Spread a layer of compost in the bottom of the planting hole before placing the raspberry plant.
- Well-rotted manure: Manure is high in nutrients and can be a great addition to the soil. Make sure that the manure is well-rotted to avoid burning the plant’s roots.
- Leaf mold: Leaf mold is a type of decomposed leaves that adds organic matter and improves soil structure. It can be mixed with the soil or used as a mulch around the base of the plants.
Fertilizer
In addition to organic matter, it is beneficial to add a balanced fertilizer to the planting hole. This will provide the plants with a quick boost of nutrients and help them establish quickly. Look for a fertilizer specifically formulated for fruiting plants or use a general purpose fertilizer with a balanced NPK ratio.
When adding fertilizer, follow the instructions on the package and apply the appropriate amount. It is important not to over-fertilize, as this can cause root burn and damage the plants. A general guideline is to sprinkle a small amount of fertilizer in the planting hole, making sure it is not in direct contact with the plant’s roots.
Final Thoughts
By adding organic matter and fertilizer to the planting hole, you can optimize the soil conditions for your raspberry plants. This will give them a head start in establishing healthy roots and ensure their success in the coming growing season. Remember to water the plants well after planting to help settle the soil and promote root development.
Planting the Raspberry Canes
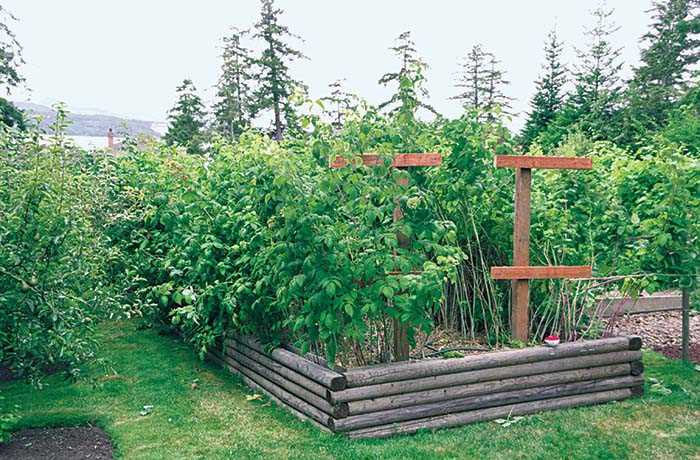
After preparing the planting hole, it’s time to plant the raspberry canes. Follow these steps to ensure success:
- Dig a trench in the center of the planting hole, about 4-6 inches deep.
- Place the raspberry cane in the trench, making sure the roots are spread out and facing downwards.
- Backfill the trench with soil, gently firming it around the base of the cane to ensure good contact.
- If the cane is too long, you can trim it back to about 8-12 inches above the ground.
- Water the newly planted cane thoroughly to settle the soil and help the roots establish.
- Repeat the process with the remaining raspberry canes, spacing them about 2-3 feet apart.
It’s important to note that raspberry canes should be planted at a slight angle, leaning towards the supporting structure or trellis. This helps them grow in the desired direction and reduces the risk of wind damage.
Supporting the Raspberry Canes
Raspberry canes are best grown with support, as their branches might become heavy with fruit. Here are some options for supporting your raspberry canes:
- Install a trellis system with sturdy posts and wires to guide the canes vertically.
- Use a raspberry cage, which is a wire cage that surrounds the plants and provides support.
- Create a fence-like structure with wooden posts and horizontal wires for the canes to lean against.
- Alternatively, you can tie the raspberry canes individually to stakes or bamboo poles.
Whichever method you choose, make sure the support system is strong enough to bear the weight of the canes and the fruit they will produce.
Proper Placement and Careful Soil Filling
When planting raspberries in autumn, it’s crucial to choose the right location and prepare the soil properly. Here are some important factors to consider:
Location
- Ensure that the planting site receives at least six hours of direct sunlight each day.
- Avoid areas with strong winds, as raspberries can be easily damaged.
- Make sure the soil is well-drained to prevent waterlogging, which can lead to root rot.
- Consider planting raspberries away from trees or other plants that may compete for nutrients and water.
Soil Preparation
Before planting raspberries, it’s important to prepare the soil properly:
- Start by removing any weeds or grass from the planting area.
- Loosen the soil with a garden fork or tiller to a depth of about 12 inches.
- Add organic matter, such as compost or well-rotted manure, to improve soil structure and fertility.
- Test the soil pH and adjust if necessary. Raspberries prefer slightly acidic soil with a pH between 5.5 and 6.5.
Planting Hole
When digging the planting hole for your raspberry plants, follow these guidelines:
- Make the hole wide and deep enough to accommodate the plant’s roots without bending or crowding them.
- The hole should be about 12-18 inches wide and 10-12 inches deep.
- Ensure that the hole is large enough to allow room for the roots to spread out.
Soil Filling
After placing the raspberry plant in the hole, carefully fill it with soil:
- Hold the plant upright and fill the hole with soil, gently tamping it down with your hands.
- Avoid compacting the soil too much to allow for good drainage.
- Make sure the soil level is even with the surrounding ground.
- Water the newly planted raspberry thoroughly to settle the soil.
By following these steps, you can ensure that your autumn-planted raspberries have the proper placement and soil filling for successful growth and fruit production.
Question-answer:
What is the best time to plant raspberries in autumn?
The best time to plant raspberries in autumn is during September or October, when the soil is still warm but the weather is cooler. This allows the plants to establish their roots before the winter season.
Why should I plant raspberries in autumn instead of spring?
Planting raspberries in autumn allows the plants to establish a strong root system before the winter season. This gives them a head start in the following spring, resulting in healthier and more productive plants.
What are the benefits of optimizing the planting hole for raspberry plants?
Optimizing the planting hole for raspberry plants has several benefits. It helps improve drainage, prevents waterlogging, and ensures that the plants have enough space for their roots to grow. Additionally, it helps retain moisture and nutrients, promoting better overall plant growth and productivity.
How should I optimize the planting hole for raspberry plants?
To optimize the planting hole for raspberry plants, start by digging a hole that is wide and deep enough to accommodate the plant’s roots. Remove any weeds or debris from the hole and mix in organic matter, such as compost or well-rotted manure, to improve the soil’s fertility. Make sure to place the plant at the same depth it was grown in the nursery and backfill the hole, gently firming the soil around the roots.
What is the ideal distance between raspberry plants?
The ideal distance between raspberry plants depends on the variety being planted. For summer-bearing varieties, a distance of 1.5 to 2 feet between plants is recommended, while for fall-bearing varieties, a distance of 2.5 to 3 feet is recommended. These distances allow the plants to have enough space for their roots to grow and ensure good airflow between the plants.
Can I use cover crops in between raspberry plants?
Yes, using cover crops in between raspberry plants can be beneficial. Cover crops help suppress weeds, retain moisture in the soil, and improve soil fertility. However, it is important to choose cover crops that do not compete with the raspberries for nutrients and water. Some suitable cover crops for raspberry plantings include clover, vetch, and rye grass.
