- Choosing the Right Time
- Best Conditions for Planting Blackcurrants
- Soil
- Sunlight
- Spacing
- Watering
- Fertilizer
- Pruning
- Preparing the Soil
- Soil Preparation Techniques
- 1. Clear the area:
- 2. Test the soil:
- 3. Improve soil structure:
- 4. Add organic matter:
- 5. Apply fertilizers:
- 6. Mulch the planting area:
- 7. Water the soil:
- Planting the Seedlings
- Step 1: Prepare the planting area
- Step 2: Prune the seedling
- Step 3: Plant the seedling
- Step 4: Mulch and support
- Step 5: Care and maintenance
- Proper Transplanting Methods
- 1. Choosing the Right Location
- 2. Preparing the Soil
- 3. Digging the Hole
- 4. Transplanting the Seedling
- 5. Backfilling and Firming the Soil
- 6. Watering
- 7. Mulching
- 8. Providing Support
- 9. Regular Maintenance
- Caring for Young Plants
- Watering and Fertilization Tips
- Watering
- Fertilization
- Additional Tips
- Protecting the Plant from Pests
- 1. Clear the area:
- 2. Use netting or fencing:
- 3. Monitor for pests:
- 4. Use natural insecticides or repellents:
- 5. Employ companion planting:
- 6. Maintain good hygiene:
- 7. Encourage natural predators:
- 8. Regularly prune:
- Common Pests and Prevention Methods
- Aphids
- Currant Bud Mites
- Blackcurrant Sawflies
- Redcurrant Worms
- Root Rot
- Question-answer:
- When is the best time to plant blackcurrant seedlings in autumn?
- What is the ideal location for planting blackcurrant seedlings?
- How deep should blackcurrant seedlings be planted?
- What should be added to the planting hole when planting blackcurrant seedlings?
- How far apart should blackcurrant seedlings be planted?
- Do blackcurrant seedlings need to be pruned after planting?
- Video: If you’re growing pumpkins, here’s what you need to know & a seed giveaway
Blackcurrants are a delicious and nutritious berry that can be easily grown in your own backyard. With their tart flavor and high levels of vitamin C, they make a great addition to jams, jellies, and baked goods. One of the best times to plant blackcurrant seedlings is in the autumn, when the soil is still warm and the plants have time to establish themselves before the winter.
When it comes to planting blackcurrant seedlings, timing is everything. You want to make sure that the soil is still warm and workable, but the weather isn’t too hot or dry. This is typically in the months of October and November, depending on your location. Planting in the autumn gives the plants a chance to establish their root system before the cold winter weather sets in.
Before you plant your blackcurrant seedlings, it’s important to prepare the soil. Blackcurrants prefer a well-drained, slightly acidic soil with a pH of around 6.5. You can test the pH of your soil using a simple testing kit, which can be purchased at most garden centers. If necessary, you can adjust the pH by adding organic matter, such as compost or well-rotted manure, to the soil.
“When planting your blackcurrant seedlings, make sure to dig a hole that is large enough to accommodate the roots without bending or crowding them. Place the seedling in the hole, making sure that the roots are spread out and not tangled together. Backfill the hole with soil, firming it gently around the base of the plant. Water the seedling thoroughly after planting to help settle the soil and remove any air pockets.”
Once your blackcurrant seedlings are planted, it’s important to provide them with the proper care and maintenance. Keep the soil consistently moist, but not waterlogged, and apply a layer of mulch around the base of the plants to help retain moisture and suppress weed growth. Prune the blackcurrant bushes in late winter or early spring to maintain their shape and promote healthy growth.
With the right timing and proper care, autumn planting of blackcurrants can result in a plentiful harvest of delicious berries year after year. So why not add these versatile and flavorful fruits to your garden this season?
Choosing the Right Time
When it comes to planting blackcurrant seedlings in autumn, timing is crucial. It is important to choose a time when the soil is still warm enough for the plants to establish their roots before winter. Planting too early in autumn may cause the seedlings to grow too quickly before the cold weather sets in, making them susceptible to frost damage. On the other hand, if you plant them too late, they may not have enough time to develop strong roots before winter arrives.
A good rule of thumb is to plant blackcurrant seedlings in late September or early October, depending on your specific climate and weather conditions. Ideally, the soil temperature should still be above 50°F (10°C) to ensure proper root development.
Before planting, it is recommended to prepare the soil by removing any weeds, rocks, and debris. This will help create an optimal environment for the seedlings to grow. Additionally, it is advisable to add organic matter, such as compost or well-rotted manure, to enrich the soil and improve its fertility.
If you are uncertain about the timing or conditions for planting, it is always a good idea to consult with local gardening experts or agricultural extension services. They can provide valuable insights and guidance based on your specific location and climate.
Best Conditions for Planting Blackcurrants
When planting blackcurrants, it is important to ensure that the conditions are optimal for the seedlings to thrive. Here are some guidelines on the best conditions for planting blackcurrants:
Soil
Blackcurrants prefer well-drained soil that is rich in organic matter. The soil should have a pH level between 5.5 and 7.0. It is advisable to conduct a soil test before planting to ensure that the pH level is suitable for blackcurrants. If the soil is too acidic, lime can be added to raise the pH level.
Sunlight
Blackcurrants require full sunlight to produce a bountiful harvest. It is important to choose a planting location that receives at least 6 to 8 hours of direct sunlight each day. Without adequate sunlight, the plants may not grow as vigorously and the yield may be reduced.
Spacing
When planting blackcurrants, it is important to provide adequate spacing between the seedlings. Each plant should be spaced about 3 to 4 feet apart to allow for proper air circulation and prevent the spread of diseases. This spacing also ensures that each plant has enough room to grow and develop a strong root system.
Watering
Blackcurrants require regular watering, especially during dry periods. It is important to keep the soil consistently moist but not saturated. Overwatering can lead to root rot and other diseases, so it is important to strike a balance. A layer of mulch around the plants can help retain moisture in the soil and prevent weed growth.
Fertilizer
Blackcurrants benefit from regular fertilization to ensure healthy growth and high fruit production. Before planting, it is advisable to incorporate well-rotted compost or organic matter into the soil. Additionally, it is recommended to apply a balanced fertilizer in early spring and again after harvest to provide the necessary nutrients for the plants.
Pruning
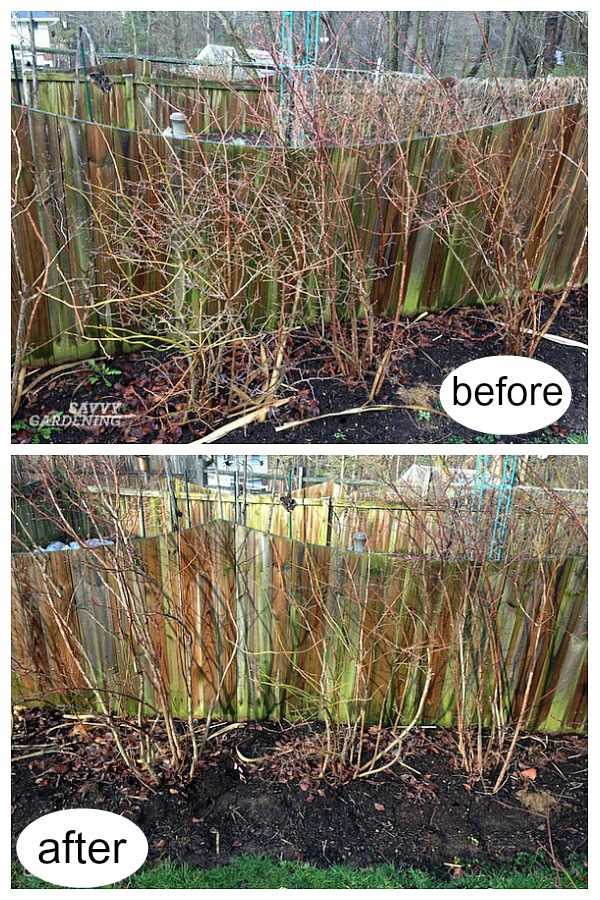
Regular pruning is essential for blackcurrants to maintain their health and productivity. Pruning should be done in late winter or early spring when the plants are dormant. It is important to remove any dead or diseased branches and thin out the center of the bush to improve airflow. This helps prevent the spread of diseases and promotes the development of strong, fruit-bearing branches.
| Condition | Optimal Requirement |
|---|---|
| Soil | Well-drained, pH level between 5.5 and 7.0 |
| Sunlight | 6 to 8 hours of direct sunlight per day |
| Spacing | 3 to 4 feet between plants |
| Watering | Consistently moist, but not saturated |
| Fertilizer | Regular application of well-rotted compost and balanced fertilizer |
| Pruning | Regular pruning in late winter or early spring |
By ensuring that the best conditions are met, you can create an ideal environment for your blackcurrant plants to grow and produce a plentiful harvest.
Preparing the Soil
Before planting blackcurrant seedlings in autumn, it is essential to prepare the soil properly. Preparing the soil ensures that the plants have a good start and helps them establish strong root systems. Here are some steps to follow:
- Choose a suitable location: Blackcurrants prefer planting locations with full sun or partial shade. Ensure the location has well-draining soil to prevent waterlogging.
- Clear the area: Remove any weeds, rocks, or debris from the planting area. These can hinder the growth of the blackcurrant plants and compete for nutrients.
- Test the soil: Conduct a soil test to determine its pH level and nutrient content. Blackcurrants prefer slightly acidic soil with a pH between 6.0 and 6.5.
- Adjust the soil pH if necessary: If the soil pH is too high, add sulfur or peat moss to lower it. If the soil pH is too low, add lime to raise it. Follow the recommendations from the soil test results.
- Amend the soil: Blackcurrants thrive in well-draining soil rich in organic matter. Add compost, well-rotted manure, or other organic amendments to improve soil structure and fertility.
- Loosen the soil: Use a garden fork or tiller to loosen the soil to a depth of at least 12 inches. This helps with root penetration and increases water drainage.
- Remove any perennial weeds: If there are any stubborn perennial weeds, such as dandelions or bindweed, dig them out or use an appropriate herbicide. Preventing the growth of these weeds will reduce competition for nutrients with the blackcurrant plants.
Following these steps will create a favorable environment for blackcurrant plants to thrive and ensure a successful autumn planting. Taking the time to prepare the soil properly will pay off in the long run, as it sets the foundation for healthy and productive plants.
Soil Preparation Techniques
Proper soil preparation is essential for the successful growth of blackcurrant seedlings. Here are a few techniques to ensure optimal soil conditions for planting:
1. Clear the area:
- Remove any weeds, rocks, or debris from the planting area.
- Clear the site of any existing vegetation or grass to prevent competition for nutrients.
2. Test the soil:
- Perform a soil test to determine the pH level and nutrient content of the soil.
- Blackcurrants prefer slightly acidic soil with a pH range of 5.5 to 7.
- If the soil pH is too low, add lime to raise it. If it’s too high, add sulfur to lower it.
3. Improve soil structure:
- Loosen the soil by digging it to a depth of about 12 inches.
- Break up any compacted soil using a garden fork or a tiller.
4. Add organic matter:
- Incorporate compost, well-rotted manure, or other organic matter into the soil.
- This will improve the soil’s fertility, structure, and moisture retention capabilities.
5. Apply fertilizers:
- Based on the soil test results, apply a balanced fertilizer or a specific formula recommended for blackcurrants.
- Follow the instructions on the fertilizer package for the correct dosage and application method.
6. Mulch the planting area:
- Apply a layer of organic mulch, such as straw or wood chips, around the blackcurrant plants.
- This will help conserve moisture, suppress weed growth, and regulate soil temperature.
7. Water the soil:
- Before planting, thoroughly water the soil to ensure it is moist but not waterlogged.
- After planting the blackcurrant seedlings, water them deeply to help establish their root systems.
By following these soil preparation techniques, you can create a favorable environment for your blackcurrant seedlings to thrive and produce healthy fruits.
Planting the Seedlings
When it comes to planting blackcurrant seedlings in the autumn, there are a few key steps to follow to ensure successful growth and development.
Step 1: Prepare the planting area
- Choose a location that receives full sun or partial shade.
- Clear the area of any weeds or grass and ensure the soil is well-drained.
- Dig a hole that is wide and deep enough to accommodate the root system of the seedling.
Step 2: Prune the seedling
- Trim any damaged or broken roots, as well as any overly long or tangled roots.
- Cut back the top growth of the seedling to about 6-8 inches (15-20 cm) above the ground.
Step 3: Plant the seedling
- Place the seedling in the prepared hole, ensuring that the roots are spread out evenly.
- Backfill the hole with soil, gently firming it around the roots to eliminate air pockets.
- Water the newly planted seedling thoroughly, making sure the soil is evenly moist.
Step 4: Mulch and support
- Apply a layer of organic mulch, such as wood chips or straw, around the base of the seedling.
- This will help conserve moisture, suppress weeds, and provide insulation during winter.
- Install a support system, such as a trellis or stakes, to protect the seedling from strong winds and promote upright growth.
Step 5: Care and maintenance
- Water the seedling regularly, especially during dry periods, to keep the soil consistently moist.
- Monitor for pests and diseases, and take appropriate action if needed.
- Prune the blackcurrant bush annually to remove dead, damaged, or overcrowded branches.
- Apply a balanced fertilizer in the spring to promote healthy growth and fruit production.
Following these steps will help ensure that your blackcurrant seedlings have the best possible start and will lead to a bountiful harvest in the future. Happy planting!
Proper Transplanting Methods
Transplanting blackcurrant seedlings in the autumn requires proper techniques to ensure their successful establishment and growth. Here are some recommended methods:
1. Choosing the Right Location
Before transplanting, select a location that receives full sun or partial shade and has well-draining soil. Avoid areas prone to waterlogging or standing water.
2. Preparing the Soil
Prepare the planting area by removing any weeds, rocks, or debris. Loosen the soil to a depth of at least 12 inches and incorporate organic matter such as compost or well-rotted manure to improve drainage and nutrient content.
3. Digging the Hole
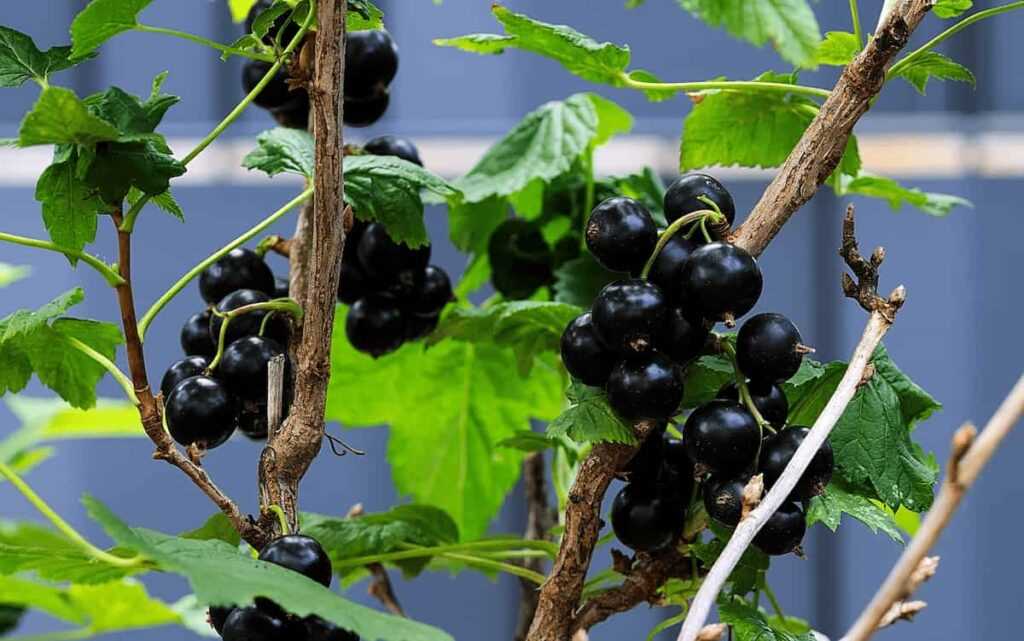
Dig a hole that is wide and deep enough to accommodate the blackcurrant seedling’s root system. The hole should be slightly larger than the root ball but not excessively deep.
4. Transplanting the Seedling
Carefully remove the blackcurrant seedling from its container, taking care not to damage the roots. Place the seedling in the prepared hole, ensuring the top of the root ball is level with or slightly above the soil surface.
5. Backfilling and Firming the Soil
Gently backfill the hole with soil, making sure to eliminate any air pockets around the roots. Lightly firm the soil around the seedling to provide stability.
6. Watering
After transplanting, thoroughly water the blackcurrant seedling to settle the soil and eliminate any remaining air pockets. Keep the soil evenly moist but not waterlogged during the establishment period.
7. Mulching
Apply a layer of organic mulch, such as wood chips or straw, around the base of the seedling to conserve moisture, suppress weeds, and regulate soil temperature.
8. Providing Support
If necessary, install stakes or supports to provide the blackcurrant seedling with additional support and protection against wind or heavy fruit loads.
9. Regular Maintenance
Monitor the seedling for signs of stress or nutrient deficiencies. Keep the area around the seedling weed-free and provide regular watering, especially during dry periods.
By following these proper transplanting methods, you can help ensure the successful establishment and growth of blackcurrant seedlings planted in the autumn.
Caring for Young Plants
- Watering: It is important to keep the soil around the young blackcurrant plants consistently moist. Water the plants regularly, especially during dry periods. Be careful not to overwater, as excessive moisture can lead to root rot.
- Mulching: Apply a layer of organic mulch around the base of the plants to help retain moisture, suppress weeds, and regulate soil temperature. Mulching also helps to provide nutrients as the mulch decomposes over time.
- Fertilizing: Young blackcurrant plants benefit from regular fertilization to ensure healthy growth. Use a balanced, slow-release fertilizer or organic compost to nourish the plants. Follow the manufacturer’s instructions or consult with a gardening expert for specific dosage recommendations.
- Pruning: In the first couple of years, it is important to prune the young blackcurrant plants to help shape their growth and encourage strong, sturdy branches. Remove any weak or damaged branches, as well as any branches that are crossing or overcrowding. This will help improve air circulation and prevent disease.
- Weed Control: Regularly check the planting area for weeds and remove them promptly. Weeds compete with the young blackcurrant plants for nutrients and water, so it is important to keep the planting area weed-free.
- Pest and Disease Monitoring: Keep an eye out for any signs of pests or diseases on the young blackcurrant plants. Common pests include aphids and mites, while common diseases include powdery mildew and leaf spot. If necessary, take appropriate measures to control and treat these issues.
By following these care tips, you can help ensure the healthy growth and development of your young blackcurrant plants. With proper care, they will thrive and provide you with a bountiful harvest in the future.
Watering and Fertilization Tips
Proper watering and fertilization are essential for the successful growth and development of blackcurrant seedlings. Here are some important tips to keep in mind:
Watering
- Blackcurrant seedlings require regular watering, especially during the first few weeks after planting.
- Water your blackcurrants deeply and thoroughly, ensuring that the root zone is adequately saturated.
- Watering should be done at the base of the plants to avoid wetting the leaves, as this can lead to diseases.
- During dry periods, increase the frequency of watering to prevent the soil from drying out completely.
- Be careful not to overwater the plants, as this can lead to root rot. The soil should be moist but not waterlogged.
Fertilization
- Apply a balanced fertilizer to the soil around the blackcurrant seedlings in early spring, before new growth appears. This will provide the necessary nutrients for healthy development.
- Use a fertilizer with a higher nitrogen content for the first year to promote strong shoot growth.
- In subsequent years, switch to a balanced fertilizer or one with a higher phosphorus content to promote fruit production.
- Avoid applying fertilizers too close to the stems of the plants, as this can cause damage to the roots.
- Follow the manufacturer’s instructions for application rates and timing.
Additional Tips
Here are a few additional tips to help ensure the success of your blackcurrant seedlings:
- Spread a layer of organic mulch around the base of the plants to help retain moisture, suppress weeds, and regulate soil temperature.
- Regularly monitor the moisture level of the soil and adjust your watering schedule accordingly.
- Inspect the plants regularly for any signs of pests or diseases and take appropriate action to prevent or treat them.
- Prune the blackcurrant plants during the dormant season to improve airflow and remove any damaged or diseased branches.
By following these watering and fertilization tips, you can ensure that your blackcurrant seedlings have the best possible start and grow into healthy, productive plants.
Protecting the Plant from Pests
Planting blackcurrant seedlings in autumn can expose them to various pests, which can hinder their growth and damage the overall health of the plant. However, taking preventative measures can help protect the plants from pests.
1. Clear the area:
Before planting blackcurrant seedlings, it is important to clear the area from any debris or weeds. This will reduce the hiding places for pests and eliminate potential habitats.
2. Use netting or fencing:
Netting or fencing can be used to create a physical barrier around the blackcurrant plants. This can help prevent pests such as birds, rabbits, and deer from accessing the plants and causing damage.
3. Monitor for pests:
Regularly inspect the blackcurrant plants for signs of pests such as aphids, mites, or caterpillars. Early detection can help prevent the infestation from spreading and causing extensive damage.
4. Use natural insecticides or repellents:
If pests are present, consider using natural insecticides or repellents to control their populations. These can include neem oil, insecticidal soap, or homemade sprays made from ingredients such as garlic or chili peppers.
5. Employ companion planting:
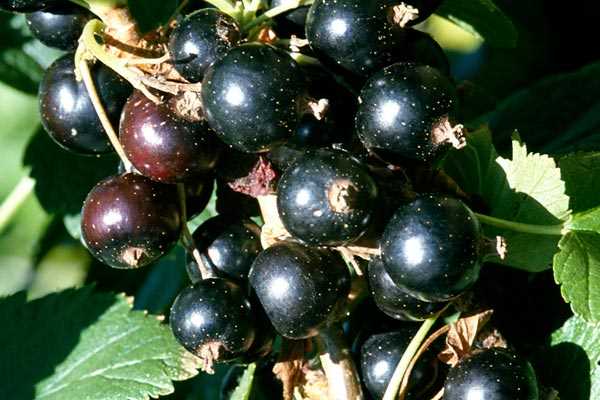
Companion planting involves planting certain species of plants near blackcurrants to repel pests or attract beneficial insects. For example, marigolds can deter nematodes, while planting lavender can attract bees for pollination.
6. Maintain good hygiene:
Keeping the planting area clean and free from fallen or diseased leaves can help prevent pests from hiding or breeding. Regularly remove any affected leaves or fruits and dispose of them properly.
7. Encourage natural predators:
Invite natural predators such as ladybugs, lacewings, or birds into the garden to help control pest populations. Providing suitable habitats such as birdhouses or planting flowers that attract beneficial insects can help create a balanced ecosystem.
8. Regularly prune:
Pruning blackcurrant plants can help improve air circulation and reduce the risk of fungal diseases. It can also remove any branches or leaves that may be infested with pests.
By implementing these precautions and strategies, blackcurrant plants can be protected from pests, allowing them to thrive and produce a healthy harvest.
Common Pests and Prevention Methods
Blackcurrants are susceptible to various pests that can damage the plants and reduce fruit yield. Here are some of the most common pests that you may encounter when growing blackcurrants, along with prevention methods to keep them at bay:
Aphids
- Description: Aphids are small, soft-bodied insects that feed on the sap of blackcurrant plants. They can cause stunted growth, yellowing leaves, and distorted fruits.
- Prevention: Regularly inspect your plants for signs of aphids and apply sticky traps or insecticidal soap to control their population. Encourage natural predators like ladybugs and lacewings to feed on aphids.
Currant Bud Mites
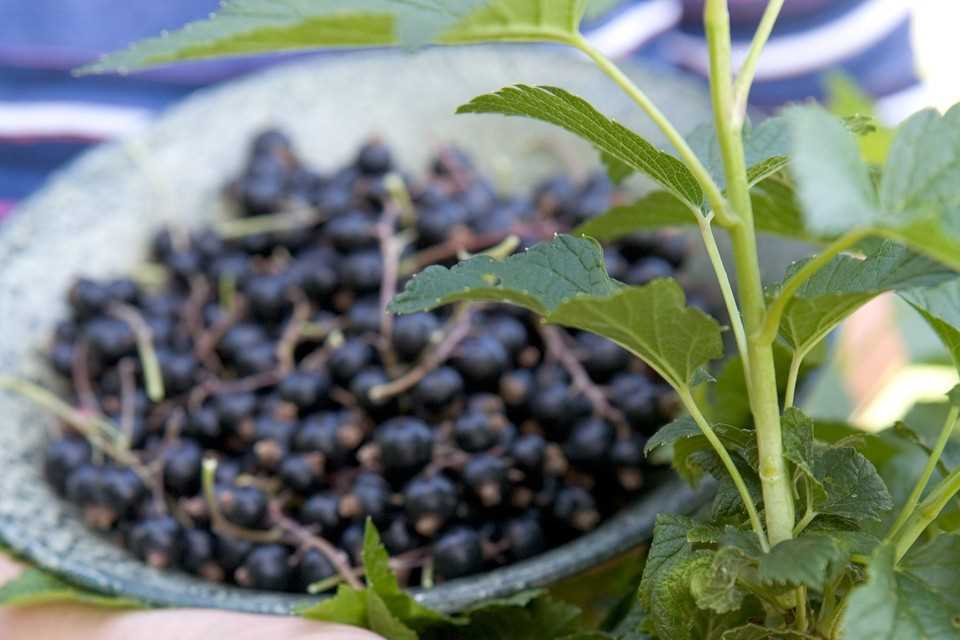
- Description: Currant bud mites are microscopic pests that infest the buds of blackcurrant plants. They cause distorted buds, reduced fruit size, and can lead to plant decline.
- Prevention: Prune and destroy any infested buds during the dormant season. Avoid planting blackcurrant varieties that are highly susceptible to bud mite infestation.
Blackcurrant Sawflies
- Description: Blackcurrant sawflies are small caterpillar-like larvae that feed on blackcurrant leaves. They can skeletonize the leaves, which reduces the plant’s ability to produce energy through photosynthesis.
- Prevention: Handpick and destroy any sawflies or larvae that you find on the plants. Introduce natural predators like birds or parasitic wasps to control the population.
Redcurrant Worms
- Description: Redcurrant worms are green, white, or pink caterpillar-like larvae that feed on blackcurrant leaves. They can defoliate the plant and reduce fruit production.
- Prevention: Inspect your plants regularly for signs of redcurrant worms and handpick them off. You can also use insecticidal sprays or organic insecticides to control their population.
Root Rot
- Description: Root rot is a fungal disease that affects the roots of blackcurrant plants. It can cause wilting, yellowing of leaves, and stunted growth.
- Prevention: Plant blackcurrants in well-draining soil and avoid overwatering. Improve soil drainage if necessary. Remove and destroy any infected plants to prevent the spread of the disease.
By being vigilant and implementing these prevention methods, you can protect your blackcurrant plants from common pests and diseases, ensuring a healthy and productive harvest.
Question-answer:
When is the best time to plant blackcurrant seedlings in autumn?
The best time to plant blackcurrant seedlings in autumn is usually from late October to early November.
What is the ideal location for planting blackcurrant seedlings?
Blackcurrant seedlings thrive in a sunny or partially shaded location with well-drained soil and good air circulation.
How deep should blackcurrant seedlings be planted?
Blackcurrant seedlings should be planted at the same level they were grown in the nursery, with the bud union or graft union just above the soil line.
What should be added to the planting hole when planting blackcurrant seedlings?
When planting blackcurrant seedlings, it is recommended to add compost or well-rotted manure to the planting hole to improve soil fertility and drainage.
How far apart should blackcurrant seedlings be planted?
Blackcurrant seedlings should be planted about 1.5-2 meters apart to allow for adequate air circulation and future growth.
Do blackcurrant seedlings need to be pruned after planting?
Yes, blackcurrant seedlings should be pruned after planting by removing any broken or damaged shoots and cutting back the remaining shoots to about 10-15cm above ground level.
