- Choosing the Right Phlox Seeds
- 1. Variety
- 2. Soil Type
- 3. Sun Exposure
- 4. Climate
- 5. Growing Conditions
- Soil Preparation for Phlox Seeds
- 1. Choose a Well-Draining Location
- 2. Clear the Area
- 3. Loosen the Soil
- 4. Amend the Soil
- 5. Apply Fertilizer
- 6. Level the Soil
- 7. Water the Soil
- 8. Sow the Seeds
- 9. Mulch the Area
- 10. Water Regularly
- Sowing Phlox Seeds
- 1. Timing
- 2. Seed Preparation
- 3. Soil Preparation
- 4. Sowing
- 5. Watering
- 6. Germination
- 7. Transplanting
- 8. Harden Off
- 9. Planting out
- 10. Care
- Providing the Right Conditions for Phlox Seed Germination
- 1. Temperature
- 2. Light
- 3. Moisture
- 4. Soil
- 5. Stratification (Optional)
- 6. Patience
- Transplanting Phlox Seedlings
- Caring for Phlox Plants
- 1. Planting
- 2. Watering
- 3. Fertilizing
- 4. Pruning
- 5. Disease and Pest Control
- 6. Mulching
- Dealing with Common Phlox Pests and Diseases
- Pests
- Diseases
- Harvesting and Saving Phlox Seeds
- 1. Timing
- 2. Obtaining Seeds
- 3. Drying Seeds
- 4. Removing Chaff
- 5. Storing Seeds
- 6. Labeling
- Questions and Answers:
- What is phlox?
- When is the best time to plant phlox seeds?
- Do phlox plants require a lot of sunlight?
- How often should I water phlox plants?
- Can phlox plants tolerate cold temperatures?
- Do phlox plants require any fertilizer?
- How long does it take for phlox seeds to germinate?
- Videos: How grow Phlox from seed ✨
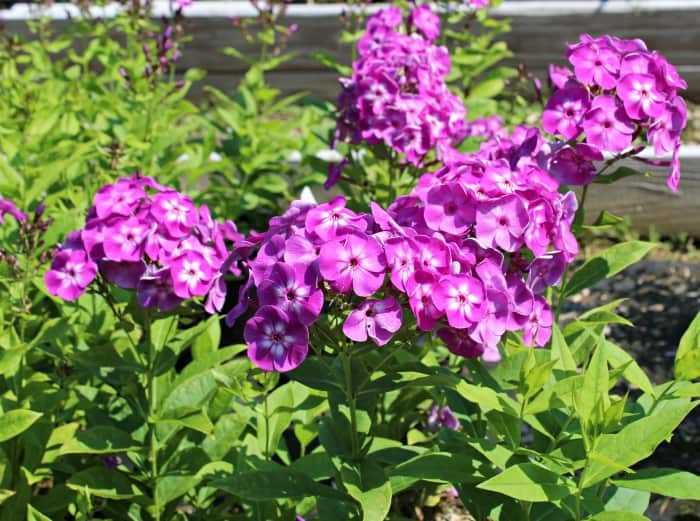
Phlox, also known as garden phlox or summer phlox, is a beautiful and versatile flower that can be grown from seeds. With its vibrant colors and fragrant blooms, phlox adds a touch of elegance to any garden or landscape. If you’re interested in growing phlox from seeds, this complete guide will provide you with all the information you need to get started.
Choosing the Right Seeds
When it comes to growing phlox from seeds, it’s important to start with high-quality seeds. Look for seeds that are fresh and have a high germination rate. You can find a wide variety of phlox seeds at nurseries, garden centers, and online stores. Choose a mix of colors or select specific varieties depending on your preference.
Pro tip: Consider purchasing a few extra seeds to ensure a higher probability of germination.
Preparing the Soil
Phlox thrives in well-draining soil that is rich in organic matter. Before sowing the seeds, prepare the soil by removing any weeds or debris and loosening it with a garden fork. Incorporate compost or well-rotted manure to improve soil fertility and drainage. Phlox prefers a slightly acidic soil with a pH level between 6.0 and 7.0.
Did you know? Phlox is a native North American plant that has been cultivated for centuries. It was a popular choice for early American settlers due to its beauty and versatility.
Choosing the Right Phlox Seeds
When it comes to growing phlox from seeds, selecting the right seeds is essential for a successful garden. Here are some factors to consider when choosing phlox seeds:
1. Variety

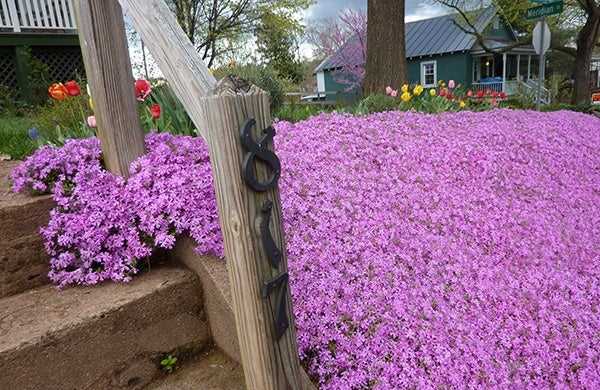
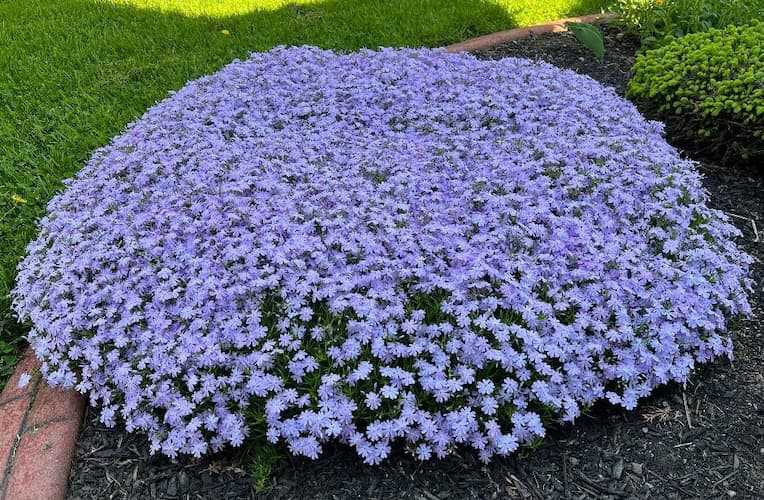
Phlox comes in a wide variety of colors, shapes, and sizes. There are tall garden phlox, creeping phlox, and even dwarf phlox varieties. Consider the overall look and feel you want for your garden and choose a variety that suits your preferences.
2. Soil Type
Phlox thrives in well-draining soil and prefers a slightly acidic to neutral pH. Before choosing your phlox seeds, determine the type of soil in your garden and ensure that it is suitable for growing phlox. If your soil is heavy clay or sandy, you may need to amend it with organic matter to improve its drainage and fertility.
3. Sun Exposure
Phlox is a sun-loving plant that requires at least 6 hours of direct sunlight each day to thrive. Before selecting your phlox seeds, assess the sun exposure in your garden and choose a variety that matches your available sunlight. Some phlox varieties can tolerate partial shade, but they may not bloom as profusely as those in full sun.
4. Climate
Consider your climate when choosing phlox seeds. Some phlox varieties are more cold-hardy, while others are better suited for warmer climates. Check the hardiness zone information for each variety to ensure that it is suitable for your region. This will help ensure that your phlox seeds have the best chance of germinating and thriving in your garden.
5. Growing Conditions
Lastly, consider the growing conditions in your garden. Phlox is generally a low-maintenance plant, but some varieties may have specific needs. Take into account factors like humidity, pest resistance, and disease tolerance when selecting your phlox seeds. This will help ensure that your phlox plants are healthy and will perform well in your garden.
| Factor | Considerations |
|---|---|
| Variety | Choose a variety that suits your preferences and garden style. |
| Soil Type | Ensure your soil is well-draining and has a slightly acidic to neutral pH. |
| Sun Exposure | Assess the sun exposure in your garden and select a variety that matches your available sunlight. |
| Climate | Check the hardiness zone information for each variety to ensure it is suitable for your region. |
| Growing Conditions | Consider factors like humidity, pest resistance, and disease tolerance for optimal plant health. |
Soil Preparation for Phlox Seeds
Before planting phlox seeds, it is important to prepare the soil to provide optimal growing conditions for the plants. Here are the steps to properly prepare the soil:
1. Choose a Well-Draining Location
Phlox plants prefer well-draining soil to prevent waterlogging, as excessive moisture can lead to root rot. Select a location in your garden that has good drainage, or consider adding drainage amendments to the soil if necessary.
2. Clear the Area
Remove any weeds, rocks, or debris from the area where you plan to plant your phlox seeds. This will provide a clean and clear space for the seeds to grow and reduce competition for nutrients and water.
3. Loosen the Soil
Using a garden fork or a tiller, loosen the soil to a depth of at least 6 inches. This will help create a loose, well-aerated soil structure that promotes healthy root development and allows the phlox seeds to establish easily.
4. Amend the Soil

Phlox plants prefer slightly acidic to neutral soil with a pH range of 6.0 to 7.0. Test the soil pH and amend it if necessary to achieve the desired range. Adding organic matter, such as compost or well-rotted manure, can also improve the soil’s fertility and moisture retention capabilities.
5. Apply Fertilizer
Before planting the phlox seeds, apply a balanced fertilizer according to the package instructions. This will provide essential nutrients that will help the phlox plants thrive and promote vigorous growth.
6. Level the Soil
Rake the soil to remove any large clumps and create a smooth, level surface. This will make it easier to sow the phlox seeds evenly and ensure uniform germination and growth.
7. Water the Soil
Before planting the phlox seeds, thoroughly water the soil to ensure it is evenly moist. This will help the seeds germinate and establish quickly.
8. Sow the Seeds
Following the packet instructions, sow the phlox seeds evenly over the prepared soil. Lightly press the seeds into the soil, but do not bury them too deep, as phlox seeds require light to germinate. Space the seeds according to the recommended spacing guidelines.
9. Mulch the Area
Spread a layer of organic mulch, such as straw or wood chips, over the planted area. This will help retain moisture in the soil, suppress weed growth, and protect the emerging phlox seedlings.
10. Water Regularly
Keep the soil consistently moist, but not waterlogged, during the germination and establishment period. Water the plants regularly, especially during dry spells, to ensure they receive adequate moisture for healthy growth.
By following these soil preparation steps, you can create an ideal growing environment for your phlox seeds and help them thrive and flourish in your garden.
Sowing Phlox Seeds
Sowing phlox seeds is a simple and rewarding process that can be done by gardeners of all skill levels. By starting phlox from seeds, you have control over the varieties you grow and can ensure the health and vigor of your plants. Follow these steps for successful phlox seed sowing:
1. Timing

Phlox seeds should be sown in early spring or late fall. Sowing in spring allows the plants to establish before the heat of summer, while sowing in fall takes advantage of natural cold stratification, aiding in germination.
2. Seed Preparation
Before sowing, it is beneficial to soak the phlox seeds in water overnight. This softens the seed coat and improves germination rates. Additionally, scarifying or nicking the seeds with a small file or sandpaper can further enhance germination.
3. Soil Preparation
Prepare a well-draining soil mix for sowing your phlox seeds. A mix of equal parts peat moss, perlite, and vermiculite works well. Fill seed trays or small pots with the soil mix, leaving about half an inch of space at the top.
4. Sowing
Spread the phlox seeds evenly over the soil surface, aiming for about 2-3 seeds per square inch. Lightly press the seeds into the soil, ensuring good seed-to-soil contact. Cover the seeds with a thin layer of soil, approximately 1/8 inch deep.
5. Watering
Maintain moisture in the soil by misting it gently with water or using a spray bottle. Avoid overwatering, as excessive moisture can lead to damping-off disease. Keep the soil consistently moist until the seeds germinate.
6. Germination
Phlox seeds typically germinate within 10-20 days, depending on the variety. Place the seed trays or pots in a warm and brightly lit location, but avoid direct sunlight. A constant temperature between 60-70°F (15-20°C) is ideal for germination.
7. Transplanting
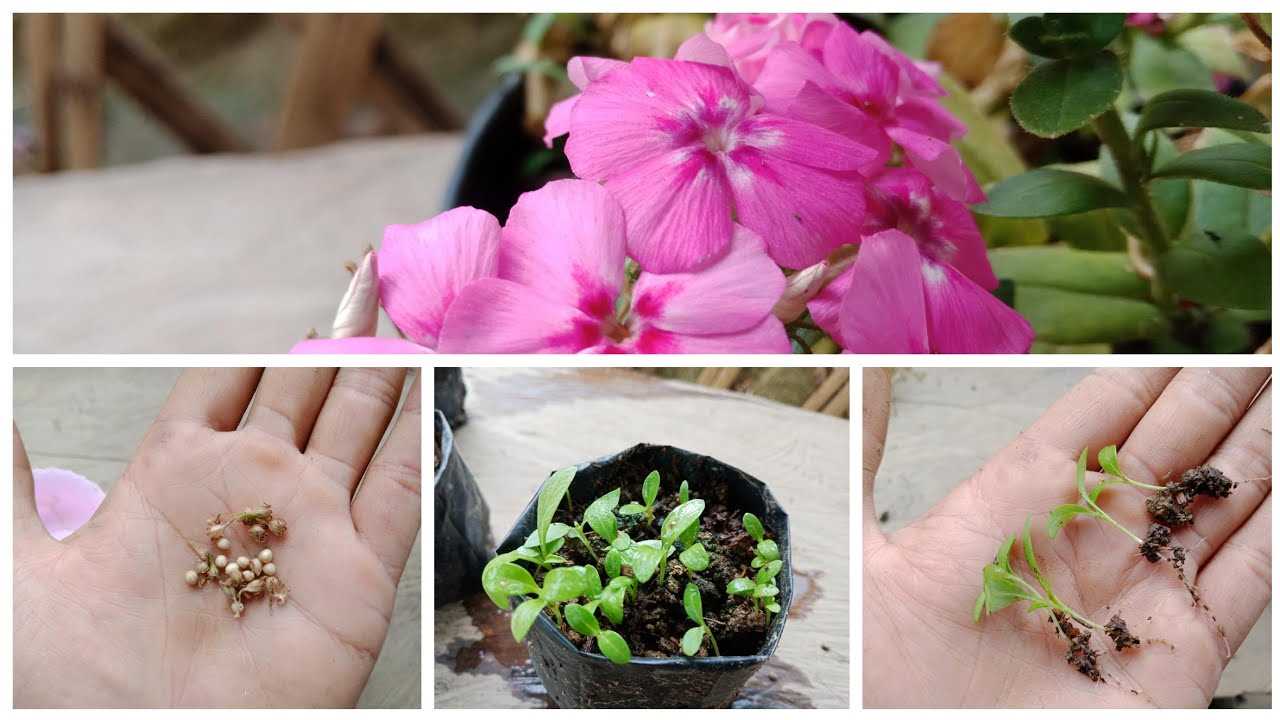
Once the phlox seedlings have developed their first true leaves, they can be transplanted into larger pots or directly into the garden. If transplanting outdoors, prepare the soil by removing weeds and incorporating organic matter.
8. Harden Off
Gradually acclimate the seedlings to outdoor conditions over a period of 7-10 days. Start by placing them in a sheltered location for a few hours each day, gradually increasing the exposure to direct sunlight and outdoor temperatures.
9. Planting out
Choose a sunny location in your garden with well-draining soil. Dig a hole slightly larger than the root ball of the phlox seedling and place it in the hole. Backfill with soil, gently firming it around the roots.
10. Care
Water the newly planted phlox thoroughly and monitor the soil moisture regularly. Mulch around the plants to conserve moisture and suppress weeds. Deadhead spent flowers to encourage continuous blooming.
By following these steps, you can successfully sow phlox seeds and enjoy the beautiful and fragrant blooms of this versatile plant in your garden.
Providing the Right Conditions for Phlox Seed Germination
When it comes to germinating phlox seeds successfully, it is important to create the right conditions for the seeds to sprout. Here are some key factors to consider:
1. Temperature
Phlox seeds require a consistent temperature range of 60-70°F (15-21°C) for optimal germination. This temperature range is ideal for promoting seed sprouting. You can use a seed starting heat mat to maintain the desired temperature.
2. Light
Phlox seeds do not require light to germinate. In fact, they actually prefer darkness during the germination process. Therefore, it is important to cover the seeds with a thin layer of soil or vermiculite to keep them in the dark. Once the seeds have germinated and sprouted, you can gradually introduce them to light.
3. Moisture
Keeping the seeds moist is essential for successful germination. However, it is equally important to avoid overwatering, as this can lead to rotting. The best approach is to mist the soil surface with water to keep it moist, but not saturated. Use a spray bottle or a mister to distribute the water evenly.
4. Soil
Phlox seeds prefer well-draining soil that is lightweight and fertile. A good option is to use a seed starting mix or a mixture of equal parts perlite and vermiculite. This type of soil will provide the right balance of moisture retention and drainage, promoting healthy seed germination.
5. Stratification (Optional)
Some phlox varieties may benefit from a process called stratification, which involves exposing the seeds to cold temperatures for a period of time to simulate winter conditions. This can help break seed dormancy and improve germination rates. If stratification is recommended for the specific variety of phlox you are growing, follow the instructions provided.
6. Patience
Germinating phlox seeds can take anywhere from 10 to 21 days, depending on the variety and germination conditions. During this time, it is important to be patient and avoid disturbing the seeds. Check the moisture levels regularly and maintain the desired temperature until the seeds sprout.
By providing the right conditions of temperature, darkness, moisture, and soil, you can increase the chances of successful phlox seed germination. With a little patience and proper care, you will soon see your phlox seedlings emerge, ready to grow into beautiful plants.
Transplanting Phlox Seedlings
Transplanting phlox seedlings is an important step in their growth process, as it allows them to establish deep roots and create a stronger foundation for future growth. Here are some steps to follow when transplanting phlox seedlings:
- Choose the right time: Transplant phlox seedlings after the last frost date in your area. This is usually in early spring or late fall, depending on your climate.
- Prepare the soil: Phlox prefers well-draining soil with a pH between 6.0 and 7.0. Amend the soil with compost or well-rotted manure to improve its fertility and drainage.
- Choose a planting location: Select a location that receives full sun to partial shade. Phlox can tolerate some shade, but they prefer at least 6 hours of direct sunlight per day.
- Water the seedlings: Before transplanting, thoroughly water the seedlings to ensure they are well-hydrated and their roots are moist.
- Dig a hole: Dig a hole in the prepared soil that is deep enough and wide enough to accommodate the root ball of the seedling.
- Remove the seedling: Gently loosen the soil around the seedling and carefully lift it out, trying to keep the root ball intact.
- Place the seedling in the hole: Place the seedling in the hole, making sure the top of the root ball is level with the surface of the soil.
- Backfill the hole: Backfill the hole with soil, gently firming it around the root ball to eliminate any air pockets.
- Water thoroughly: After transplanting, water the seedling thoroughly to help settle the soil and promote root establishment.
- Mulch and protect: Apply a layer of organic mulch around the base of the plant to conserve moisture, suppress weeds, and protect the roots.
By following these steps, you can successfully transplant phlox seedlings and ensure their healthy growth and development. Remember to monitor the plants regularly and provide adequate water and care to help them thrive.
Caring for Phlox Plants
Phlox plants are known for their beautiful and vibrant flowers. Proper care is essential to keep these plants healthy and thriving. Here are some tips on caring for phlox plants:
1. Planting
- Choose a location that receives at least 6 hours of sunlight per day.
- Ensure the soil is well-drained and fertile.
- Dig a hole that is slightly larger than the root ball of the phlox plant.
- Place the plant in the hole and backfill with soil, ensuring that the crown of the plant is level with the ground.
- Water the plant thoroughly after planting.
2. Watering
- Phlox plants require regular watering, especially during dry periods.
- Water deeply, making sure the soil is moist but not waterlogged.
- It is better to water deeply once a week rather than lightly every day.
- Avoid overhead watering, as wet foliage can lead to diseases.
3. Fertilizing
- Phlox plants benefit from regular fertilization to promote healthy growth and abundant blooms.
- Use a balanced fertilizer with an equal ratio of nitrogen, phosphorus, and potassium.
- Apply the fertilizer in early spring and again in mid-summer.
- Follow the package instructions for the correct dosage.
4. Pruning
- Pruning phlox plants helps maintain their shape and promotes bushier growth.
- Remove spent flowers to encourage more blooms.
- In late fall, cut back the foliage to about 3 inches above the ground.
- This will help prevent disease and prepare the plants for winter.
5. Disease and Pest Control
- Phlox plants are susceptible to diseases such as powdery mildew and root rot.
- To prevent disease, avoid overhead watering and provide good air circulation.
- If necessary, treat with a fungicide according to the manufacturer’s instructions.
- Monitor for pests like aphids and caterpillars, and treat as needed.
6. Mulching
- Applying a layer of organic mulch around phlox plants helps conserve moisture, suppress weeds, and regulate soil temperature.
- Use a 2-3 inch layer of organic material such as compost or wood chips.
- Avoid piling mulch against the stems of the plants to prevent rot.
By following these care tips, you can enjoy the beauty of phlox plants in your garden for years to come.
Dealing with Common Phlox Pests and Diseases
Phlox plants are generally quite resilient and can withstand various pests and diseases. However, there are a few common ones that gardeners should be aware of and take measures to prevent or control.
Pests
Aphids: Aphids are small, soft-bodied insects that feed on plant sap. They can be found on the undersides of leaves and can cause leaf curling, stunted growth, and the transmission of diseases. To control aphids, you can spray the plants with a strong jet of water or use insecticidal soap.
Spider Mites: Spider mites are tiny pests that suck sap from the undersides of leaves, resulting in yellow or brown spots and webbing. To control spider mites, you can spray the plants with water regularly and use insecticidal soap if necessary.
Slugs and Snails: Slugs and snails can damage phlox plants by eating through leaves and stems. Handpicking them off the plants and creating physical barriers like copper tape can help control these pests. You can also use slug pellets or beer traps as a deterrent.
Diseases
Powdery Mildew: Powdery mildew is a fungal disease that appears as a white, powdery coating on the leaves. It thrives in humid conditions and can cause foliage distortion and reduced plant vigor. To prevent powdery mildew, ensure good air circulation around the plants and avoid overhead watering. If powdery mildew does appear, you can treat it with a fungicidal spray.
Root Rot: Root rot is a fungal disease that affects the roots, causing them to rot and turn brown or black. It can be caused by overwatering or poorly draining soil. To prevent root rot, ensure that the soil is well-drained and avoid overwatering. If root rot occurs, you may need to remove affected plants and improve soil drainage.
Leaf Spot: Leaf spot is a fungal disease that causes dark spots or lesions on the leaves. It can weaken the plant and lead to defoliation. To prevent leaf spot, water the plants at the base and remove any infected leaves. Fungicidal sprays can also be used to control leaf spot.
| Pests | Diseases |
|---|---|
| Aphids | Powdery Mildew |
| Spider Mites | Root Rot |
| Slugs and Snails | Leaf Spot |
By being vigilant and taking appropriate action, you can effectively manage common pests and diseases that may affect your phlox plants, ensuring their health and vitality.
Harvesting and Saving Phlox Seeds

Harvesting and saving phlox seeds is a simple process that allows you to grow new plants in the future. Follow these steps to collect and store phlox seeds:
1. Timing
Wait until the phlox flowers have faded and the seed heads have turned brown. This usually occurs in late summer or early fall.
2. Obtaining Seeds
Cut the seed heads from the plant using sharp, clean scissors or garden shears. Place the seed heads in a paper bag or a container with good air circulation.
3. Drying Seeds
Leave the seed heads in a dry and well-ventilated area for about one week. This allows the seeds to fully dry out and separate from the seed heads.
4. Removing Chaff
Once the seeds are completely dry, gently crush the seed heads to release the seeds. Separate the seeds from any remaining chaff or debris by using a sieve or a fine-mesh strainer.
5. Storing Seeds
Store the phlox seeds in a cool, dark, and dry place. Use airtight containers such as glass jars or seed envelopes to prevent moisture or humidity from damaging the seeds.
6. Labeling
Don’t forget to label the containers with the name of the phlox variety and the date of collection. This will help you keep track of the seeds and their viability.
With proper harvesting and storage, phlox seeds can remain viable for several years. Remember to check the seeds periodically for any signs of mold or deterioration and discard any damaged or non-viable seeds.
Questions and Answers:
What is phlox?
Phlox is a flowering plant that belongs to the Polemoniaceae family. It comes in a variety of colors and is known for its fragrant blossoms.
When is the best time to plant phlox seeds?
The best time to plant phlox seeds is in the early spring, after the danger of frost has passed. This allows the plants to establish themselves before the hot summer months.
Do phlox plants require a lot of sunlight?
Yes, phlox plants require at least 6 hours of direct sunlight per day to thrive. They can tolerate some shade, but less sunlight may result in fewer blooms.
How often should I water phlox plants?
Phlox plants prefer evenly moist soil, so it’s important to water them regularly, especially during dry spells. Aim to water them about once a week, but adjust the frequency as needed based on the weather and soil conditions.
Can phlox plants tolerate cold temperatures?
Phlox plants are generally hardy and can tolerate light frosts. However, prolonged exposure to freezing temperatures can damage or kill the plants. It’s important to provide them with adequate protection during cold spells.
Do phlox plants require any fertilizer?
Phlox plants benefit from regular fertilization to promote healthy growth and abundant blooms. Apply a balanced, slow-release fertilizer in early spring, and then again in mid-summer. Be sure to follow the package instructions for application rates.
How long does it take for phlox seeds to germinate?
Phlox seeds typically take about 10 to 21 days to germinate. However, germination time can vary depending on the variety of phlox and the conditions in which they are grown.


