- What are large-flowered portulaca seedlings?
- Why sow portulaca on seedlings?
- Preparation
- 1. Choose a suitable planting location
- 2. Prepare the soil
- 3. Sow the seeds at the right time
- 4. Soak the seeds (optional)
- 5. Sow the seeds
- 6. Water and care for the seedlings
- Choosing the right pot or tray
- Selecting the right soil
- Sowing process
- 1. Prepare the seeds
- 2. Select the right container
- 3. Sow the seeds
- 4. Provide the right environment
- 5. Transplanting the seedlings
- 6. Maintenance and care
- Preparing the seeds
- Sowing the seeds
- 1. Selecting the seeds
- 2. Preparing the soil
- 3. Sowing the seeds
- 4. Watering
- 5. Providing warmth and light
- 6. Germination
- 7. Transplanting
- 8. Hardening off
- 9. Planting outdoors
- 10. Care and maintenance
- Caring for the seedlings
- 1. Watering
- 2. Providing sunlight
- 3. Fertilizing
- 4. Transplanting
- 5. Weeding and mulching
- 6. Protecting from pests
- Questions and Answers:
- What is portulaca?
- Can I sow large-flowered portulaca directly in the garden?
- What are the ideal conditions for sowing large-flowered portulaca seeds?
- How do I sow large-flowered portulaca seeds indoors?
- When should I transplant the portulaca seedlings into the garden?
- Are there any special care tips for growing large-flowered portulaca seedlings?
- Videos: Beautiful DIY vertical hanging garden growing Portulaca (Mossrose) for small spaces
Portulaca, also known as moss rose or purslane, is a beautiful and low-maintenance flowering plant that can add vibrant colors to any garden or landscape. One of the most popular varieties of portulaca is the large-flowered portulaca, which features stunning and showy blooms in a wide range of colors. While portulaca can be grown from seeds directly in the ground, starting them indoors as seedlings can help ensure a successful and early bloom.
Step 1: Prepare the Seeds
Before sowing the large-flowered portulaca seeds, it is important to prepare them properly. Fill a small bowl with warm water and place the seeds in it. Let them soak for about 24 hours, which will help soften the outer coat and promote better germination.
Tip: If you have a large quantity of seeds, you can place them in a wet paper towel instead of using a bowl of water.
Step 2: Choose the Right Potting Mix
Portulacas prefer well-draining soil, so it’s important to choose a potting mix that provides good drainage. Look for a mix specifically designed for cacti and succulents, or create your own mix by combining equal parts of sand, peat moss, and perlite.
Expert Tip: Add some crushed eggshells to the potting mix to provide extra calcium, which can promote stronger root development.
Step 3: Sow the Seeds
Fill seed trays or small pots with the chosen potting mix, leaving about half an inch of space at the top. Spread the large-flowered portulaca seeds evenly over the surface of the soil and gently press them down, ensuring good seed-to-soil contact. Mist the soil with water to keep it slightly moist.
Pro Tip: To speed up germination, you can cover the seeds with a thin layer of vermiculite or fine sand.
What are large-flowered portulaca seedlings?
Large-flowered portulaca, also known as Portulaca grandiflora, is a beautiful flowering plant that belongs to the family Portulacaceae. It is native to hot and dry regions of South America, but it is commonly grown as an annual in many parts of the world.
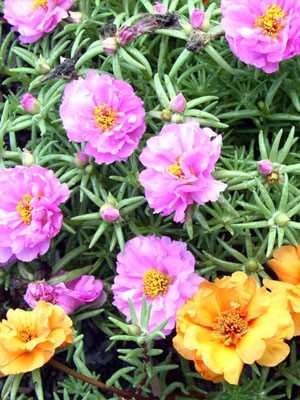
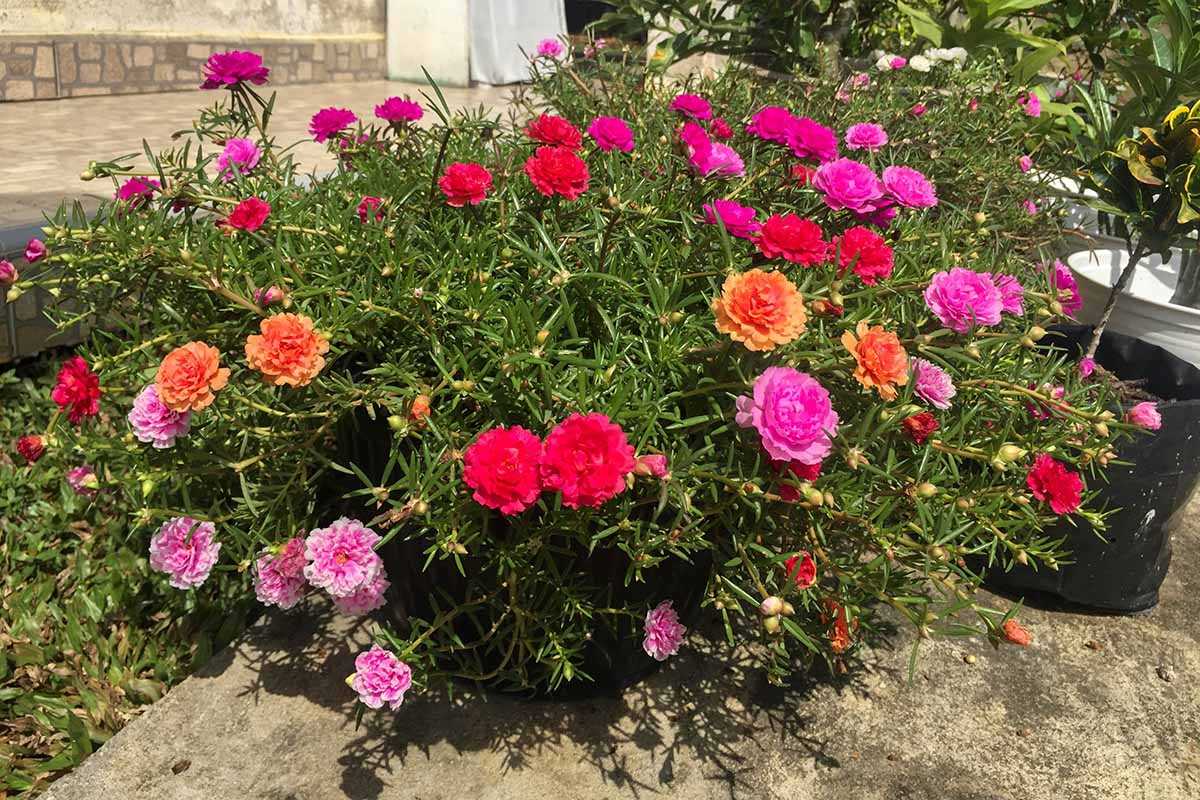
Large-flowered portulaca seedlings are young plants that emerge from the seeds of the portulaca plant. These seedlings are known for their vibrant and colorful flowers, which come in a wide range of hues including red, pink, yellow, orange, and white.
The leaves of large-flowered portulaca seedlings are succulent and fleshy, helping the plant retain moisture in hot and dry conditions. The flowers are composed of multiple petals and are typically saucer-shaped or bowl-shaped, adding to their attractiveness.
Large-flowered portulaca seedlings are relatively easy to grow and care for, making them a popular choice for gardeners and landscape designers. They thrive in full sun and well-draining soil, and they are drought-tolerant, making them ideal for areas with limited water availability.
These seedlings can be used in various settings, including flower beds, containers, hanging baskets, and rock gardens. Their low-growing and spreading habit also makes them suitable for ground covers.
Large-flowered portulaca seedlings can be started from seeds, which are small and black in color. The seeds should be sown directly in the desired location after the threat of frost has passed. The seedlings will emerge within a couple of weeks and will start flowering in about 8 to 10 weeks, depending on the growing conditions.
Overall, large-flowered portulaca seedlings are a versatile and beautiful addition to any garden or landscape. With their striking flowers and ability to thrive in hot and dry conditions, they are sure to attract attention and add a pop of color to any setting.
Why sow portulaca on seedlings?
Portulaca is a beautiful and vibrant flowering plant that can add a splash of color to any garden or landscape. It is known for its large and showy flowers that come in a variety of colors, including red, pink, yellow, white, and purple. Sowing portulaca on seedlings can be a great way to ensure a successful and healthy growth of these large-flowered plants.
There are several reasons why sowing portulaca on seedlings is beneficial:
- Controlled environment: By sowing portulaca on seedlings indoors, you can provide them with a controlled and favorable environment for germination and early growth. This way, you can protect the seeds from harsh weather conditions, pests, and diseases.
- Early start: Sowing portulaca on seedlings allows you to get a head start on the growing season. By starting the seeds indoors, you can sow them earlier than you would be able to in the outdoor garden. This can help you extend the flowering period and enjoy beautiful blooms for a longer time.
- Better germination: Some gardeners find that portulaca seeds have low germination rates when sown directly in the garden. By sowing them on seedlings, you can ensure a higher germination success rate. This is because the controlled environment and optimal conditions indoors can promote faster and more successful germination.
- Easy transplanting: Sowing portulaca on seedlings makes it easier to transplant them into the garden once they have grown a bit. Seedlings are small and tender, making them easier to handle and transplant without damaging the fragile roots. This ensures a smoother transition from indoor to outdoor growing conditions.
Overall, sowing portulaca on seedlings can give you more control over the growing process, increase germination success, and provide an early start to the growing season. It is a great way to ensure a successful and bountiful display of large-flowered portulaca plants in your garden.
Preparation
Before sowing large-flowered portulaca seeds, there are a few steps you can take to ensure successful germination and growth:
1. Choose a suitable planting location
Large-flowered portulaca prefers full sun, so select a location that receives at least 6-8 hours of direct sunlight per day. It is also important to choose well-draining soil, as portulaca does not thrive in soggy conditions. Consider planting them in garden beds, containers, or hanging baskets.
2. Prepare the soil
Portulaca can tolerate poor soil conditions, but it will thrive in well-draining soil amended with organic matter. Add compost or well-rotted manure to the soil before planting to improve its texture and fertility. Avoid using heavy clay soils that retain water.
3. Sow the seeds at the right time
Large-flowered portulaca seeds can be sown indoors or directly in the garden. If you choose to start them indoors, sow the seeds about 8-10 weeks before the last frost date. If sowing outdoors, wait until after the danger of frost has passed and the soil has warmed up to at least 70°F (21°C). The ideal outdoor sowing time will vary depending on your location.
4. Soak the seeds (optional)
Some gardeners find that soaking portulaca seeds for a few hours before sowing can help speed up germination. Fill a small bowl with water and place the seeds in it. Allow them to soak for 2-4 hours, then drain the water before sowing.
5. Sow the seeds
Whether sowing indoors or outdoors, scatter the seeds over the prepared soil. Portulaca seeds are small, so a light dusting of soil or vermiculite is sufficient to cover them. Gently press the soil down to ensure good seed-to-soil contact.
6. Water and care for the seedlings
Water the soil lightly after sowing to keep it moist, but avoid overwatering, as this can lead to rotting. Once the seedlings emerge, water them regularly, but allow the soil to dry out slightly between waterings. Provide the plants with a balanced fertilizer every two weeks to promote healthy growth.
Following these preparation steps will give your large-flowered portulaca seedlings the best start for successful growth and beautiful blooms.
Choosing the right pot or tray

Choosing the right pot or tray for sowing large-flowered portulaca is essential for the success of your seedlings. Here are some factors to consider when selecting the right container:
- Size: Large-flowered portulaca seedlings have delicate and shallow root systems, so it is important to choose a pot or tray that is not too deep. A shallow pot or tray with a depth of around 2-3 inches is ideal.
- Drainage: It is crucial to choose a container with good drainage to prevent waterlogged soil, which can lead to root rot. Look for pots or trays with drainage holes at the bottom or use a container with a tray underneath to catch excess water.
- Material: You can choose between plastic, terracotta, or biodegradable pots or trays. Plastic containers are lightweight, durable, and retain moisture well. Terracotta containers are breathable and help to prevent overwatering. Biodegradable pots or trays made from materials such as coconut coir or peat are eco-friendly and can be planted directly into the ground, reducing transplant shock.
Additionally, consider the number of seeds you plan to sow. If you have a large number of seeds, it might be more practical to use a tray with multiple compartments or a larger pot to accommodate the seedlings. This will also make it easier when it comes time to transplant the seedlings.
By carefully selecting the right pot or tray for sowing large-flowered portulaca, you can provide the optimal growing conditions and set your seedlings up for success!
Selecting the right soil
- Well-draining soil: It is important to choose a soil mix that provides good drainage for the portulaca seedlings. This is because portulaca plants are susceptible to root rot if the soil retains too much moisture. Look for a soil mix that is specifically designed for succulents or cacti, as these types of soil tend to have excellent drainage properties.
- Sandy or loamy soil: Portulaca plants thrive in sandy or loamy soil. Sandy soil helps to prevent waterlogging and allows excess water to drain away quickly, while loamy soil is rich in organic matter and provides good aeration for the roots.
- pH level: Portulaca plants prefer slightly acidic to neutral soil with a pH level between 6.0 and 7.0. Test the pH level of your soil using a pH testing kit, and adjust it if necessary by adding soil amendments.
- Organic matter: Adding organic matter such as compost or well-rotted manure to the soil can improve its fertility and moisture-retention capacity. This can help support the healthy growth of the portulaca seedlings.
- Supplementary nutrients: While portulaca plants are fairly low-maintenance, adding a slow-release fertilizer to the soil before sowing the seeds can provide the necessary nutrients for the seedlings to grow strong and healthy. Look for a balanced fertilizer with an NPK ratio of 10-10-10 or similar.
- Sterilized soil: It is important to use sterilized soil to prevent the growth of harmful pathogens and weed seeds. You can either purchase sterilized soil from a gardening store or sterilize it yourself by baking it in the oven at a temperature of 180°F (82°C) for 30 minutes.
Sowing process
1. Prepare the seeds
Before you can start sowing the large-flowered portulaca seeds, you need to ensure they are properly prepared. Follow these steps to prepare the seeds:
- Collect mature seeds from a healthy portulaca plant.
- Remove any debris or dirt from the seeds.
- If the seeds have a hard coating, scarify them to improve germination by gently rubbing them with sandpaper or nicking them with a sharp knife.
- Soak the seeds in water for 24 hours to soften the hard coating (this step is optional, but can boost germination rates).
2. Select the right container
Choosing the appropriate container for sowing the portulaca seeds is important for successful growth. Consider the following factors:
- Use a clean tray or shallow pot with drainage holes to allow excess water to escape.
- Ensure the container is large enough to accommodate the number of seeds you plan to sow.
- Fill the container with a well-draining seed-starting mix or a mixture of sand, peat moss, and perlite.
3. Sow the seeds
Now it’s time to sow the prepared portulaca seeds in the container:
- Make small holes in the soil using your finger or a pencil.
- Place one or two seeds in each hole and cover them lightly with soil.
- Moisten the soil gently using a spray bottle or by pouring water carefully.
4. Provide the right environment
Creating the ideal environment for germination and growth is crucial for the success of your portulaca seedlings:
- Place the container in a warm location with a temperature around 70-80°F (21-27°C).
- Keep the soil consistently moist, but not waterlogged, by watering whenever the top inch of soil feels dry.
- Provide bright, indirect sunlight or use a fluorescent grow light to ensure proper seedling development.
- Consider covering the container with a plastic wrap or using a seedling dome to create a greenhouse-like environment.
5. Transplanting the seedlings
When the portulaca seedlings have grown large enough, usually with two to three true leaves, they can be transplanted into individual pots or into the garden:
- Carefully lift the seedlings from the container, being mindful not to damage the roots.
- Plant the seedlings in a well-draining soil mixture in their new pots or garden bed.
- Space the seedlings at least 6 inches apart to allow for proper growth and development.
- Water the transplanted seedlings well and continue to provide them with adequate sunlight and water.
6. Maintenance and care
Once the portulaca seedlings are established, they require regular maintenance and care to thrive:
- Water the plants regularly, but avoid overwatering to prevent root rot.
- Fertilize the portulaca plants every 4-6 weeks with a balanced fertilizer to promote healthy growth and abundant flowering.
- Remove any weeds or competing plants from the vicinity to prevent them from depriving the portulacas of nutrients and sunlight.
- Monitor the plants for signs of pests or diseases and take appropriate action, such as using organic insecticides or fungicides.
By following these steps and providing the right conditions and care, you can successfully sow large-flowered portulaca seeds and enjoy their vibrant blooms in your garden or containers.
Preparing the seeds

Before sowing large-flowered portulaca seeds, it is important to ensure they are properly prepared. This will increase their chances of germination and successful growth. Here are the steps to prepare the seeds:
- Cleaning the seeds: Start by removing any impurities or debris from the seeds. You can do this by gently rubbing the seeds between your fingers or by placing them in a fine-mesh sieve and rinsing them with water.
- Scarifying the seeds: Portulaca seeds have a hard outer coating that can prevent water and air from reaching the embryo, inhibiting germination. To promote germination, scarify the seeds by gently scratching or nicking the outer seed coat with a sharp knife or sandpaper. Be careful not to damage the embryo inside.
- Soaking the seeds: Once scarified, soak the seeds in a bowl of lukewarm water for 24 hours. This will further soften the seed coat and help facilitate germination.
- Draining and drying: After soaking, carefully drain the water and spread the seeds on a clean paper towel or tray. Allow them to air dry for a few hours until they are no longer wet to the touch.
Following these steps to prepare the seeds will enhance their chances of germination and successful growth when sown as seedlings. Be sure to handle the seeds with care to avoid damaging the delicate embryo inside. Once prepared, the seeds are ready to be sown and nurtured into beautiful large-flowered portulaca plants.
Sowing the seeds
When sowing large-flowered portulaca from seeds, it is important to follow a few steps to ensure successful germination and healthy seedlings.
1. Selecting the seeds

Choose high-quality seeds from a reputable supplier or collected from mature portulaca plants.
2. Preparing the soil

Portulaca prefers well-draining soil with a pH level between 5.5 and 7.5. Prepare the soil by removing any weeds or debris and add organic matter such as compost or peat moss to improve drainage.
3. Sowing the seeds
Portulaca seeds are small and should be sown directly on the soil surface. Gently press the seeds into the soil or lightly cover them with a thin layer of fine soil. Keep the spacing between seeds at least 6 inches apart.
4. Watering

After sowing the seeds, water the area gently to avoid displacing the seeds. Keep the soil consistently moist until the seeds germinate. Be careful not to overwater as portulaca prefers drier conditions.
5. Providing warmth and light
Portulaca seeds require warmth and plenty of light to germinate. Place the sowing tray or pot in a warm location with temperatures between 70 and 80°F (21-27°C). Provide 12-16 hours of bright but indirect light. A sunny windowsill or a grow light can be used to provide adequate light.
6. Germination
Portulaca seeds usually germinate within 7-14 days. Once the seedlings have emerged, thin them out if they are too close together to allow proper air circulation and prevent overcrowding.
7. Transplanting

When the seedlings have developed their second set of leaves, they can be transplanted into individual pots or containers. Choose well-draining containers and fill them with a suitable potting mix. Handle the seedlings carefully to avoid damaging their delicate roots.
8. Hardening off
Before transplanting the seedlings outdoors, acclimatize them to outdoor conditions gradually. Start by exposing them to sunlight and wind for a few hours each day and gradually increase the time over a period of 7-10 days.
9. Planting outdoors
Choose a sunny location with well-draining soil to plant the portulaca seedlings. Dig holes that are slightly larger than the root ball of each seedling and place them in the holes. Gently firm the soil around the roots and water well.
10. Care and maintenance
Water the portulacas sparingly, allowing the soil to partially dry between watering to prevent overwatering. Apply a balanced fertilizer every 4-6 weeks to promote healthy growth. Remove any weeds or competing plants that may impact the growth of the portulacas.
Following these steps will help ensure a successful sowing and flourishing growth of your large-flowered portulaca seedlings.
Caring for the seedlings
Once your large-flowered portulaca seedlings have emerged, it’s important to provide them with proper care to ensure their healthy growth and development. Here are some essential tips for caring for the seedlings:
1. Watering
Water the seedlings regularly to keep the soil moist but not saturated. Avoid overwatering, as it can lead to root rot. It’s best to water the seedlings in the morning or evening to prevent water evaporation during the hottest part of the day.
2. Providing sunlight
Portulaca seedlings need plenty of sunlight to grow and thrive. Place them in a sunny spot where they can receive at least 6-8 hours of direct sunlight each day. If you’re growing them indoors, use a grow light to supplement natural sunlight.
3. Fertilizing
Feed the seedlings with a balanced liquid fertilizer once they have developed their first true leaves. Dilute the fertilizer according to the instructions on the package and apply it to the soil around the seedlings. Repeat the fertilization process every two weeks to provide them with the necessary nutrients for healthy growth.
4. Transplanting
Once the seedlings have grown to a suitable size and outdoor temperatures have warmed up, transplant them into larger individual containers or directly into the garden bed. Make sure to harden off the seedlings before transplanting by exposing them gradually to outdoor conditions over a period of several days.
5. Weeding and mulching
Keep the area around the seedlings free from weeds, as they can compete for nutrients and water. Mulching the soil with organic materials, such as straw or wood chips, can help suppress weed growth and retain soil moisture.
6. Protecting from pests

Monitor the seedlings regularly for pests such as aphids, snails, and slugs. If you notice any pest infestations, take appropriate measures to control them. This may include using organic pest control methods, such as insecticidal soap or introducing beneficial insects.
By following these care tips, you can ensure that your large-flowered portulaca seedlings grow into healthy and vibrant plants that will grace your garden with their beautiful flowers.
Questions and Answers:
What is portulaca?
Portulaca is a type of flowering plant that is known for its large flowers and succulent leaves. It is often grown in gardens or containers and is prized for its vibrant, long-lasting blooms.
Can I sow large-flowered portulaca directly in the garden?
Yes, you can directly sow large-flowered portulaca seeds in the garden. However, starting them indoors as seedlings can give you a head start and help ensure successful germination and growth.
What are the ideal conditions for sowing large-flowered portulaca seeds?
The ideal conditions for sowing large-flowered portulaca seeds include a warm and sunny location, well-drained soil, and a temperature of around 70-75°F (21-24°C). It is best to sow the seeds after the last frost date in your area.
How do I sow large-flowered portulaca seeds indoors?
To sow large-flowered portulaca seeds indoors, fill a seed tray or pots with well-draining seed starting mix. Moisten the soil and sprinkle the seeds on the surface, lightly pressing them into the soil. Keep the tray/pots in a warm and bright location, and water them regularly to keep the soil moist.
When should I transplant the portulaca seedlings into the garden?
You should transplant the portulaca seedlings into the garden after the danger of frost has passed and the seedlings have developed at least two sets of true leaves. This is typically around 4-6 weeks after sowing the seeds.
Are there any special care tips for growing large-flowered portulaca seedlings?
Yes, there are a few special care tips for growing large-flowered portulaca seedlings. These include providing them with plenty of sunlight, watering them regularly but avoiding overwatering, and protecting them from pests like slugs and snails. It is also important to acclimate the seedlings to outdoor conditions before transplanting them into the garden.


