- Growing Clematis from Seeds
- Choosing the Right Seeds
- Sowing the Seeds
- Germination and Transplanting
- Planting in the Garden
- Care and Maintenance
- Choosing the Right Seeds for Your Garden
- 1. Determine the Climate
- 2. Consider Soil Type
- 3. Assess Sunlight Requirements
- 4. Consider Space and Height
- 5. Check Growing Requirements
- 6. Consider Your Preferences
- Preparing the Soil for Clematis Seeds
- 1. Choose a suitable location
- 2. Clear the area
- 3. Loosen the soil
- 4. Amend the soil
- 5. Test the pH level
- 6. Water the soil
- Planting Clematis Seeds: Step-by-Step Guide
- 1. Collecting Seeds
- 2. Preparing the Soil
- 3. Soaking the Seeds
- 4. Sowing the Seeds
- 5. Providing Moisture
- 6. Germination
- 7. Transplanting Seedlings
- 8. Providing Support
- 9. Caring for Clematis Seedlings
- Providing Proper Care for Seedlings
- 1. Watering
- 2. Light
- 3. Temperature
- 4. Fertilizer
- 5. Transplanting
- 6. Support
- Pruning Clematis: Tips from the Experts
- 1. Pruning Group:
- 2. Timing:
- 3. Tools:
- 4. Pruning Techniques:
- 5. Support Structures:
- 6. Fertilizing and Mulching:
- Understanding Different Pruning Groups
- Pruning Group 1 – Early-flowering Clematis
- Pruning Group 2 – Large-flowered Clematis
- Pruning Group 3 – Late-flowering Clematis
- Pruning Techniques for Optimal Blooming
- When to Prune
- Pruning Techniques
- Tools for Pruning
- Troubleshooting Common Issues when Growing Clematis
- 1. Lack of Flowering
- 2. Yellowing or Wilting Leaves
- 3. Stunted Growth
- 4. Lack of Support
- 5. Lack of Blooming in First Year
- Questions and Answers:
- Is it possible to grow clematis from seeds?
- When is the best time to prune clematis?
- Can clematis seeds be planted directly in the garden?
- Do all clematis plants need pruning?
- How long does it take for clematis seeds to germinate?
- Videos: Pruning Clematis in Spring for Maximum Flowers
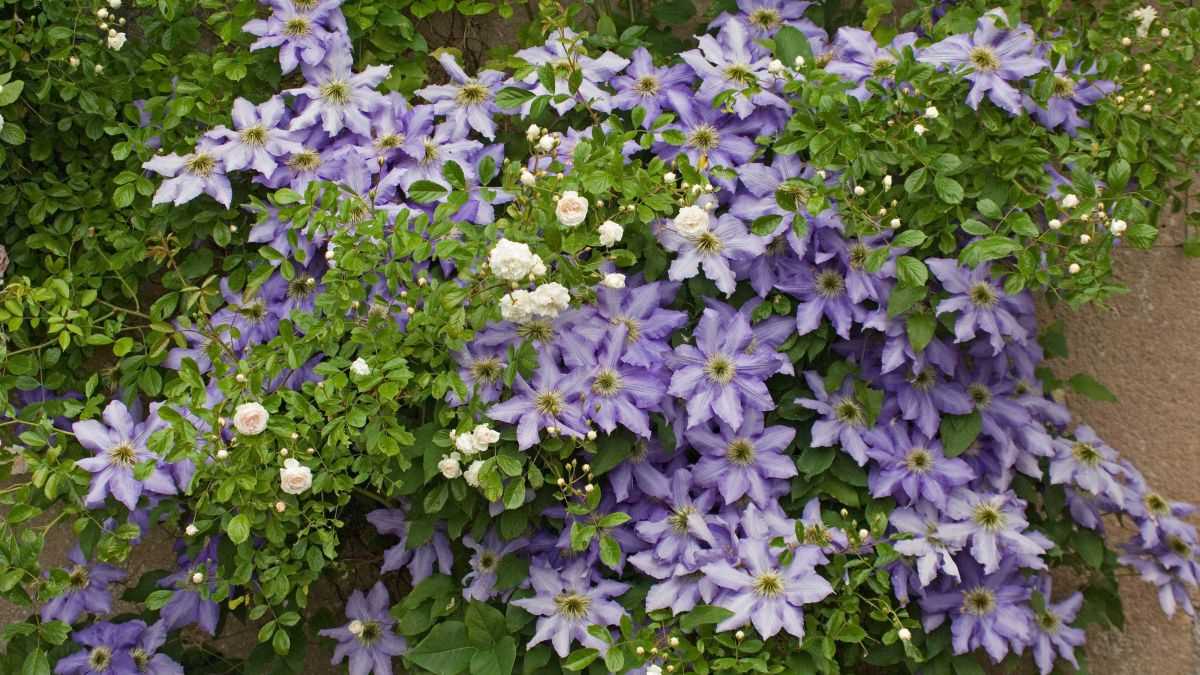
Clematis is a beautiful flowering vine that can add a touch of elegance to any garden. While clematis is commonly grown from cuttings or purchased as potted plants, growing them from seeds is another option that allows for a wider range of varieties and colors. In this article, we will explore the process of growing clematis from seeds in the garden and provide expert tips on pruning to help you achieve beautiful blooms.
Growing clematis from seeds requires patience, as the plants take a few years to reach maturity and start blooming. However, the end result is well worth the wait, as you can have a unique, stunning clematis that reflects your personal taste and style. To begin, start by collecting seeds from mature clematis plants in the fall. Look for seed heads that have turned brown and dry, indicating that the seeds are ripe. Gently remove the seeds from the seed head and store them in a cool, dry place until spring.
In early spring, it’s time to sow the clematis seeds. Start by filling small pots with a well-draining potting mix. Moisten the soil and then sprinkle the seeds evenly on the surface. Lightly press the seeds into the soil, but do not cover them, as they require light to germinate. Place the pots in a warm area with indirect sunlight and keep the soil consistently moist. Within a few weeks, you should start to see tiny green shoots appearing.
Expert Tip: To increase the chances of successful germination, soak the seeds in warm water for 24 hours before sowing. This will help soften the seed coat and promote quicker germination.
Once the seedlings have grown a few inches tall and have developed a few sets of true leaves, they can be transplanted into individual containers or directly into the garden. Choose a location in the garden that receives full sun or partial shade, depending on the specific requirements of the clematis variety you are growing. The soil should be rich in organic matter and well-drained. It’s also important to provide support for the young plants, such as trellises or stakes, as clematis are climbing vines that need something to cling to.
As your clematis plants continue to grow, proper pruning is essential for encouraging healthy growth and abundant blooms. Each clematis variety has different pruning requirements, so it’s important to consult a pruning guide specific to the type of clematis you are growing. Generally, pruning is done in early spring before new growth begins. Remove any dead or weak stems, and cut back the remaining stems to just above a pair of healthy buds. This will help promote new growth and ensure a vigorous, well-shaped plant.
Growing Clematis from Seeds
Clematis is a beautiful flowering vine that can add a touch of elegance to any garden. While many gardeners prefer to buy established plants, growing clematis from seeds can be a rewarding and cost-effective way to introduce new varieties into your garden.
Choosing the Right Seeds
When selecting clematis seeds, it’s important to choose varieties that are suitable for your climate and growing conditions. Look for seeds that are labeled as “hardy” or “perennial” in your specific region.
Additionally, consider the growth habit and flowering characteristics of the clematis variety you’re interested in. Some clematis varieties are climbers, while others are bushy or compact. Choose a variety that will suit your garden’s needs and the available space.
Sowing the Seeds
Start by preparing a well-draining seed-starting mix in a shallow tray or individual pots. Moisten the mix before sowing the seeds to ensure good contact between the seeds and the soil.
Place the seeds on the soil surface and press them lightly into the mix, but do not cover them with soil. Clematis seeds require light for germination.
Keep the soil consistently moist but not waterlogged. Cover the tray or pots with a clear plastic lid or plastic wrap to create a humid environment. Place the tray or pots in a warm location, such as near a window or on a germination heat mat.
Germination and Transplanting
Clematis seeds typically take several weeks to germinate. Once you see tiny seedlings emerge, remove the plastic cover and provide them with bright indirect light. Avoid placing them in direct sunlight, as it can scorch the delicate seedlings.
When the seedlings have grown enough to handle, typically after two to three pairs of true leaves have developed, carefully transplant them into larger pots with potting soil. Be gentle when handling the seedlings to avoid damaging the roots.
Planting in the Garden
After the last frost date in your area, when the seedlings are about 6 to 8 inches tall, it’s time to transplant them into your garden. Choose a location with well-draining soil and plenty of sunlight.
Dig a hole that is slightly larger than the root ball of the seedling. Place the seedling in the hole, backfill with soil, and gently firm the soil around the base of the plant. Water thoroughly after planting and provide support for the young clematis if necessary.
Care and Maintenance
Water clematis regularly, especially during dry periods, to keep the soil consistently moist but not waterlogged. Mulch around the base of the plant to help retain moisture and suppress weeds.
Prune clematis in late winter or early spring to remove dead or damaged wood and promote new growth. Consult a pruning guide specific to the clematis variety you’re growing for proper pruning techniques.
Consider applying a slow-release fertilizer in early spring to provide essential nutrients for healthy growth and abundant flowering.
Remember that growing clematis from seeds may take longer to establish and start blooming compared to buying established plants. However, with patience and proper care, you can enjoy the beauty of your very own homegrown clematis in your garden.
Choosing the Right Seeds for Your Garden
Choosing the right seeds for your garden is crucial to ensure a successful and thriving garden. Here are some tips to help you make the right choice:
1. Determine the Climate
Understand the climate in your area and choose seeds that are suitable for that climate. Some plants thrive in warm climates, while others prefer cool or temperate climates. Consider the average temperature, rainfall, and length of growing season in your region.
2. Consider Soil Type
Take into account the type of soil in your garden. Some plants prefer well-draining sandy soil, while others thrive in heavy clay soil. If you’re unsure about your soil type, you can get it tested or observe the types of plants that already grow well in your area.
3. Assess Sunlight Requirements
Pay attention to the amount of sunlight your garden receives throughout the day. Some plants require full sunlight to grow properly, while others can tolerate partial shade or even thrive in full shade. Make sure to choose seeds that match the sunlight conditions in your garden.
4. Consider Space and Height
Take into account the available space in your garden and the ultimate height the plants will reach. Some plants, such as sunflowers or corn, can grow quite tall and may overshadow other plants if not properly spaced. Make sure to choose seeds that will fit well within your garden space.
5. Check Growing Requirements
Read the seed packets or research online to understand the specific growing requirements of the plants you’re interested in. Some plants require specific conditions such as trellises or support structures, while others may need additional nutrients or fertilizers to grow well.
6. Consider Your Preferences
Lastly, consider your own preferences and taste when choosing seeds for your garden. Think about the colors, textures, and scents you enjoy. Gardening is a personal experience, so choose seeds that will bring you joy and satisfaction.
By following these tips and choosing the right seeds for your garden, you’ll increase your chances of a successful and beautiful garden.
Preparing the Soil for Clematis Seeds
Before planting clematis seeds, it is important to prepare the soil properly to provide the best growing conditions for the seeds. Here are some steps to follow:
1. Choose a suitable location
- Select a spot in your garden that receives at least 6-8 hours of sunlight per day. Clematis plants thrive in full sun to partial shade.
- Ensure that the soil is well-draining to prevent waterlogging, as clematis plants don’t tolerate wet feet.
2. Clear the area
- Remove any weeds, rocks, or debris from the planting area. These can impede seed germination and root development.
3. Loosen the soil
- Using a garden fork or a tiller, loosen the soil to a depth of about 12-18 inches. This will improve drainage and allow the young clematis roots to penetrate easily.
- Break up any clumps of soil and remove large stones or roots that may obstruct growth.
4. Amend the soil
- If your soil is heavy clay or sandy, incorporate organic matter such as compost or well-rotted manure into the soil. This will improve its structure, fertility, and moisture-holding capacity.
- Add a balanced slow-release fertilizer according to the package instructions to provide essential nutrients for the growing clematis plants.
5. Test the pH level
- Clematis plants prefer slightly acidic to neutral soil with a pH range of 6.0-7.0. Use a soil testing kit to check the pH level of your soil.
- If the pH is too low or too high, you can adjust it by adding lime to raise the pH or sulfur to lower the pH until it falls within the desired range.
6. Water the soil


- Before planting clematis seeds, thoroughly water the soil to ensure it is evenly moist but not waterlogged.
By following these steps, you will create optimal soil conditions for clematis seeds to germinate and grow into beautiful and healthy plants.
Planting Clematis Seeds: Step-by-Step Guide
Clematis can be grown from seeds, but it requires some patience and knowledge. Here is a step-by-step guide on how to plant clematis seeds in your garden:
1. Collecting Seeds
When your clematis plant develops seed heads, wait until they turn brown and dry before collecting them. Gently shake the seed heads over a piece of paper or into a small container to release the seeds. Remove any remaining debris from the seeds.
2. Preparing the Soil
Clematis plants prefer well-drained soil with good organic content. Before planting the seeds, prepare the soil by removing any weeds or debris and mixing in compost or well-rotted manure. Ensure that the soil is loose and crumbly.
3. Soaking the Seeds
Some clematis seeds have a hard outer coat that needs to be softened before they can germinate. To do this, soak the seeds in warm water for 24 to 48 hours. This will help the seeds absorb enough water to break through the hard shell.
4. Sowing the Seeds
After soaking, carefully place the seeds on the prepared soil, spacing them about 1 inch apart. Lightly press the seeds into the soil but do not bury them too deep. Cover the seeds with a thin layer of soil or vermiculite.
5. Providing Moisture
Clematis seeds need consistently moist soil to germinate and grow. Water the seeds gently but thoroughly after planting and ensure that the soil remains moist throughout the germination period. Use a spray bottle or a watering can with a fine nozzle to avoid displacing the seeds.
6. Germination
Place a clear plastic cover or a plastic bag over the seeded area to create a humid environment and retain moisture. Keep the soil temperature between 65 and 70 degrees Fahrenheit (18 and 21 degrees Celsius). Germination can take anywhere from a few weeks to several months, so be patient and continue to monitor the soil moisture.
7. Transplanting Seedlings
Once the clematis seedlings have grown a few sets of true leaves, they can be transplanted into individual pots or a prepared garden bed. Gently lift the seedlings with a spoon or small trowel, ensuring that the roots are intact, and plant them at the same depth as they were in the starting container.
8. Providing Support
Clematis plants are climbers and need some form of support to grow. Install a trellis, fence, or other support structure near the planted seedlings. As the plants grow, guide the tendrils towards the support structure to help them climb.
9. Caring for Clematis Seedlings
Water the seedlings regularly, keeping the soil moist but not waterlogged. Mulch around the base of the plants to help retain moisture and suppress weed growth. Fertilize the plants with a balanced, slow-release fertilizer according to package instructions.
With proper care and attention, your clematis seedlings will grow into beautiful, flowering plants that will enhance any garden or landscape.
Providing Proper Care for Seedlings
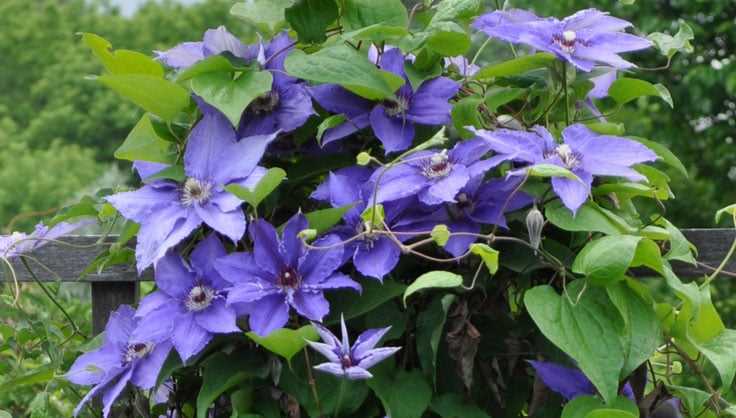

Proper care is essential for the healthy growth of clematis seedlings. Here are some expert tips to help you provide the best care for your seedlings:
1. Watering
Keep the seedlings well-watered, but be careful not to overwater them. Allow the top inch of soil to dry out before watering again. Use a misting nozzle or watering can with a fine spout to avoid damaging the delicate seedlings.
2. Light
Provide your seedlings with bright, indirect light. A sunny windowsill or a fluorescent grow light can work well. Avoid placing the seedlings in direct sunlight, as it can scorch the delicate leaves.
3. Temperature
Keep the seedlings at a temperature between 70-75°F (21-24°C) during the day and around 55-60°F (13-16°C) at night. Avoid exposing the seedlings to extreme temperature fluctuations, which can negatively impact their growth.
4. Fertilizer
Once the seedlings have developed a few sets of true leaves, you can start fertilizing them. Use a balanced liquid fertilizer diluted to half strength and apply it every two weeks. Be careful not to over-fertilize, as it can lead to weak growth.
5. Transplanting
When the seedlings have grown to about 2-3 inches tall and have at least two sets of true leaves, they are ready to be transplanted into individual pots. Use a well-draining potting mix and be gentle when handling the delicate roots.
6. Support
As the seedlings grow, provide them with a suitable support structure to help them climb. A small trellis or bamboo stakes can be used. Ensure the support is sturdy enough to support the weight of the mature clematis plant.
By providing proper care for your clematis seedlings, you can ensure their healthy growth and increase their chances of flourishing in your garden.
Pruning Clematis: Tips from the Experts
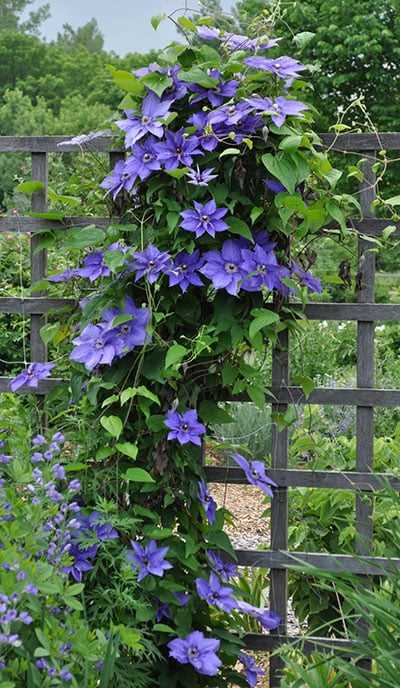

Pruning clematis is an important part of maintaining their health and promoting abundant blooming. Here are some expert tips to help you prune your clematis correctly:
1. Pruning Group:
Identify the pruning group in which your clematis belongs. There are three main pruning groups for clematis, and each group requires a specific pruning approach. Group 1 clematis blooms on old wood and should only be pruned lightly after flowering. Group 2 clematis blooms on both old and new wood and requires light pruning in early spring and after the first flush of flowering. Group 3 clematis blooms on new wood and should be pruned back to a few buds above ground level in early spring.
2. Timing:
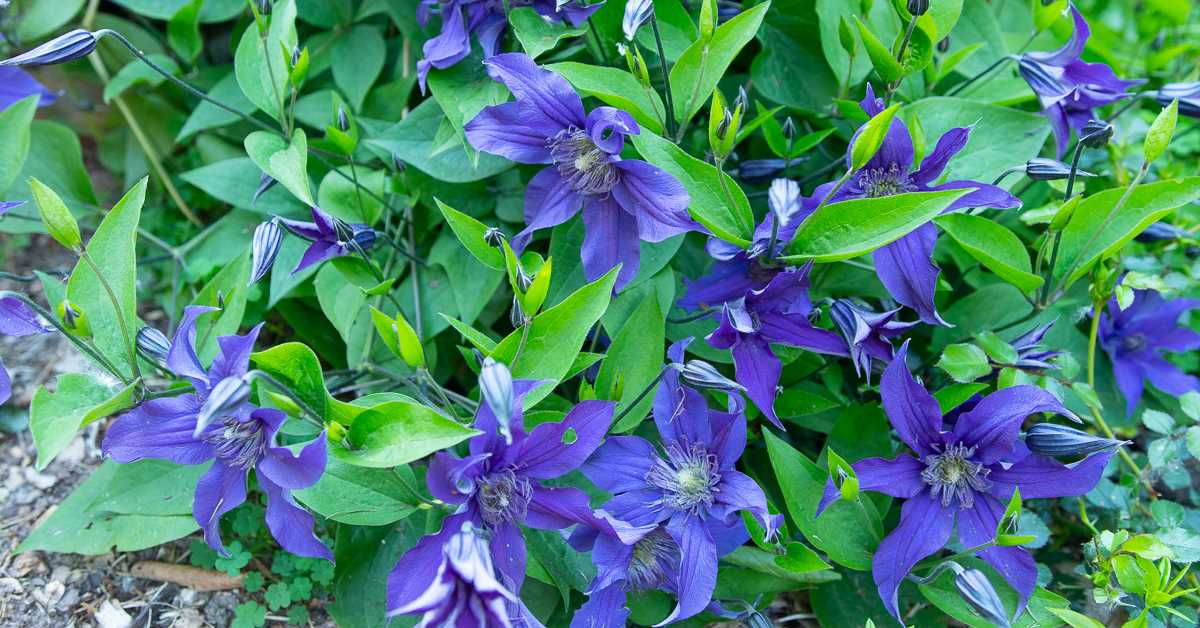

Prune clematis at the appropriate time for its pruning group. Group 1 clematis should be pruned after flowering in early summer. Group 2 clematis should be pruned in early spring and after the first round of flowering. Group 3 clematis should be pruned back hard in early spring.
3. Tools:

Use sharp and clean pruning tools to prevent damage to the clematis. A pair of sharp bypass pruning shears is ideal for most pruning tasks. Make sure to clean the tools with rubbing alcohol or a mild bleach solution before and after use to prevent the spread of diseases.
4. Pruning Techniques:
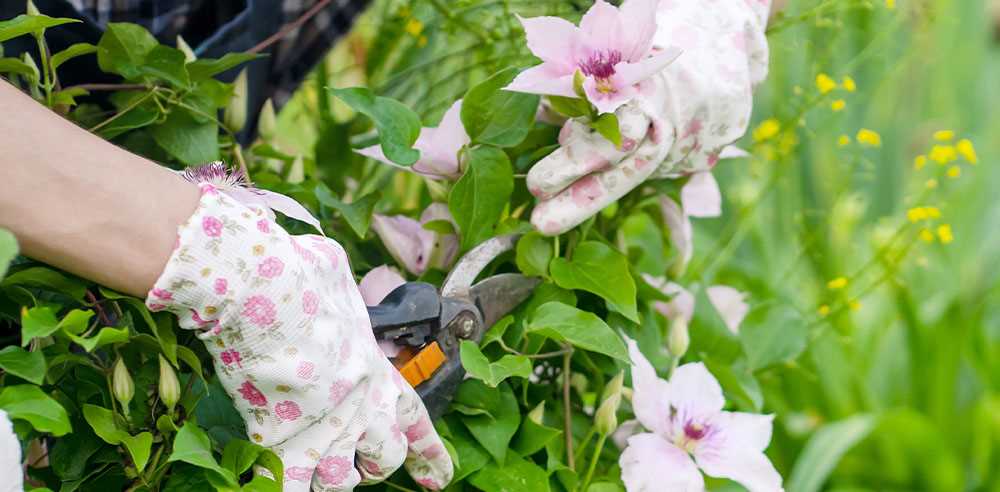

When pruning, always make clean cuts at a 45-degree angle just above a leaf node or bud. This encourages new growth and prevents disease. Remove any dead, damaged, or diseased stems and tendrils. For Group 2 and 3 clematis, prune back the remaining stems to the desired height, leaving a few buds or nodes above ground level.
5. Support Structures:


Consider the type of support structure you have for your clematis when planning your pruning. Some clematis varieties can grow very tall, while others are more compact and require less pruning. Adjust your pruning approach accordingly to maintain the desired growth habit and aesthetics of your clematis.
6. Fertilizing and Mulching:
After pruning, apply a balanced fertilizer to promote healthy growth and flowering. Mulch around the base of the clematis with organic matter to retain moisture, suppress weeds, and provide additional nutrients.
By following these expert tips, you can ensure that your clematis remains healthy, vigorous, and produces an abundance of beautiful blooms.
Understanding Different Pruning Groups
When it comes to pruning Clematis, it’s important to understand the different pruning groups. These groups are designated based on the time of year that particular Clematis varieties bloom, and they can help guide you in determining when and how to prune your plants.
Pruning Group 1 – Early-flowering Clematis
- Includes species such as Clematis alpina and Clematis macropetala.
- These varieties bloom on the previous year’s growth.
- Prune immediately after flowering, removing any dead or damaged wood and lightly shaping the plant if needed.
Pruning Group 2 – Large-flowered Clematis
- Includes popular cultivars like Clematis ‘Nelly Moser’ and Clematis ‘Jackmanii’.
- Bloom on both the previous year’s growth and new growth.
- Prune in early spring, just as new growth begins to emerge.
- Remove any dead or weak stems, and cut back the remaining stems to a pair of strong buds.
- This group benefits from a more thorough pruning every few years to rejuvenate the plant.
Pruning Group 3 – Late-flowering Clematis
- Includes varieties like Clematis ‘Henryi’ and Clematis ‘Ville de Lyon’.
- Bloom exclusively on new growth that emerges in the current year.
- Prune in early spring, just as new growth begins to emerge.
- Cut back all of the previous year’s growth to a pair of strong buds, as these varieties flower on new wood.
Understanding the pruning group of your Clematis varieties will ensure that you are able to prune them at the proper time and in the correct manner, resulting in healthier and more abundant blooms.
Pruning Techniques for Optimal Blooming
Pruning clematis is an essential task to ensure optimal blooming. By following the correct pruning techniques, you can help your clematis produce more flowers and maintain a healthy, well-shaped plant.
When to Prune
The timing of pruning depends on the clematis variety. Most clematis can be divided into three main pruning groups: Group 1, Group 2, and Group 3.
- Group 1: Early-flowering clematis that bloom in spring, such as C. alpina and C. montana, should be pruned immediately after flowering.
- Group 2: Large-flowered clematis that bloom in early to mid-summer, such as C. Jackmanii and C. Nelly Moser, should be pruned in late winter or early spring before new growth begins.
- Group 3: Late-flowering clematis that bloom in late summer or fall, such as C. viticella and C. texensis, should be pruned in early spring down to the ground level.
Pruning Techniques
Regardless of the pruning group, there are several pruning techniques that apply to all clematis varieties.
- Deadheading: Remove spent flowers regularly to encourage continuous blooming.
- Light Pruning: In late winter or early spring, lightly prune the entire plant, removing any dead or weak growth to promote strong new shoots.
- Renovation Pruning: Every few years, perform a more severe pruning to rejuvenate the plant. Cut back the entire plant to about 12 inches above the ground level.
- Training: As your clematis grows, train the stems to climb a trellis, fence, or other support structure. This helps to create an attractive, well-structured plant.
Tools for Pruning
Having the right tools is important for successful pruning. Here are some essential tools for pruning clematis:
| Pruning Shears: | Used for general pruning tasks, such as removing dead or weak growth. |
| Secateurs: | Great for cutting thicker stems and branches. |
| Loppers: | Designed for cutting thicker branches that pruning shears or secateurs cannot handle. |
| Pole Pruners: | Useful for reaching and pruning high branches without the need for a ladder. |
Remember to clean and disinfect your pruning tools before and after each use to prevent the spread of diseases.
By understanding the pruning techniques and following the proper timing, you can ensure your clematis plants display an abundance of beautiful blooms year after year.
Troubleshooting Common Issues when Growing Clematis
1. Lack of Flowering
One common issue when growing clematis is a lack of flowering. This can be caused by several factors:
- Improper Pruning: Clematis have different pruning requirements depending on their flower type. Make sure you are pruning at the correct time and to the appropriate level.
- Insufficient Sunlight: Clematis plants generally require at least 6 hours of direct sunlight each day to produce flowers. If your plant is not getting enough sunlight, consider moving it to a sunnier location.
- Improper Fertilization: Too much nitrogen in the soil can stimulate leafy growth at the expense of flowers. Use a balanced fertilizer with lower nitrogen content to promote blooming.
2. Yellowing or Wilting Leaves
Yellowing or wilting leaves can be a sign of various issues:
- Overwatering: Clematis plants prefer moist, well-draining soil. Watering too frequently or allowing the soil to become waterlogged can lead to root rot and yellowing leaves. Adjust your watering schedule and ensure proper drainage.
- Underwatering: On the other hand, underwatering can also cause yellowing or wilting leaves. Check the soil moisture regularly and water thoroughly when needed.
- Pests or Diseases: Certain pests, such as aphids or powdery mildew, can cause yellowing or wilting leaves. Inspect your plant for signs of insect infestation or fungal diseases and treat accordingly.
3. Stunted Growth
If your clematis is not growing as expected, there may be a few factors to consider:
- Inadequate Nutrients: Clematis plants are heavy feeders and require fertile soil. Make sure you are providing enough nutrients by amending the soil with compost or using a slow-release fertilizer specifically formulated for flowering vines.
- Root Damage: Damage to the roots, such as from overzealous digging or transplanting, can stunt the growth of clematis. Be careful when working around the plant and avoid disturbing the root system.
- Improper Planting Depth: Clematis should be planted with the crown at soil level. If the plant is buried too deeply or planted too shallow, it can affect growth. Adjust the planting depth if necessary.
4. Lack of Support
Clematis vines are natural climbers and require a support structure to grow and flourish. If your clematis is not growing vertically or sprawling on the ground, it may not have sufficient support to latch onto. Install a trellis, arbor, or other sturdy structure for the plant to climb and spread its foliage.
5. Lack of Blooming in First Year
It is common for newly planted clematis to take a year or two before they start blooming abundantly. Patience is key during the establishment period. Focus on providing proper care and optimum growing conditions to encourage healthy growth, and the blooms will come in due time.
Questions and Answers:
Is it possible to grow clematis from seeds?
Yes, it is possible to grow clematis from seeds. However, it is important to note that clematis seeds have a low germination rate and can take a long time to sprout. It is recommended to soak the seeds in water for 24 hours before planting and to provide a moist and warm environment for germination.
When is the best time to prune clematis?
The best time to prune clematis depends on the variety. Generally, spring-blooming clematis should be pruned right after they finish blooming, while summer and fall-blooming clematis should be pruned in late winter or early spring before new growth begins. It is important to know the specific pruning requirements of your clematis variety to ensure proper care.
Can clematis seeds be planted directly in the garden?
Yes, clematis seeds can be planted directly in the garden. However, it is important to prepare the soil beforehand by loosening it and removing any weeds or debris. The seeds should be planted at a depth of about 1/4 inch and spaced 6 to 8 inches apart. It is also recommended to water the seeds regularly and provide them with a trellis or other support as they grow.
Do all clematis plants need pruning?
No, not all clematis plants need pruning. Some varieties, such as the early- flowering types, require little to no pruning. However, most clematis varieties benefit from some form of pruning to control their growth, promote blooming, and maintain a healthy shape. It is important to know the specific pruning requirements of your clematis variety to ensure proper care.
How long does it take for clematis seeds to germinate?
The germination time for clematis seeds can vary depending on the variety and growing conditions. In general, clematis seeds can take anywhere from a few weeks to several months to germinate. It is important to be patient and provide the seeds with the proper care, including regular watering and a warm environment, to encourage germination.


