- Benefits of growing strawberries from seeds
- Choosing the right strawberry variety
- Growing region
- Day-neutral, everbearing, or June-bearing
- Taste and texture
- Disease resistance
- Preparing the soil for strawberry seeds
- Sowing strawberry seeds
- 1. Choosing the right seeds
- 2. Preparing the soil
- 3. Sowing the seeds
- 4. Watering
- 5. Covering the seeds
- 6. Providing optimal conditions
- 7. Germination
- 8. Transplanting
- Caring for strawberry seedlings
- 1. Providing the right environment
- 2. Watering
- 3. Fertilization
- 4. Pruning
- 5. Pest and disease control
- 6. Pollination
- 7. Harvesting
- Transplanting strawberry seedlings
- 1. Prepare the planting area
- 2. Dig the planting holes
- 3. Water the seedlings
- 4. Carefully remove the seedlings from their containers
- 5. Place the seedlings in the planting holes
- 6. Firmly press the soil around the seedlings
- 7. Water the transplanted seedlings
- 8. Mulch around the seedlings
- 9. Provide proper care and maintenance
- Harvesting and enjoying your homegrown strawberries
- 1. Check for ripeness:
- 2. Pick your strawberries:
- 3. Clean and store your strawberries:
- 4. Enjoy your homegrown strawberries:
- Troubleshooting:
- Question-answer:
- What is the best time to grow strawberries from seeds?
- How long does it take for strawberry seeds to germinate?
- Can I grow strawberries from seeds indoors?
- Do strawberry seeds need light to germinate?
- Can I grow strawberries from store-bought fruit?
- Video: How To Produce Billions Of Strawberries In California – Strawberry Harvesting
Strawberries are sweet, juicy fruits that are loved by many people around the world. Growing strawberries from seeds can be a rewarding experience, as you have the opportunity to watch your plants grow and enjoy the harvest of fresh, homegrown strawberries. However, growing strawberries from seeds can be a bit challenging, as the seeds are tiny and require specific conditions to germinate and grow into healthy plants.
Before you start growing strawberries from seeds, you need to gather the necessary materials and prepare the soil. You will need a sunny location with well-drained soil, as strawberries require at least six hours of direct sunlight per day. It’s also important to have a soil pH of 5.5 to 6.5, as strawberries prefer slightly acidic soil. Once you have chosen the perfect location, prepare the soil by removing any weeds and adding organic matter, such as compost or aged manure, to improve the soil’s fertility.
After preparing the soil, it’s time to plant the strawberry seeds. Start by sprinkling the seeds over the soil, leaving about 1 inch between each seed. Gently press the seeds into the soil, making sure they are covered with a very thin layer of soil. Keep the soil moist but not soggy, as excessive moisture can cause the seeds to rot. It’s also important to protect the seeds from birds and other animals, so consider covering the area with a net or using a cloche.
Once the seeds have germinated and the seedlings have grown a few leaves, you can thin them out by removing the weaker seedlings. This will give the remaining seedlings more space to grow and thrive. As the seedlings continue to grow, make sure to water them regularly, especially during dry periods. You should also fertilize the plants every two weeks with a balanced fertilizer to provide them with the necessary nutrients.
Finally, after a few months of caring for your strawberry plants, you can enjoy the harvest of delicious, homegrown strawberries. Don’t forget to pick the strawberries as soon as they ripen to ensure the best flavor and texture. Growing strawberries from seeds may require some patience and hard work, but the results are definitely worth it.
Benefits of growing strawberries from seeds
There are several benefits to growing strawberries from seeds instead of buying already established plants. Here are some of the main advantages:
- Cost-effective: Growing strawberries from seeds is a cost-effective way to start your own strawberry garden. It is much cheaper to buy a packet of strawberry seeds than to buy multiple established plants.
- Greater variety: When you grow strawberries from seeds, you have access to a wider variety of strawberry cultivars. You can choose from different sizes, colors, and flavors to suit your preferences.
- Fresh and organic: By growing strawberries from seeds, you have complete control over the growing process. You can ensure that your strawberries are free from pesticides and other chemicals, making them a fresh and organic choice.
- Learning experience: Growing strawberries from seeds can be a fun and educational experience. You get to learn about the different stages of plant growth and how to care for the plants. This knowledge can be applied to other gardening endeavors as well.
- Long-term investment: Once you have successfully grown strawberries from seeds, you can save the seeds from your harvest and use them for future plantings. This allows you to create a sustainable source of strawberries for years to come without the need to purchase new seeds or plants.
Growing strawberries from seeds is a rewarding and sustainable way to enjoy fresh and delicious strawberries right from your own garden. With the various benefits it offers, it is definitely worth giving it a try!
Choosing the right strawberry variety
When it comes to growing strawberries from seeds, selecting the right variety is crucial for success. There are several factors to consider when choosing which strawberry variety to grow:
Growing region
Different strawberry varieties have specific growing zone requirements. Some varieties are better suited for colder climates, while others thrive in warmer regions. It is important to choose a variety that is well adapted to your specific growing region to ensure the best results.
Day-neutral, everbearing, or June-bearing
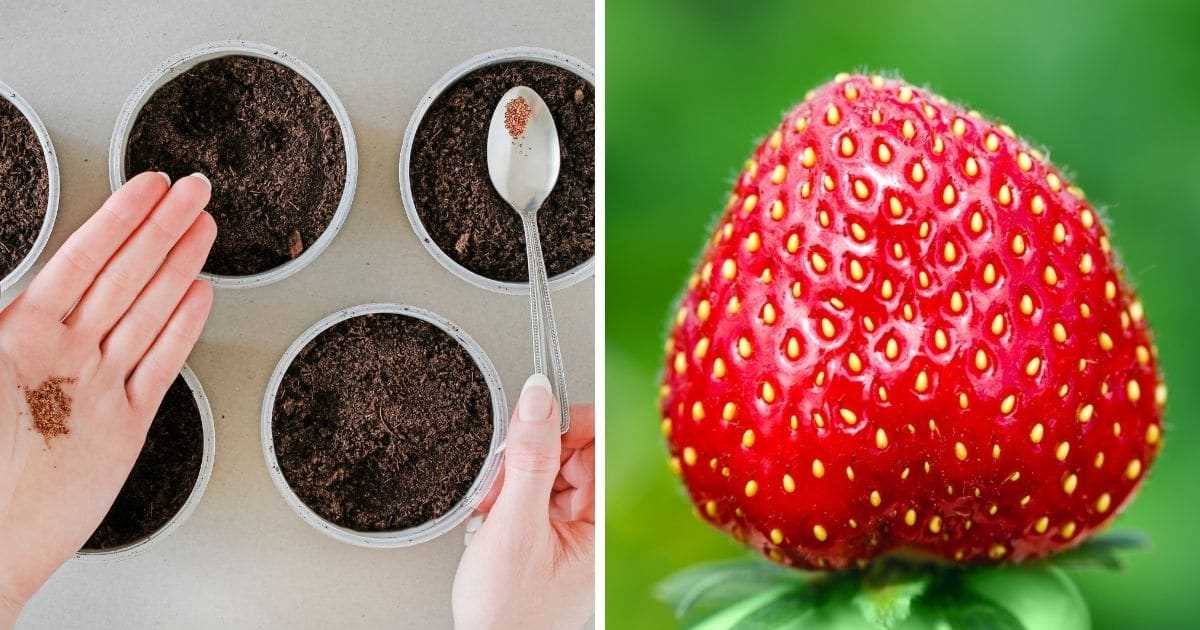
There are three main types of strawberry plants: day-neutral, everbearing, and June-bearing. Day-neutral strawberries are the most versatile, as they produce fruit throughout the growing season. Everbearing strawberries produce two harvests – one in spring and another in fall. June-bearing strawberries produce a single large harvest in early summer. Consider the fruiting habits of each type and choose the one that best suits your needs and preferences.
Taste and texture
Strawberries come in a range of flavors and textures, from sweet and juicy to tart and firm. Consider your personal preferences and the intended use of the strawberries. Some varieties are better for eating fresh, while others are more suitable for making preserves or baking.
Disease resistance
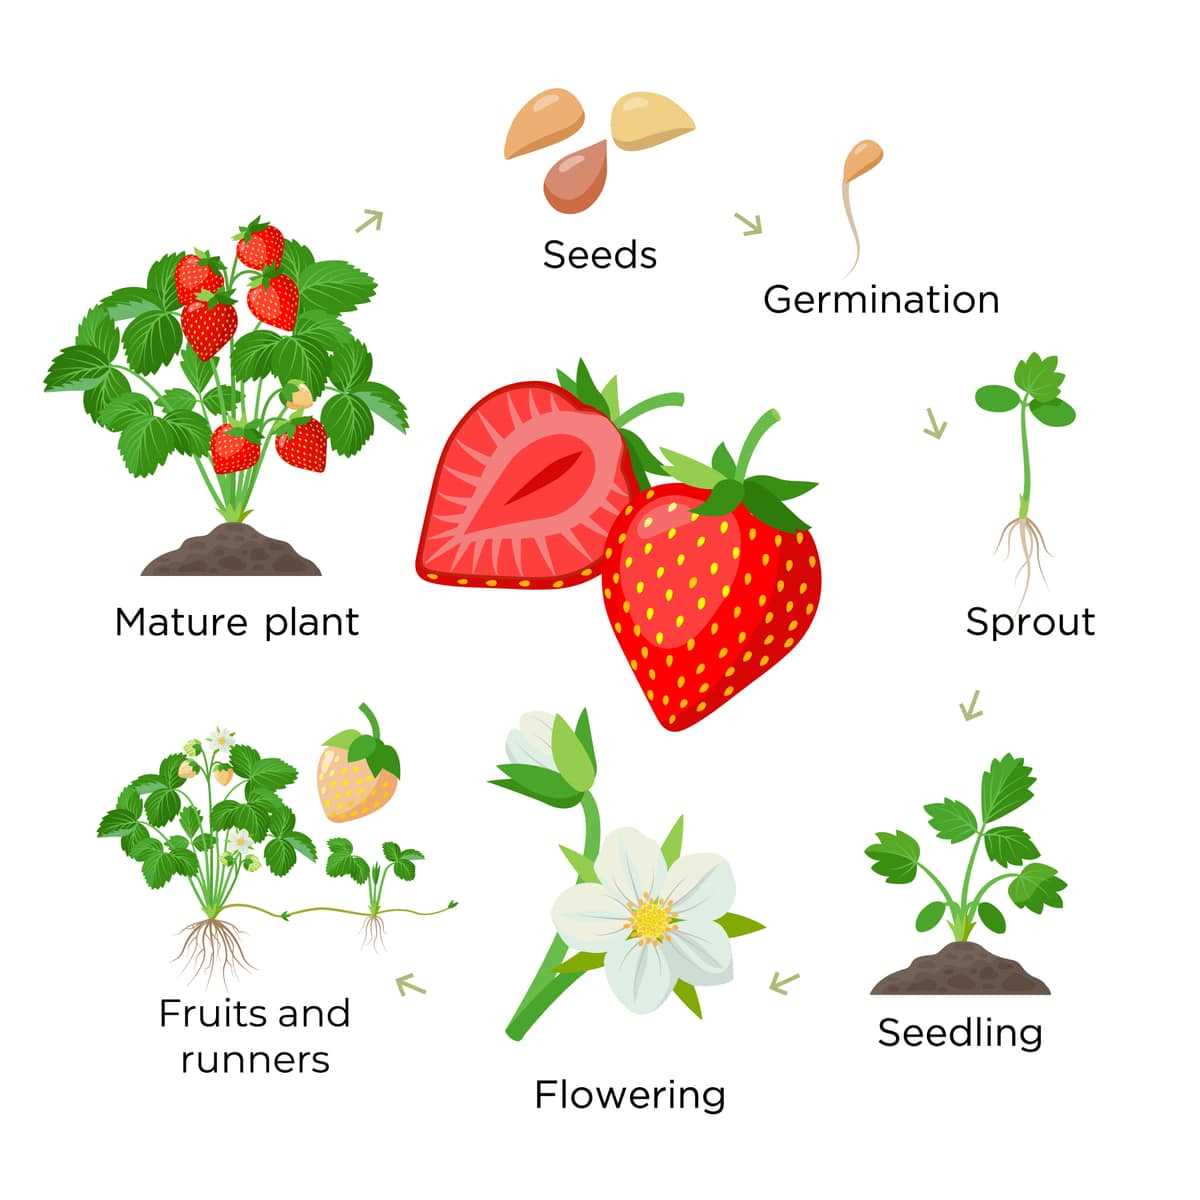
Certain strawberry varieties are more resistant to common diseases, such as powdery mildew and botrytis fruit rot. Choosing disease-resistant varieties can help reduce the need for chemical interventions and increase the overall health and productivity of your plants.
It is important to do thorough research and consult local gardening experts to find the best strawberry variety for your specific needs and growing conditions.
Preparing the soil for strawberry seeds
Before planting strawberry seeds, it is important to prepare the soil properly to provide the best conditions for germination and growth. Here are the steps to prepare the soil for strawberry seeds:
- Choose a suitable location: Find a location for your strawberry seeds that receives at least 6 to 8 hours of direct sunlight daily. Ensure that the soil has good drainage to prevent waterlogging.
- Clear the area: Remove any weeds, rocks, or debris from the planting area. These can hinder the growth of the strawberry seeds and compete for nutrients.
- Loosen the soil: Use a garden fork or a tiller to loosen the soil to a depth of at least 6 inches. This will help the strawberry roots to penetrate easily and allows for better water and nutrient absorption.
- Amend the soil: Test the soil to determine its pH level. Strawberries prefer a slightly acidic soil with a pH of 6.0 to 6.5. If the soil pH is too high, add sulfur or peat moss to lower it. If the pH is too low, add lime to raise it. Additionally, incorporate organic matter like compost or well-rotted manure to improve soil structure and fertility.
- Level the soil: Rake the soil to level it for planting. This will help in even watering and prevent water runoff.
By preparing the soil correctly, you will create an optimal environment for your strawberry seeds to grow and thrive. This will increase your chances of successful germination and a healthy strawberry crop.
Sowing strawberry seeds
Growing strawberries from seeds can be a rewarding and cost-effective way to expand your strawberry garden. Here are some important steps to follow when sowing strawberry seeds:
1. Choosing the right seeds
Before sowing strawberry seeds, it is important to choose the right variety that suits your growing conditions and preferences. Consider factors such as climate, soil type, and intended use (e.g., for fresh eating or jam making).
2. Preparing the soil
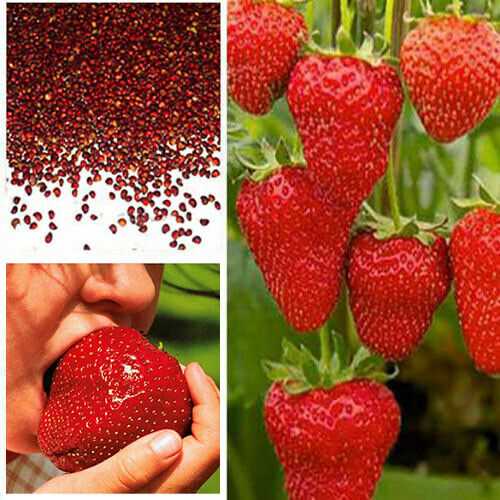
Prepare a well-draining soil mix by combining equal parts of high-quality potting soil, sand, and perlite. Fill the seed trays or pots with the soil mix, leaving about an inch of space at the top for watering.
3. Sowing the seeds
Gently scatter the strawberry seeds evenly over the soil surface. As strawberry seeds are small, it is best to mix them with fine sand or vermiculite to ensure even distribution. Press the seeds lightly into the soil mix, but do not bury them too deep, as they require light to germinate.
4. Watering
After sowing the seeds, use a misting spray bottle or a fine spray nozzle to water the soil gently. Keep the soil consistently moist, but avoid overwatering, as it can lead to fungal diseases.
5. Covering the seeds
To retain moisture and create a humid environment for germination, cover the seed trays or pots with a clear plastic wrap or place them in a clear plastic bag. This will help speed up germination and protect the seeds from drying out.
6. Providing optimal conditions
Place the covered seed trays or pots in a warm and bright location, such as a sunny windowsill or a greenhouse. The ideal temperature for germinating strawberry seeds is around 70-75°F (21-24°C).
7. Germination
Strawberry seeds usually take around 2-3 weeks to germinate. Remove the plastic wrap or bag as soon as you see the first seedlings emerge. Continue to provide adequate moisture and light for the seedlings.
8. Transplanting
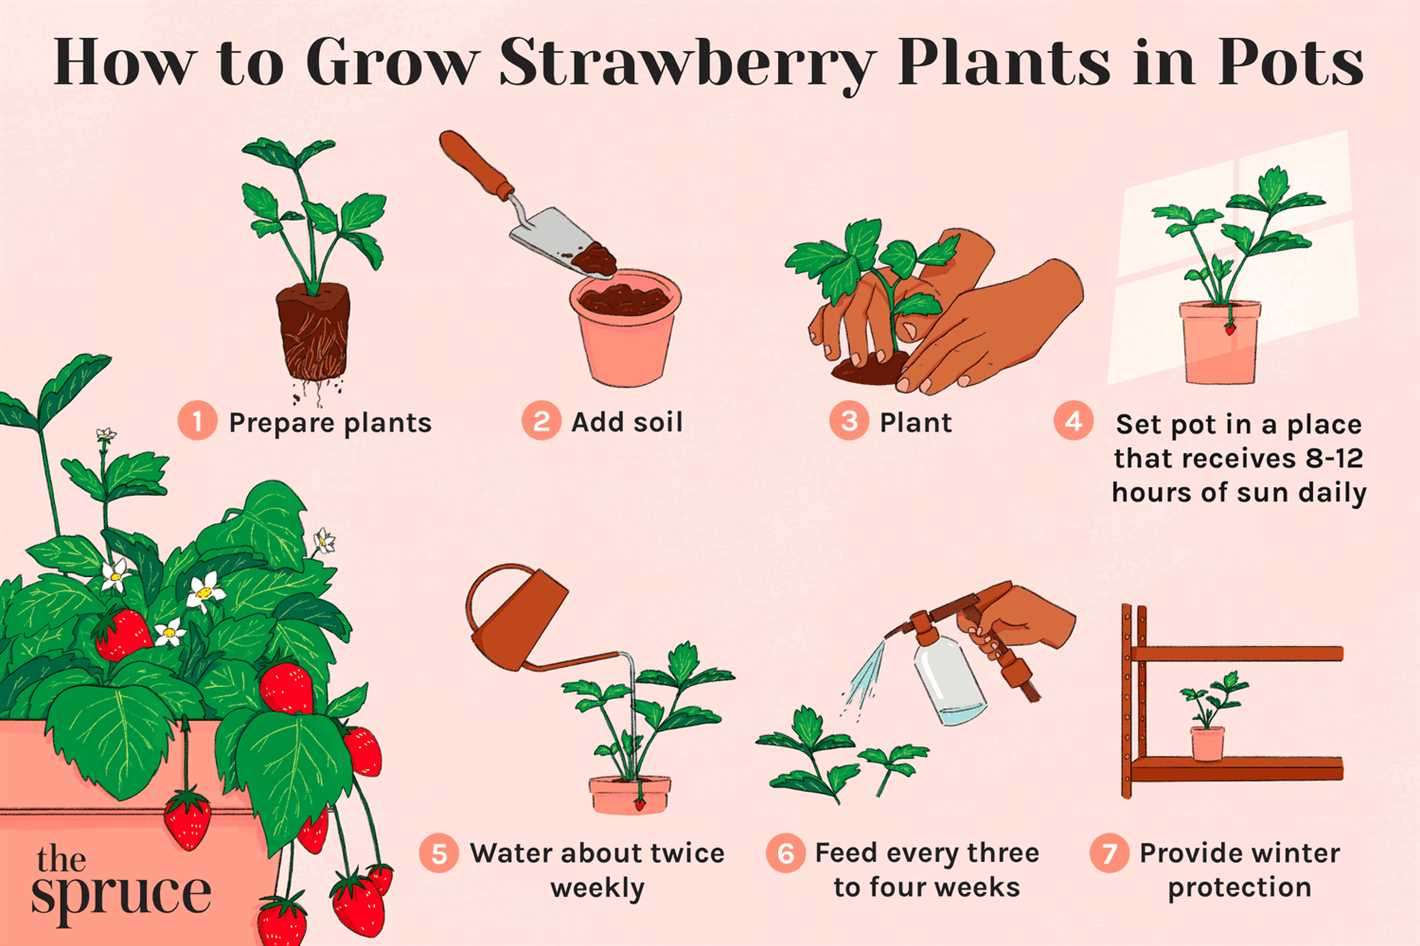
Once the seedlings have developed their first true leaves, they can be transplanted into individual pots or into the garden bed. Handle the seedlings carefully by their leaves to avoid damaging the fragile stems.
Following these steps will help you successfully sow strawberry seeds and start your own thriving strawberry garden.
Caring for strawberry seedlings
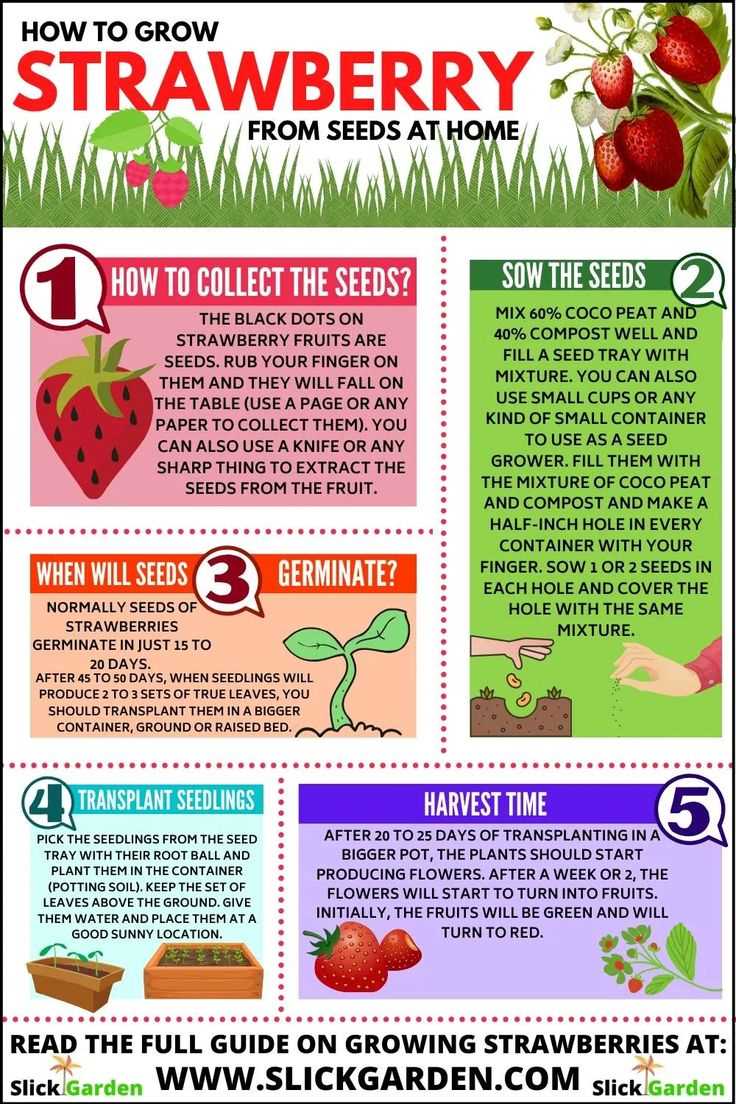
Once your strawberry seeds have germinated and started to grow, there are a few important steps you need to take to ensure their healthy growth and development. Here are some guidelines for caring for strawberry seedlings:
1. Providing the right environment
Make sure to keep your strawberry seedlings in a location that receives plenty of sunlight. They require at least 6-8 hours of direct sunlight per day. If you’re growing them indoors, consider using a grow light to provide the necessary light intensity.
In terms of temperature, strawberries prefer cooler conditions. Maintain a temperature of around 60-75°F (15-24°C) during the day and slightly lower at night. Avoid extreme temperature fluctuations, as they can stress the plants.
2. Watering
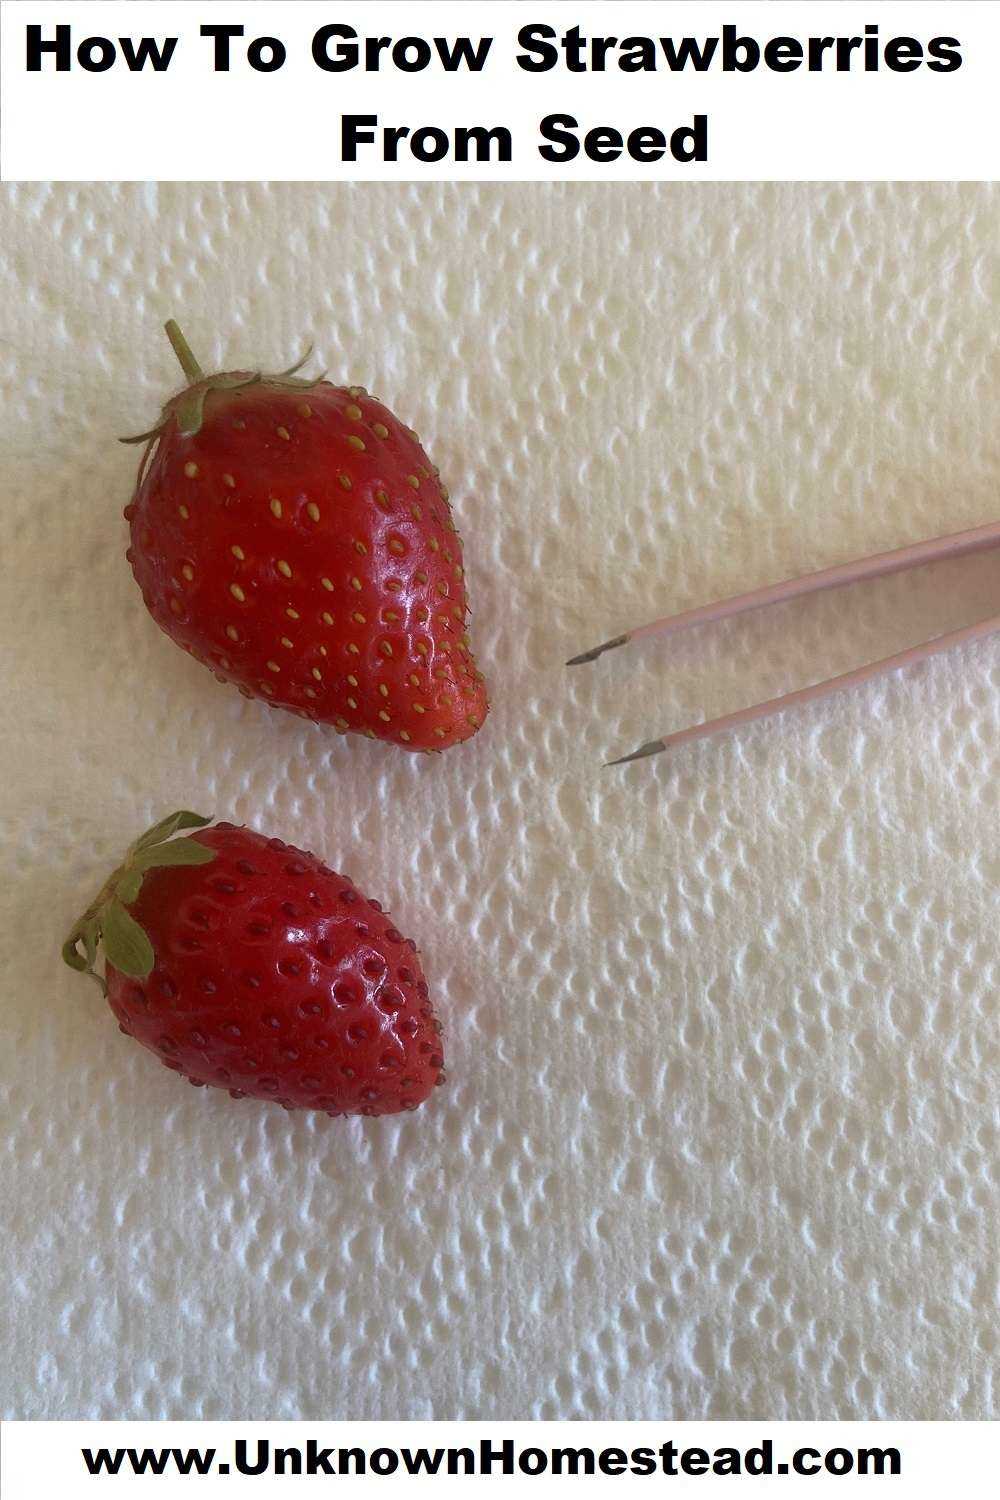
Strawberries have shallow roots, so they need regular watering to keep the soil evenly moist. Water them deeply, making sure the water reaches the roots. Avoid excessive watering, as it can cause root rot. Mulching around the plants can help retain moisture in the soil.
3. Fertilization
Strawberries are heavy feeders, so it’s important to provide them with regular fertilization. Use a balanced organic fertilizer or compost once a month during the growing season. Be careful not to over-fertilize, as it can result in poor fruit quality.
4. Pruning
As your strawberry plants grow, they will produce runners or stolons. These are long shoots that can root and form new plants. To encourage fruit production and prevent overcrowding, it’s important to prune the runners. Simply snip them off using clean scissors or pruning shears.
5. Pest and disease control
Keep an eye out for common pests that can damage your strawberry plants, such as aphids, slugs, and snails. Remove any pests you see by hand or use organic pest control methods. Additionally, monitor your plants for signs of diseases like gray mold or powdery mildew and take appropriate actions to prevent their spread.
6. Pollination
Although strawberries are self-pollinating, you can help improve the fruit set by gently shaking the plants or using a small brush to transfer pollen between flowers. This will increase the chances of getting a higher yield.
7. Harvesting
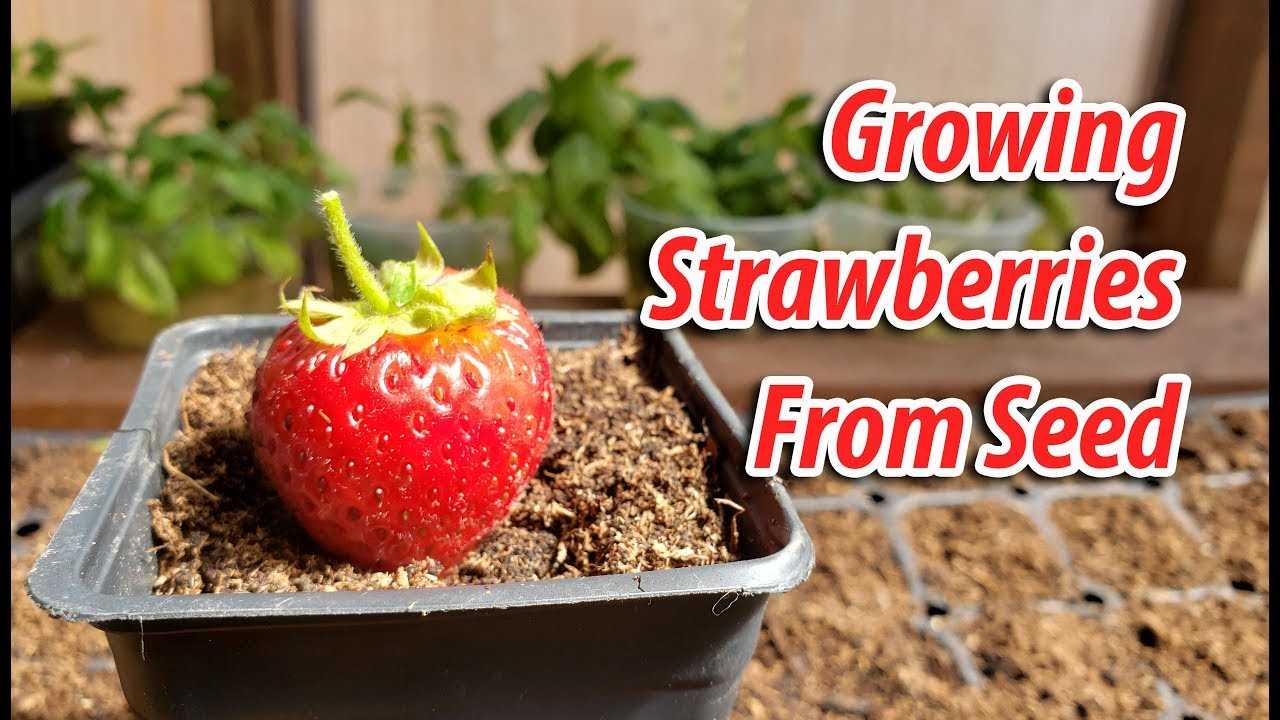
Once your strawberry plants start producing fruits, it’s important to regularly harvest them when they reach their peak ripeness. This will encourage continued fruit production and prevent the fruit from overripening and spoiling.
By following these care guidelines, you can ensure the healthy growth and productivity of your strawberry seedlings, leading to a bountiful harvest of delicious strawberries.
Transplanting strawberry seedlings

Transplanting strawberry seedlings is an important step in the growing process. It involves moving the seedlings from their initial containers to a larger, more permanent location. Here’s a step-by-step guide on how to transplant strawberry seedlings:
1. Prepare the planting area
Choose a well-draining location in your garden that receives at least 6 hours of sunlight per day. Remove any weeds or grass from the area and loosen the soil to a depth of about 6 inches.
2. Dig the planting holes
Space the planting holes about 12-18 inches apart in rows that are 3 feet apart. The holes should be large enough to accommodate the root system of the seedlings.
3. Water the seedlings
Before removing the seedlings from their containers, water them thoroughly to ensure that the roots are well-hydrated.
4. Carefully remove the seedlings from their containers
Gently tap the bottom of the container to loosen the soil and then carefully remove the seedlings. Be careful not to damage the delicate roots.
5. Place the seedlings in the planting holes
Insert the seedlings into the planting holes, making sure that the crown is level with the soil surface. The crown is the part of the plant where the leaves meet the roots.
6. Firmly press the soil around the seedlings
Gently press the soil around the seedlings to eliminate any air pockets and ensure good soil-to-root contact. Avoid compacting the soil too much, as strawberries prefer loose soil.
7. Water the transplanted seedlings
After transplanting, water the seedlings thoroughly to help settle the soil around the roots and provide hydration.
8. Mulch around the seedlings
Apply a layer of mulch, such as straw or wood chips, around the seedlings to help retain moisture and suppress weeds.
9. Provide proper care and maintenance
Continue to water the transplanted seedlings regularly, especially during dry periods, and monitor for any signs of pests or diseases. Consider adding a slow-release fertilizer to provide essential nutrients as the plants grow.
Following these steps will help ensure successful transplantation of strawberry seedlings and contribute to healthy plant growth and abundant fruit production.
Harvesting and enjoying your homegrown strawberries
Once your strawberry plants have flowered and the berries have ripened, it’s time to harvest and enjoy your homegrown strawberries. Follow these steps to ensure you harvest your strawberries at the peak of their flavor:
1. Check for ripeness:
Look for strawberries that are fully red all over, with no hints of green or white. They should be firm and plump to the touch, indicating that they are ripe and ready to be picked.
2. Pick your strawberries:
Gently grasp the stem of the strawberry and pull it with a slight twisting motion. Avoid pulling the berry by the fruit itself, as this may cause damage. Place the picked strawberries in a basket or container, being careful not to stack them too high to avoid crushing the delicate fruit.
3. Clean and store your strawberries:
When you’re ready to enjoy your freshly picked strawberries, rinse them gently with cool water to remove any dirt or debris. Pat them dry with a clean cloth or paper towel. If you’re not using them right away, store them in the refrigerator in a breathable container, such as a loosely covered bowl or a perforated plastic bag, to help them stay fresh for longer.
4. Enjoy your homegrown strawberries:
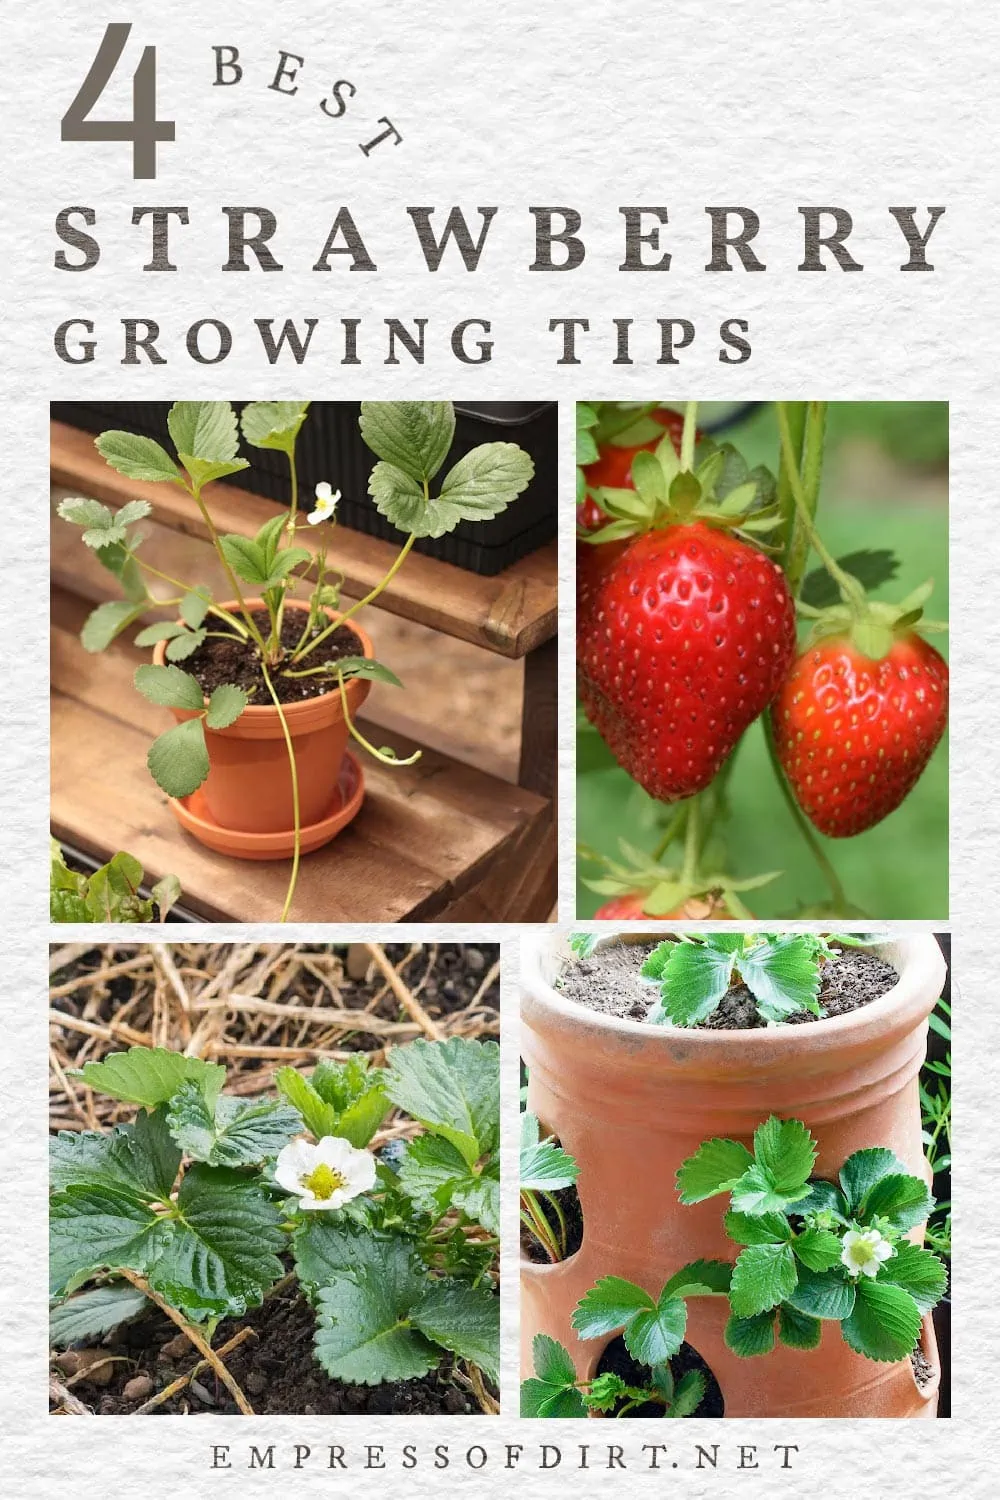
There are endless ways to enjoy your homegrown strawberries. Here are just a few ideas:
- Eat them fresh: Bite into a juicy strawberry for a sweet and refreshing snack.
- Make strawberry jam: Preserve your strawberries by making homemade jam.
- Create delicious desserts: Use your strawberries to make pies, cakes, tarts, or parfaits.
- Add them to salads: Toss sliced strawberries into your favorite salad for a burst of flavor.
- Freeze them for later: If you have an abundance of strawberries, freeze them for future use in smoothies, ice cream, or as a topping for pancakes and waffles.
Troubleshooting:
If you encounter any issues with your strawberry harvest, such as pest damage or disease, consult a gardening expert or do some research to identify the problem and find possible solutions. Remember that growing strawberries is a learning process, and each season can bring different challenges.
By following these tips, you’ll be able to enjoy the fruits of your labor and savor the delicious taste of homegrown strawberries!
Question-answer:
What is the best time to grow strawberries from seeds?
The best time to grow strawberries from seeds is in early spring or late winter.
How long does it take for strawberry seeds to germinate?
It takes about 2-3 weeks for strawberry seeds to germinate.
Can I grow strawberries from seeds indoors?
Yes, you can grow strawberries from seeds indoors. You can start the seeds in pots or trays, and then transplant the seedlings outdoors when they are ready.
Do strawberry seeds need light to germinate?
No, strawberry seeds do not need light to germinate. They actually prefer darkness, so it’s best to cover them with a thin layer of soil.
Can I grow strawberries from store-bought fruit?
Yes, you can grow strawberries from store-bought fruit. Simply save the seeds from the fruit, clean them, and then follow the steps outlined in the article to grow them.
