- Daffodil Bulbs 101: Planting and Caring for Dazzling Spring Flowers
- Introduction
- Choosing the Right Location
- Preparing the Soil
- Planting the Bulbs
- Caring for Daffodils
- Protecting Daffodils
- Conclusion
- Choosing the Perfect Daffodil Bulbs for Your Garden
- 1. Climate and Hardiness
- 2. Flower Size and Color
- 3. Growth Habit and Height
- 4. Blooming Time
- 5. Bulb Quality and Source
- Preparing the Soil for Planting Daffodil Bulbs
- 1. Choose a Well-Draining Location
- 2. Remove Weeds and Debris
- 3. Loosen the Soil
- 4. Improve the Soil
- 5. Test the Soil pH
- 6. Create a Planting Bed
- 7. Backfill and Water
- 8. Mulch the Area
- 9. Label the Plantings
- Planting Daffodil Bulbs: Step-by-Step Guide
- 1. Choose the Right Location:
- 2. Prepare the Soil:
- 3. Dig the Holes:
- 4. Plant the Bulbs:
- 5. Water the Bulbs:
- 6. Mulch the Area:
- 7. Label and Care for Your Bulbs:
- 8. Enjoy the Blooms:
- Watering and Fertilizing Daffodil Bulbs
- Watering
- Fertilizing
- Protecting Daffodil Bulbs from Pests and Diseases
- Pests
- Diseases
- Pruning and Deadheading Daffodil Flowers
- 1. Pruning Daffodil Leaves
- 2. Deadheading Daffodil Flowers
- 3. Handling Cut Daffodil Stems
- 4. Disposing of Pruned Material
- 5. Fertilizing after Pruning
- 6. Cleaning Pruning Tools
- Overwintering Daffodil Bulbs for Blooming in the Next Season
- When to Lift Daffodil Bulbs
- How to Lift Daffodil Bulbs
- Preparing Daffodil Bulbs for Storage
- Storing Daffodil Bulbs
- Monitoring and Maintenance
- Planting Daffodil Bulbs in the Next Season
- Creating Stunning Daffodil Bouquets: Tips and Tricks
- Choose the Right Daffodils
- Combine Colors and Varieties
- Consider the Scent
- Pair with Complementary Flowers
- Trim and Arrange
- Change the Water and Re-Cut the Stems
- Questions and Answers:
- When is the best time to plant daffodil bulbs?
- How deep should I plant the daffodil bulbs?
- Can daffodil bulbs be planted in containers?
- How often should I water daffodil bulbs?
- Can daffodils be grown in hot climates?
- What should I do with daffodil foliage after they finish blooming?
- Videos: The Best Method for Planting Tulip Bulbs
When spring arrives, one of the most delightful sights is a field of vibrant yellow daffodils. These beautiful flowers are a favorite among gardeners and can easily be grown in your own backyard. Daffodil bulbs are the key to growing these stunning flowers, and with a little care and attention, you can enjoy their bright blooms year after year.
Planting daffodil bulbs is a simple process that can be done in the fall or early winter, before the ground freezes. Choose a sunny spot in your garden with well-draining soil. Dig a hole that is three times as deep as the bulb, and place the bulb pointy side up in the hole. Cover the bulb with soil and water thoroughly.
Once planted, daffodil bulbs require minimal care. It is important to keep the soil moist during the growing season, but be careful not to overwater, as daffodils prefer slightly dry conditions. Fertilize the bulbs with a balanced fertilizer in the spring and again after the flowers have bloomed. This will help promote healthy growth and ensure that the bulbs flower again the following year.
Daffodils are known for their hardiness and ability to thrive in a variety of conditions. However, they do require a period of dormancy to replenish their energy. After the flowers have faded, allow the foliage to die back naturally. This allows the nutrients to be absorbed back into the bulb. Once the foliage has turned yellow and withered, you can remove it. Be sure to leave the bulbs in the ground so they can continue to grow and multiply.
In conclusion, daffodil bulbs are an easy and rewarding way to add a splash of color to your garden. With a few simple steps, you can grow these beautiful spring flowers and enjoy their vibrant blooms year after year. So grab a shovel and get planting – your garden will thank you!
Daffodil Bulbs 101: Planting and Caring for Dazzling Spring Flowers
Introduction
Daffodils are beautiful spring flowers that bring cheer and brightness to any garden. They are easy to grow and care for, making them a popular choice among gardeners. In this article, we will provide a beginner’s guide to planting and caring for daffodil bulbs.
Choosing the Right Location
Before planting your daffodil bulbs, it’s important to choose the right location. Daffodils thrive in sunny or partially shaded areas with well-draining soil. Avoid planting them in areas that are prone to waterlogging, as this can lead to rot.
Preparing the Soil
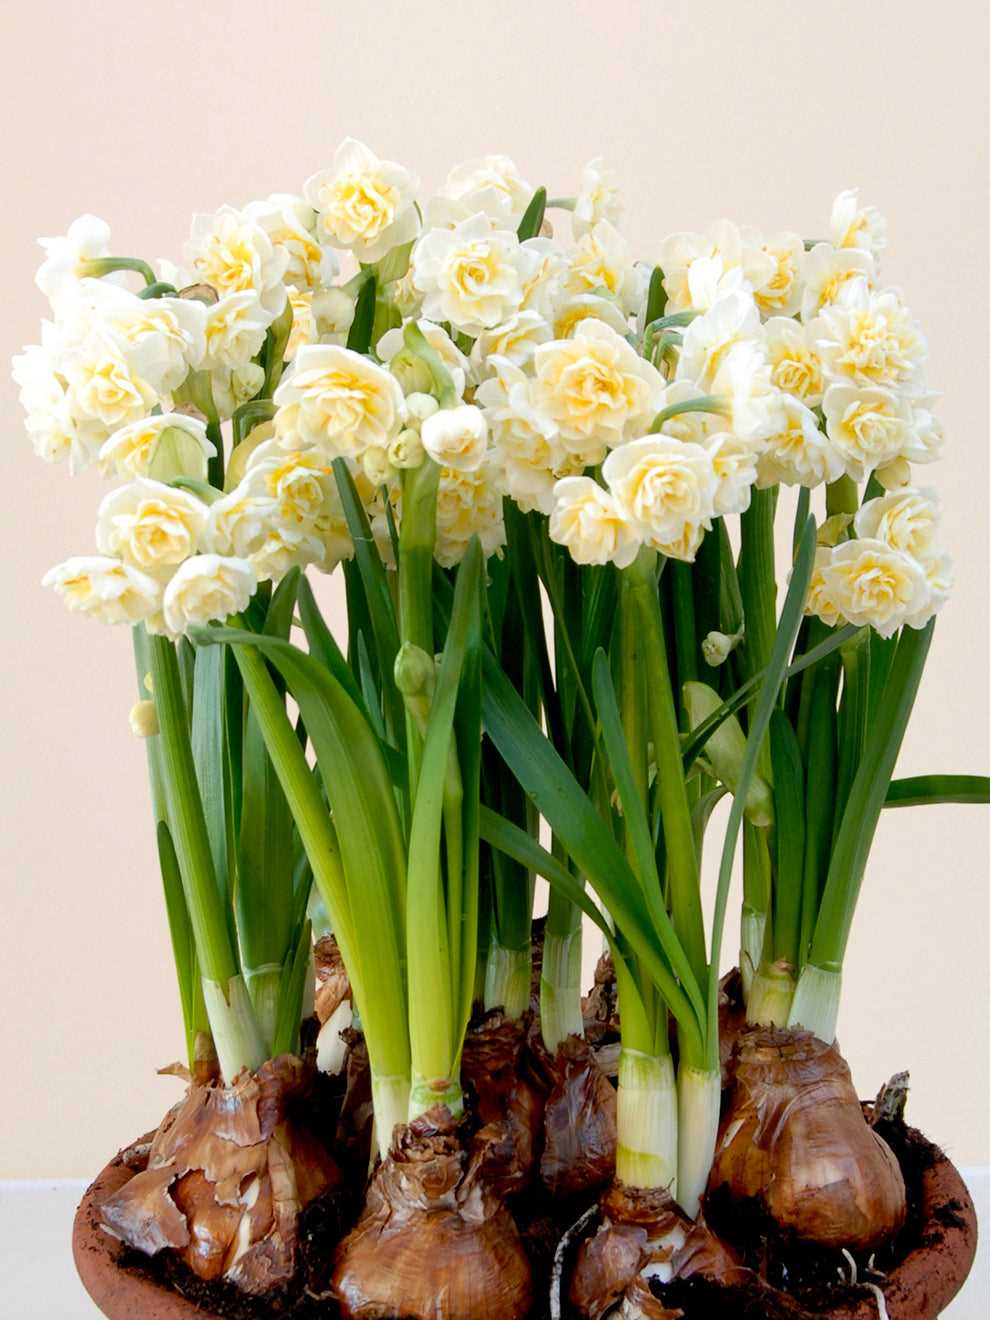
Prepare the soil before planting your daffodil bulbs. Start by removing any weeds or grass from the area. Loosen the soil using a garden fork or tiller, ensuring it is well-drained and crumbly. Incorporate some organic matter, such as compost or well-rotted manure, to improve the soil’s fertility.
Planting the Bulbs
Plant your daffodil bulbs in the fall, ideally around 2-4 weeks before the ground freezes. Dig a hole that is two to three times deeper than the bulb’s height. Place the bulb in the hole, pointed end up, and cover it with soil. Space the bulbs 4-6 inches apart to allow for proper growth.
Caring for Daffodils
Once your daffodils are planted, there are a few important care tips to keep in mind:
- Watering: Daffodils require regular watering, especially during dry spells. However, be cautious not to overwater, as this can cause bulb rot.
- Fertilizing: Apply a balanced fertilizer in early spring when the shoots begin to emerge. Follow the manufacturer’s instructions for proper application.
- Deadheading: After your daffodils have bloomed, deadhead them by removing the faded flowers. This will help redirect the plant’s energy back into the bulb for next year’s growth.
Protecting Daffodils
Daffodils are generally hardy and can withstand cold temperatures. However, extreme freezing conditions or late frosts can damage the flowers. If you live in an area with severe winters, consider covering your daffodils with a layer of mulch or straw to provide protection.
Conclusion
Daffodils are a stunning addition to any garden, and with the right care, they will reward you with their vibrant colors year after year. Remember to choose a suitable location, prepare the soil, and follow proper planting and care techniques to ensure the success of your daffodil bulbs. Happy gardening!
Choosing the Perfect Daffodil Bulbs for Your Garden
When it comes to choosing daffodil bulbs for your garden, there are a few factors to consider. From the size and color of the flowers to their growth habit and blooming time, each variety of daffodil brings its own unique charm to your landscape. Here are some tips to help you choose the perfect daffodil bulbs for your garden:
1. Climate and Hardiness
Before selecting daffodil bulbs, it’s important to consider your climate and the hardiness of different varieties. Daffodils are available in a wide range of hardiness zones, so make sure to choose bulbs that are suitable for your specific region. Bulbs that are not well-suited to your climate may struggle to thrive or fail to bloom altogether.
2. Flower Size and Color
Daffodils come in a variety of flower sizes and colors, ranging from small, delicate blooms to large, showy flowers. Consider the overall aesthetic of your garden and choose bulbs that complement your existing plantings. If you’re looking to create a vibrant and colorful display, opt for daffodils in shades of yellow, orange, or white. For a more subtle and elegant look, choose daffodils with pastel hues.
3. Growth Habit and Height
Daffodils vary in their growth habit and height, which can have an impact on their placement in your garden. Some daffodil varieties have a more upright growth habit, while others have a more spreading or cascading form. Think about where you plan to plant your daffodils and choose bulbs that will complement the surrounding vegetation. Taller daffodil varieties work well in the background of flower beds, while shorter varieties are ideal for the front of borders or rock gardens.
4. Blooming Time
If you want to enjoy a continuous display of daffodils throughout the spring season, consider selecting bulbs with different blooming times. Early blooming varieties will be the first to emerge, while late blooming varieties will extend the flowering season well into spring. By choosing bulbs with staggered blooming times, you can ensure that your garden is filled with daffodils for an extended period.
5. Bulb Quality and Source
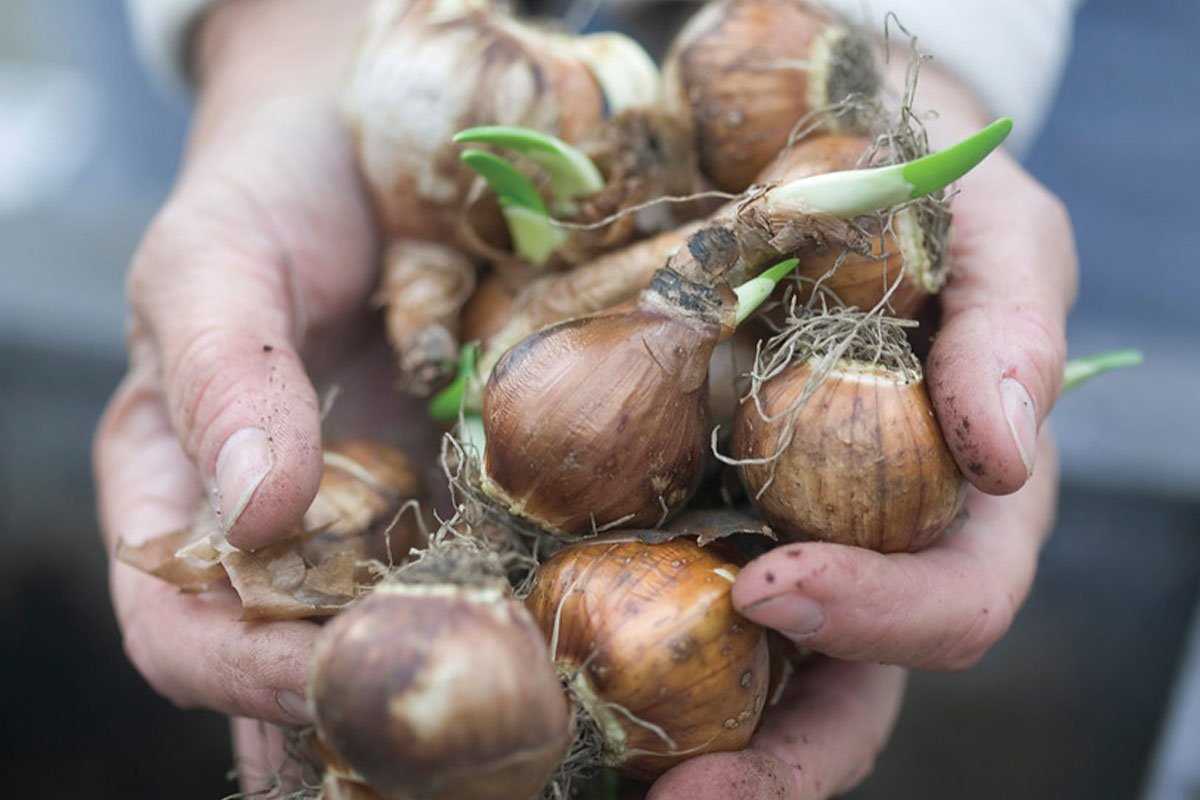
Finally, when purchasing daffodil bulbs, it’s important to consider the quality of the bulbs and the source from which you are buying them. Look for bulbs that are firm, plump, and free from any signs of decay or damage. Consider buying bulbs from reputable nurseries or garden centers, as they are more likely to provide high-quality bulbs that are true to the labeled variety.
By considering these factors and taking the time to choose the perfect daffodil bulbs for your garden, you can create a stunning display of these beautiful spring flowers that will brighten up your landscape year after year.
Preparing the Soil for Planting Daffodil Bulbs
Before planting daffodil bulbs, it is important to prepare the soil properly. By providing the right conditions, you can ensure that your daffodils will thrive and produce beautiful blooms in the spring.
1. Choose a Well-Draining Location
Daffodil bulbs prefer well-draining soil to prevent them from sitting in water and rotting. Select a location in your garden that has good drainage or improve the drainage by incorporating organic matter into the soil.
2. Remove Weeds and Debris
Clear the area of any weeds, grass, or debris that may compete with the daffodils for nutrients and water. This will give the bulbs a better chance of establishing and growing successfully.
3. Loosen the Soil
Use a garden fork or a spade to loosen the soil to a depth of about 8-10 inches. This will make it easier for the daffodil bulbs to establish their roots and allow for proper nutrient uptake.
4. Improve the Soil
Consider adding compost or well-rotted manure to the soil to improve its fertility and texture. This will provide the daffodil bulbs with the necessary nutrients for healthy growth and flowering.
5. Test the Soil pH
Daffodils prefer slightly acidic to neutral soil with a pH between 6 and 7. If your soil is too acidic, you can add lime to raise the pH. If it is too alkaline, you can add sulfur or peat moss to lower the pH.
6. Create a Planting Bed
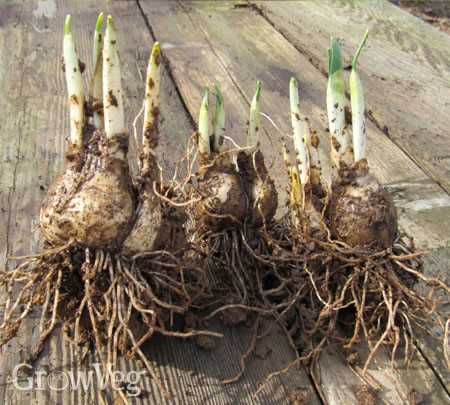
Create a planting bed by digging a trench or individual holes for the daffodil bulbs. The depth should be about 6 inches, or three times the height of the bulb. Space the bulbs about 3-6 inches apart, depending on the size of the bulb.
7. Backfill and Water
Once the bulbs are in place, backfill the holes with soil and gently firm it around the bulbs. Water the area thoroughly to help settle the soil and promote root growth.
8. Mulch the Area
Apply a layer of organic mulch, such as straw or wood chips, to the planting area. This will help conserve moisture, suppress weed growth, and provide insulation for the bulbs during cold weather.
9. Label the Plantings
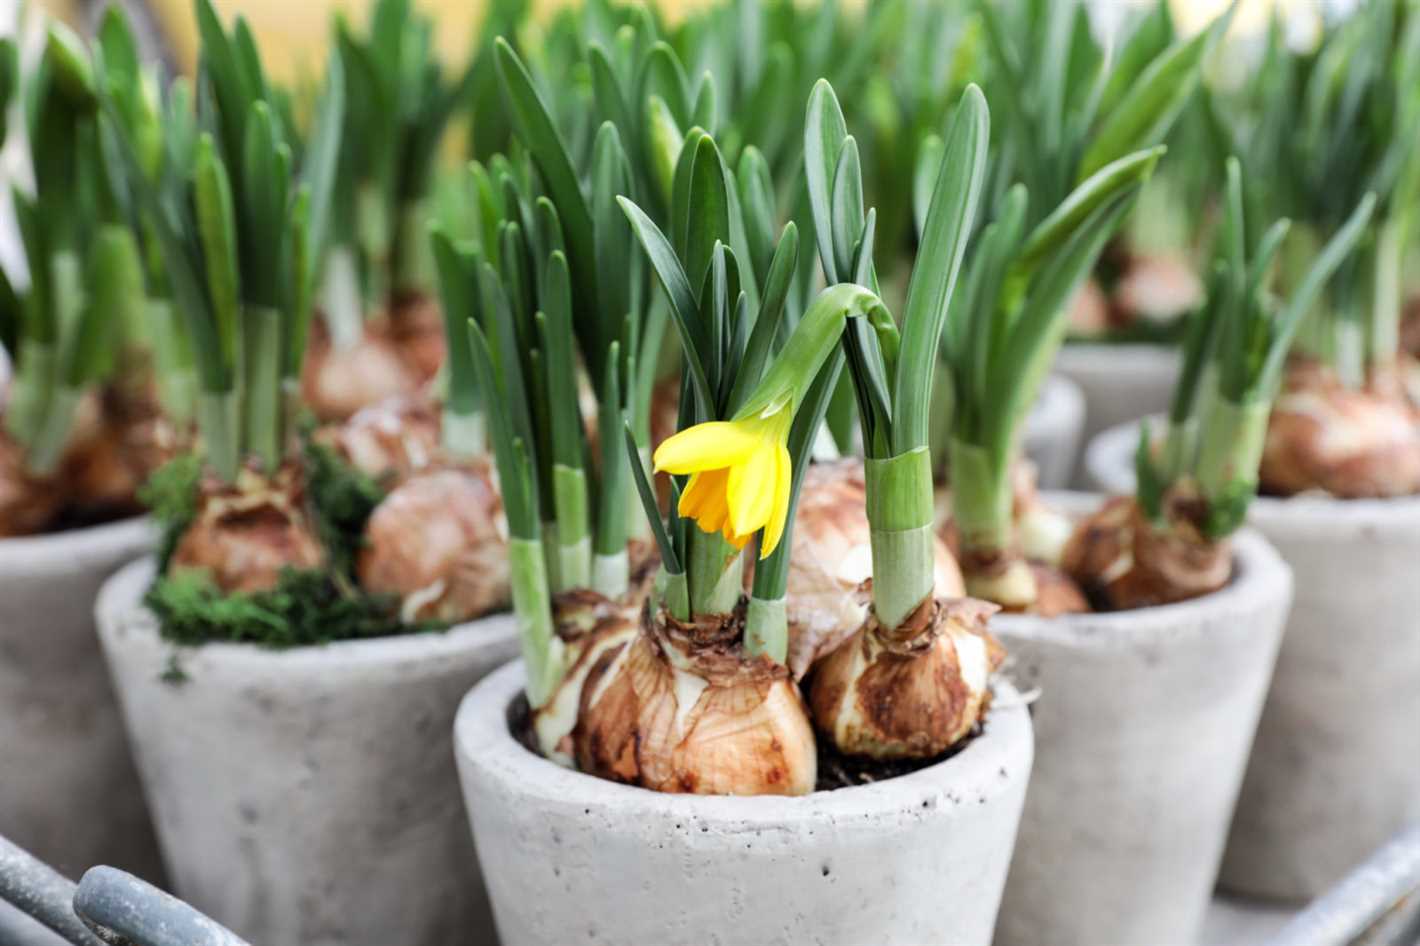
It’s helpful to label the daffodil plantings to keep track of the different varieties and ensure proper care. Use small stakes or markers to indicate the location and variety of each bulb.
By following these steps to prepare the soil for planting daffodil bulbs, you can ensure that your flowers will have the best chance of thriving and producing beautiful blooms in the spring. With the right conditions, daffodils can be a stunning addition to any garden or landscape.
Planting Daffodil Bulbs: Step-by-Step Guide
Planting daffodil bulbs is a simple and rewarding process that will brighten up your garden in the spring. Follow these easy steps to ensure successful growth and beautiful blooms:
1. Choose the Right Location:
Find a suitable spot in your garden that receives full sun to partial shade. Daffodils thrive in well-draining soil, so make sure the area is not prone to standing water.
2. Prepare the Soil:
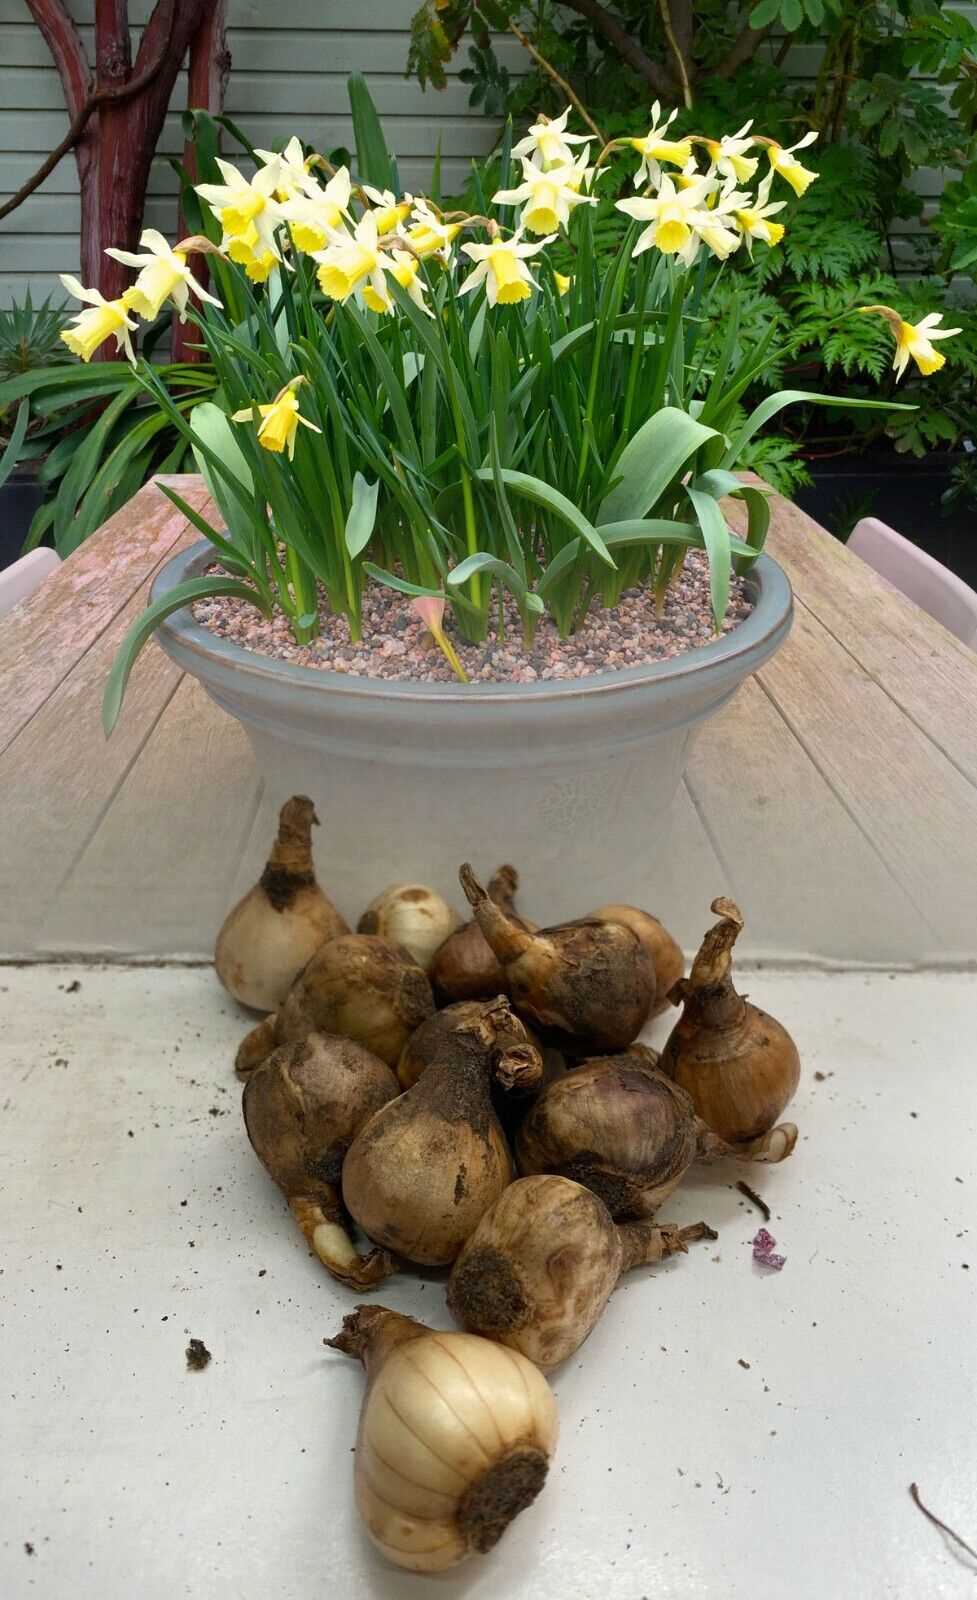
Loosen the soil with a garden fork or tiller to a depth of 6 to 8 inches. Remove any weeds or rocks that may interfere with bulb growth. It’s also a good idea to add some organic matter, such as compost or peat moss, to improve the soil’s fertility and drainage.
3. Dig the Holes:
Using a bulb planter or garden trowel, dig holes that are 6 to 8 inches deep and about 4 to 6 inches apart. If you’re planting a large number of bulbs, you can also dig a trench and place the bulbs in a row.
4. Plant the Bulbs:
Place each bulb in the hole with the pointed end facing up. This is important as bulbs will not produce flowers if planted upside down. Cover the bulbs with soil and gently firm it around them to remove any air pockets.
5. Water the Bulbs:
After planting, give the bulbs a thorough watering to settle the soil and initiate root growth. However, be careful not to overwater, as daffodils prefer slightly drier conditions.
6. Mulch the Area:
Apply a layer of mulch, such as straw or wood chips, around the planted bulbs. Mulch helps regulate soil temperature, retains moisture, and suppresses weed growth.
7. Label and Care for Your Bulbs:
It’s a good idea to label the planted area, especially if you’re planting different varieties of daffodils. This will help you remember their names and characteristics. Additionally, daffodils are low-maintenance plants, but make sure to water them during dry spells and remove any weeds that may compete for nutrients.
8. Enjoy the Blooms:
With proper care and attention, your daffodils will begin to emerge in the spring and produce beautiful blooms. Enjoy their vibrant colors and delightful fragrance, knowing that you successfully planted and nurtured these lovely spring flowers.
| Tools Needed: | Garden fork or tiller, bulb planter or garden trowel |
| Location: | Full sun to partial shade, well-draining soil |
| Soil Preparation: | Loosen soil, remove weeds and rocks, add organic matter |
| Planting Depth: | 6 to 8 inches |
| Spacing: | 4 to 6 inches apart |
| Watering: | Thoroughly after planting, then during dry spells |
| Mulching: | Apply a layer of mulch around planted bulbs |
Watering and Fertilizing Daffodil Bulbs
Watering
Watering is crucial for the growth and development of daffodil bulbs. These bulbs require a moderate amount of water, especially during their active growing season in the spring. Here are some guidelines to follow when watering your daffodil bulbs:
- Water your daffodil bulbs regularly, keeping the soil consistently moist but not overly saturated.
- During the spring, when the bulbs are actively growing, water them thoroughly to ensure deep root penetration.
- Avoid over-watering, as daffodil bulbs are susceptible to rot and fungal diseases in waterlogged conditions.
- Water deeply once a week during dry periods, providing approximately 1 inch of water per week.
Fertilizing
Fertilizing daffodil bulbs is important to ensure healthy growth and vibrant flowers. Here are some tips for fertilizing your daffodil bulbs:
- Apply a high-phosphorus fertilizer, such as a 5-10-10 or 10-20-10 formula, when planting the bulbs. This will promote strong root development.
- Avoid fertilizing daffodil bulbs immediately before or after planting, as this can cause damage to the delicate roots.
- Once the daffodils have finished blooming and the foliage has turned yellow, you can apply a slow-release granular fertilizer around the bulbs.
- Follow the manufacturer’s instructions for the application rate, as over-fertilizing can burn the bulbs.
- Water the fertilized area thoroughly after application to help the nutrients reach the root zone.
By following these watering and fertilizing guidelines, you can help your daffodil bulbs thrive and reward you with beautiful blooms year after year.
Protecting Daffodil Bulbs from Pests and Diseases
Daffodil bulbs are generally quite hardy and resistant to pests and diseases. However, there are a few common issues that can affect these beautiful spring flowers. By taking a few precautions, you can protect your daffodil bulbs and ensure a healthy and vibrant display.
Pests
While daffodil bulbs are not typically attractive to pests, there are a few insects that may cause problems if they find their way into your garden. The most common pests that can affect daffodil bulbs include:
- Narcissus fly: These small flies lay their eggs at the base of the bulbs. The larvae then feed on the bulbs, resulting in weak and stunted plants. To prevent this, you can use a fine mesh netting or row covers to keep the flies away.
- Slugs and snails: These slimy creatures can munch on daffodil leaves and flowers, causing damage to the plants. To deter slugs and snails, you can surround your daffodil beds with a layer of crushed eggshells or diatomaceous earth, which will create a barrier that they are reluctant to cross.
- Deer and rabbits: These animals are known to browse on daffodil plants, especially in areas where they are abundant. To protect your daffodils from deer and rabbits, you can install fencing or use scent repellents, such as bars of soap or predator urine, around your garden.
Diseases
Daffodil bulbs can also be susceptible to certain diseases, which can affect their growth and overall health. The most common diseases that can affect daffodil bulbs include:
- Bulb rot: This fungal disease can cause the bulbs to become soft and mushy. To prevent bulb rot, it’s important to plant your daffodil bulbs in well-draining soil and avoid overwatering. Additionally, you can treat the bulbs with a fungicide before planting to reduce the risk of infection.
- Daffodil virus: This viral disease can cause distorted growth, yellow streaking, and reduced flowering in daffodil plants. Unfortunately, there is no cure for daffodil virus, so it’s important to remove and destroy any infected plants to prevent the disease from spreading to healthy ones.
- Grey mold: Also known as botrytis, grey mold is a common fungal disease that can affect daffodil flowers, causing them to turn brown and mushy. To prevent grey mold, make sure to provide adequate air circulation around your daffodils by spacing them properly and removing any dead foliage.
By being aware of these common pests and diseases, and taking the necessary precautions, you can protect your daffodil bulbs and enjoy a beautiful display of flowers in the spring.
Pruning and Deadheading Daffodil Flowers
Pruning and deadheading daffodil flowers is an important part of their care to ensure their continued health and beauty. Here are some tips to help you properly prune and deadhead your daffodils:
1. Pruning Daffodil Leaves

Daffodil leaves should not be pruned until they have turned yellow and wilted. This is usually about six weeks after the flowers have bloomed. The leaves are important for the bulb to store energy for next year’s growth, so it’s important not to cut them back too soon. Once the leaves have turned yellow and wilted, you can trim them back to the base of the plant.
2. Deadheading Daffodil Flowers
Deadheading daffodil flowers is the process of removing the faded blooms. This not only improves the appearance of the plant, but it also helps redirect the plant’s energy towards bulb growth. To deadhead daffodils, wait until the flowers have completely withered and the petals have fallen off. Then, using clean pruning shears, cut the flower stem back to the base of the plant.
3. Handling Cut Daffodil Stems
It’s important to note that daffodil stems, leaves, and bulbs contain a sap that can cause skin irritation. To avoid this, always wear gloves when handling cut daffodil stems. If the sap comes into contact with your skin, wash the affected area thoroughly with soap and water.
4. Disposing of Pruned Material
After pruning and deadheading, it’s important to properly dispose of the pruned material to prevent the spread of pests and diseases. Do not compost daffodil foliage or stems, as they may harbor fungal diseases. Instead, dispose of them in a sealed bag or burn them.
5. Fertilizing after Pruning
After pruning and deadheading your daffodils, it’s a good idea to fertilize the bulbs to provide them with nutrients for the next growing season. Use a slow-release bulb fertilizer, following the instructions on the package for application rates. Apply the fertilizer around the base of the plants and water it in.
6. Cleaning Pruning Tools
It’s important to clean and disinfect your pruning tools after every use, especially when working with daffodils or other plants that may carry diseases. This helps prevent the spread of pathogens from one plant to another. Clean your pruning shears or scissors with warm, soapy water and rinse them thoroughly. You can also disinfect them with a solution of one part bleach to nine parts water. Rinse and dry the tools before storing them.
By following these pruning and deadheading tips, you can help your daffodils thrive and produce beautiful blooms year after year.
Overwintering Daffodil Bulbs for Blooming in the Next Season
Overwintering daffodil bulbs is an important step in ensuring a beautiful display of these spring flowers in the next season. By providing the right conditions and care, you can protect the bulbs and help them survive the cold winter months to bloom again in the spring.
When to Lift Daffodil Bulbs
The best time to lift daffodil bulbs for overwintering is after the foliage has turned yellow and died back. This is usually in late spring or early summer, depending on your climate. It’s important to allow the foliage to fully mature and provide nutrients to the bulbs before lifting them.
How to Lift Daffodil Bulbs
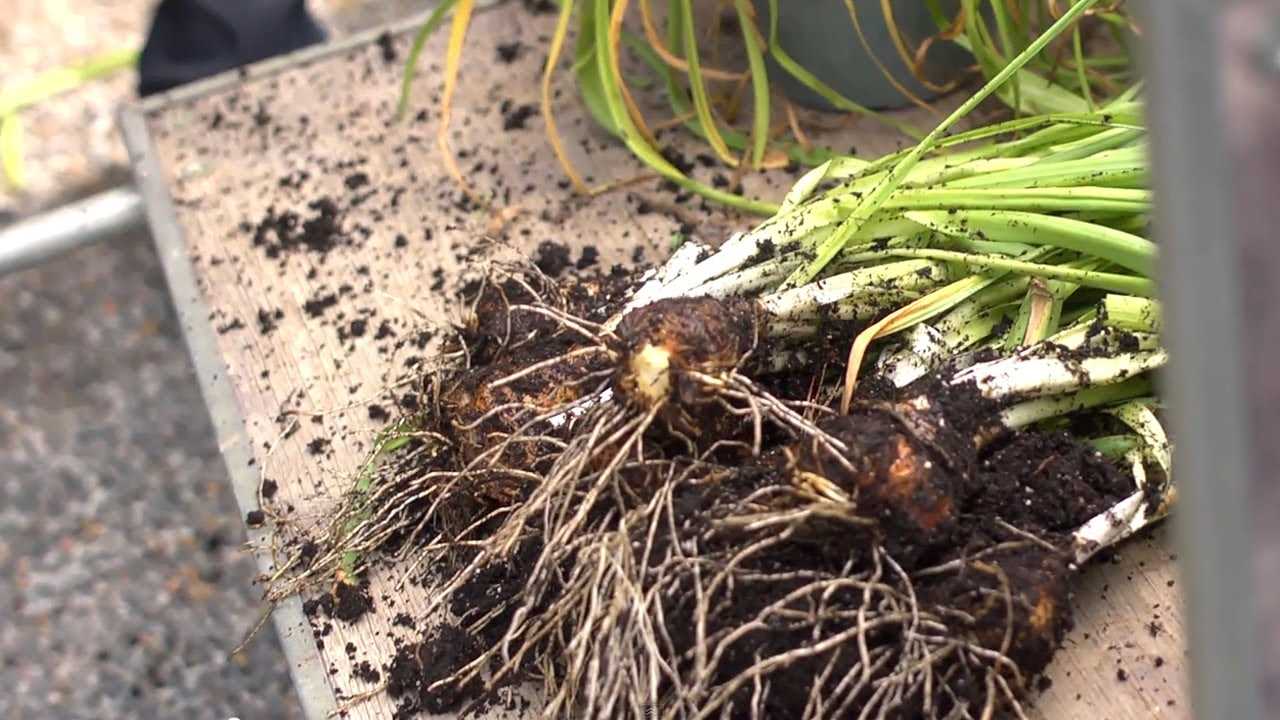
To lift the daffodil bulbs, gently loosen the soil around them using a garden fork or shovel. Carefully lift the bulbs out of the ground, being cautious not to damage them. Shake off any excess soil and remove any dead foliage or debris.
Preparing Daffodil Bulbs for Storage
After lifting the daffodil bulbs, it’s essential to prepare them for storage. Start by inspecting each bulb for any signs of damage or disease. Discard any bulbs that are soft or rotting, as they can spread diseases to the healthy bulbs.
Next, clean the bulbs by gently brushing off any remaining soil or debris. Avoid washing them, as this can remove the protective outer layer of the bulb.
Once the bulbs are clean, allow them to dry in a cool, shady place for a few days. This helps prevent rot and fungal growth during storage.
Storing Daffodil Bulbs
The ideal conditions for storing daffodil bulbs include a cool and dry environment. Choose a dark and well-ventilated area, such as a garage or basement, with temperatures between 35-50°F (2-10°C).
You can store the bulbs in various ways, depending on your preference. One option is to place them in cardboard boxes or mesh bags with good air circulation. Alternatively, you can store them in paper bags or old pantyhose, making sure to label and separate different varieties.
Avoid storing the bulbs in plastic bags or containers, as this can trap moisture and lead to rot.
Monitoring and Maintenance
While the daffodil bulbs are in storage, it’s important to regularly monitor and inspect them for any signs of rot, disease, or pests. Remove any bulbs that show signs of damage to prevent the spread of diseases.
Additionally, it’s a good idea to check the bulbs occasionally for moisture and make sure the storage area remains dry and well-ventilated.
Planting Daffodil Bulbs in the Next Season
In the late fall or early winter, when the soil has cooled down but isn’t frozen yet, it’s time to plant the daffodil bulbs for blooming in the next season. Choose a well-draining location with full sun or partial shade.
Plant the daffodil bulbs at a depth that is two to three times their own height, with the pointed end facing upwards. Space the bulbs at least two to six inches apart, depending on the variety.
After planting, water the bulbs thoroughly and apply a layer of mulch to help insulate the soil and protect the bulbs from temperature fluctuations.
In the following spring, you’ll be rewarded with the beautiful blooms of daffodils as a result of properly overwintering the bulbs.
Creating Stunning Daffodil Bouquets: Tips and Tricks
As spring arrives, many people look forward to the vibrant colors and sweet scent of daffodils. These beautiful flowers can be enjoyed not only in gardens, but also as stunning bouquets that bring the freshness of spring indoors. Here are some tips and tricks for creating stunning daffodil bouquets:
Choose the Right Daffodils
When selecting daffodils for your bouquet, look for ones that are fully open but still have firm petals and upright stems. Avoid flowers that are wilted or have yellowing leaves. It’s best to pick daffodils in the morning when they are at their freshest.
Combine Colors and Varieties
Daffodils come in a variety of colors and sizes, from traditional yellow to white, pink, and even orange. To create a stunning bouquet, mix different varieties and colors together. This adds depth and visual interest to your arrangement.
Consider the Scent
Daffodils have a distinctive, sweet scent that can fill a room. If you’re creating a bouquet for a small space or someone who is sensitive to strong scents, consider using daffodil varieties that are less fragrant. This way, you can still enjoy the beauty of daffodils without overwhelming the senses.
Pair with Complementary Flowers
To create a truly stunning bouquet, pair your daffodils with complementary flowers. Some great options include tulips, hyacinths, and freesias. These flowers not only add color and texture, but also enhance the overall look of the bouquet.
Trim and Arrange
Before arranging your daffodil bouquet, trim the stems at an angle to promote water absorption. Remove any foliage that will be below the water line. Arrange the flowers in a vase or container, starting with the daffodils as the focal point and filling in with the complementary flowers. Pay attention to the height and distribution of the flowers to create a balanced and visually appealing arrangement.
Change the Water and Re-Cut the Stems
To keep your daffodil bouquet looking fresh and vibrant, change the water every few days and re-cut the stems at an angle. This will help the flowers stay hydrated and last longer.
With these tips and tricks, you can create stunning daffodil bouquets that bring the beauty and freshness of spring into your home. Whether you’re creating a bouquet for yourself or as a gift, daffodils are sure to brighten any space.
Questions and Answers:
When is the best time to plant daffodil bulbs?
The best time to plant daffodil bulbs is in the fall, usually in September or October. This allows the bulbs to establish their root systems before winter sets in.
How deep should I plant the daffodil bulbs?
Daffodil bulbs should be planted about 6 inches deep. Make sure to dig a hole that is deep enough to accommodate the entire bulb.
Can daffodil bulbs be planted in containers?
Yes, daffodil bulbs can be planted in containers. It is important to choose a container that has drainage holes to prevent overwatering. Use a well-draining potting mix and plant the bulbs at the same depth as you would in the ground.
How often should I water daffodil bulbs?
Daffodil bulbs should be watered regularly, especially during dry periods. However, it is important not to overwater them as this can cause the bulbs to rot. Check the soil moisture and water when it feels dry to the touch.
Can daffodils be grown in hot climates?
Daffodils are typically better suited for cooler climates. If you live in a hot climate, you may need to refrigerate the bulbs for a few weeks before planting them in order to simulate a period of cold dormancy. Provide some shade and ensure they receive enough water to help them thrive in hot conditions.
What should I do with daffodil foliage after they finish blooming?
After daffodils finish blooming, it is important to leave the foliage intact until it turns yellow and withers. This allows the bulbs to store energy for next year’s blooms. Do not cut off or tie up the foliage as this can interfere with the bulb’s ability to photosynthesize.


