- Gloxinias: Key Steps for Planting from Seeds and Tubers
- 1. Choosing Seeds and Tubers
- 2. Preparing the Soil
- 3. Planting Seeds
- 4. Planting Tubers
- 5. Caring for Gloxinias
- 6. Propagation
- 7. Pests and Diseases
- 8. Flowering and Blooming
- Choosing the Right Soil for Gloxinias
- 1. Well-Draining Soil
- 2. Soil pH
- 3. Loamy and Light Texture
- 4. Rich in Organic Matter
- 5. Avoid Heavy Clay Soil
- Sowing Gloxinia Seeds: Tips for Success
- Preparing Gloxinia Tubers for Planting
- Planting Gloxinia Tubers: Best Practices
- 1. Choosing the Right Pot
- 2. Soil Preparation
- 3. Planting Depth
- 4. Watering
- 5. Light and Temperature
- 6. Fertilization
- 7. Pruning
- 8. Support
- Providing Adequate Water and Humidity for Gloxinias
- Watering
- Humidity
- Monitoring
- Caring for Growing Gloxinias: Light and Temperature
- Light
- Temperature
- Gloxinia Fertilization Tips from Expert Florists
- 1. Choose the Right Fertilizer
- 2. Follow the Label Instructions
- 3. Apply Fertilizer During the Growing Season
- 4. Use a Diluted Solution
- 5. Apply Fertilizer to Moist Soil
- 6. Avoid Fertilizer Contact with Leaves
- 7. Monitor Plant Response
- Preventing Common Gloxinia Diseases and Pests
- 1. Proper Watering
- 2. Good Air Circulation
- 3. Sterilized Potting Mix
- 4. Regular Cleaning
- 5. Pest Control
- 6. Proper Fertilization
- 7. Quarantine New Plants
- 8. Remove Infected Plants
- 9. Maintain Ideal Growing Conditions
- 10. Regular Monitoring
- Q&A:
- What is the best way to plant gloxinias from seeds?
- Is it possible to grow gloxinias from tubers?
- What are the ideal growing conditions for gloxinias?
- When should I start planting gloxinias?
- What are some common problems that can occur when growing gloxinias?
- How long does it take for gloxinias to flower?
- Can gloxinias be grown outdoors?
- Video: Planting GLOXINIA Seeds | Sinningia Seciosa | Stokes Seeds
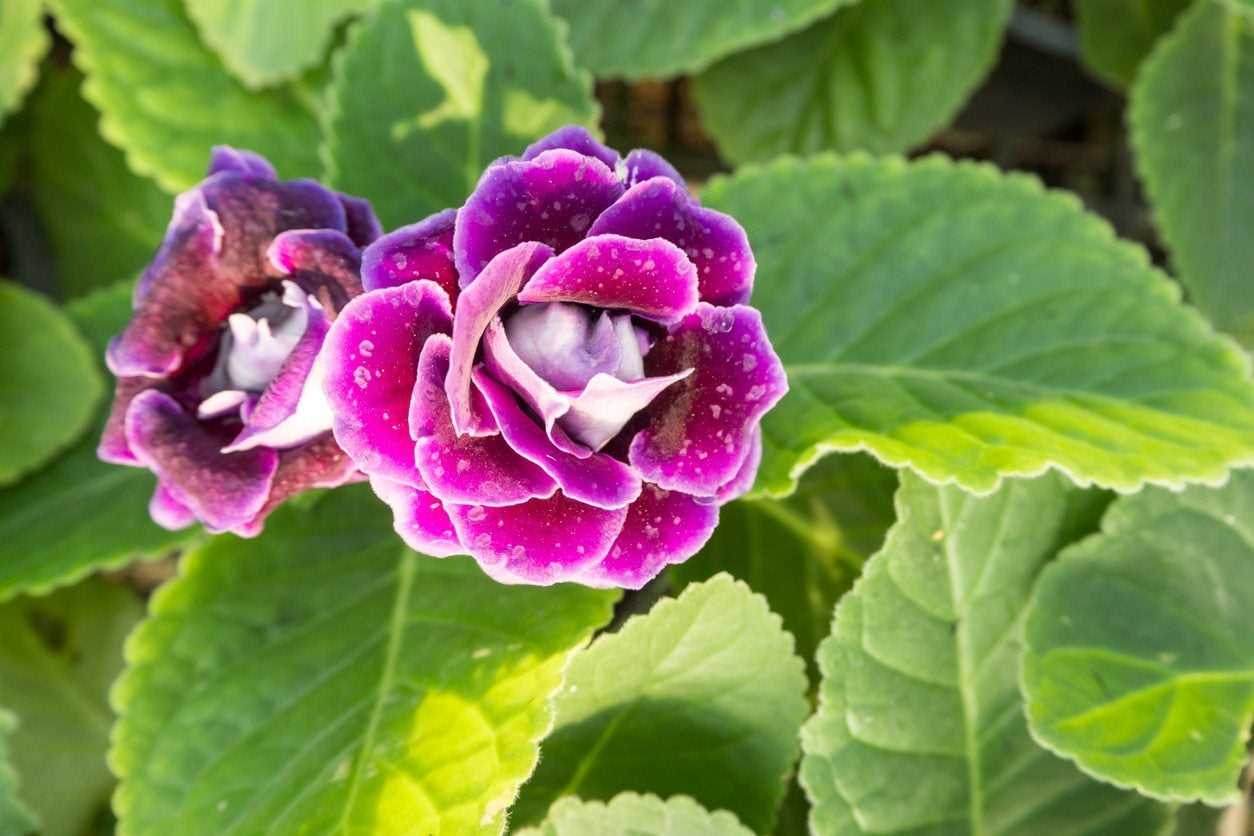
Gloxinias are beautiful flowering plants that are known for their vibrant, trumpet-shaped flowers. They come in a variety of colors, including purple, pink, and white, and are a popular choice for both indoor and outdoor gardens. While these plants can be grown from seeds or tubers, many people find it easier to start with tubers as they tend to produce more consistent and reliable blooms.
When planting gloxinias from seeds, it’s important to create the right conditions for germination. Start by filling a tray or pot with a well-draining seed compost and lightly press the seeds into the surface. Cover the tray or pot with a clear plastic bag or a propagator lid to create a humid environment. Place the tray or pot in a warm spot, ideally around 70-75°F (21-24°C), and make sure to keep the compost moist but not waterlogged. Within a couple of weeks, you should start to see the seeds germinate and tiny seedlings begin to emerge.
If you choose to grow gloxinias from tubers, the process is a bit different. Start by selecting a healthy tuber that is firm and free from any signs of damage or disease. Fill a pot with a well-draining potting mix and place the tuber on the surface. Gently press it down, making sure it is in contact with the soil. Cover the tuber with a thin layer of soil, leaving the growing tips exposed. Water the pot thoroughly, allowing the excess to drain away. Place the pot in a warm spot, out of direct sunlight. In a few weeks, you should start to see new growth emerging from the tuber.
Expert tip: To encourage bushier growth and more flowers, pinch out the growing tips of the seedlings or emerging tubers. This will help to promote branching and a fuller plant.
Whether you choose to grow gloxinias from seeds or tubers, it’s important to provide them with the right care to ensure their success. They prefer bright, indirect light and thrive in temperatures between 60-75°F (15-24°C). Keep the soil consistently moist but not waterlogged, and avoid overwatering as this can cause the tubers to rot. Feed the plants every 2-4 weeks with a balanced liquid fertilizer to promote healthy growth and flowering. With proper care, your gloxinias will reward you with beautiful blooms that will add a touch of elegance to any space.
Gloxinias: Key Steps for Planting from Seeds and Tubers
1. Choosing Seeds and Tubers
When planting gloxinias, you have the option to start from either seeds or tubers. Seeds allow for a wider variety of cultivars, while tubers provide a head start with a more established plant. Choose high-quality seeds or plump, firm tubers from a reputable supplier.
2. Preparing the Soil
Gloxinias prefer well-draining soil that is rich in organic matter. Prepare the soil by mixing peat moss, perlite, and compost in equal parts to create a loose, fertile medium. Ensure that the pH level of the soil is slightly acidic, around 5.5 to 6.5.
3. Planting Seeds
- Fill small seed trays or pots with the prepared soil mixture.
- Sow gloxinia seeds on the surface of the soil and gently press them down, but do not cover them with soil.
- Mist the seeds with water to keep the soil moist but avoid overwatering.
- Place the trays or pots in a warm location with indirect light.
- Germination usually takes 2-3 weeks, during which you should continue to keep the soil moist.
- Once the seedlings have grown to a few inches in height, they can be transplanted into individual pots.
4. Planting Tubers
- Fill a pot or container with the prepared soil mixture, leaving enough space for the tuber to be planted.
- Place the tuber horizontally on the soil surface and cover it with a thin layer of soil, leaving the top exposed.
- Water the soil thoroughly to moisten it but avoid soaking.
- Place the pot in a warm location with indirect light.
- Within a few weeks, you should start to see new growth emerging from the tuber.
- As the plant grows, you can transfer it to a larger pot to allow for more root development.
5. Caring for Gloxinias
Watering: Keep the soil evenly moist but not waterlogged. Gloxinias are sensitive to overwatering, so it’s important to allow the top layer of soil to dry before watering again.
Light: Place the plants in a location with bright but indirect light. Avoid direct sunlight as it can scorch the leaves.
Fertilizing: Feed the plants with a balanced, water-soluble fertilizer every 2-3 weeks during the growing season.
Temperature: Gloxinias prefer temperatures between 70-75°F (21-24°C) during the day and 60-65°F (15-18°C) at night.
6. Propagation
Gloxinias can be propagated by dividing tubers or taking leaf cuttings. To propagate through tuber division, carefully separate the tubers in spring when repotting. Leaf cuttings can be taken by removing a healthy leaf from the parent plant, trimming the leaf stem, and placing it in a pot with moist soil.
7. Pests and Diseases
Common pests that can affect gloxinias include aphids, mealybugs, and spider mites. Regular inspection and treatment with insecticidal soap or neem oil can help control these pests. Gloxinias are also prone to fungal diseases, so it’s important to provide good air circulation and avoid overwatering to prevent rot.
8. Flowering and Blooming
Gloxinias typically bloom in summer, producing large, bell-shaped flowers in a variety of vibrant colors. To encourage blooming, provide the plants with a period of rest during the winter by decreasing watering and keeping them in a cooler location. This will help stimulate flower production in the following growing season.
Choosing the Right Soil for Gloxinias
Gloxinias are delicate plants that require specific soil conditions to thrive. When choosing soil for your gloxinias, it’s important to consider its texture, composition, and drainage capabilities. Here are some tips for selecting the right soil:
1. Well-Draining Soil
Gloxinias do not like sitting in waterlogged soil, so it’s crucial to choose a well-draining soil. This ensures that excess water can easily escape, preventing root rot and other moisture-related issues. A good option is a soil mix formulated specifically for tropical plants.
2. Soil pH
Gloxinias prefer slightly acidic to neutral soil with a pH level between 6 and 7. It’s essential to test the pH of your soil or use a pre-mixed soil that is formulated for gloxinias to ensure the correct pH level.
3. Loamy and Light Texture
Gloxinias thrive in soil with a loamy and light texture that provides good aeration. A soil mix containing a combination of organic matter, such as peat moss or compost, and perlite or vermiculite can help create the ideal texture.
4. Rich in Organic Matter
Gloxinias benefit from soil that is rich in organic matter. This can be achieved by adding organic compost or well-rotted manure to the soil mix. Organic matter improves soil fertility, helps retain moisture, and provides essential nutrients to the plants.
5. Avoid Heavy Clay Soil
Heavy clay soil retains water for extended periods and can suffocate gloxinia roots. It’s best to avoid using heavy clay soil or any soil mix that contains it. If your soil is clay-heavy, consider amending it with organic matter and sand to improve its drainage and texture.
- Choose a well-draining soil mix formulated for tropical plants.
- Test the pH of your soil or use a pre-mixed soil with the correct pH level for gloxinias.
- Use a soil mix with a loamy and light texture for good aeration.
- Add organic compost or well-rotted manure to enrich the soil with organic matter.
- Avoid using heavy clay soil or amend it with organic matter and sand to improve drainage.
Sowing Gloxinia Seeds: Tips for Success
Gloxinias are beautiful flowering plants that can be grown from seeds. If you’re interested in growing your own gloxinias, here are some tips to help you successfully sow their seeds:
- Choose high-quality seeds: To ensure the best chances of success, it’s important to start with high-quality gloxinia seeds. Look for reputable seed suppliers or consider collecting seeds from mature gloxinia plants.
- Prepare the soil: Gloxinias prefer well-draining soil that is rich in organic matter. Before sowing the seeds, prepare the soil by mixing in some compost or peat moss to improve its texture and fertility.
- Sow the seeds: Fill a seed tray or pot with the prepared soil. Gently press the seeds into the soil, making sure they are not buried too deeply. Leave some space between each seed to allow for proper growth.
- Provide the right conditions: Gloxinia seeds require warmth and humidity to germinate. Place the seed tray or pot in a warm area with temperatures between 70-75°F (21-24°C). Cover the container with a plastic wrap or place it in a plastic bag to create a mini greenhouse effect. Keep the soil moist but not waterlogged.
- Be patient: Gloxinia seeds can take anywhere from 10 days to several weeks to germinate. Be patient and maintain the ideal conditions for germination.
- Transplanting: Once the seedlings have grown their first set of true leaves, it’s time to transplant them into individual pots. Carefully remove each seedling from the tray and plant it in a pot filled with well-draining potting soil.
- Care and maintenance: After transplanting, continue to provide the right conditions for gloxinias to thrive. Keep the soil moist but not waterlogged, provide bright but indirect light, and maintain a temperature range of 70-75°F (21-24°C).
- Fertilize: Feed your gloxinias with a balanced liquid fertilizer every two weeks during the growing season to promote healthy growth and vibrant blooms.
- Watch for pests and diseases: Keep an eye out for common pests like aphids and spider mites, as well as diseases like powdery mildew. If necessary, treat the plants with appropriate insecticides or fungicides.
- Enjoy your gloxinias: With proper care and attention, your gloxinias should reward you with beautiful blooms. Enjoy their vibrant colors and delicate petals!
By following these tips, you can increase your chances of successfully sowing gloxinia seeds and growing beautiful, healthy plants.
Preparing Gloxinia Tubers for Planting
Before planting your gloxinia tubers, it is important to properly prepare them to ensure success. The following steps will guide you through the preparation process:
- Choose healthy tubers: Select tubers that are firm, plump, and free from mold or damage. Avoid tubers that are soft or have any signs of rot.
- Clean the tubers: Gently remove any excess soil or debris from the tubers. Be careful not to damage the delicate roots.
- Inspect for pests or diseases: Check the tubers for any signs of pests or diseases, such as mealybugs or powdery mildew. If you notice any issues, treat them accordingly before planting.
- Prepare the planting medium: Gloxinias prefer a well-draining planting medium. Mix equal parts of peat moss, perlite, and vermiculite to create a suitable mix. This will provide the tubers with the necessary moisture and aeration.
- Soak the tubers: To encourage proper hydration and stimulate growth, soak the tubers in lukewarm water for a few hours or overnight before planting. This will help to soften the tuber and promote healthy root development.
- Plant the tubers: Once the tubers have been soaked, plant them in the prepared planting medium. Make sure to plant them with the concave side facing up and the rounded side facing down. Plant them at a depth of about 1 to 2 inches.
- Provide proper care: After planting, place the pots in a warm location with bright, indirect sunlight. Water the tubers sparingly, keeping the soil moist but not overly wet. Avoid waterlogging the tubers, as this can lead to rot.
- Monitor growth: Keep an eye on the tubers as they start to grow. Once the plants have established roots and leaves, you can gradually increase watering and provide fertilization to support their growth.
By following these steps, you can ensure that your gloxinia tubers are well-prepared for planting and have the best chance of thriving.
Planting Gloxinia Tubers: Best Practices
Gloxinia tubers are a popular choice among gardeners due to their vibrant blooms and rich colors. Here are some best practices to follow when planting gloxinia tubers:
1. Choosing the Right Pot
Select a pot that is deep enough to accommodate the tuber and has drainage holes at the bottom. A clay or ceramic pot is preferred as it provides better airflow to the roots.
2. Soil Preparation

Prepare a well-draining potting mix by combining equal parts peat moss, perlite, and vermiculite. This mix provides the necessary moisture retention and aeration for the gloxinia tuber.
3. Planting Depth
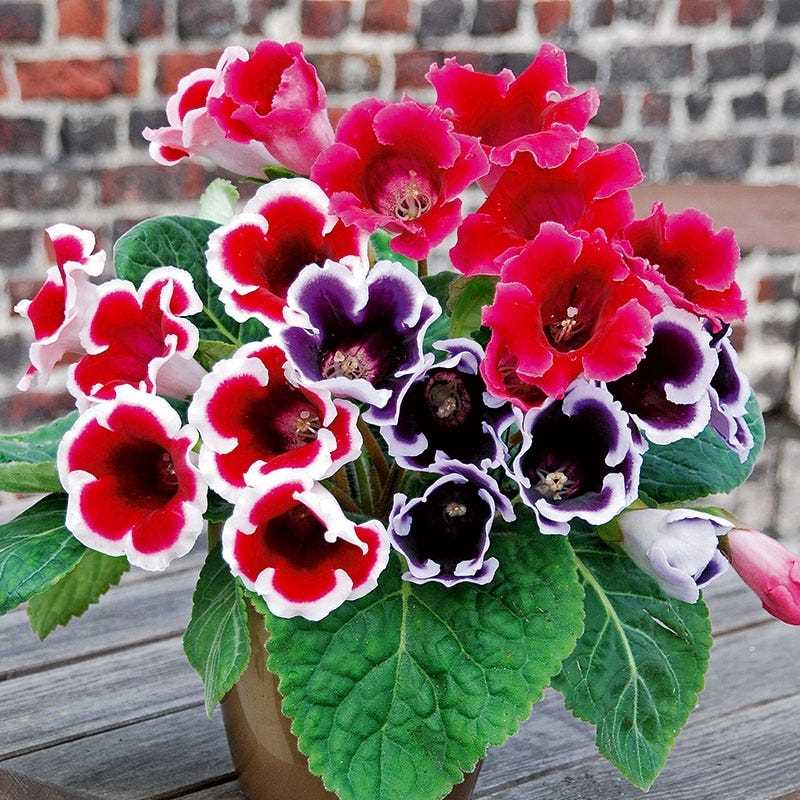
Plant the gloxinia tuber with the concave side facing up, about 1 inch deep into the soil. It is important not to bury the tuber too deeply as it may rot. Leave some space at the top to allow for watering.
4. Watering
Water the tuber thoroughly after planting to ensure it is properly hydrated. From then on, water the plant whenever the top inch of the soil feels dry to the touch. Avoid overwatering, as it can lead to root rot.
5. Light and Temperature
Place the pot in a location that receives bright, indirect light. Avoid exposing the plant to direct sunlight, as it can scorch the leaves. Gloxinias prefer temperatures between 65-75°F (18-24°C).
6. Fertilization
Once the plant starts to grow and develop leaves, you can start fertilizing it. Use a balanced, water-soluble fertilizer once a month during the growing season. Follow the manufacturer’s instructions for proper dilution and application.
7. Pruning
Regularly pinch off any faded blooms or yellowing leaves to encourage the plant to produce more flowers. This also helps maintain the plant’s overall shape and appearance.
8. Support
If your gloxinia grows tall and starts to lean, provide support by gently tying it to a stake. This will prevent the plant from toppling over and ensure proper growth.
By following these best practices, you can enjoy the beauty of gloxinias in your garden or indoor space. Remember to provide the necessary care and attention to help the plant thrive and flourish.
Providing Adequate Water and Humidity for Gloxinias
Gloxinias are tropical plants that require consistent moisture and high humidity to thrive. Here are some tips on how to provide adequate water and humidity for your gloxinias:
Watering
- Water your gloxinias thoroughly, making sure the soil is evenly moist. Avoid overwatering, as it can lead to root rot.
- Allow the top inch of soil to dry out slightly before watering again.
- Water your gloxinias from the bottom, using a tray or saucer. This helps prevent the leaves from getting wet, which can lead to fungal diseases.
- Use room temperature water to avoid shocking the roots.
Humidity
- Gloxinias prefer high humidity levels, between 50% to 70%. If you live in a dry climate, you may need to increase the humidity around your plants.
- Place a tray filled with water near your gloxinias to increase humidity through evaporation.
- You can also mist the leaves of your gloxinias with water daily to create a humid environment.
- Consider using a humidifier in the room where your gloxinias are located.
Monitoring
It’s important to monitor the moisture levels in the soil and the humidity levels around your gloxinias.
- Check the soil regularly by inserting your finger into the soil up to the knuckle. If it feels dry, it’s time to water.
- Use a hygrometer to measure the humidity levels. Adjust your watering and humidity techniques accordingly.
By providing adequate water and humidity for your gloxinias, you can ensure they have the optimal conditions for growth and blooming.
Caring for Growing Gloxinias: Light and Temperature
Gloxinias are tropical plants that thrive in warm temperatures and high humidity. Proper light and temperature conditions are crucial for the successful growth of gloxinias.
Light
Gloxinias prefer bright, indirect light. They should be placed in a location with bright but filtered light, away from direct sunlight. Direct sunlight can scorch the leaves and flowers, so it is important to protect them from intense sunlight.
Adjust the position of gloxinias based on the amount of light they receive. If the leaves are yellowing or fading, it may be a sign that the plants are receiving too much light. On the other hand, if the leaves are dark green and the stems are elongating, it may suggest that they are not getting enough light.
Temperature
Gloxinias thrive in warm temperatures between 70°F and 80°F (21°C to 27°C). They are sensitive to cold drafts and low temperatures, so it is important to keep them away from windows and doors. Avoid placing them in areas where temperatures can drop below 60°F (15°C) as it can cause damage to the plant.
Additionally, fluctuating temperatures can result in leaf drop and poor growth. Therefore, it is essential to maintain a consistent temperature for gloxinias.
It is important to note that these temperature and light requirements may vary slightly depending on the specific variety of gloxinia you are growing. Always refer to the specific care instructions provided with your plant to ensure optimal growth and flowering.
Gloxinia Fertilization Tips from Expert Florists
Proper fertilization is essential for the healthy growth and vibrant blooms of gloxinias. Here are some expert tips to help you fertilize your plants effectively:
1. Choose the Right Fertilizer
When selecting a fertilizer for your gloxinias, it is important to choose one that is specifically formulated for flowering plants or African violets (which are closely related to gloxinias). Look for a balanced fertilizer with equal amounts of nitrogen (N), phosphorus (P), and potassium (K). An example of a suitable ratio is 10-10-10 or 20-20-20.
2. Follow the Label Instructions
Always follow the label instructions on the fertilizer packaging. The instructions will provide you with guidance on how much fertilizer to use and how often to apply it. Over-fertilizing can lead to nutrient burn and damage to the plant, so it is important to apply the fertilizer in the recommended amounts.
3. Apply Fertilizer During the Growing Season
Gloxinias have a growing season that typically spans spring and summer. During this period, you should fertilize your plants every two weeks to provide them with the necessary nutrients for healthy growth and blooming. Reduce or stop fertilizing during the plant’s dormant period in fall and winter.
4. Use a Diluted Solution
Before applying the fertilizer, it is best to dilute it with water according to the instructions on the label. This helps prevent over-fertilization and allows for better absorption of nutrients by the plants. A general guideline is to use half the recommended strength for gloxinias.
5. Apply Fertilizer to Moist Soil
It is recommended to apply the fertilizer to moist soil. Water your gloxinias thoroughly a day or two before fertilizing. This ensures that the nutrients are evenly distributed in the soil and are readily available for the plants to uptake.
6. Avoid Fertilizer Contact with Leaves
When applying the fertilizer, make sure to avoid direct contact with the leaves of the gloxinias. Fertilizer residue on the leaves can cause burning or damage. Aim to apply the fertilizer around the base of the plant, taking care not to pour it directly on the foliage.
7. Monitor Plant Response
Keep a close eye on your gloxinias after fertilizing. If you notice any signs of leaf burn, wilting, or other adverse effects, it may indicate that you are using too much fertilizer or applying it too frequently. Adjust the fertilization schedule or dilute the solution further to prevent damage to the plants.
By following these expert tips for fertilizing your gloxinias, you can help ensure their healthy growth, vibrant blooms, and overall success in your garden or indoor space.
Preventing Common Gloxinia Diseases and Pests
Gloxinias are beautiful flowering plants that can be susceptible to various diseases and pests. Taking preventive measures can help ensure that your gloxinias stay healthy and vibrant. Here are some tips to prevent common gloxinia diseases and pests:
1. Proper Watering
Gloxinias prefer consistent moisture, but overwatering can lead to root rot and other fungal diseases. Water the plant when the top inch of soil feels dry, and avoid getting water on the leaves to prevent leaf spot diseases.
2. Good Air Circulation
Proper air circulation helps prevent the development of fungal diseases. Avoid overcrowding your gloxinias and place them in a location with good air movement.
3. Sterilized Potting Mix
Use sterilized potting mix to prevent fungal diseases. This helps eliminate any pathogens that may be present in the soil and reduces the risk of diseases spreading to your plants.
4. Regular Cleaning
Regularly clean your gloxinia’s leaves by gently wiping them with a damp cloth. This helps prevent the buildup of dust and debris that can attract pests and lead to diseases.
5. Pest Control

Inspect your plants regularly for signs of pests such as aphids, spider mites, and mealybugs. If you notice any pests, remove them by hand or use appropriate insecticidal soap or spray to control their population.
6. Proper Fertilization
Avoid overfertilizing your gloxinias, as excessive nutrients can make them more susceptible to diseases. Follow the recommended fertilization schedule and use a balanced, water-soluble fertilizer.
7. Quarantine New Plants
When introducing new gloxinia plants to your collection, quarantine them for a few weeks before placing them with your existing plants. This helps prevent the spread of any potential diseases or pests that the new plants may carry.
8. Remove Infected Plants
If you notice any signs of diseases such as leaf discoloration, wilting, or unusual growth, promptly remove the infected plants from your collection. This helps prevent the spread of diseases to healthy plants.
9. Maintain Ideal Growing Conditions
Gloxinias thrive in specific temperature and humidity ranges. Maintaining ideal growing conditions helps prevent stress on the plants, making them less susceptible to diseases and pests. Keep the temperature between 65-75°F (18-24°C) and maintain a humidity level of around 50-60%.
10. Regular Monitoring
Regularly monitor your gloxinias for any signs of diseases or pests. Early detection allows for timely intervention and increases the chances of saving your plants.
By following these preventive measures, you can minimize the risk of common gloxinia diseases and pests and keep your plants healthy and thriving.
Q&A:
What is the best way to plant gloxinias from seeds?
The best way to plant gloxinias from seeds is to start by preparing a suitable potting mix, which should be light and well-draining. Moisten the mix before filling the container and then sprinkle the seeds on the surface, gently pressing them into the soil. Cover the container with a plastic bag to maintain humidity and place it in a warm and bright location. It usually takes about 3-4 weeks for the seeds to germinate.
Is it possible to grow gloxinias from tubers?
Yes, it is possible to grow gloxinias from tubers. Tubers are underground structures that store nutrients for the plant, and they can be planted directly into a suitable potting mix. Before planting, it is recommended to soak the tubers in water for a few hours to rehydrate them. Then, place the tubers horizontally in the potting mix, burying them about halfway with the top of the tuber exposed. Keep the soil moist and place the pot in a warm and bright location. New growth should emerge in a few weeks.
What are the ideal growing conditions for gloxinias?
Gloxinias prefer warm and humid conditions, with temperatures around 70-75°F (21-24°C). They require bright, indirect light, so placing them near a window with filtered sunlight is ideal. It is important to keep the soil consistently moist, but not overly wet, to prevent root rot. A well-draining potting mix and regular fertilization can also help promote healthy growth.
When should I start planting gloxinias?
The best time to start planting gloxinias is in late winter or early spring. This gives the plants enough time to grow and establish before the blooming period, which typically occurs in late spring or early summer. By starting the planting process early, you can ensure that your gloxinias will be ready to flower when the time comes.
What are some common problems that can occur when growing gloxinias?
Some common problems that can occur when growing gloxinias include powdery mildew, root rot, and aphid infestations. Powdery mildew is a fungal disease that appears as a white, powdery coating on the leaves. To prevent this, it is important to provide good air circulation and keep the foliage dry. Root rot can occur when the soil is too wet, so it is important to avoid over-watering. Aphids are small insects that feed on the plant sap and can be controlled by using insecticidal soap or neem oil.
How long does it take for gloxinias to flower?
The time it takes for gloxinias to flower can vary depending on growing conditions and the type of gloxinia. Generally, it takes about 12-16 weeks from planting to flowering. However, some varieties may take longer, while others may bloom earlier. Providing the right conditions, such as proper light, temperature, and regular fertilization, can help promote faster flowering.
Can gloxinias be grown outdoors?
Gloxinias are primarily grown as indoor plants, but they can be grown outdoors in certain climates. They are native to tropical regions and require warm and humid conditions. If you live in a climate with mild winters and warm summers, you can try growing gloxinias outdoors during the summer months. However, they should be protected from direct sunlight, strong winds, and heavy rainfall, as these can damage the delicate foliage and flowers.
Video:
Planting GLOXINIA Seeds | Sinningia Seciosa | Stokes Seeds
