- Choosing the Right Seeds
- Preparing the Soil
- 1. Choose the Right Location
- 2. Remove Weeds and Debris
- 3. Test the Soil
- 4. Improve the Soil Structure
- 5. Level the Soil
- 6. Water the Soil
- 7. Mulch the Soil
- Sowing the Seeds
- 1. Choose the Right Location
- 2. Prepare the Soil
- 3. Sow the Seeds
- 4. Water the Seeds
- 5. Provide Proper Care
- Providing Proper Care
- Watering
- Light and Temperature
- Fertilizing
- Transplanting
- Pest and Disease Control
- Weeding
- Support and Staking
- Mulching
- Watering and Fertilizing
- Protecting from Pests
- 1. Aphids:
- 2. Slugs and Snails:
- 3. Caterpillars:
- 4. Root-Knot Nematodes:
- 5. Deer and Rabbits:
- Picking the Seedlings
- Transplanting Outdoors
- Questions and Answers:
- When is the best time to sow daisy seeds?
- What kind of soil do daisy seedlings prefer?
- How deep should I sow the daisy seeds?
- How often should I water daisy seedlings?
- How long does it take for daisy seeds to germinate?
- When should I transplant daisy seedlings into the garden?
- Can I grow daisy seedlings indoors?
- Videos: How to Grow Broccoli | Complete Guide from Seed to Harvest
Growing your own daisy seedlings can be a rewarding and enjoyable experience. Whether you are an experienced gardener or just starting out, daisies are a versatile and easy-to-grow flower that can add beauty to any garden. In this article, we will guide you through the process of sowing and picking daisy seedlings, from preparing the soil to caring for your plants.
Step 1: Choosing the Right Seeds
Before you can start sowing daisy seedlings, you need to choose the right seeds for your garden. There are many different varieties of daisies to choose from, including the classic white and yellow daisies, as well as vibrant pink, purple, and red varieties. Consider the climate and soil conditions in your area, as well as the amount of sunlight your garden receives, when selecting your seeds.
Step 2: Preparing the Soil
A crucial step in growing healthy daisy seedlings is preparing the soil. Daisies thrive in well-draining soil, so ensure that your garden bed is free from any compacted soil or debris. Loosen the soil using a garden fork or tiller, and remove any weeds or large rocks. It’s also a good idea to add organic matter, such as compost or aged manure, to improve the soil’s fertility and drainage.
Step 3: Sowing the Seeds
Once the soil is ready, it’s time to sow the daisy seeds. Scatter the seeds evenly across the prepared bed, ensuring they are spaced apart to allow room for growth. Lightly press the seeds into the soil and cover them with a thin layer of fine compost or potting mix. Water the bed gently, using a mist spray or a watering can with a fine rose, to avoid disturbing the seeds.
Step 4: Caring for Your Seedlings
As the daisy seedlings begin to grow, it’s important to provide them with the care they need to thrive. Water your seedlings regularly, keeping the soil moist but not waterlogged. If the weather is dry, you may need to water them more frequently. Be sure to remove any weeds that may compete with your seedlings for nutrients and sunlight. Additionally, consider adding a layer of mulch around the base of your plants to help retain soil moisture and suppress weed growth.
Step 5: Picking and Enjoying Your Blooms
Once your daisy seedlings have grown and produced beautiful blooms, it’s time to pick and enjoy them. Use sharp pruning shears or scissors to cut the flowers just above a leaf or bud junction, which will encourage more blooms to grow. Arrange your freshly picked daisies in a vase filled with clean water, and place them in a cool spot away from direct sunlight. Change the water every few days to ensure the longevity of your beautiful daisy blooms.
In conclusion, growing daisy seedlings can be a simple and rewarding gardening experience. With the right seeds, soil preparation, and care, you can have a beautiful display of daisies in your garden. So why not give it a try and bring a touch of natural beauty to your outdoor space?
Choosing the Right Seeds
When it comes to growing daisies, choosing the right seeds is essential. The quality of the seeds you select will determine the success and health of your seedlings. Here are some key factors to consider when choosing daisy seeds:
- Species: There are various species of daisies available, each with its own characteristics and growing requirements. Consider the specific type of daisy you want to grow and make sure to choose seeds for that particular species.
- Seed suppliers: It is important to source your seeds from reputable suppliers. Look for suppliers that have a good reputation and positive reviews. This will ensure that you are getting high-quality seeds that have been properly stored and tested for germination.
- Freshness: Check the freshness of the seeds before purchasing. Fresh seeds have a higher chance of germination compared to older seeds. Look for seeds that are labeled with a recent harvest date.
- Germination rate: The germination rate refers to the percentage of seeds that are likely to germinate under ideal conditions. Opt for seeds with a high germination rate to increase the chances of successful seedling growth.
- Organic vs. conventional: Consider whether you prefer organic or conventional seeds. Organic seeds are grown without the use of synthetic chemicals, while conventional seeds may have been treated with pesticides or chemical fertilizers. Choose seeds that align with your gardening practices.
By considering these factors when choosing your daisy seeds, you can ensure that you are starting your seedlings off on the right foot. Remember to read the seed packet instructions carefully and provide the appropriate growing conditions for your chosen species of daisy.
Preparing the Soil

Before sowing daisy seeds, it is important to prepare the soil properly. This will provide the necessary nutrients and conditions for the seedlings to thrive. Follow these steps to prepare the soil:
1. Choose the Right Location
Find a location that receives full sun or partial shade. Daisy seedlings prefer bright light, so avoid areas that are heavily shaded. Ensure the soil drains well to prevent waterlogging.
2. Remove Weeds and Debris
Clear the area of any weeds, grass, or debris. This will help prevent competition for nutrients and reduce the risk of pests and diseases. Use a garden fork or shovel to loosen the soil and remove any large rocks or roots.
3. Test the Soil

Perform a soil test to determine its pH level. Daisies prefer slightly acidic to neutral soil with a pH range between 6.0 and 7.5. Adjust the pH if necessary by adding lime to raise it or sulfur to lower it.
4. Improve the Soil Structure
Amend the soil by adding organic matter such as compost or well-rotted manure. This will help improve the soil’s structure, drainage, and fertility. Spread a layer of organic matter over the soil and mix it in using a garden fork or tiller.
5. Level the Soil

Smooth out the soil surface using a rake or shovel. Make sure the soil is even and free from any large clumps or bumps. This will provide an ideal seedbed for the daisy seeds.
6. Water the Soil
Moisten the soil thoroughly with water. This will help settle the soil and prepare it for seed sowing. Avoid overwatering, as excessively wet soil can lead to rotting of the seeds or seedlings.
7. Mulch the Soil

Apply a layer of organic mulch such as straw or wood chips to conserve moisture, suppress weed growth, and regulate soil temperature. Keep the mulch a few inches away from where the daisy seedlings will be planted to avoid smothering them.
Preparing the soil properly is crucial for successful daisy seedling growth. By following these steps, you can create an optimal environment for your daisy seeds to germinate and thrive.
Sowing the Seeds
One of the best ways to start growing daisy seedlings is by sowing the seeds directly in the garden bed. Follow these steps to ensure successful sowing:
1. Choose the Right Location
Select a sunny spot in your garden that receives at least 6 hours of direct sunlight every day. Daisy seedlings thrive in full sun, so it’s crucial to provide them with adequate light.
2. Prepare the Soil
Before sowing the seeds, prepare the soil by removing any weeds and loosening it with a garden fork or tiller. Daisies prefer well-drained soil, so amend it with compost or organic matter to improve drainage if necessary.
3. Sow the Seeds
Scatter the daisy seeds over the prepared soil, ensuring even distribution. Lightly press the seeds into the soil, but do not cover them as they need light to germinate. Keep in mind that daisy seeds are very small, so be careful during this step.
4. Water the Seeds
Gently water the sown seeds using a watering can or a gentle spray from a hose. Ensure that the water reaches the soil but does not wash away the seeds. Keep the soil moist but not soggy during the germination process.
5. Provide Proper Care
Once the seeds have germinated and the seedlings start to emerge, provide them with proper care. Thin out the seedlings, leaving around 6-12 inches of space between them. This will allow the daisies to grow and spread without overcrowding.
Note: Alternatively, you can also start the daisy seeds indoors in seed trays or pots and then transplant the seedlings into the garden bed once they are established.
Providing Proper Care
Watering
Watering is essential for the growth and health of daisy seedlings. Make sure to water the seedlings regularly, keeping the soil moist but not waterlogged. Avoid overwatering, as it can lead to root rot and other diseases.
Light and Temperature
Daisy seedlings need plenty of light to thrive. Place them in a sunny spot or under grow lights for at least 6-8 hours a day. Maintain a temperature between 65-75°F (18-24°C) to promote healthy growth.
Fertilizing
Provide nutrients to the daisy seedlings by fertilizing them regularly. Use a balanced water-soluble fertilizer diluted to half the recommended strength. Apply the fertilizer every two weeks during the growing season.
Transplanting
Once the daisy seedlings have developed several sets of true leaves and are strong enough to handle, they can be transplanted into larger containers or into the garden. Transplant them carefully, without disturbing the roots, and provide them with adequate spacing to promote healthy growth.
Pest and Disease Control
Monitor the daisy seedlings for any signs of pests or diseases. Common pests that can affect daisies include aphids, slugs, and snails. Use organic pest control methods such as manual removal, insecticidal soap, or neem oil to keep these pests under control. Additionally, avoid overwatering and provide good air circulation to prevent fungal diseases.
Weeding
Regularly remove any weeds that may compete with the daisy seedlings for nutrients and water. Keep the area around the seedlings clean and free from weeds to ensure their healthy development.
Support and Staking
Some daisy varieties can grow tall and may require support or staking. As the seedlings grow, provide them with proper support to prevent them from bending or breaking. Use stakes or cages to support the plants, ensuring they grow upright and strong.
Mulching
Apply a layer of organic mulch around the daisy seedlings to conserve moisture, suppress weeds, and regulate soil temperature. Use materials such as straw, wood chips, or dried leaves to create a mulch layer around the plants.
Watering and Fertilizing
Proper watering is crucial for the growth and health of daisy seedlings. Here are some guidelines to help you water your seedlings effectively:
- Water consistently: Daisy seedlings need a regular and consistent supply of water. Keep the soil evenly moist, but not soggy. Avoid overwatering, as it can lead to root rot.
- Water from the bottom: Instead of watering from the top, which can disturb the delicate seedlings, consider watering from the bottom. Place the seedling trays in a shallow tray filled with water and allow the plants to soak up the moisture through the drainage holes.
- Use room temperature water: Cold water can shock the seedlings, while hot water can damage the roots. Use room temperature water to avoid any temperature extremes.
- Observe the soil: Check the moisture level of the soil regularly by inserting your finger into the soil up to the first knuckle. If the soil feels dry, it’s time to water.
- Choose the right fertilizer: Daisy seedlings benefit from a balanced fertilizer with equal amounts of nitrogen, phosphorus, and potassium. Look for a slow-release granular fertilizer specifically formulated for seedlings.
- Follow the product instructions: Read and follow the instructions provided on the fertilizer packaging to ensure the correct application. Over-fertilizing can harm the seedlings, so it’s important to use the recommended amount.
Fertilize your daisy seedlings every 2-4 weeks to provide them with the necessary nutrients for healthy growth. With proper watering and fertilizing, your daisy seedlings will thrive and develop into beautiful mature plants.
Protecting from Pests
Daisy seedlings are vulnerable to various pests that can damage or destroy them. It is important to take preventive measures to protect your plants from these pests. Here are some common pests that you may encounter when growing daisy seedlings and how to protect your plants from them:
1. Aphids:
Aphids are small, soft-bodied insects that suck the sap from plants, causing stunted growth and distorted leaves. To control aphids, you can spray your daisy seedlings with a solution of water and insecticidal soap. You can also introduce natural predators like ladybugs or lacewings to your garden, as they feed on aphids.
2. Slugs and Snails:

Slugs and snails can cause significant damage to daisy seedlings, as they feed on the leaves and stems. To protect your plants from slugs and snails, you can create barriers around the seedlings using copper tape or crushed eggshells. You can also handpick these pests from your garden in the evening when they are more active.
3. Caterpillars:
Caterpillars can chew through daisy seedlings’ leaves, causing severe damage. To control caterpillars, you can use biological controls such as Bacillus thuringiensis (Bt) or spinosad-based insecticides. You can also attract birds to your garden, as they feed on caterpillars.
4. Root-Knot Nematodes:
Root-knot nematodes are tiny roundworms that infect the roots of plants, causing root galls and stunted growth. To prevent nematode infestation, you can choose nematode-resistant daisy varieties or use soil solarization techniques. Crop rotation and regular soil testing can also help identify and manage nematode problems.
5. Deer and Rabbits:
Deer and rabbits can be a major threat to daisy seedlings, as they feed on the tender leaves and stems. To protect your plants from these animals, you can install fencing around your garden. You can also use repellents or deterrents, such as human hair or hanging shiny objects, to keep them away.
By taking proactive measures to protect your daisy seedlings from pests, you can ensure their healthy growth and increase the chances of a successful harvest.
Picking the Seedlings

When your daisy seedlings have grown to a suitable size, it is time to pick them and transplant them into their final growing location. Picking the seedlings carefully and properly is essential to ensure their successful growth and development. Here are the steps to follow when picking your daisy seedlings:
- Choose the right time: It is recommended to pick the seedlings when they have reached a height of about 3 to 4 inches. At this stage, they will have developed a strong root system and will be ready for transplantation.
- Prepare the planting area: Before picking the seedlings, make sure the planting area is well-prepared. Remove any weeds or grass and loosen the soil to create a suitable environment for the seedlings.
- Water the seedlings: Water the seedlings thoroughly a few hours before picking them. This will help to keep the roots moist and make it easier to remove them from the soil.
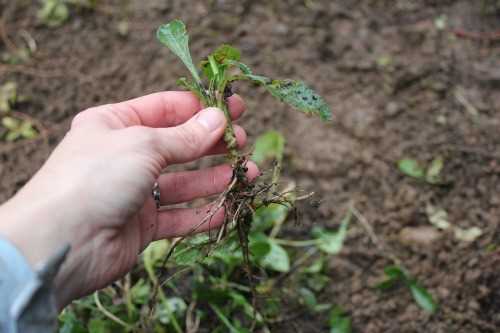
- Use a gardening tool: To pick the seedlings, gently loosen the soil around the base using a gardening tool like a trowel or fork. Be careful not to damage the delicate roots in the process.
- Remove the seedlings: Once the soil is loosened, carefully lift the seedlings out of the ground by gripping them at the base. Avoid pulling them from the leaves or stem, as this can cause damage.
- Transplant the seedlings: Immediately after picking, transplant the seedlings into their final growing location. Dig a hole slightly larger than the root system of the seedling and gently place it in the hole. Press the soil around the seedling to secure it in place.
- Water and care: After transplanting, water the seedlings thoroughly and provide them with appropriate care. Regularly monitor their growth and make sure to water them whenever the soil feels dry.
Picking the seedlings is an important step in the process of growing daisies from seeds. By following these steps, you can ensure the successful transplantation and continued growth of your seedlings.
Transplanting Outdoors
Once your daisy seedlings have grown to a height of about 2 to 3 inches and have developed a healthy root system, it’s time to transplant them outdoors. Transplanting can be done when the danger of frost has passed and the soil temperature has warmed up.
Here are the steps to transplant your daisy seedlings outdoors:
- Choose a suitable location: Select a sunny spot in your garden with well-drained soil. Daisies thrive in full sunlight, but they can tolerate some shade.
- Prepare the soil: Before transplanting, prepare the soil by removing any weeds and loosening it with a garden fork or tiller. Add organic matter, such as compost, to improve the soil’s fertility and drainage.
- Water the seedlings: Water the daisy seedlings thoroughly the day before transplanting. This will help reduce transplant shock and promote healthy growth.
- Dig holes: Dig planting holes that are slightly larger than the root ball of each seedling. Space the holes about 12 to 18 inches apart, depending on the variety of daisies you are growing.
- Transplant the seedlings: Gently remove the seedlings from their containers, being careful not to damage the roots. Place each seedling in a planting hole and backfill with soil, firming it gently around the roots.
- Water the transplants: After transplanting, water the seedlings deeply to help them establish their roots. Keep the soil moist but not soggy during the first few weeks.
- Mulch around the seedlings: Apply a layer of organic mulch, such as straw or wood chips, around the base of the seedlings. Mulching helps retain moisture, suppress weeds, and regulate soil temperature.
- Provide support if needed: Some daisy varieties, such as tall or large-flowered varieties, may require support to prevent them from flopping over. Install stakes or plant supports around the seedlings if necessary.
Remember to continue watering and caring for your daisy seedlings as they establish in their new outdoor environment. With proper care, your transplanted daisies will reward you with beautiful blooms and provide a vibrant addition to your garden.
Questions and Answers:
When is the best time to sow daisy seeds?
The best time to sow daisy seeds is in early spring or late fall when the soil temperature is cool.
What kind of soil do daisy seedlings prefer?
Daisy seedlings prefer well-drained soil that is rich in organic matter.
How deep should I sow the daisy seeds?
You should sow the daisy seeds about 1/4 inch deep in the soil.
How often should I water daisy seedlings?
You should water daisy seedlings regularly, keeping the soil evenly moist but not soggy.
How long does it take for daisy seeds to germinate?
Daisy seeds usually germinate in 7 to 14 days, depending on the temperature and moisture levels.
When should I transplant daisy seedlings into the garden?
You should transplant daisy seedlings into the garden after the last frost date in your area, when the seedlings are about 2 to 3 inches tall.
Can I grow daisy seedlings indoors?
Yes, you can grow daisy seedlings indoors by starting them in containers and providing them with proper light and moisture.


