- Benefits of Making Seedling Cups
- Materials Required for Making Seedling Cups
- Step-by-Step Guide on Making Seedling Cups
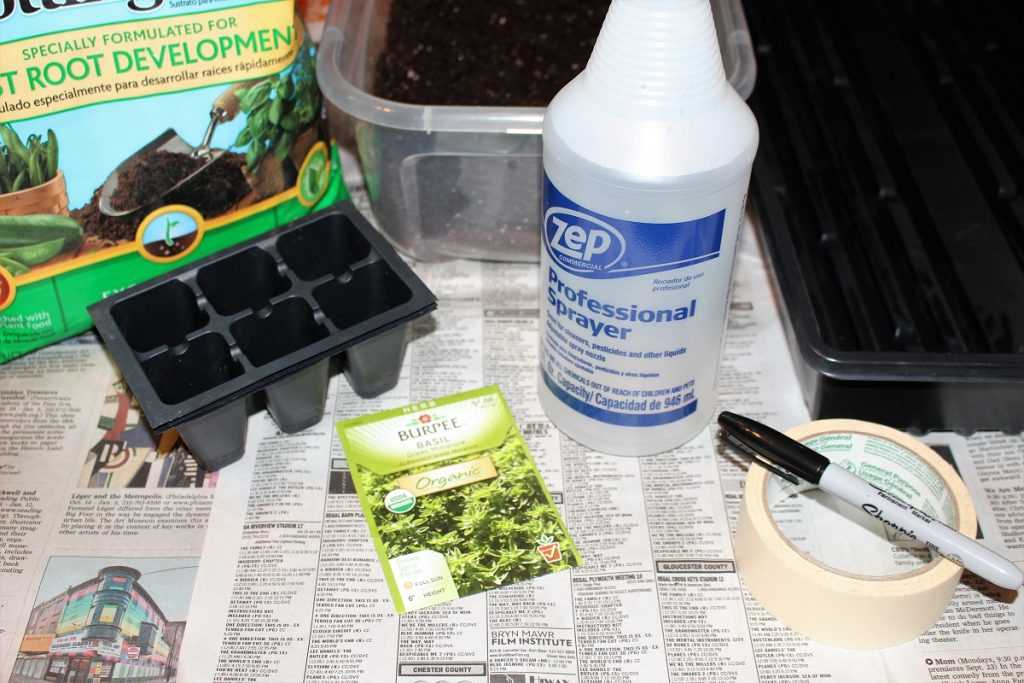
- Materials Needed:
- Step 1: Prepare the Materials
- Step 2: Cut the Bottle
- Step 3: Prepare the Bottom Part
- Step 4: Create a Tray
- Step 5: Make Seedling Cups
- Step 6: Fill with Soil
- Step 7: Plant the Seeds
- Step 8: Water the Cups
- Step 9: Place in a Sunny Spot
- Step 10: Care for the Seedlings
- Step 11: Transplant the Seedlings
- Step 12: Enjoy Your Healthy Seedlings
- Notes:
- Tips and Tricks for Making Seedling Cups
- 1. Choose the right bottle
- 2. Use clear film
- 3. Secure with scotch tape
- 4. Label your cups
- 5. Provide proper drainage
- 6. Place in a warm and well-lit area
- 7. Water regularly
- 8. Transplant carefully
- 9. Harden off before planting
- 10. Recycle or reuse
- Best Plants to Grow in Seedling Cups
- Transferring Seedlings from Cups to Garden
- Questions and Answers:
- What materials do I need to make seedling cups?
- How do I make seedling cups with a bottle, film, and scotch tape?
- Why should I use seedling cups instead of regular planting pots?
- What types of seeds can I plant in seedling cups?
- How do I care for the seedlings once they are planted in the cups?
- Can I reuse the seedling cups for future plantings?
- Videos: How to Make Seed Tape
If you’re a gardener looking for a sustainable and eco-friendly way to start your seedlings, then making seedling cups using a bottle, film, and scotch tape is a great option. Plastic seedling cups can be expensive and not very environmentally friendly, but repurposing materials you already have can save money and reduce waste. Plus, these homemade seedling cups are convenient and easy to make. In this article, we’ll guide you through the simple steps to create your own seedling cups using a plastic bottle, transparent film, and scotch tape.
First, gather your materials. You’ll need an empty plastic bottle, preferably one with a wide mouth for easy planting, transparent film or plastic wrap, and scotch tape. Make sure the bottle is clean and dry before you start. The size of the bottle will depend on how many seedlings you plan to start, so choose accordingly.
Next, cut the bottle into sections. Start by cutting off the bottom part of the bottle to create the seedling cup. Depending on the size of the bottle, you can make multiple seedling cups by cutting the bottle into equal sections. The height of the cup should be around 4-6 inches, which is enough space for the seedlings to grow.
Then, prepare the transparent film or plastic wrap. Cut a piece of film that is large enough to cover the top of the cup and wrap around the edges. This will create a mini greenhouse effect, providing the seedlings with the warmth and humidity they need to germinate. Secure the film in place using scotch tape, ensuring all edges are sealed tightly. Be careful not to tear the film while taping.
Finally, your seedling cups are ready for planting! Fill each cup with soil or a seedling mix, leaving some space at the top for watering. Plant your desired seeds or transplant small seedlings into each cup. Place the cups in a sunny spot or under a grow light, making sure to water them regularly. The transparent film will help retain moisture and create a warm environment for the seedlings to thrive.
These homemade seedling cups are not only a cost-effective solution for starting your garden from seeds, but they also reduce waste by repurposing materials you already have at home. Plus, they provide an ideal environment for seed germination and early growth. So, why not give it a try and make your own seedling cups today?
Benefits of Making Seedling Cups
- Cost-effective: Making seedling cups from a bottle, film, and scotch tape is a budget-friendly alternative to purchasing disposable cups or pots. These materials are typically readily available at home, reducing the need to spend money on new supplies.
- Eco-friendly: By repurposing a plastic bottle and using a film and scotch tape, you are practicing recycling and reducing waste. Instead of adding to landfill waste by throwing away plastic bottles, you can give them a new lease of life by using them as seedling cups.
- Customizable: Making your own seedling cups allows you to choose the size and shape that suits your needs. You can create cups of different dimensions depending on the type of seedlings you are planting.
- Improved root growth: The transparent nature of the materials used for making these seedling cups allows you to monitor root growth without disturbing the plant. This ensures that the roots have space to grow and develop properly, leading to healthier and stronger seedlings.
- Easy transplant: Seedling cups made from bottles are easy to transplant since you can cut through the bottom or remove the tape and film to release the seedlings. This minimizes the risk of damaging the roots during transplantation and reduces transplant shock.
- Protection: The film and scotch tape create a protective barrier around the seedling, shielding it from external elements such as wind and pests. This helps to promote successful germination and growth.
- Lightweight: The lightweight nature of these seedling cups makes them easy to handle and move around, allowing you to arrange and rearrange your seedlings as needed for optimal sunlight exposure.
Materials Required for Making Seedling Cups

- A plastic bottle
- Clear plastic film or plastic wrap
- Scotch tape or any adhesive tape
- A pair of scissors
- A permanent marker
- A small measuring cup or scale (optional)
- A cutting board or flat surface
- A pen or pencil
- Seeds or seedlings
- Potting soil or any growing medium
- Water
These materials are readily available and can be found at home or easily purchased from a local store. The plastic bottle will serve as the base for the seedling cup, while the clear plastic film or plastic wrap will be used to cover the cup and create a small greenhouse effect. Scotch tape or any adhesive tape will be used to secure the plastic film to the cup, and a pair of scissors will be needed to cut the necessary shapes and sizes from the materials.
A permanent marker will be used to label the seedling cups, especially if different types of seeds or seedlings are being grown. A small measuring cup or scale can be used to measure the amount of potting soil or growing medium needed for each cup, although this is optional. A cutting board or flat surface will provide a stable platform for cutting and assembling the seedling cups, and a pen or pencil may be useful for marking and measuring on the materials.
Additionally, seeds or seedlings will be required to plant inside the cups, along with potting soil or any other growing medium. Water will also be needed for watering the seeds or seedlings after planting.
Step-by-Step Guide on Making Seedling Cups
Materials Needed:
- Plastic bottle
- Clear plastic film
- Scotch tape
- Scissors
- Marker
- Seeds
- Soil
- Water
Step 1: Prepare the Materials
Gather all the materials needed for making seedling cups, including a plastic bottle, clear plastic film, Scotch tape, scissors, marker, seeds, soil, and water.
Step 2: Cut the Bottle
Use scissors to cut the plastic bottle horizontally, creating two pieces – the bottom part and the upper part. Ensure the bottom part is taller than the upper part.
Step 3: Prepare the Bottom Part
Take the bottom part of the bottle and make small drainage holes at the bottom using the scissors. This will allow excess water to drain out.
Step 4: Create a Tray

Place the upper part of the bottle upside down inside the bottom part. This will form a tray-like structure to hold the seedling cups.
Step 5: Make Seedling Cups
Cut the clear plastic film into squares or rectangles, large enough to cover the upper part of the bottle. Place each piece of film over the top of the bottle and secure it with Scotch tape, creating a cup-like structure.
Step 6: Fill with Soil

Fill each seedling cup with soil, leaving some space at the top for watering and seed growth.
Step 7: Plant the Seeds
Take the seeds and plant them in the soil in each cup according to the instructions on the seed packet.
Step 8: Water the Cups

Using a watering can or a spray bottle, water each cup, ensuring that the soil is evenly moist.
Step 9: Place in a Sunny Spot
Find a sunny spot to place the seedling cups, as most seeds require sunlight to germinate and grow.
Step 10: Care for the Seedlings
Continue to water the seedling cups regularly, ensuring the soil remains moist but not waterlogged. Keep an eye on the seedlings for any signs of growth and adjust the watering as needed.
Step 11: Transplant the Seedlings
Once the seedlings have grown strong enough, they can be transplanted into larger pots or directly into the garden.
Step 12: Enjoy Your Healthy Seedlings
With proper care and attention, your seedlings will flourish and be ready to be planted in your garden or used to start a new indoor garden.
Notes:
Make sure to label each seedling cup with the type of seed planted to keep track of the different plants.
Tips and Tricks for Making Seedling Cups

When it comes to making seedling cups, there are several tips and tricks that can help you achieve better results. Whether you are a beginner or an experienced gardener, these tips will come in handy:
1. Choose the right bottle
When selecting a plastic bottle for making seedling cups, opt for one with a wide mouth. This will make it easier to fill the cup with soil and plant the seeds. Additionally, make sure the bottle is clean and free from any chemicals or residue.
2. Use clear film

Clear film or plastic wrap is ideal for covering the mouth of the bottle and creating a mini greenhouse effect. This will help retain moisture and create a warm, humid environment for the seedlings to grow.
3. Secure with scotch tape
Scotch tape is a simple and effective way to secure the clear film around the mouth of the bottle. Make sure the tape is tightly sealed to prevent any moisture from escaping.
4. Label your cups

It’s important to label your seedling cups to keep track of the different plant varieties. Use a waterproof marker or label stickers to identify each cup. This will prevent confusion and help you monitor the progress of each seedling.
5. Provide proper drainage
While the seedling cups create a humid environment, it’s essential to provide proper drainage to prevent water logging. Make small holes at the bottom of the cup to allow excess water to drain out.
6. Place in a warm and well-lit area
Seedlings require warmth and sunlight to grow. Place your seedling cups in a warm and well-lit area, such as a windowsill or under a grow light. This will help promote healthy seedling growth.
7. Water regularly
Keep a close eye on the moisture levels of the soil and water your seedlings regularly. Avoid overwatering, as it can lead to root rot. A good rule of thumb is to keep the soil slightly damp, but not saturated.
8. Transplant carefully
When the seedlings have grown strong and are ready for transplant, be gentle when removing them from the seedling cups. Use a spoon or your fingers to carefully separate the seedling from the soil, taking care not to damage the roots.
9. Harden off before planting
Prior to planting your seedlings in the garden, it’s important to harden them off. Gradually expose the seedlings to outdoor conditions by placing them outside for a few hours a day, gradually increasing the time over the course of a week. This will help acclimate the seedlings to the outdoor environment.
10. Recycle or reuse
After transplanting your seedlings, you can recycle or reuse the seedling cups for future gardening projects. Simply clean them thoroughly and store them for future use. This is a sustainable and eco-friendly way to reduce waste.
By following these tips and tricks, you can successfully make seedling cups and give your plants a healthy start. Happy gardening!
Best Plants to Grow in Seedling Cups
1. Leafy Greens:
- Spinach
- Lettuce
- Kale
- Swiss chard
2. Herbs:
- Basil
- Parsley
- Cilantro
- Thyme
3. Vegetables:
- Tomatoes
- Peppers
- Eggplants
- Zucchini
4. Flowers:
- Marigolds
- Petunias
- Geraniums
- Zinnias
5. Fruits:
- Strawberries
- Watermelons
- Cantaloupes
- Squashes
6. Succulents:
- Aloe vera
- Jade plant
- Echeveria
- Hens and chicks (Sempervivum)
7. Annuals:
- Pansies
- Impatiens
- Begonias
- Zinnias
8. Perennials:
- Roses
- Lavender
- Daylilies
- Hostas
| Plant | Preferred Growing Conditions |
|---|---|
| Spinach | Partial shade, moist soil |
| Basil | Sunny location, well-drained soil |
| Tomatoes | Full sun, rich soil |
| Marigolds | Sunny location, well-drained soil |
| Strawberries | Full sun to partial shade, well-drained soil |
| Aloe vera | Bright indirect sunlight, well-drained soil |
| Pansies | Partial shade to full sun, well-drained soil |
| Roses | Full sun, well-drained soil |
Transferring Seedlings from Cups to Garden
Once your seedlings have grown and are ready to be transplanted into your garden, you will need to carefully transfer them from the cups to the garden. Follow these steps to ensure a successful transfer:
- Choose the right timing: It is important to choose the right time to transplant your seedlings. Typically, this will be when they have developed their true leaves and are about 2-3 inches tall.
- Prepare the garden: Before transplanting, make sure the garden bed is prepared and ready for the seedlings. Clear any weeds, loosen the soil, and add organic matter if needed.
- Water the seedlings: Give the seedlings a thorough watering a few hours before transplanting. This will help to keep them hydrated during the transition.
- Prepare the transplant holes: Dig holes in the garden bed that are slightly larger and deeper than the cups. Space the holes according to the recommended spacing for the specific plant.
- Transplant the seedlings: Gently remove the seedlings from the cups, taking care not to disturb the roots too much. Place each seedling into a hole in the garden bed and carefully firm the soil around it.
- Water the transplanted seedlings: After transplanting, give the seedlings a light watering to help settle the soil around the roots.
- Protect the seedlings: If the weather is still chilly or there is a risk of frost, consider protecting the transplanted seedlings with a row cover or cloche.
- Maintain proper care: After transplanting, make sure to provide proper care to the seedlings, including regular watering, fertilizing, and protection from pests.
- Monitor the seedlings: Keep a close eye on the transplanted seedlings and watch for any signs of stress or problems. Address any issues promptly to ensure the health and success of your plants.
Following these steps will help you successfully transfer your seedlings from cups to the garden, giving them the best chance for growth and development.
Questions and Answers:
What materials do I need to make seedling cups?
To make seedling cups, you will need a plastic bottle, plastic film, and scotch tape.
How do I make seedling cups with a bottle, film, and scotch tape?
To make seedling cups, you first need to cut the plastic bottle into small sections. Next, take the plastic film and wrap it around each section of the bottle, securing it with scotch tape. Make sure to leave an opening at the top for planting the seeds. Once you have made all the cups, fill them with soil and plant your seeds.
Why should I use seedling cups instead of regular planting pots?
Using seedling cups has several advantages. Firstly, they are inexpensive as they can be made from recycled materials. Secondly, the clear plastic film allows you to easily monitor the growth of the seedlings. Lastly, the cups can be planted directly into the soil, reducing transplant shock and promoting better root development.
What types of seeds can I plant in seedling cups?
You can plant a variety of seeds in seedling cups, including vegetables, herbs, flowers, and even small trees or shrubs. However, it is important to choose seeds that are suitable for starting indoors and have a short germination period.
How do I care for the seedlings once they are planted in the cups?
Once the seedlings are planted in the cups, it is important to provide them with proper care. Keep the soil moist but not waterlogged, and place the cups in a warm and well-lit area, preferably near a window. As the seedlings grow, you may need to thin them out to allow for proper spacing and airflow.
Can I reuse the seedling cups for future plantings?
Yes, you can reuse the seedling cups for future plantings. After removing the seedlings, clean the cups thoroughly to remove any remaining soil or debris. You can then store them for future use. Reusing the cups is not only environmentally friendly but also saves you money on purchasing new planting pots.


