- Why propagate indoor violets?
- The benefits of propagating indoor violets with a leaf
- What you will need
- Essential items for propagating indoor violets
- Step 1: Choose a healthy leaf
- Step 2: Prepare the potting soil
- Step 3: Cut the leaf at the stem
- Step 4: Place the leaf in the soil
- Step 5: Provide proper care and maintenance
- Tips for nurturing propagated indoor violets
- Q&A:
- What is the best time to propagate indoor violets with a leaf?
- Can I use any leaf from an indoor violet plant to propagate?
- What is the best soil mix for propagating indoor violets with a leaf?
- How long does it take for the leaf to develop roots?
- Can I use rooting hormone to speed up the propagation process?
- Video: How to Grow African Violets from Leaf Cuttings
Indoor violets, also known as African violets, are beautiful flowering plants that can brighten up any room. They are easy to care for and can be propagated with just a single leaf, making them a popular choice for beginner gardeners. If you want to expand your collection of indoor violets or share them with friends and family, propagating them with a leaf is a simple and cost-effective method. In this step-by-step guide, we will walk you through the process of propagating indoor violets using a leaf.
Step 1: Select a healthy leaf
Start by selecting a healthy leaf from your indoor violet plant. Look for a leaf that is mature and free from any signs of disease or damage. The leaf should be plump and green, with no yellowing or browning edges. Choosing a healthy leaf will increase the chances of successful propagation.
Step 2: Prepare a propagation tray
Next, prepare a propagation tray or container for your leaf cuttings. Fill the tray with a well-draining soil mix, such as a combination of peat moss and perlite. This will provide the ideal growing conditions for the new violet plantlets.
Step 3: Cut the leaf
Using a clean and sharp knife or scissors, carefully cut the selected leaf from the plant, ensuring that you have a small section of the stem attached. Make the cut just below a leaf node, which is the point where a leaf emerges from the stem. This will allow the leaf to produce new roots and eventually develop into a new plant.
Step 4: Plant the leaf
Gently insert the stem of the leaf into the prepared soil mix, making sure that the leaf rests on the surface of the soil. It’s important not to bury the leaf too deep, as this can hinder root development. Press the soil around the base of the leaf to secure it in place.
Step 5: Provide proper care
Place your propagation tray in a location with bright, indirect light. Avoid direct sunlight, as this can scorch the delicate leaf. Keep the soil moist but not overly wet, as excessive moisture can lead to rot. Mist the leaf occasionally to provide humidity and prevent it from drying out. Within a few weeks, you should start to see new roots emerging from the leaf.
Step 6: Transplant the new plantlets
Once the new plantlets have developed a strong root system, typically after a few months, they can be carefully transplanted into their own individual pots. Use a well-draining potting mix and provide the same care as you would for established indoor violet plants.
Propagating indoor violets with a leaf is a rewarding and enjoyable process that allows you to expand your collection and share these beautiful plants with others. With proper care and patience, you can successfully propagate indoor violets and enjoy their vibrant blooms for years to come.
Why propagate indoor violets?
Propagating indoor violets is a great way to expand your collection of these beautiful and low-maintenance plants. There are several reasons why you might want to propagate indoor violets:
- Cost-effective: Propagating indoor violets from a leaf is a cost-effective way to obtain new plants, especially if you already have an existing plant.
- Preservation: If you have a particularly rare or valuable indoor violet, propagating it can help preserve and protect the plant for future generations.
- Sharing with others: Propagating indoor violets allows you to share these beautiful plants with friends and family members, spreading the joy of growing and caring for indoor plants.
- Experimentation: Propagation can also be a fun and educational process, allowing you to experiment with different methods and techniques to learn more about indoor violet growth and development.
Whether you are a seasoned gardener or a beginner, propagating indoor violets can be a rewarding and fulfilling experience. It allows you to create new plants, share your love of gardening with others, and learn more about the fascinating world of indoor violets.
The benefits of propagating indoor violets with a leaf
Propagating indoor violets with a leaf can be a beneficial and rewarding process. Here are some of the advantages of propagating these plants using this method:
- Cost-effective: Propagating indoor violets with a leaf is a cost-effective way to expand your plant collection. Instead of purchasing new plants, you can simply propagate new ones from existing ones.
- Increase plant count: By propagating indoor violets with a leaf, you can significantly increase the number of plants you have. This is particularly useful if you want to fill a large space or if you want to give away plants as gifts to friends and family.
- Healthy plants: When you propagate indoor violets with a leaf, you are essentially creating a new plant from a healthy parent plant. This means that the new plant is likely to inherit the same good qualities and characteristics as the parent plant, resulting in healthy and thriving plants.
- Learning experience: Propagating indoor violets with a leaf can be a great learning experience for plant enthusiasts. It allows you to understand the growth and development process of plants, and gives you the opportunity to experiment with different propagation methods.
- Preservation of rare varieties: If you have a rare variety of indoor violets and want to ensure its preservation, propagating them with a leaf can be a great way to do so. By creating new plants from the leaf, you can ensure that the rare variety continues to thrive and can be shared with other plant enthusiasts.
In conclusion, propagating indoor violets with a leaf is a cost-effective, rewarding, and educational way to expand your plant collection. It allows you to increase plant count, obtain healthy plants, and preserve rare varieties. So why not give it a try and enjoy the benefits of this propagation method?
What you will need
Before you start propagating indoor violets with a leaf, make sure you have the following items:
A healthy violet plant: Choose a mature plant with vibrant and healthy leaves. This will ensure a higher success rate in propagating new plants.
Sharp and clean scissors: Use a pair of sharp scissors to make clean cuts on the leaves. This will prevent any damage or infection to the plant.
Small pots or containers: Prepare small pots or containers for planting the new violet plants. Make sure the pots have drainage holes to prevent waterlogging.
Well-draining potting mix: Use a well-draining potting mix specifically formulated for indoor plants. This will provide the necessary nutrients and drainage for the new plants.
Rooting hormone (optional): If you want to increase the success rate of rooting, you can use a rooting hormone to stimulate the growth of new roots.
A spray bottle: Fill a spray bottle with clean water to mist the violet leaf cuttings. This will help maintain a moist environment for root development.
Plastic bags or propagation dome: Covering the leaf cuttings with plastic bags or using a propagation dome can create a humid environment, promoting faster growth of new roots.
A bright and warm location: Find a bright location in your home where the violet leaf cuttings can receive indirect sunlight. Avoid placing them in direct sunlight, as this can cause damage to the leaves.
Patience and care: Propagating indoor violets with a leaf takes time and patience. Make sure to provide proper care, including regular watering and monitoring for any signs of disease or pests.
Essential items for propagating indoor violets
Growing indoor violets from a leaf can be a rewarding and fun experience. To ensure successful propagation, there are a few essential items you will need:
- A healthy violet leaf: Look for a leaf that is healthy and free from any visible damage or disease.
- A sharp, clean knife or scissors: You will need a tool to carefully cut the leaf from the parent plant.
- A clean container: Choose a small container with drainage holes to plant the leaf in.
- Potting mix: Use a well-draining potting mix specifically formulated for violets or a mix of peat moss, perlite, and vermiculite.
- A misting bottle: Indoor violets prefer high humidity, so misting the leaf daily will help keep it moist.
- Rooting hormone (optional): Using a rooting hormone can increase the success rate of leaf propagation.
- A clear plastic bag or plastic wrap: Covering the container with plastic will create a mini greenhouse effect and help retain moisture.
- A warm and bright location: Violets need warmth and bright indirect light to grow, so find a suitable spot in your home.
- Patience: Leaf propagation can take several weeks or even months, so be patient and enjoy the process.
By having these essential items ready, you will be well-prepared to start propagating your indoor violets and watch them grow into beautiful new plants.
Step 1: Choose a healthy leaf
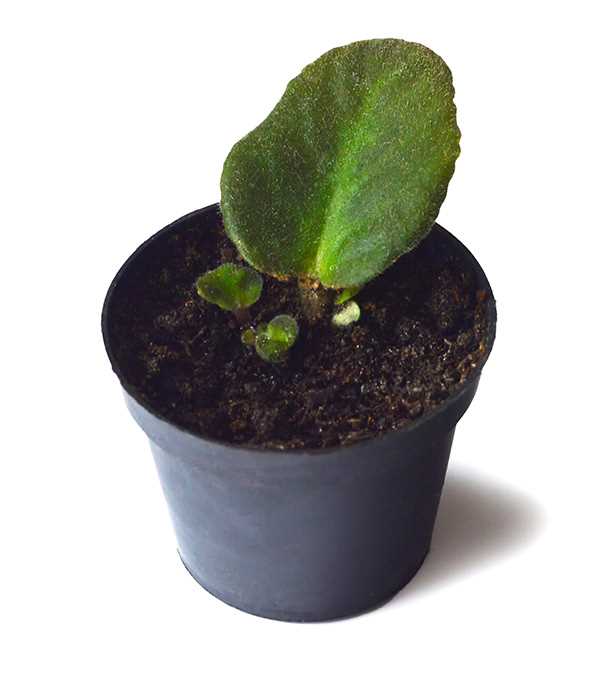
When propagating indoor violets with a leaf, it is important to start with a healthy leaf. This will increase the chances of successful propagation and ensure that the new plant grows strong and healthy.
To choose a healthy leaf for propagation, follow these guidelines:
- Look for a leaf that is mature and fully developed. Avoid using young or immature leaves.
- Check the leaf for any signs of disease or damage. Look for spots, discoloration, or holes in the leaf. Choose a leaf that is free from any such issues.
- Make sure the leaf is firm and plump. Avoid using leaves that are wilted, dried out, or wrinkled.
- Select a leaf that is attached to a healthy plant. Avoid leaves that are detached or fallen from the plant.
By choosing a healthy leaf, you are providing a strong foundation for propagation. This will increase the chances of successful root growth and development of a new plant.
Step 2: Prepare the potting soil
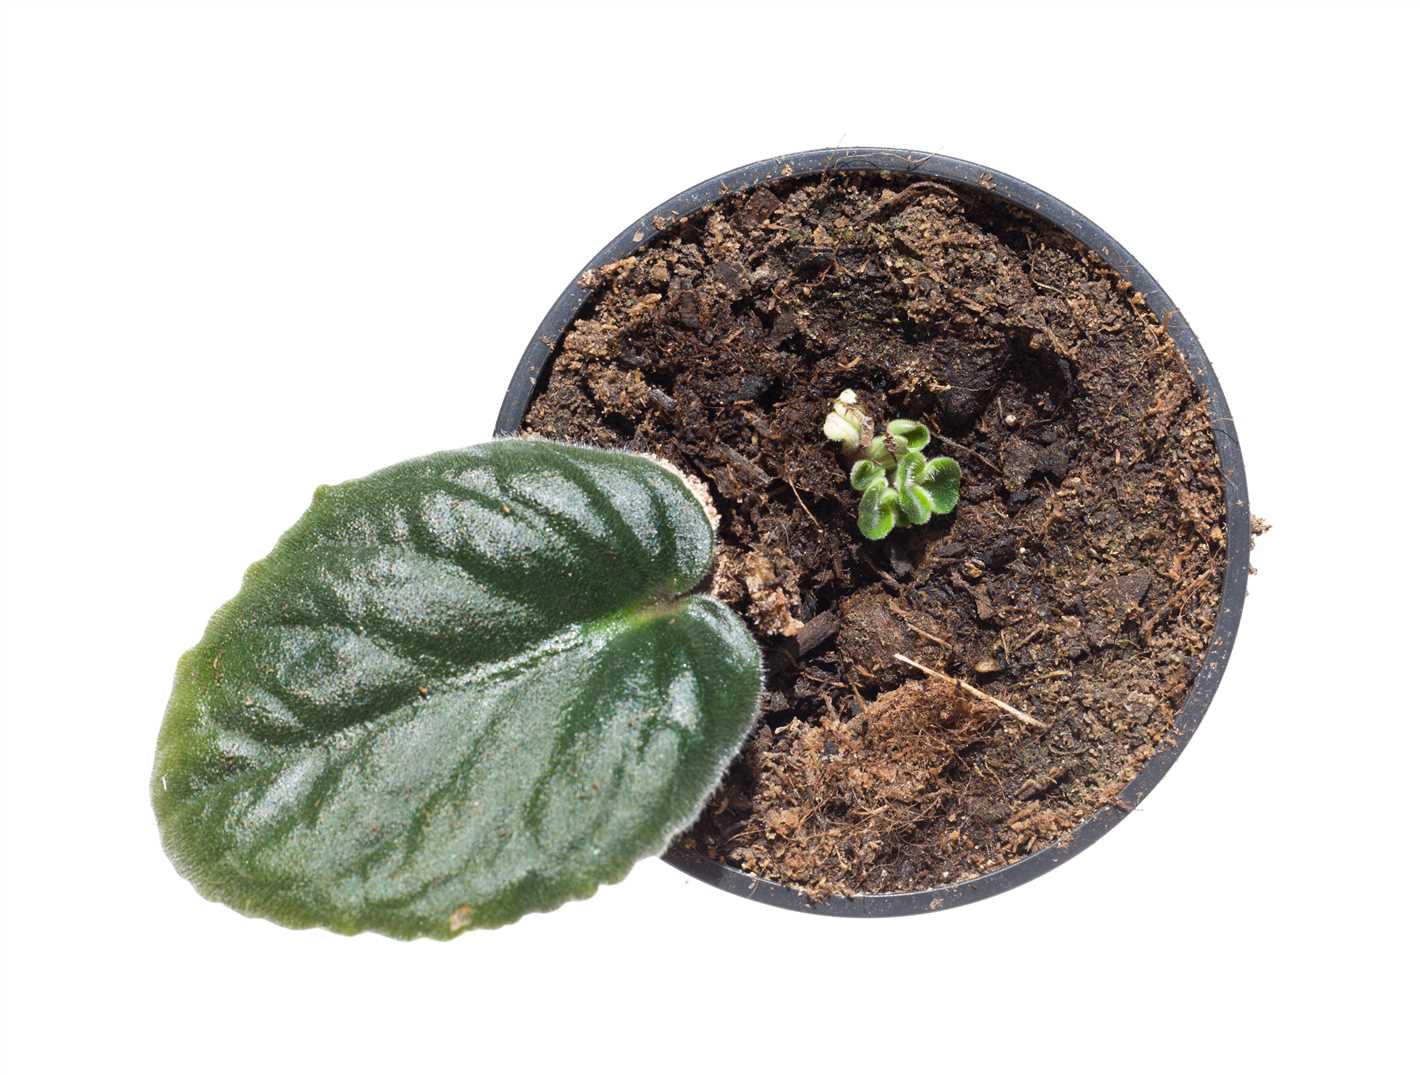
Preparing the right potting soil is crucial for the successful propagation of indoor violets. Here’s how you can do it:
Choose the right potting mix: Look for a potting mix that is well-draining, lightweight, and specifically formulated for indoor plants. Avoid using garden soil or regular potting soil, as they can hinder root growth and potentially introduce pests or diseases.
Moisten the potting mix: Before using the potting mix, moisten it slightly by adding water and mixing it thoroughly. This will help ensure that the soil is evenly moist, which is essential for root development.
Add perlite or vermiculite: To enhance drainage and aeration in the potting mix, you can add perlite or vermiculite. These amendments help prevent waterlogged soil and promote healthy root growth. Mix them into the potting mix according to the manufacturer’s instructions.
Check the pH level: Indoor violets prefer slightly acidic soil with a pH level between 5.5 and 6.5. You can use a pH testing kit to check the pH of the potting mix and adjust it if necessary by adding lime to raise the pH or sulfur to lower it.
By preparing the potting soil properly, you create the optimal conditions for your indoor violets to thrive and establish healthy root systems.
Step 3: Cut the leaf at the stem
Once you have chosen a healthy, mature leaf from your indoor violet plant, it’s time to cut it at the stem. Follow the steps below:
- Locate the stem from which you want to propagate the leaf. This stem should have at least two or three leaves attached to it.
- Using a sharp and clean pair of scissors or pruners, make a clean cut near the base of the stem. Make sure the cut is at a 45-degree angle to increase the surface area for rooting.
- Ensure that the cut includes a portion of the stem, as this will be the part that will develop into new roots.
- Remove any lower leaves on the stem, leaving only a few at the top. This will prevent excess moisture loss and focus the plant’s energy on root development.
At this point, you should have a leaf cutting with a small portion of the stem. This cutting is ready to be placed in a potting mix or water, where it will start developing roots and eventually grow into a new violet plant.
Step 4: Place the leaf in the soil
After preparing the pot and the soil mixture, it’s time to place the leaf in the soil. Follow these steps:
- Using your finger or a pencil, make a small hole in the soil mixture. The hole should be deep enough to comfortably accommodate the petiole (stalk) of the leaf without bending or breaking it.
- Gently insert the petiole of the leaf into the hole in the soil. Make sure the leaf is positioned upright and the petiole is fully inserted into the soil.
- Press the soil around the base of the petiole to ensure good contact between the leaf and the soil. Be careful not to damage the leaf or the petiole in the process.
- Repeat the process for any additional leaves you are propagating.
Once you have placed all the leaves in the soil, give them a light misting of water to settle the soil and provide moisture to the leaf. Avoid overwatering at this stage, as too much moisture can lead to rotting of the leaf.
Now that the leaves are planted, it’s time to move on to the next step: providing the right conditions for the propagation to take place.
Step 5: Provide proper care and maintenance
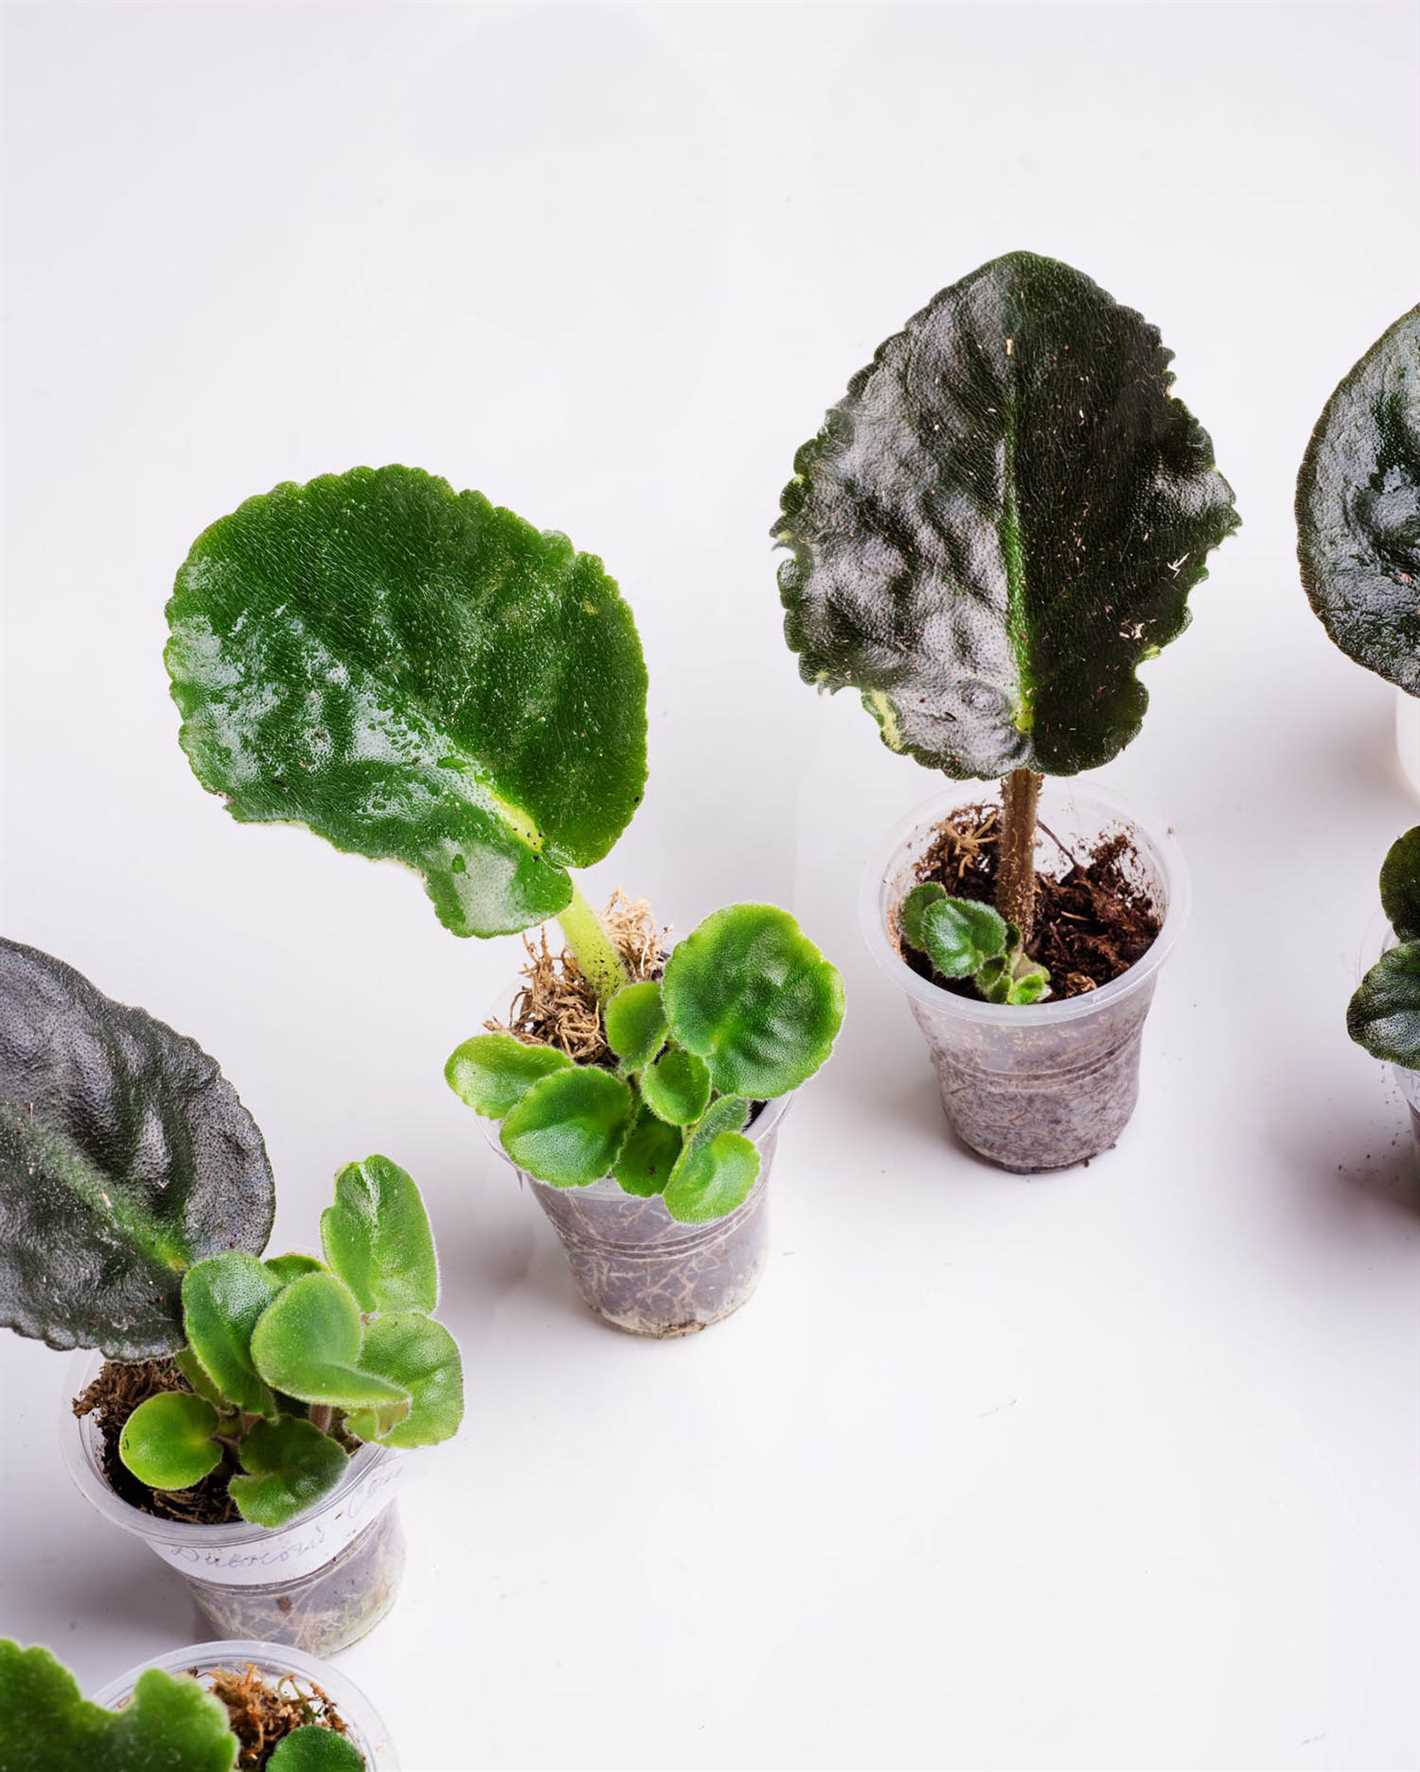
Once your indoor violets have started to root and develop new plants, it’s important to provide them with proper care and maintenance to ensure their continued growth and health. Here are some steps you can take to care for your propagated violets:
- Watering: Keep the soil moist but not waterlogged. Water the plants when the top inch of soil feels dry to the touch. Avoid overwatering as it can lead to root rot.
- Lighting: Place the propagated violets in a brightly lit spot, but avoid direct sunlight, as it can scorch the leaves. Indirect or filtered light is ideal for these plants.
- Temperature: Indoor violets prefer temperatures between 60°F and 75°F (15°C and 24°C). Avoid exposing them to extreme temperature fluctuations or drafts.
- Fertilizing: Use a balanced, water-soluble fertilizer specifically formulated for violets. Follow the instructions on the fertilizer package for application rates and frequency.
- Pruning: Regularly remove any dead or yellowing leaves to maintain plant health and appearance. You can also pinch back the tips of the plants to encourage bushier growth.
- Potting: As the propagated violets grow, you may need to transfer them to larger pots to accommodate their expanding root systems. Use a well-draining potting mix formulated for violets.
By providing the proper care and maintenance, your propagated indoor violets will continue to thrive and reward you with beautiful blooms.
Tips for nurturing propagated indoor violets
- Provide the right amount of light: Indoor violets thrive in bright, indirect light. Place them near a window where they can receive bright light, but avoid placing them in direct sunlight.
- Keep the temperature consistent: Indoor violets prefer temperatures between 60°F (15°C) and 75°F (24°C). Avoid placing them near drafts or in areas with extreme temperature fluctuations.
- Water the plants carefully: When watering indoor violets, use room-temperature water and make sure the soil is evenly moist. Avoid overwatering, as this can lead to root rot. Allow the top inch of soil to dry out before watering again.
- Provide humidity: Violets prefer relatively high humidity levels. You can increase humidity by placing a tray of water near the plants or using a humidifier. Avoid misting the leaves, as this can cause fungal diseases.
- Fertilize regularly: Indoor violets benefit from regular fertilization. Use a balanced, water-soluble fertilizer diluted to half the recommended strength. Apply the fertilizer every 2-4 weeks during the growing season.
- Prune and remove spent blooms: Regularly prune and remove spent blooms to encourage new growth and prolong the blooming period. Use clean, sharp scissors to remove faded flowers and trim back overgrown or leggy stems.
- Monitor for pests: Keep an eye out for common pests like aphids, mealybugs, and spider mites. If you notice any signs of infestation, take immediate action to control the pests using organic insecticides or by rinsing the plants with water.
- Rotate the plants: Every few weeks, rotate the plants to ensure even growth and prevent them from leaning towards the light source.
- Keep the leaves clean: Dust can accumulate on the leaves of indoor violets, affecting their ability to photosynthesize. Wipe the leaves gently with a damp cloth or use a soft brush to remove any dust regularly.
Q&A:
What is the best time to propagate indoor violets with a leaf?
The best time to propagate indoor violets with a leaf is during the spring or early summer when the plant is actively growing and has new leaves.
Can I use any leaf from an indoor violet plant to propagate?
No, not all leaves can be used for propagation. It is best to choose a healthy leaf that is free from any diseases or pests.
What is the best soil mix for propagating indoor violets with a leaf?
The best soil mix for propagating indoor violets with a leaf is a well-draining mix that consists of equal parts of peat moss, perlite, and vermiculite.
How long does it take for the leaf to develop roots?
It usually takes about 4-6 weeks for the leaf to develop roots. During this time, it is important to keep the soil moist but not overly wet.
Can I use rooting hormone to speed up the propagation process?
Using rooting hormone is optional, but it can help speed up the propagation process by stimulating root growth. However, it is not necessary and the leaf should still be able to develop roots without it.
Video:
How to Grow African Violets from Leaf Cuttings

