- Nidularium Species Overview
- Nidularium fulgens
- Nidularium innocentii
- Nidularium procerum
- Nidularium rutilans
- Nidularium purpureum
- Choosing the Right Nidularium for Your Home
- Consider the Lighting Conditions
- Determine the Size of the Plant
- Consider the Temperature and Humidity
- Take into Account the Maintenance Level
- Consider the Overall Aesthetic
- Consult a Plant Specialist
- Conclusion
- Nidularium Care Tips and Best Practices
- 1. Lighting
- 2. Temperature and Humidity
- 3. Watering
- 4. Fertilizing
- 5. Potting and Repotting
- 6. Pruning
- 7. Common Pests and Diseases
- 8. Propagation
- 9. Display and Decor
- Understanding Nidularium’s Watering Needs
- Watering Frequency
- Watering Method
- Soil Moisture
- Seasonal Variations
- Signs of Underwatering and Overwatering
- Providing the Optimal Lighting Conditions for Nidularium
- Indirect Sunlight
- Artificial Lighting
- Light Intensity
- Signs of Inadequate Lighting
- Nidularium Propagation Methods
- 1. Division
- 2. Seeds
- 3. Offsets
- Common Pests and Diseases in Nidularium Plants
- Pests
- Diseases
- Q&A:
- What is Nidularium?
- How do I care for Nidularium?
- What are some common Nidularium species?
- Can I grow Nidularium indoors?
- How often should I water Nidularium?
- Video: How to care for a Bromeliad Plant | Donna Joshi
If you’re a fan of unique and exotic houseplants, consider adding nidularium to your collection. With their vibrant colors and unusual growth habits, these plants are sure to be conversation starters in any setting. In this guide, we’ll explore the different species of nidularium and provide tips on how to care for them.
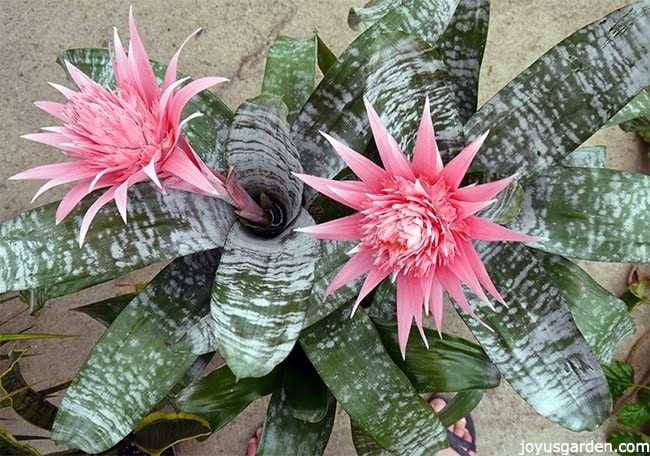
Nidularium is a genus of bromeliads that are native to South America. They are known for their rosette-like growth pattern, with leaves forming a circular shape that creates a “nest” in the center. This is where the plant gets its name – ‘nidulus’ means nest in Latin. The nest serves as a catchment area for water and fallen debris, creating a unique and interesting display.
One of the most appealing aspects of nidularium is their stunning foliage. The leaves are usually long and slender, with various patterns and colors. Some species have bold stripes or spots, while others feature delicate variegation or vibrant hues. The combination of these intricate leaf patterns and the nest-like structure makes nidularium a true visual spectacle.
When it comes to caring for nidularium, it’s important to recreate their natural habitat as much as possible. These plants thrive in warm, tropical conditions with high humidity levels. They prefer bright, indirect light, so placing them near a window with filtered sunlight is ideal. In terms of watering, it’s best to keep the center of the plant’s nest filled with water at all times. However, be careful not to overwater, as this can lead to rot.
There are many different species of nidularium, each with its own unique characteristics. Some popular varieties include Nidularium innocentii, Nidularium regelioides, and Nidularium procerum. To see photos and learn more about each species, continue reading our comprehensive nidularium species guide.
Nidularium Species Overview
There are several species of Nidularium plants, each with its own unique characteristics and growth requirements. In this overview, we will explore some of the most popular Nidularium species and provide key information about their care.
Nidularium fulgens
Nidularium fulgens, also known as the Painted Nidularium, is a striking species with vibrant foliage. Its leaves are often speckled or striped with shades of red, orange, and yellow. This species prefers bright, indirect light and well-draining soil. It should be watered regularly, allowing the soil to slightly dry out between waterings.
Nidularium innocentii
The Innocent’s Nidularium, or Nidularium innocentii, is a species that is native to Brazil. It has long, narrow leaves that are typically green with prominent red or purple bands. This Nidularium enjoys bright, indirect light and prefers to be kept consistently moist. It is important to avoid overwatering, as this can lead to root rot.
Nidularium procerum
Also known as the Giant Nidularium, Nidularium procerum is a large species with wide, arching leaves. The leaves are usually green with prominent white or silver banding. This Nidularium thrives in bright, indirect light and requires well-draining soil. It should be watered when the top inch of soil feels dry.
Nidularium rutilans
Nidularium rutilans, commonly referred to as the Rusty Nidularium, is a species known for its rusty red coloration. Its leaves are typically green with reddish-brown spots or patches. This Nidularium does well in bright, indirect light and prefers to be kept slightly moist. It is important to avoid direct sunlight, as it can scorch the leaves.
Nidularium purpureum
The Purple Nidularium, or Nidularium purpureum, is a species with colorful foliage. Its leaves are often green with purple undersides and purple markings. This Nidularium prefers bright, indirect light and should be watered when the top inch of soil feels dry. It is also important to maintain high humidity levels for this species.
| Species | Common Name | Light Requirements | Watering |
|---|---|---|---|
| Nidularium fulgens | Painted Nidularium | Bright, indirect light | Regular watering, allow soil to slightly dry out between waterings |
| Nidularium innocentii | Innocent’s Nidularium | Bright, indirect light | Consistently moist soil, avoid overwatering |
| Nidularium procerum | Giant Nidularium | Bright, indirect light | Water when top inch of soil is dry |
| Nidularium rutilans | Rusty Nidularium | Bright, indirect light | Keep slightly moist, avoid direct sunlight |
| Nidularium purpureum | Purple Nidularium | Bright, indirect light | Water when top inch of soil is dry, maintain high humidity |
Choosing the Right Nidularium for Your Home
Consider the Lighting Conditions
When choosing a Nidularium for your home, it’s important to consider the lighting conditions the plant requires. Some species of Nidularium thrive in bright, indirect light, while others prefer lower light levels. Assess the available lighting in the area where you plan to place the plant and choose a species that matches those conditions.
Determine the Size of the Plant
Nidulariums come in various sizes, so it’s essential to determine the size of the plant you want for your home. If you have limited space, opt for a smaller Nidularium species that will fit comfortably. On the other hand, if you have a spacious area, you can choose a larger Nidularium that will make a statement as a centerpiece.
Consider the Temperature and Humidity
Nidulariums generally prefer warm and humid conditions. Ensure that the temperature and humidity levels in your home are suitable for the species you choose. Some Nidulariums can tolerate lower humidity levels, but they still prefer a more humid environment for optimal growth. Consider using a humidifier if necessary to provide the ideal conditions.
Take into Account the Maintenance Level
When choosing a Nidularium, consider the level of maintenance you are willing to provide. Some species require more care and attention, while others are more forgiving and can tolerate neglect better. If you are a beginner or don’t have much time to devote to plant care, opt for a Nidularium species that is known for being low-maintenance.
Consider the Overall Aesthetic
Nidulariums come in various colors, shapes, and patterns, so consider the overall aesthetic you want to achieve in your home. Choose a species that complements your existing decor or adds a pop of color to your space. Take into account the unique foliage and flower characteristics of each species to find the Nidularium that best suits your aesthetic preferences.
Consult a Plant Specialist
If you are unsure about which Nidularium species is best for your home, don’t hesitate to consult a plant specialist or a nursery. They can provide valuable advice and guidance based on your specific needs and preferences. They can also recommend Nidularium species that are well-suited to indoor cultivation.
Conclusion
Choosing the right Nidularium for your home involves considering the lighting conditions, size, temperature and humidity, maintenance level, overall aesthetic, and consulting a plant specialist. By taking these factors into account, you can select a Nidularium species that will thrive in your home and enhance the beauty of your living space.
Nidularium Care Tips and Best Practices
1. Lighting
Nidularium plants thrive in bright, indirect sunlight. Place your plant near a window where it can receive filtered light throughout the day. Avoid exposing it to direct sunlight, as it can burn the leaves.
2. Temperature and Humidity
Nidularium plants prefer to be kept in warm environments with temperatures between 65°F and 85°F (18°C and 29°C). They also appreciate high humidity levels, so consider misting the leaves occasionally or using a humidifier.
3. Watering
Water your Nidularium plant regularly, keeping the soil moist but not soggy. Allow the top inch (2.5 cm) of soil to dry out before watering again. Be sure to use well-draining soil and a pot with drainage holes to prevent waterlogging.
4. Fertilizing
Feed your Nidularium plant with a balanced, water-soluble fertilizer once a month during the growing season (spring and summer). Follow the instructions on the fertilizer packaging for the correct dilution and application method.
5. Potting and Repotting
Repot your Nidularium plant when it outgrows its current pot or every 2-3 years. Use a well-draining potting mix suitable for bromeliads. Gently remove the plant from its old pot, shake off any old soil, and place it into the new pot. Ensure the plant is stable and the roots are covered with soil.
6. Pruning
Trim any dead or yellowing leaves from your Nidularium plant using clean, sharp scissors or pruning shears. This will help maintain the overall appearance of the plant and promote new growth.
7. Common Pests and Diseases
Nidularium plants are generally resistant to pests and diseases. However, they can be susceptible to mealybugs and scale insects. If you notice any signs of infestation, treat the affected plant with an appropriate insecticide or wipe the pests off using a cotton swab soaked in alcohol.
8. Propagation
Nidularium plants can be propagated by separating the offsets, also known as pups, that grow at the base of the plant. Wait until the pups are approximately one-third the size of the parent plant before removing them. Gently detach the pups from the main plant and plant them in separate pots with well-draining soil.
9. Display and Decor
With their colorful foliage and unique flower bracts, Nidularium plants make beautiful additions to any indoor garden or decorative display. Consider showcasing them in hanging baskets, terrariums, or on shelves where their vibrant colors can be admired.
| Category | Requirement |
|---|---|
| Lighting | Bright, indirect sunlight |
| Temperature | 65°F – 85°F (18°C – 29°C) |
| Humidity | High humidity levels |
| Watering | Keep soil moist, not soggy |
| Fertilizing | Monthly during the growing season |
| Potting and Repotting | Every 2-3 years or when outgrowing pot |
| Pruning | Remove dead or yellowing leaves |
| Propagation | Separate offsets (pups) from the base |
Following these care tips and best practices will help ensure the health and vitality of your Nidularium plants, allowing you to enjoy their beauty for years to come.
Understanding Nidularium’s Watering Needs
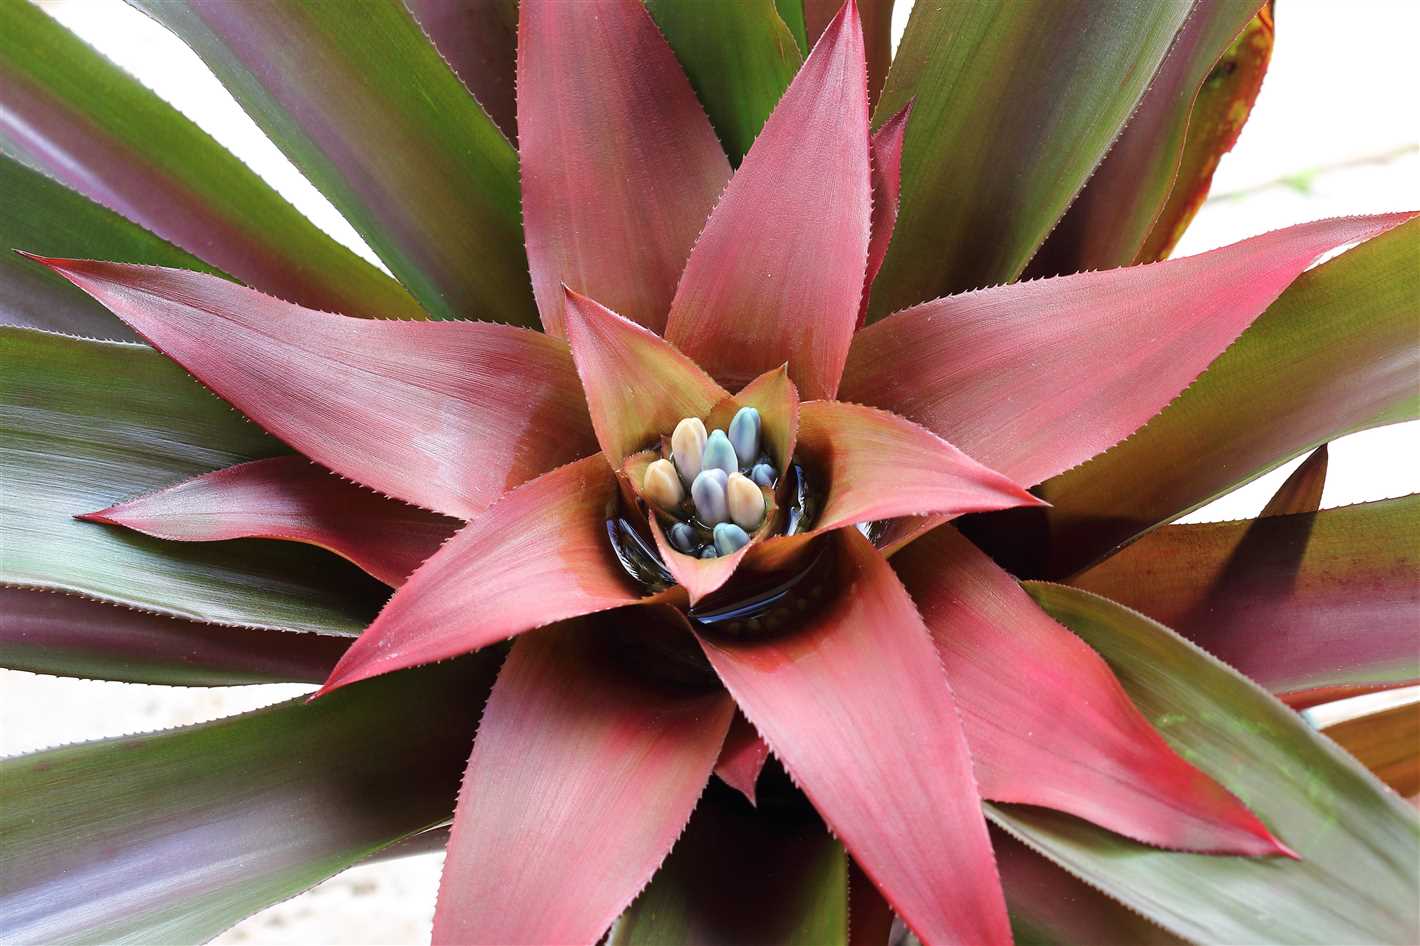
Proper watering is crucial for the health and growth of Nidularium plants. As tropical plants, they have unique watering needs that require attention and care.
Watering Frequency
Nidularium plants should be watered regularly, but not excessively. It is important to strike a balance between providing enough moisture and avoiding waterlogging the roots. As a general guideline, water your Nidularium plant once every 7-10 days.
Watering Method
Avoid watering the leaves of the Nidularium plant directly. Instead, direct the water towards the base of the plant, ensuring that it reaches the roots. This helps prevent the accumulation of water in the leaf rosettes, which can lead to rot and other issues.
When watering, use room temperature water or water that has been left sitting out for a day to allow any chlorine to dissipate. If possible, use rainwater or distilled water, which are free from minerals that can build up in the soil over time.
Soil Moisture
The soil should be moist but not soggy. Before watering, check the top inch of soil using your finger. If it feels dry, it’s time to water. However, if it feels moist, wait a few more days before watering to avoid overwatering.
It is essential to ensure proper drainage in the pot or container as Nidularium plants do not tolerate standing water. Choose a well-draining potting mix that is specifically formulated for tropical plants.
Seasonal Variations
During the warmer months or periods of active growth, Nidularium plants may require more frequent watering. Conversely, during cooler months or dormancy, they may require less water. Monitor the soil moisture level and adjust your watering schedule accordingly.
Signs of Underwatering and Overwatering
When underwatered, Nidularium plants may have drooping leaves, dry or crispy edges, and slower growth. On the other hand, overwatered plants may exhibit yellowing leaves, wilting, and root rot. Adjust your watering practices accordingly if you notice any signs of watering issues.
- Underwatering:
- Drooping leaves
- Dry or crispy leaf edges
- Slower growth
- Overwatering:
- Yellowing leaves
- Wilting
- Root rot
By understanding and meeting the watering needs of your Nidularium plant, you can ensure its optimal growth and overall health.
Providing the Optimal Lighting Conditions for Nidularium
Proper lighting is essential for the healthy growth and development of Nidularium plants. In their natural habitat, Nidularium species are found in shady areas under the tropical rainforest canopy. Therefore, replicating similar lighting conditions is crucial for their wellbeing in a home environment.
Indirect Sunlight
Nidularium plants thrive in bright but indirect sunlight. Placing them near a north-facing window or any spot where they can receive filtered sunlight is ideal. Direct sunlight can scorch their leaves and cause damage, so it is important to avoid placing them in direct sunlight.
Artificial Lighting
If you don’t have access to enough natural light, or if you want to supplement their lighting conditions, you can use artificial lighting. LED grow lights are a popular choice for providing the necessary light intensity and spectrum for Nidularium plants.
When using artificial lighting, it is important to mimic natural light cycles. Provide Nidularium plants with approximately 10-12 hours of light per day, followed by a period of darkness. Using a timer can help automate this process and ensure consistent lighting conditions.
Light Intensity
While Nidularium plants prefer bright light, they can also tolerate lower light levels. However, insufficient light may result in slower growth and less vibrant foliage. To ensure optimal growth, it is best to provide moderate to bright light conditions to your Nidularium plants.
Signs of Inadequate Lighting
If your Nidularium plant is not receiving enough light, you may notice the following signs:
- Long and leggy stems
- Small and pale leaves
- Pale colors or lack of vibrancy in foliage
- Stunted growth
If you observe any of these symptoms, consider adjusting the lighting conditions to provide more suitable light intensity.
Remember, each Nidularium species may have slightly different lighting requirements, so it is important to research and understand the specific needs of your plant. By providing the optimal lighting conditions, you can ensure the overall health and beauty of your Nidularium plant.
Nidularium Propagation Methods
Nidularium plants can be propagated through several methods. Here are some common techniques for propagating Nidularium:
1. Division
Division is the most common method for propagating Nidularium plants. It involves separating the offsets, or the smaller plants that grow around the main plant, and planting them as individual plants.
To propagate through division, follow these steps:
- Choose a mature Nidularium plant with healthy offsets.
- Gently remove the offsets from the mother plant, making sure to keep their roots intact.
- Plant the offsets in separate pots or in a suitable planting medium.
- Provide the newly planted offsets with proper care and maintenance.
2. Seeds
Another method of propagating Nidularium plants is through seeds. This method requires more patience and time, as it takes longer for the plants to grow from seeds.
To propagate Nidularium through seeds, follow these steps:
- Collect mature Nidularium seeds from the plant.
- Prepare a seed-starting mix or a suitable planting medium.
- Sow the seeds on the surface of the planting medium, pressing them lightly into the soil.
- Maintain a warm and humid environment for the seeds to germinate.
- Keep the soil moist but not waterlogged.
- Once the seedlings develop, transplant them into separate pots or a larger container.
3. Offsets
Some Nidularium plants produce offsets naturally, which can be easily removed and planted as individual plants.
To propagate through offsets, follow these steps:
- Identify the offsets that have formed around the base of the mother plant.
- Gently separate the offsets from the mother plant, taking care not to damage their roots.
- Plant the offsets in separate pots or a suitable planting medium.
- Provide the newly planted offsets with the appropriate care and maintenance.
Propagation is an exciting way to expand your collection of Nidularium plants. With the proper techniques and care, you can enjoy the beauty of these unique and fascinating plants.
Common Pests and Diseases in Nidularium Plants
Nidularium plants are generally hardy and resistant to pests and diseases. However, there are still some common issues that can affect these plants. Knowing how to identify and treat these problems can help keep your Nidularium plants healthy and thriving.
Pests
- Spider mites: These tiny pests can cause damage to the leaves by sucking on the plant juices. Signs of spider mite infestation include yellowing leaves and webbing on the plant. You can treat spider mites by wiping the leaves with a damp cloth or using a horticultural oil spray.
- Mealybugs: Mealybugs are small, white, cottony insects that can infest the leaves and stems of Nidularium plants. They can cause yellowing, stunted growth, and wilting of the plant. To get rid of mealybugs, you can use a cotton swab dipped in rubbing alcohol to remove them from the plant.
- Aphids: Aphids are another common pest that can affect Nidularium plants. These small insects can cause stunted growth, distorted leaves, and yellowing. You can control aphids by spraying the infected plant with a mixture of dish soap and water.
Diseases
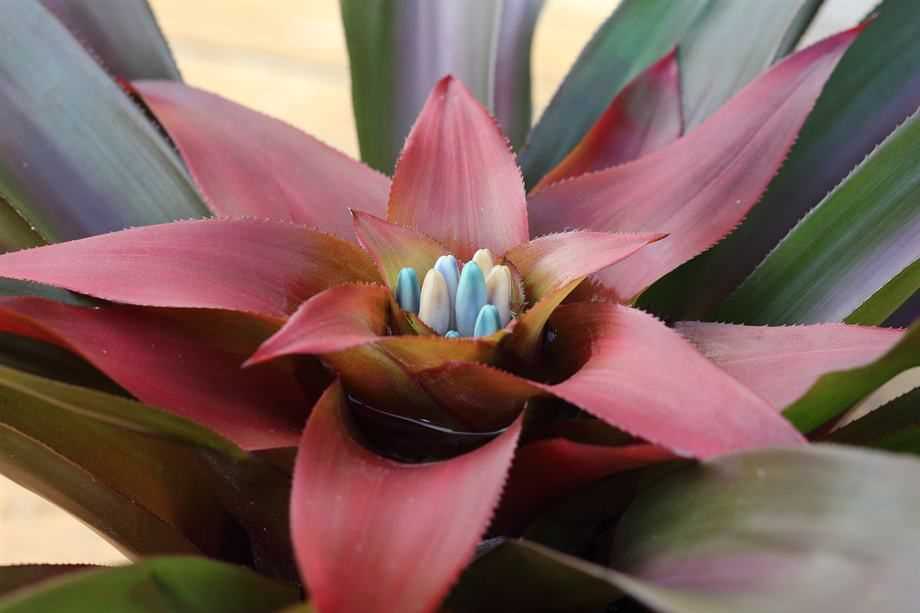
- Root rot: Overwatering can lead to root rot, which is a common disease in Nidularium plants. Signs of root rot include yellowing leaves, wilting, and a foul odor coming from the soil. To prevent root rot, make sure the soil is well-draining and avoid overwatering the plant.
- Leaf spot: Leaf spot is a fungal disease that can cause brown spots on the leaves of Nidularium plants. This can be caused by overwatering or high humidity. To treat leaf spot, remove the affected leaves and reduce moisture levels around the plant.
- Leaf blight: Leaf blight is another fungal disease that can affect Nidularium plants. It causes dark spots and streaks on the leaves, which can eventually lead to the death of the plant. To prevent leaf blight, make sure to provide adequate airflow around the plant and avoid overcrowding.
Regularly inspecting your Nidularium plants and taking appropriate measures at the first sign of pests or diseases can help ensure their health and vitality. Proper care, including maintaining the right moisture levels, providing good air circulation, and avoiding overcrowding, can also prevent these problems from occurring in the first place.
Q&A:
What is Nidularium?
Nidularium is a genus of bromeliad plants native to South America. They are known for their vibrant colors and unique flower shape.
How do I care for Nidularium?
Caring for Nidularium involves providing them with bright indirect light, regular watering, and well-draining soil. They also prefer warm and humid conditions.
What are some common Nidularium species?
Some common Nidularium species include Nidularium fulgens, Nidularium innocentii, and Nidularium procerum. Each species has its own unique characteristics and care requirements.
Can I grow Nidularium indoors?
Yes, Nidularium can be grown indoors as long as they receive sufficient light and humidity. It’s important to place them near a window or provide artificial lighting to meet their light requirements.
How often should I water Nidularium?
Nidularium should be watered thoroughly when the top inch of soil feels dry. It’s important to avoid overwatering, as it can lead to root rot. Regular misting can also help to maintain the desired humidity level.
Video:
How to care for a Bromeliad Plant | Donna Joshi
