- Propagation of Thuja and Juniper
- Seed Propagation
- Cutting Propagation
- Layering
- Benefits of Propagation at the Optimal Time
- Optimal Time for Rooting: Factors to Consider
- Understanding the Growth Cycle of Thuja and Juniper
- Stage 1: Dormant Phase
- Stage 2: Awakening Phase
- Stage 3: Active Growth Phase
- Stage 4: Maturation Phase
- Techniques for Propagation at the Optimal Time
- 1. Layering
- 2. Softwood Cuttings
- 3. Hardwood Cuttings
- 4. Seed Propagation
- 5. Grafting
- Common Mistakes to Avoid during Propagation
- Monitoring and Maintaining Propagated Plants
- 1. Watering
- 2. Fertilizing
- 3. Pruning
- 4. Pest and Disease Control
- 5. Monitoring Growth and Development
- 6. Providing Adequate Sunlight and Temperature
- 7. Transplanting
- 8. Regular Maintenance Tasks
- Conclusion
- Questions and Answers:
- What is the optimal time for rooting Thuja and Juniper?
- Can I propagate Thuja and Juniper at any time of the year?
- What is the reason behind the optimal timing for rooting Thuja and Juniper?
- Can I propagate Thuja and Juniper in winter?
- Are there any specific instructions for propagating Thuja and Juniper?
- Videos: Propagating Green Giant Arborvitae | Rooting Hardwood Thuja Cuttings
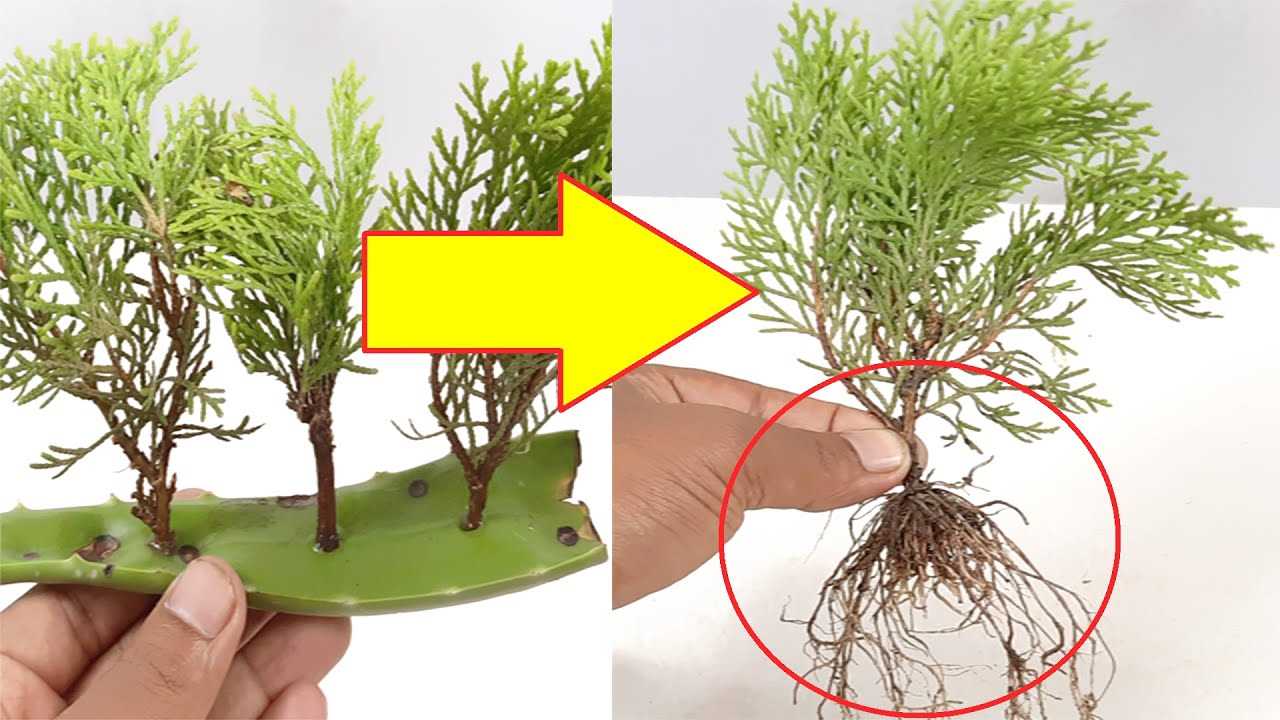
Propagating plants from cuttings is an essential skill for gardeners and horticulturists alike. Two popular species for propagation are Thuja (Arborvitae) and Juniper (Juniperus). These evergreen plants are commonly used for hedges, borders, and ornamental purposes due to their attractive foliage and versatility. Understanding the optimal time for rooting cuttings of Thuja and Juniper is crucial for successful propagation and establishment of new plants.
Rooting cuttings involves taking a portion of a plant stem, usually a young and healthy shoot, and encouraging it to develop roots and grow into a new plant. For Thuja and Juniper, the optimal time for taking cuttings is during the late spring or early summer. During this period, the plants are actively growing, and their tissues are more receptive to rooting hormones and environmental conditions that promote root development.
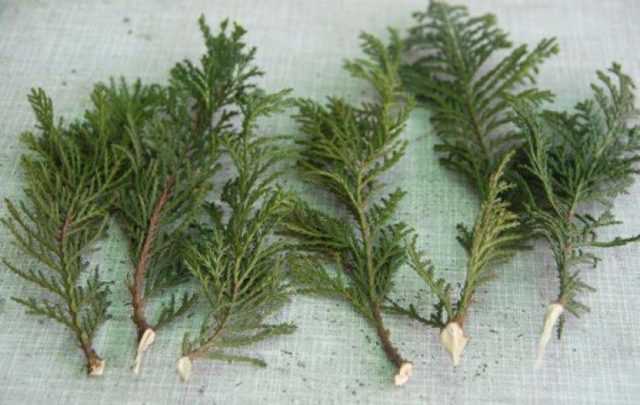
It is important to select appropriate plant material when taking cuttings from Thuja and Juniper. Choose young, vigorous shoots that are free from disease and pests. Cuttings should be about 3 to 6 inches long, with several pairs of leaves. Trim the cuttings just below a node, as this is where root development is more likely to occur. Remove any lower leaves to prevent them from rotting in the humid rooting environment.
Once the cuttings are prepared, they can be placed in a suitable rooting medium, such as a mix of peat moss and perlite or a specialized rooting mix. The cuttings should be inserted about 1 to 2 inches deep into the medium, with the nodes below the surface. Keep the medium moist but not waterlogged, and provide a warm, bright, and humid environment for the cuttings. Daily misting or using a humidity dome can help maintain the required moisture levels.
Propagation of Thuja and Juniper
Thuja and Juniper are popular evergreen trees and shrubs that are widely used in landscaping and gardening. Propagation of these plants can be done through several methods, including seed propagation, cutting propagation, and layering.
Seed Propagation
Seed propagation is the most common method for propagating Thuja and Juniper. The seeds can be collected from mature cones in the fall or early winter. They should be cleaned and stored in a cool and dry place until spring.
Before sowing the seeds, they should be soaked in water for a few hours to soften the outer seed coat. After soaking, the seeds can be stratified by placing them in a moist medium, such as sand or peat moss, and refrigerating them for 30-60 days. This process helps to break seed dormancy and improve germination rates.
Once stratification is complete, the seeds can be sown in containers filled with a well-draining potting mix. They should be covered lightly with soil and kept moist until germination occurs, which usually takes 2-3 weeks. After germination, the seedlings can be transplanted into individual pots or directly into the garden.
Cutting Propagation
Cutting propagation is another effective method for propagating Thuja and Juniper. It involves taking cuttings from a mature plant and rooting them to develop new plants. Softwood and semi-hardwood cuttings are usually taken in early summer when the plant is actively growing.
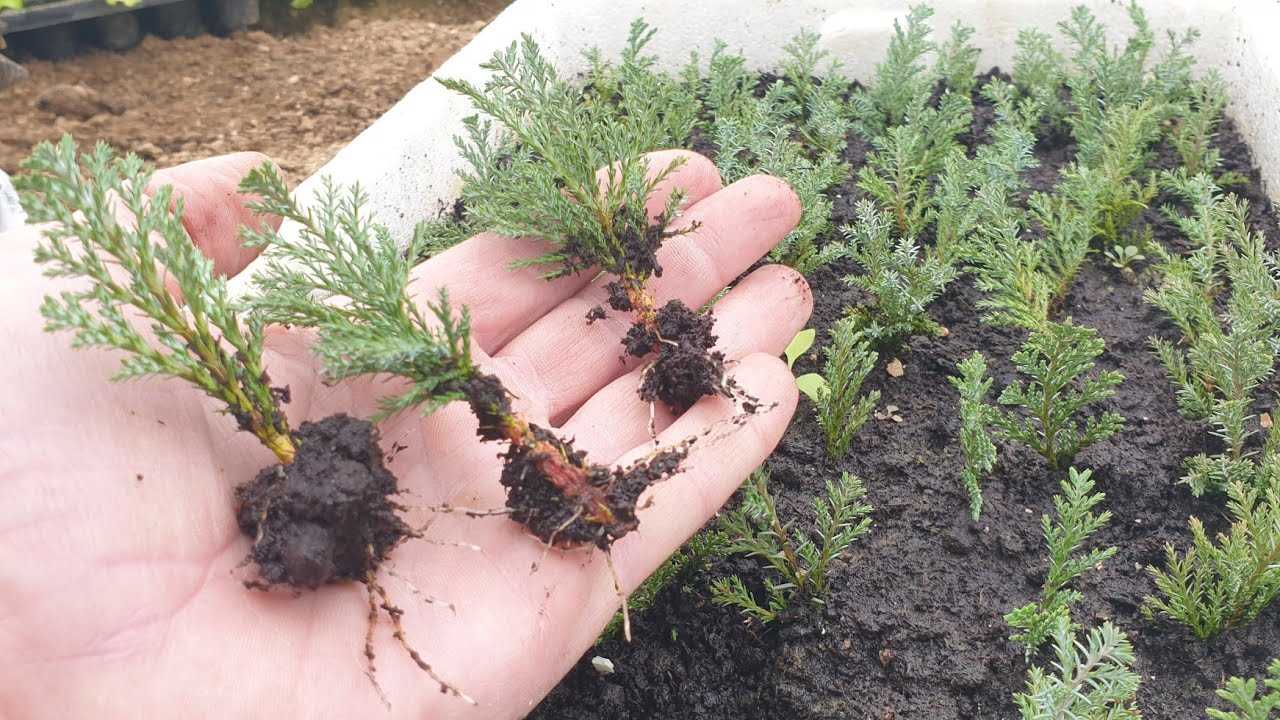
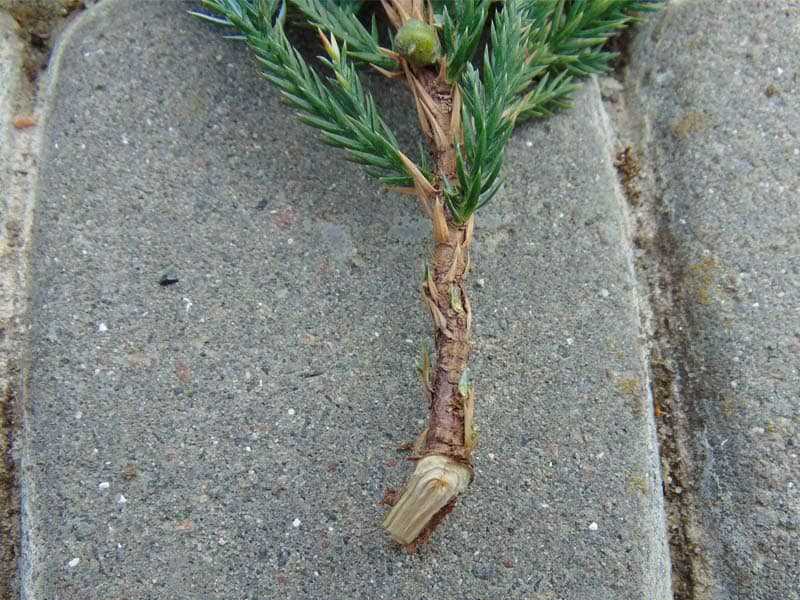
To take cuttings, select healthy and disease-free branches that are 4-6 inches long. Remove the lower leaves and dip the cut end in rooting hormone powder to encourage root development. The cuttings can then be inserted into a well-draining potting mix or a mixture of perlite and peat moss.
Place the cuttings in a warm, humid environment with bright, indirect light. Mist the cuttings regularly to maintain high humidity and prevent them from drying out. After a few weeks, the cuttings should start developing roots. Once the roots are well-established, the new plants can be potted up or planted in the garden.
Layering
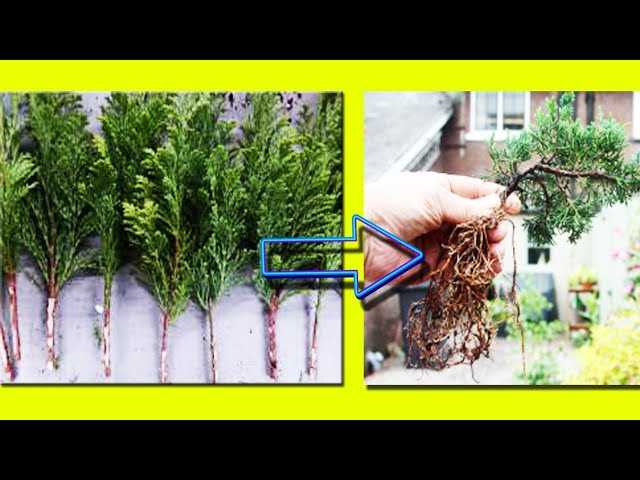

Layering is a method of propagation that involves encouraging a stem to develop roots while it is still attached to the parent plant. This can be done by bending a flexible stem and burying a portion of it in the soil or by using a technique called air-layering.
With air-layering, a small section of the stem is wounded and wrapped with damp sphagnum moss or peat moss. The wound is then covered with plastic to create a humid environment. After a few weeks or months, roots will start to develop at the wounded area. The rooted layer can then be cut from the parent plant and potted up.
Propagation of Thuja and Juniper can be an enjoyable and rewarding experience. Whether you choose to propagate through seeds, cuttings, or layering, following proper techniques and providing the right growing conditions will increase the chances of success.
Benefits of Propagation at the Optimal Time
Propagating plants such as Thuja and Juniper at the optimal time offers several benefits. This timing is crucial for successful root development and overall plant health. Here are some of the benefits of propagating these plants at the right time:
Increased Success Rate: Propagating plants at the optimal time increases the chances of successful rooting. This is because the plants are naturally more receptive to rooting during their specific growth periods. The conditions are favorable, and the plants have a higher capacity to produce healthy and robust roots.
Faster Root Development: When propagated at the right time, Thuja and Juniper plants tend to develop roots more quickly. This leads to faster establishment and growth after transplantation. The plants can take full advantage of the growing season, resulting in a stronger and healthier overall plant.
Enhanced Vigor: Propagating at the optimal time allows the plants to benefit from the natural growth patterns and hormonal changes occurring during that period. This leads to plants with improved vigor, which means they are more resistant to diseases, pests, and environmental stressors. They are also more likely to exhibit better growth and produce more vibrant foliage.
Cost Savings: Propagating plants at the right time can save significant costs in terms of resources and time. When plants root successfully and grow vigorously, they require less maintenance, such as fertilizers, pesticides, and pruning. This can result in long-term cost savings for both home gardeners and commercial growers.
Overall, propagating Thuja and Juniper plants at the optimal time ensures a higher success rate, faster root development, enhanced vigor, and cost savings. It is essential to understand the specific growth patterns of these plants to determine the ideal time for propagation and maximize their potential.
Optimal Time for Rooting: Factors to Consider
When it comes to propagating plants like Thuja and Juniper, timing plays a crucial role in determining the success of rooting. There are several factors to consider when choosing the optimal time for rooting, including:
- Season: Different plants have varying rooting requirements depending on the season. Generally, late spring and early summer are considered the best time for rooting Thuja and Juniper.
- Growth Stage: The growth stage of the plant is important in determining its ability to produce roots. Young, healthy cuttings tend to root more easily compared to older, woody branches.
- Weather Conditions: The weather conditions should be favorable for rooting, with temperatures between 65-75°F (18-24°C) and adequate humidity. Avoid extreme heat or cold as it can negatively impact root development.
- Soil Moisture: The soil moisture should be neither too dry nor too wet, as both conditions can hinder root growth. Aim for a well-draining soil that is slightly moist but not waterlogged.
- Hormonal Factors: Some plants may benefit from the application of rooting hormones to stimulate root development. Consult a horticulture expert or follow the specific guidelines for Thuja and Juniper rooting hormone usage.
It’s important to note that while these are general guidelines, the optimal time for rooting may vary depending on the specific variety of Thuja or Juniper being propagated. Consulting a local gardening expert or referring to specialized literature can provide more accurate information for your specific needs.
Understanding the Growth Cycle of Thuja and Juniper
Thuja and Juniper are evergreen shrubs that belong to the Cypress family. Understanding the growth cycle of these plants is essential for successful propagation. Both plants have a similar growth cycle, which consists of several distinct stages.
Stage 1: Dormant Phase
The growth cycle of Thuja and Juniper begins with a dormant phase during the winter months. During this time, the plants’ metabolic activity slows down, and the growth of new shoots and roots pauses. It is important to note that the exact timing of the dormant phase may vary depending on the specific species and climate conditions.
Stage 2: Awakening Phase

As the winter months come to an end and temperatures start to rise, Thuja and Juniper enter the awakening phase. During this stage, the plants begin to break their dormancy and resume their metabolic activity. New shoots and roots start to develop, and the plants prepare for the upcoming growing season.
Stage 3: Active Growth Phase
The active growth phase is the most critical stage for propagation. It occurs during the spring and summer months when the plants experience optimal growing conditions, including longer daylight hours and warmer temperatures. During this stage, Thuja and Juniper exhibit vigorous growth, with new shoots extending and roots expanding. It is the best time to take cuttings for propagation as the plants have abundant energy reserves.
Stage 4: Maturation Phase
The maturation phase takes place in the later part of the summer and early fall. During this stage, the growth rate of Thuja and Juniper begins to slow down as the plants start allocating energy towards hardening off and preparing for the upcoming winter. The new shoots and roots strengthen and mature, becoming better equipped to handle the cold temperatures of the dormant phase.
Understanding the growth cycle of Thuja and Juniper is crucial for determining the optimal time for rooting and propagation. Taking cuttings during the active growth phase ensures a higher success rate, as the plants are actively producing new tissues and have sufficient energy reserves.
Techniques for Propagation at the Optimal Time
Propagating Thuja and Juniper plants at the optimal time is crucial for their successful growth and establishment. Here are some techniques that can be used for propagation at the optimal time:
1. Layering
Layering is a propagation technique that involves bending a low and flexible stem of a parent plant to the ground and covering it with soil. This technique can be done in early spring when the plant begins to show active growth. It is an effective method for propagating both Thuja and Juniper plants.
2. Softwood Cuttings


Softwood cuttings are taken from the current season’s growth, which is still flexible and soft. This technique is best done in early summer when the plants are actively growing. The cuttings are taken from the tips of the branches and should include at least two leaf nodes. Using a rooting hormone can help promote root development.
3. Hardwood Cuttings
Hardwood cuttings are taken from mature wood of the plant during their dormant season, which is usually in late autumn or early winter. The cuttings are taken from the woody stems and should be about 6-8 inches long. They are then treated with rooting hormone and planted in well-draining soil or a propagation medium.
4. Seed Propagation
Seeds can also be used for propagating Thuja and Juniper plants. The optimal time for seed propagation is usually in autumn, as the seeds need a period of cold stratification to break their dormancy. The seeds should be sown in a well-draining soil mix and kept moist until they germinate.
5. Grafting
Grafting is a more advanced propagation technique that involves joining a desired plant (the scion) onto a rooted plant (the rootstock). This technique is typically done in late winter or early spring when the plants are still dormant. Grafting can be used to propagate specific varieties or cultivars of Thuja and Juniper plants.
By using these techniques at the optimal time, gardeners can increase their chances of successful propagation and establish healthy and thriving Thuja and Juniper plants.
Common Mistakes to Avoid during Propagation
Propagating Thuja and Juniper can be a rewarding experience, but it is important to avoid certain common mistakes that can hinder the success of the process. Here are some mistakes to avoid when propagating these plants:
Using Incorrect Tools: Using dull or unsanitized tools can damage the plants and introduce diseases. Always use sharp and clean tools when taking cuttings or preparing the propagation medium.
Not Observing Proper Timing: Timing is crucial when it comes to propagation. Taking cuttings too early or too late can reduce the chances of success. It is important to research and understand the optimal time for taking cuttings for each specific species.
Improper Preparation of Propagation Medium: The propagation medium needs to be well-draining and have the right ratio of nutrients for successful root development. Using the wrong type of soil or not preparing the medium properly can result in poor root growth.
Overwatering or Underwatering: Finding the right balance of moisture is essential during propagation. Overwatering can lead to rotting of the cuttings, while underwatering can cause wilting and the failure of root development. Regular monitoring and adjusting the moisture levels is crucial.
Neglecting Temperature and Humidity: Temperature and humidity play a significant role in the success of propagation. Failure to provide the appropriate temperature and humidity conditions can result in slow or no root development. It is important to create a suitable environment for the plant cuttings.
Skipping Hormone Treatment: Using a rooting hormone can greatly increase the chances of successful root formation. Skipping this step and not providing the necessary hormonal support can reduce the success rate of propagation.
Ignoring Pest and Disease Control: Pests and diseases can easily infest and damage the cuttings. Regularly inspect the plants for any signs of pests or diseases and take appropriate measures to control them. Ignoring pest and disease control can lead to the failure of the propagation process.
Avoiding these common mistakes and following proper propagation techniques can greatly increase the success rate of propagating Thuja and Juniper plants. Take the time to research and understand the specific needs of each plant and provide the optimal conditions for successful root development.
Monitoring and Maintaining Propagated Plants
Once the plants have been successfully propagated, it is important to monitor and maintain their growth to ensure their health and vitality. Here are some key steps to help with monitoring and maintenance:
1. Watering

Proper watering is essential for the growth and development of propagated plants. Regularly check the moisture levels in the soil and water the plants accordingly. Avoid overwatering, as it can lead to root rot, and underwatering, as it can stress the plants.
2. Fertilizing

Fertilizing the propagated plants can help provide the necessary nutrients for healthy growth. Use a balanced fertilizer and follow the instructions on the packaging for the appropriate application rates. Avoid over-fertilizing, as it can cause nutrient burn and damage the plants.
3. Pruning
Regular pruning helps shape the plants, remove any dead or damaged branches, and promote new growth. Be careful when pruning to avoid excessive cutting, which can hinder the plant’s ability to recover and regrow.
4. Pest and Disease Control
Monitor the plants for any signs of pests or diseases, such as discoloration, wilting, or presence of insects. Act promptly if any issues are detected by using appropriate pest control methods or seeking professional advice.
5. Monitoring Growth and Development
Regularly monitor the growth and development of the propagated plants. Keep track of their overall health, size, and appearance. Note any changes or abnormalities, and take the necessary steps to address them.
6. Providing Adequate Sunlight and Temperature
Ensure that the propagated plants receive the appropriate amount of sunlight and are kept in a suitable temperature range. Different plant species may have varying light and temperature requirements, so it is important to research and provide the ideal conditions for each type.
7. Transplanting
If the propagated plants outgrow their containers or need to be moved to a different location, plan and execute the transplanting process carefully. Transplant at the right time, use appropriate techniques, and provide the necessary care after transplantation to minimize stress on the plants.
8. Regular Maintenance Tasks

- Remove weeds that compete for nutrients and water
- Monitor and adjust irrigation as needed
- Check for signs of nutrient deficiency or excess
- Inspect for any signs of damage from environmental factors
Conclusion

Monitoring and maintaining propagated plants is crucial for their long-term success. By following these steps and providing proper care, you can ensure that your propagated plants thrive and grow into healthy and beautiful specimens.
Questions and Answers:
What is the optimal time for rooting Thuja and Juniper?
The optimal time for rooting Thuja and Juniper is in early spring or late summer.
Can I propagate Thuja and Juniper at any time of the year?
No, it is not recommended to propagate Thuja and Juniper at any time of the year. The optimal time for propagation is in early spring or late summer.
What is the reason behind the optimal timing for rooting Thuja and Juniper?
The optimal timing for rooting Thuja and Juniper is chosen because it allows the plants to establish roots before the onset of harsh winter or extreme summer conditions.
Can I propagate Thuja and Juniper in winter?
No, winter is not the ideal time for propagating Thuja and Juniper. It is best to wait until early spring or late summer when the conditions are more favorable for root development.
Are there any specific instructions for propagating Thuja and Juniper?
Yes, to propagate Thuja and Juniper, you should take cuttings from the current season’s growth, remove the lower leaves, and dip the cut end in a rooting hormone. Then, plant the cuttings in a well-draining soil mix and keep them in a warm and humid environment until roots develop.


