- What Causes Orchid Roots to Rot and Dry?
- 1. Overwatering
- 2. Poor Drainage
- 3. Lack of Air Circulation
- 4. Fungal and Bacterial Pathogens
- 5. Improper Potting Techniques
- Understanding the Main Culprits
- 1. Overwatering
- 2. Poor Drainage
- 3. Improper Potting Medium
- 4. Underwatering
- 5. Low Humidity
- 6. Temperature Extremes
- 7. Disease and Pests
- 8. Inadequate Light
- Signs of Orchid Roots Rot and Dryness
- Signs of Orchid Roots Rot:
- Signs of Orchid Roots Dryness:
- How to Identify the Problem
- Root Rot
- Dry Roots
- Preventing Orchid Roots Rot and Dryness
- 1. Proper Potting and Drainage
- 2. Watering Techniques
- 3. Environmental Conditions
- 4. Fertilization
- 5. Regular Inspections
- 6. Proper Air Circulation
- 7. Health and Hygiene
- 8. Monitoring and Adjusting
- 9. Seek Professional Help
- Tips for Healthy Orchid Roots
- Rescuing Orchid Roots from Rot and Dryness
- Identifying Root Rot
- Treating Root Rot
- Dealing with Dry Roots
- Reviving Dry Roots
- Expert Remedies to Save Your Orchid
- 1. Proper Drainage
- 2. Adjust Watering Routine
- 3. Improve Air Circulation
- 4. Use Proper Potting Mix
- 5. Monitor Humidity Levels
- 6. Trim Affected Roots
- 7. Provide Adequate Lighting
- 8. Avoid Overfertilizing
- 9. Quarantine New Orchids
- 10. Seek Professional Help
- Repotting Orchids: A Solution for Root Problems
- When to Repot
- Choosing the Right Potting Media
- The Repotting Process
- Preventing Root Problems
- When and How to Repot Your Orchid
- When to Repot:
- How to Repot:
- Q&A:
- What causes root rot in orchids?
- How can I prevent root rot in orchids?
- What are the signs of root rot in orchids?
- Can I save an orchid with root rot?
- What should I do if my orchid roots are dry?
- Should I cut off the dry roots on my orchid?
- Video: Understanding Phalaenopsis Orchid roots – All you should know!
Orchids are prized for their delicate and exotic beauty. However, they can be quite finicky and require special care in order to thrive. One common issue that orchid growers face is root rot or dryness. This can be caused by a variety of factors, including overwatering, underwatering, poor drainage, or fungal infections.
Root rot is a condition where the roots of the orchid become mushy and black, ultimately leading to the death of the plant. On the other hand, dry roots are characterized by a shriveled appearance and lack of moisture. Both conditions can be detrimental to the health of the orchid.
If you notice signs of root rot or dryness in your orchid, it’s important to take action promptly in order to save the plant. One effective remedy is to repot the orchid in fresh, well-draining potting mix. This will help to eliminate any excess moisture and prevent future root rot. Additionally, make sure to cut away any mushy or blackened roots before repotting.
Another remedy for root rot is to adjust your watering routine. Orchids prefer to be watered infrequently but thoroughly. Allow the potting mix to dry out slightly between waterings, and always empty out any excess water that collects in the saucer or outer pot. This will help to prevent waterlogged conditions that can lead to root rot.
If your orchid has dry roots, it is important to provide regular watering to rehydrate the roots. This can be done by soaking the orchid in a basin of water for about 15-20 minutes, allowing the roots to absorb the moisture. You may also want to consider increasing the humidity around the plant by placing it on a humidity tray or using a room humidifier.
In conclusion, root rot and dryness are common issues that orchid growers face. By taking prompt action and following these expert tips and remedies, you can help to revive your orchid and ensure its continued health and beauty.
What Causes Orchid Roots to Rot and Dry?
Orchid roots are vital for the overall health and growth of the plant. They absorb water and nutrients from the environment and help anchor the orchid in its growing medium. However, orchid roots can develop problems such as rotting or drying out, which can ultimately lead to the decline of the plant if left untreated.
1. Overwatering
Overwatering is one of the most common causes of orchid root rot. When orchids are watered too frequently or if the growing medium doesn’t allow for proper drainage, the roots can become waterlogged. This excess moisture creates a perfect environment for fungal and bacterial pathogens to thrive, leading to root rot.
2. Poor Drainage
If your orchid is planted in a growing medium that doesn’t provide adequate drainage, excess water can accumulate around the roots. This stagnant water can suffocate the roots and promote the growth of pathogens, resulting in root rot.
3. Lack of Air Circulation
A lack of air circulation around the orchid’s roots can lead to both rotting and drying out. Poor ventilation can cause moisture to become trapped around the roots, fostering fungal growth and root rot. On the other hand, excessive airflow, such as from fans or air conditioning, can cause the roots to dry out and become dehydrated.
4. Fungal and Bacterial Pathogens
Fungal and bacterial pathogens can infect orchid roots and cause them to rot. These pathogens are commonly found in contaminated growing mediums or water sources. Once the roots are infected, the rot can quickly spread to other parts of the plant if no intervention is taken.
5. Improper Potting Techniques
If an orchid is planted too deeply in its pot or if the potting medium is too compact, it can lead to poor root health. Deep planting can cause the lower portion of the roots to rot, while compacted growing mediums can suffocate the roots and restrict their growth.
In order to prevent root rot and drying in orchids, it’s important to maintain a proper watering and misting schedule, ensure good drainage, provide adequate air circulation, and use clean and appropriate potting materials. Regularly inspecting the roots for any signs of rot and taking prompt action can also help save the plant from further damage.
Understanding the Main Culprits
Orchid roots can experience two common problems: rot and dryness. Understanding the main culprits of these issues can help you prevent and treat them effectively.
1. Overwatering
Overwatering is the most common cause of root rot in orchids. Orchid roots need to breathe, and excessive moisture can lead to fungal and bacterial infections, ultimately causing the roots to rot. It is crucial to provide proper drainage and avoid overwatering your orchid.
2. Poor Drainage
If your orchid’s pot does not have adequate drainage holes or the potting medium does not provide good drainage, excess water can accumulate and lead to root rot. Make sure your orchid is potted in a well-draining medium and that the pot has sufficient drainage holes.
3. Improper Potting Medium
The potting medium you choose for your orchid can also contribute to root rot. Certain types of potting mixes, such as those that retain too much moisture or do not provide adequate aeration, can create a favorable environment for root rot. It is essential to use a well-balanced potting medium specifically designed for orchids.
4. Underwatering
On the other hand, underwatering can result in dry and shriveled orchid roots. Orchids require regular watering, and if they do not receive enough moisture, the roots can dry out and become damaged. It is important to water your orchid properly and ensure that the roots are adequately hydrated.
5. Low Humidity
Orchids thrive in environments with high humidity. Low humidity levels can cause the roots to dry out quickly, leading to root damage and potentially root rot. To create a suitable humidity level for your orchid, you can place a tray filled with water near the plant or use a humidifier in the room.
6. Temperature Extremes
Extreme temperatures, both hot and cold, can negatively impact orchid roots. High temperatures can cause the roots to dry out, while low temperatures can lead to root rot. Orchids prefer temperatures within a specific range, and maintaining a stable temperature can help keep the roots healthy.
7. Disease and Pests
Disease and pests, such as fungal infections, bacterial infections, and root-eating insects, can also harm orchid roots. Regularly inspecting your orchid for signs of disease or pests and taking immediate action can prevent further damage to the roots.
8. Inadequate Light
Orchids require the right amount of light to perform photosynthesis and grow healthy roots. Insufficient light can weaken the plant and cause root problems. Ensure that your orchid receives the appropriate amount of light for its specific species and adjust the lighting conditions accordingly.
| Culprit | Issue |
|---|---|
| Overwatering | Root rot |
| Poor Drainage | Root rot |
| Improper Potting Medium | Root rot |
| Underwatering | Dry roots |
| Low Humidity | Dry roots |
| Temperature Extremes | Root damage |
| Disease and Pests | Root damage |
| Inadequate Light | Root problems |
Signs of Orchid Roots Rot and Dryness
Orchid roots play a vital role in the overall health and well-being of the plant. However, they can sometimes suffer from rot or become excessively dry, which can negatively impact the orchid’s ability to absorb water and nutrients. Recognizing the signs of root rot or dryness is crucial in order to address the issue and save your orchid.
Signs of Orchid Roots Rot:
- Discoloration: Rotting roots often appear dark brown or black in color.
- Sogginess: Affected roots may feel soft, mushy, or slimy to the touch.
- Foul smell: Rotting roots can emit a foul odor, indicating the presence of bacteria or fungi.
- Wrinkled pseudobulbs: If the roots are unable to absorb water, the pseudobulbs may become shriveled and wrinkled.
- Leaf yellowing: Orchid leaves may start turning yellow and eventually wilt if the roots cannot provide enough moisture and nutrients.
Signs of Orchid Roots Dryness:
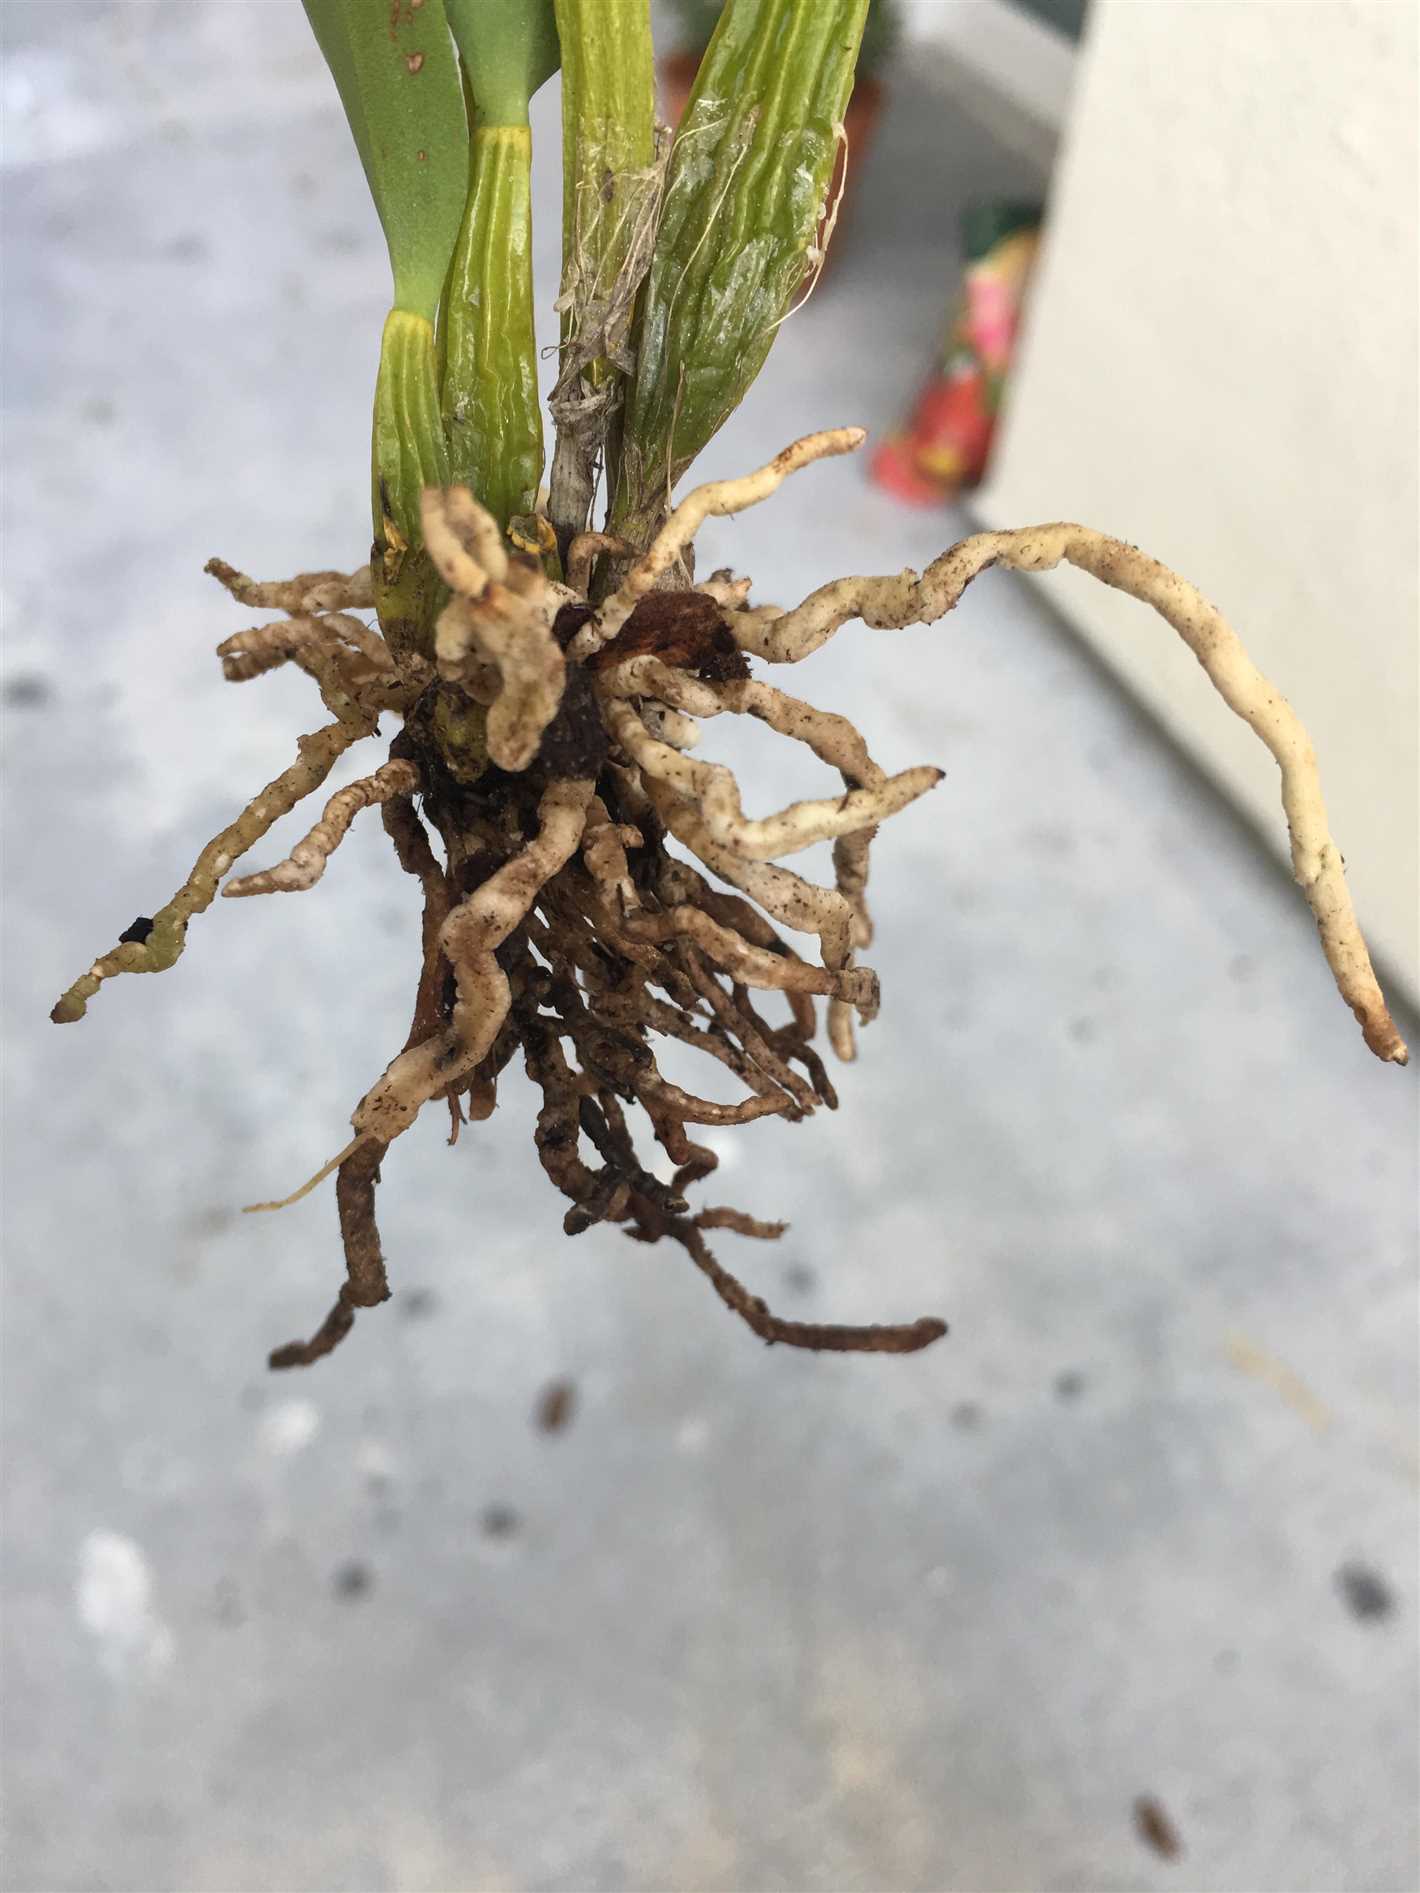
- Extremely dry appearance: Dry roots often appear shriveled, desiccated, and whitish or grayish in color.
- Brittle texture: Dry roots can become fragile and snap easily.
- Lack of green tips: Unlike healthy roots, dry roots may not have any green tips or new growth.
- Difficulty absorbing water: Dry roots struggle to absorb water, resulting in delayed growth and nutrient deficiencies.
- Leaf desiccation: When roots are dry, the leaves may also exhibit signs of desiccation, such as curling, browning, or wilting.
If you notice any of these signs indicating root rot or dryness in your orchid, it is important to take immediate action. This may involve repotting in fresh, well-draining media, trimming off the affected roots, providing proper watering and humidity conditions, or seeking advice from a professional orchid grower.
How to Identify the Problem
To effectively address orchid root rot or dryness, it is crucial to first identify the underlying problem. Here are some symptoms and signs to look out for:
Root Rot
- Discolored Roots: Healthy orchid roots should be white or green. If you observe dark brown or black roots, it is likely an indication of rot.
- Soft Roots: Gently touch the roots to check their firmness. If they feel mushy or soft, it is a sign of root rot.
- Foul Odor: Rotting roots often produce a strong, unpleasant smell. If you notice an unusual odor coming from your orchid, it could be an indication of root rot.
- Dropping Leaves: Root rot can cause the leaves of an orchid plant to turn yellow, wilt, or droop. If you notice these symptoms along with discolored or soft roots, it is likely that root rot is present.
Dry Roots
- Dry and Brittle Texture: Healthy orchid roots should have a plump and firm texture. If you notice that the roots appear dry, shriveled, or brittle, it indicates a lack of moisture.
- Barely Growing Roots: In a healthy orchid, new roots should emerge and grow consistently. If you observe a lack of new root growth or stunted roots, it could be due to dryness.
- Slow Water Absorption: Dry roots may struggle to absorb water efficiently. If you notice that water applied to the roots does not get absorbed quickly, it suggests that the roots are dry.
- Wilting or Yellowing Leaves: Lack of moisture can lead to wilting or yellowing of orchid leaves. If these symptoms are accompanied by dry and brittle roots, the plant is likely experiencing dryness.
By closely observing these symptoms, you can gain a better understanding of the root condition of your orchid plant. This will help determine whether it is suffering from root rot or dryness, enabling you to take the appropriate remedial measures.
Preventing Orchid Roots Rot and Dryness
1. Proper Potting and Drainage
One of the main causes of orchid root rot and dryness is improper potting and drainage. It is essential to choose a pot with drainage holes to allow excess water to flow out. Use a well-draining orchid potting mix that allows air circulation around the roots.
2. Watering Techniques
Watering is crucial for orchids, but it must be done correctly. Overwatering can lead to root rot, while underwatering can cause dryness. Water the orchids thoroughly but allow the top layer of the potting mix to dry out slightly before watering again. Avoid leaving water in the saucer or pot tray as it can drown the roots.
3. Environmental Conditions
Orchids thrive in specific environmental conditions. Provide them with the right amount of light, temperature, and humidity. Most orchids prefer bright, indirect light and moderate temperatures. Monitor the humidity levels and consider using a humidifier or placing a tray of water near the orchids to increase humidity.
4. Fertilization
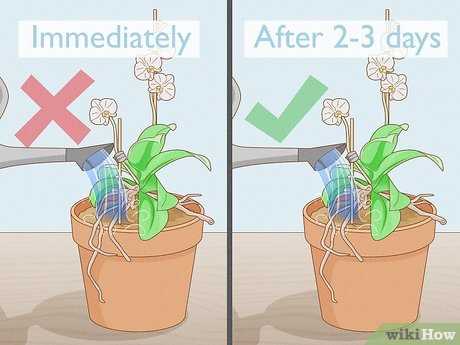
Proper fertilization is essential for orchids’ health and growth. Use a balanced orchid fertilizer that is specifically formulated for orchids. Follow the package instructions for the correct dosage and frequency. Avoid over-fertilization as it can lead to salt buildup and root damage.
5. Regular Inspections
Regularly inspect your orchids for any signs of root rot or dryness. Look for mushy, discolored roots, or dry, shriveled roots. If you notice any issues, take immediate action to prevent further damage. Trim off any affected roots and repot the orchid if necessary.
6. Proper Air Circulation
Ensuring proper air circulation around the orchid roots can help prevent rot and dryness. Avoid crowding orchids together and provide enough space for air to circulate between the leaves and roots. Place orchids in an area with good air movement.
7. Health and Hygiene
Maintaining overall orchid health and hygiene is crucial to prevent root issues. Remove any dead or decaying parts of the plant promptly. Avoid reusing old potting mix, as it can be contaminated with pathogens. Clean and sterilize your gardening tools before using them on your orchids.
8. Monitoring and Adjusting
Monitor your orchids closely and adjust their care routine as needed. Different orchid varieties may have specific requirements, so observe their behavior and adjust watering, fertilization, and environmental conditions accordingly.
9. Seek Professional Help
If you are unsure about how to prevent or treat orchid root issues, don’t hesitate to seek professional help. Consult with an experienced orchid grower or a local horticulturist who can provide expert advice and guidance.
By following these preventive measures, you can help keep your orchid roots healthy and vibrant, avoiding the problems of root rot and dryness.
Tips for Healthy Orchid Roots
Healthy roots are essential for the overall well-being of orchids. Here are some tips to help you maintain healthy orchid roots:
- Proper watering: Water your orchids carefully and avoid overwatering, as this can lead to root rot. Allow the top layer of the potting mix to dry out slightly before watering again.
- Good drainage: Ensure that your orchid pots have proper drainage holes to prevent water from accumulating at the bottom and causing root rot.
- Adequate air circulation: Orchids need good air circulation around their roots to prevent moisture buildup. Avoid placing them in closed or poorly ventilated environments.
- Regular repotting: Repot your orchids every 1-2 years to refresh the potting mix and prevent the roots from becoming overcrowded. Use a well-draining orchid mix that allows air flow to the roots.
- Fertilization: Provide your orchids with the necessary nutrients by fertilizing them regularly. However, avoid overfertilization, as it can damage the roots. Follow the instructions provided with your orchid fertilizer.
- Inspect for pests: Regularly check your orchids for signs of pests, such as mealybugs or scale insects. These pests can attack the roots and cause damage. Treat any infestations promptly.
By following these tips, you can ensure that your orchid roots stay healthy and your orchids thrive.
Rescuing Orchid Roots from Rot and Dryness
Orchids are beautiful and delicate plants that require special care. One common issue that orchid owners face is root rot or dryness.
Identifying Root Rot
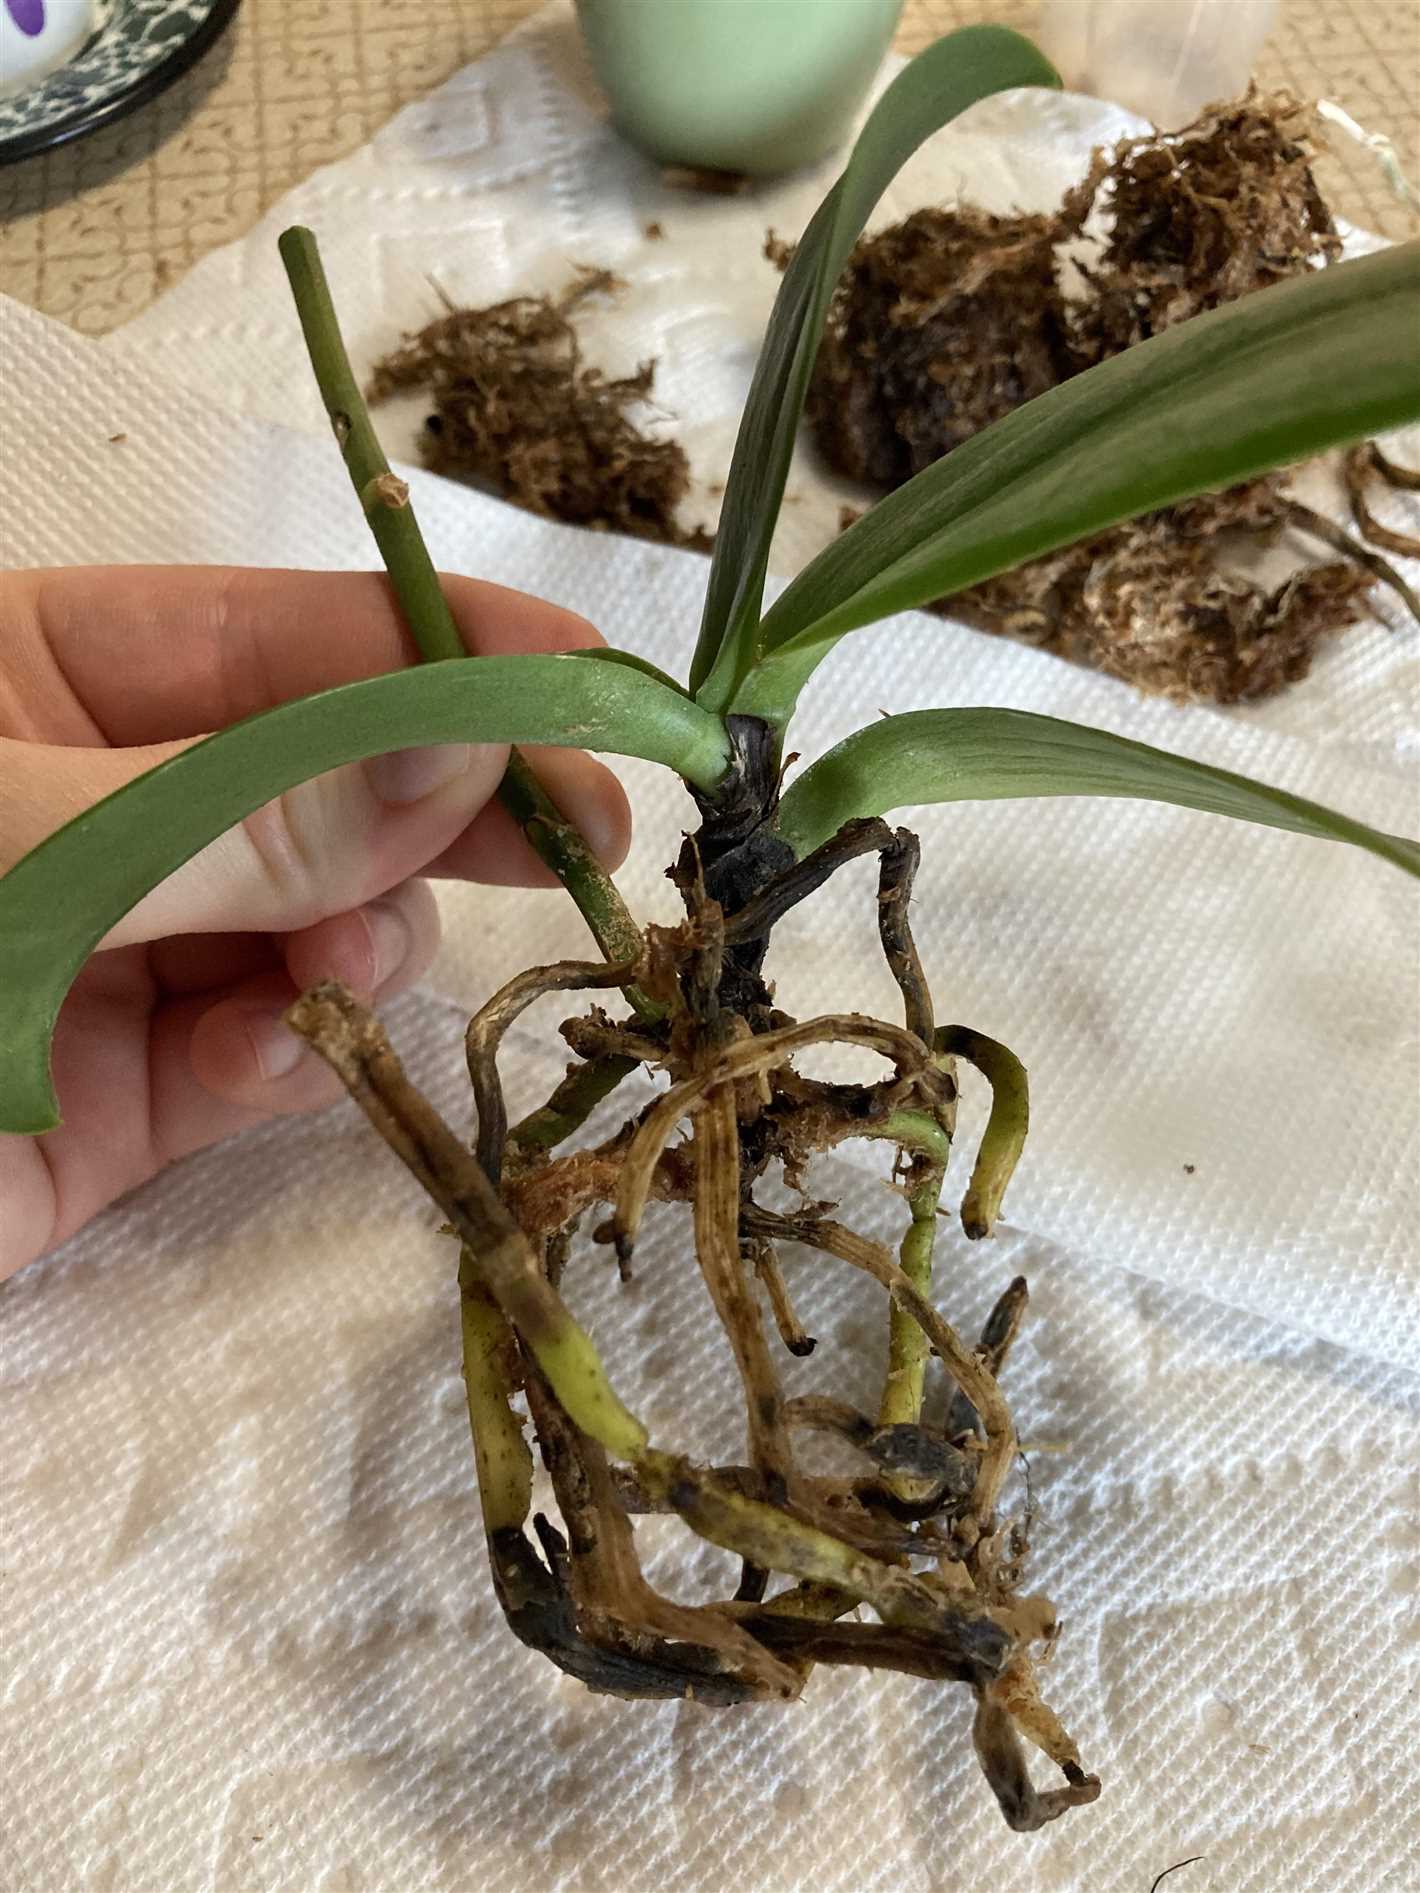
Root rot occurs when the roots of an orchid are continually exposed to excessive moisture, leading to fungal or bacterial infections. Symptoms of root rot include:
- Soft, mushy roots
- Foul odor
- Yellowing or browning of leaves
Treating Root Rot
If you notice root rot in your orchid, take immediate action to save the plant. Follow these steps:
- Remove the orchid from its pot and gently shake off excess soil or growing media.
- Inspect the roots and trim away any mushy or blackened sections using sterilized pruning shears.
- After trimming, allow the roots to dry out in a well-ventilated area for a few hours.
- Once dry, repot the orchid in fresh, well-draining orchid potting mix.
- Water the orchid sparingly, only when the potting mix feels dry to the touch.
Dealing with Dry Roots
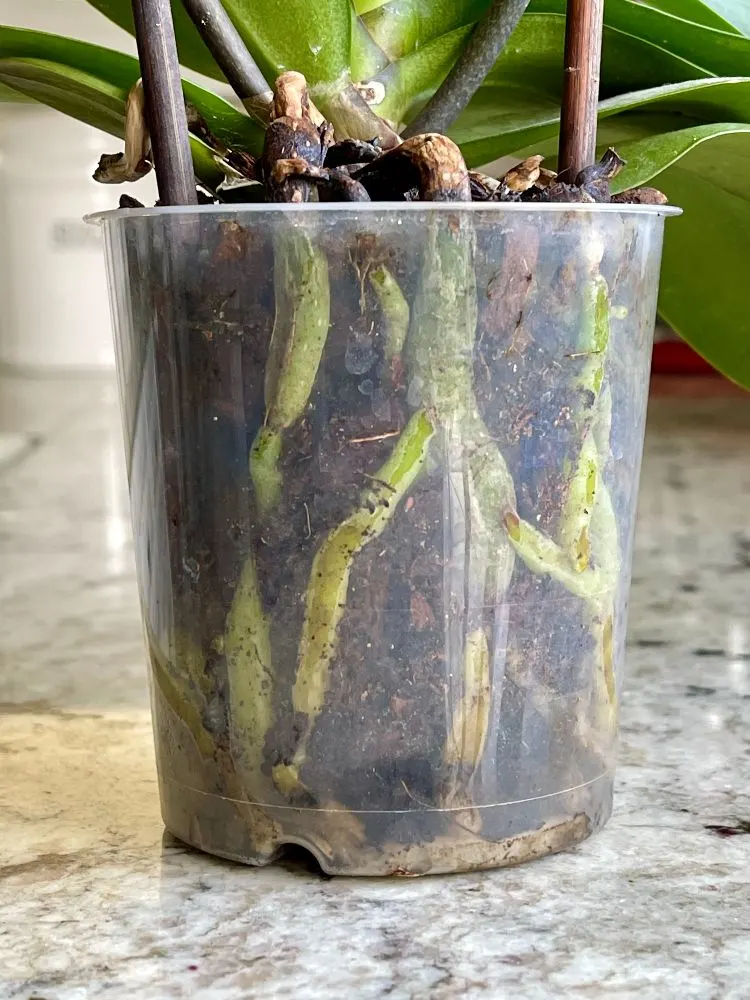
Dry roots can occur due to underwatering or low humidity. Signs of dry roots include:
- Dry, shriveled roots
- Wilting or yellowing leaves
Reviving Dry Roots
If your orchid has dry roots, try the following steps to revive them:
- Soak the orchid in room temperature water for 15-30 minutes.
- Remove the orchid from the water and gently pat dry with a clean towel.
- Mist the roots and foliage with water to increase humidity.
- Place the orchid in a humid environment or use a humidifier near the plant.
- Water the orchid regularly, ensuring the potting mix is evenly moist but not waterlogged.
By properly identifying and treating root rot or dryness, you can rescue your orchid and restore its health. Remember to provide the necessary care and attention to prevent these issues from occurring in the future.
Expert Remedies to Save Your Orchid
1. Proper Drainage
One of the main causes of orchid root rot is overwatering. To prevent this, ensure that your orchid has proper drainage. Choose a pot with good drainage holes and use a well-draining orchid mix for repotting. This will help excess water to flow out of the pot and prevent the roots from sitting in water.
2. Adjust Watering Routine
It’s important to adjust your watering routine to the specific needs of your orchid. While some varieties may require more frequent watering, others prefer to dry out slightly between waterings. To determine when to water, check the moisture level in the potting mix by inserting your finger about an inch deep. If it feels dry, it’s time to water. Be cautious not to overwater.
3. Improve Air Circulation
Poor air circulation can contribute to orchid root rot. Ensure that your orchid is placed in a location with good air movement. Avoid placing it in a stagnant or humid environment, such as near a closed window or in a bathroom. You can also use a fan to improve air circulation around your orchid.
4. Use Proper Potting Mix
Using the right potting mix is crucial to prevent root rot. Orchids require a well-draining mix that allows excess water to drain quickly. Avoid using regular potting soil, as it retains too much moisture. Instead, opt for a specialized orchid mix that contains materials like bark, sphagnum moss, or perlite.
5. Monitor Humidity Levels
Orchids thrive in a specific range of humidity. Too much or too little humidity can stress the plant and make it susceptible to root rot. Use a hygrometer to monitor the humidity levels in the orchid’s environment. You can increase humidity by placing a tray of water near the orchid or using a humidifier.
6. Trim Affected Roots
If you notice signs of root rot, such as mushy or discolored roots, it’s important to act quickly. Carefully remove the affected roots using sterilized pruning shears. Make clean cuts, removing any black or soft tissue. After removing the diseased roots, apply a fungicide to the remaining healthy roots to prevent further infection.
7. Provide Adequate Lighting
Proper lighting is essential for the overall health of your orchid. Insufficient light can weaken the plant and make it more prone to diseases. Find out the lighting requirements of your specific orchid variety and provide it with the right amount of light. If natural light is insufficient, you can supplement with artificial grow lights.
8. Avoid Overfertilizing
Overfertilizing can stress your orchid and lead to root rot. Follow a regular fertilization schedule, but avoid applying excessive amounts of fertilizer. Use a balanced orchid fertilizer and apply it according to the package instructions. Remember to flush the pot with plain water periodically to prevent a buildup of salts.
9. Quarantine New Orchids
When introducing new orchids to your collection, it’s important to quarantine them to prevent the spread of diseases. Keep newly acquired orchids separate from your established plants for a few weeks. This will allow you to monitor the new plant for any signs of root rot or other problems before integrating it into your collection.
10. Seek Professional Help
If you’ve tried various remedies and your orchid’s root rot persists, it may be time to seek professional help. Contact a local orchid expert or horticulturalist who can assess the situation and provide specific advice for saving your orchid.
Repotting Orchids: A Solution for Root Problems
Orchids are delicate and beautiful plants that require specific care and attention. One common issue that orchid owners face is root problems, such as root rot or dry roots. These issues can be detrimental to the health of the plant and can even lead to its death if not addressed promptly. Repotting orchids is a viable solution that can help solve root problems and revive the plant.
When to Repot
Repotting orchids should be done when there are signs of root problems, such as rot or excessive dryness. Additionally, if your orchid has outgrown its pot or the potting media has broken down, it is time to repot. Generally, orchids should be repotted every one to two years to ensure their overall health and vitality.
Choosing the Right Potting Media
The choice of potting media is crucial for orchids as it affects their water and nutrient uptake. Most orchids require a well-draining media that allows the roots to breathe. Common potting media for orchids include bark, sphagnum moss, perlite, and charcoal. It is essential to select a potting medium based on your orchid’s specific needs and preferences.
The Repotting Process
Repotting orchids can be a delicate process, so it’s important to follow the right steps to avoid harming the plant.
- Carefully remove the orchid from its current pot, gently loosening the roots if they are tightly packed.
- Inspect the roots for any signs of rot or damage. Trim off any rotten or dead roots using sterilized tools.
- Choose a new pot that is slightly larger than the previous one, providing enough room for the orchid to grow.
- Place a layer of potting media at the bottom of the pot, ensuring proper drainage.
- Position the orchid in the pot and add more potting media around the roots, gently pressing it down to secure the plant.
- Water the orchid thoroughly and allow any excess water to drain out.
After repotting, it is essential to monitor the orchid closely and adjust watering and care accordingly. Be patient, as orchids may take some time to adjust to their new environment.
Preventing Root Problems
Prevention is always better than cure when it comes to root problems in orchids. To prevent root rot, avoid overwatering and ensure proper drainage. For dry roots, maintain a consistent watering schedule and provide enough humidity. Regularly inspect the roots for any signs of problems and take immediate action if needed.
| Issue | Signs |
|---|---|
| Root Rot | Foul smell, mushy or black roots |
| Dry Roots | White or brownish roots with no sign of new growth |
By following proper repotting techniques and maintaining good orchid care practices, you can effectively address and prevent root problems in your orchids. Remember to research the specific needs of your orchid species and consult with experts if you need additional guidance.
When and How to Repot Your Orchid
Repotting your orchid is an important task that ensures the health and well-being of the plant. Here are some tips on when and how to repot your orchid:
When to Repot:
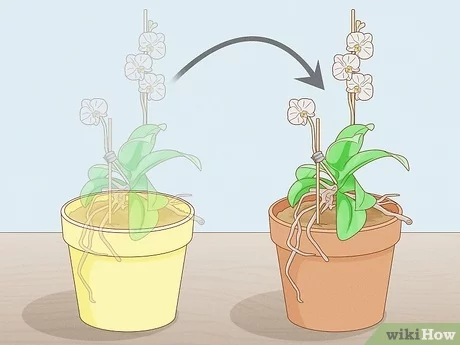
- Typically, orchids should be repotted every 1-2 years, or when you notice signs of overcrowding, such as roots growing out of the pot or lack of growth.
- It’s best to repot when the orchid is not in bloom or immediately after the blooming period.
- Spring or early summer is an ideal time to repot, as this is when the orchid is in active growth.
How to Repot:
- Choose a pot that is slightly larger than the current one, with drainage holes.
- Prepare a suitable potting mix for orchids, which usually consists of bark, sphagnum moss, or a specialized orchid mix.
- Carefully remove the orchid from its current pot, taking care not to damage the roots.
- Inspect the roots and trim any damaged or rotting roots with sterile tools.
- Place a layer of the potting mix at the bottom of the new pot.
- Position the orchid in the pot, ensuring that the roots are spread out evenly.
- Add more potting mix around the roots, gently pressing it down to secure the plant.
- Water the orchid thoroughly, allowing the excess water to drain out of the pot.
- Place the repotted orchid in a location with appropriate light and temperature conditions.
Remember, repotting orchids can be stressful for the plant, so it’s important to handle them with care and provide the necessary aftercare, such as adjusting watering and fertilizing routines. By repotting your orchid when needed, you can promote its overall health and encourage better growth and blooming.
Q&A:
What causes root rot in orchids?
Root rot in orchids is primarily caused by overwatering. When orchids are exposed to excessive moisture and lack proper drainage, it leads to the roots becoming waterlogged, resulting in root rot.
How can I prevent root rot in orchids?
To prevent root rot in orchids, it is important to ensure proper watering techniques. Orchids should be watered only when the top inch of the potting medium is dry. Additionally, providing good air circulation, using a well-draining potting mix, and avoiding overwatering can help prevent root rot.
What are the signs of root rot in orchids?
The signs of root rot in orchids include discolored and mushy roots, a foul odor coming from the potting medium, yellowing or wilting leaves, and stunted growth. If any of these symptoms are observed, it is important to take action to treat the root rot.
Can I save an orchid with root rot?
It is possible to save an orchid with root rot if it is identified and treated early. The first step is to remove the affected part of the roots and inspect for any healthy roots. The orchid should then be replanted in fresh, well-draining potting mix and provided with appropriate care to encourage the growth of new, healthy roots.
What should I do if my orchid roots are dry?
If your orchid roots are dry, it may indicate underwatering or inadequate humidity. To remedy this, you can increase the watering frequency or provide more humidity by placing a tray of water near the orchid or using a humidifier. Additionally, checking the potting medium for dryness and adjusting the watering schedule accordingly can help prevent dry orchid roots.
Should I cut off the dry roots on my orchid?
It is not necessary to cut off dry roots on an orchid unless they are completely withered or diseased. Dry roots can be a sign of underwatering or insufficient humidity, so it is important to address these issues. However, if dry roots are causing the plant to become unstable or rot is spreading, it may be necessary to trim them to promote the growth of healthy roots.
Video:
Understanding Phalaenopsis Orchid roots – All you should know!
