- Benefits of Transplanting Seedlings
- When to Transplant Pelargonium Seedlings
- Choosing the Right Cups for Transplanting
- 1. Size
- 2. Material
- 3. Drainage
- 4. Transparency
- 5. Quantity
- 6. Eco-Friendly Options
- Preparing the Cups for Transplanting
- Transplanting Pelargonium Seedlings Step-by-Step
- Step 1: Prepare the Individual Cups
- Step 2: Water the Seedlings
- Step 3: Loosen the Soil
- Step 4: Remove the Seedlings
- Step 5: Transplant into Cups
- Step 6: Water the Transplanted Seedlings
- Step 7: Provide Proper Care
- Providing the Proper Care for Transplanted Seedlings
- Watering
- Light and Temperature
- Fertilization
- Pest and Disease Control
- Transplanting into Larger Containers
- Troubleshooting Transplanting Issues
- 1. Root Damage
- 2. Transplant Shock
- 3. Nutrient Deficiencies
- 4. Over-Watering or Under-Watering
- Q&A:
- What is pelargonium propagation?
- Why should I propagate pelargonium?
- How do I transplant pelargonium seedlings into individual cups?
- When should I transplant pelargonium seedlings into individual cups?
- What type of potting soil should I use for transplanting pelargonium seedlings?
- Can I transplant pelargonium seedlings directly into the garden instead of individual cups?
- Video: How to easily propagate & grow a Scented Geranium aka Citronella (Mosquito) plant
Propagation is an important process in the growth and care of pelargoniums. This popular flowering plant is commonly known as geranium and is often cultivated for its beautiful and vibrant flowers. Transplanting seedlings into individual cups is a crucial step in the propagation process, as it ensures the proper growth and development of the plant.
When the seedlings have reached a suitable size, usually with two or three true leaves, they are ready to be transplanted into individual cups. This step is necessary to provide each seedling with enough space for its roots to grow and receive proper nutrients. Transplanting seedlings into individual cups also helps to reduce competition for resources and prevents the roots from becoming entangled.
Before transplanting, it is important to prepare the individual cups by filling them with a well-draining potting mix. The potting mix should be light and airy to allow for proper aeration and drainage. It is also recommended to add a layer of organic matter, such as compost or aged manure, to provide additional nutrients for the seedlings.
When transplanting the seedlings, gently remove them from their current container, being careful not to damage the delicate root system. Make a small hole in the potting mix of the individual cup and place the seedling in the hole, making sure that the roots are covered and the stem is above the soil surface. Gently firm the soil around the seedling to provide support.
After transplanting, water the seedlings thoroughly to settle the soil and ensure good moisture distribution. Place the individual cups in a warm and well-lit area, but avoid direct sunlight as it can scorch the delicate seedlings. Regularly check the moisture level of the soil and water as needed to keep it consistently moist but not waterlogged.
Benefits of Transplanting Seedlings
Transplanting seedlings into individual cups offers several benefits for the growth and development of Pelargonium plants. These benefits include:
- Improved root development: By transplanting seedlings into individual cups, each plant has its own space for roots to grow. This allows for better root development, which is essential for overall plant health and vigor.
- Reduced competition: When seedlings are grown together in a tray or seedling pot, they often have to compete for light, nutrients, and water. Transplanting them into individual cups eliminates this competition, ensuring that each seedling gets the resources it needs for optimal growth.
- Easier monitoring: With seedlings in individual cups, it becomes easier to monitor their growth and health. You can easily identify any issues such as pests or diseases and address them before they spread to other plants.
- Flexibility in plant care: Transplanting seedlings into individual cups allows you to provide customized care for each plant. You can adjust watering and fertilization based on individual plant needs, which is especially important if you are growing different varieties of Pelargonium.
- Higher survival rate: When seedlings are transplanted into individual cups at the right time, they are more likely to survive compared to being left crowded together. Each plant has enough space and resources to establish itself and grow into a healthy and robust plant.
Overall, transplanting seedlings into individual cups is a crucial step in Pelargonium propagation. It promotes better root development, reduces competition, allows for easier monitoring, provides flexibility in plant care, and increases the survival rate of the seedlings. By giving each plant its own space and resources, you are setting them up for success and ensuring strong, healthy plants in the future.
When to Transplant Pelargonium Seedlings
Transplanting pelargonium seedlings into individual cups is an important step in their propagation process. Timing the transplant correctly is crucial for the success of the seedlings. Here are some key factors to consider when deciding when to transplant your pelargonium seedlings:
- Size of the seedlings: Pelargonium seedlings should have reached a certain size before they are ready to be transplanted. The seedlings should have developed a few sets of true leaves and should be about 2-3 inches tall. This indicates that the seedlings are strong enough to handle the stress of transplantation.
- Root development: It is essential to check the root development of the pelargonium seedlings before transplanting them. The roots should be well-established and should have formed a compact root ball. This indicates that the seedlings have a strong root system to support their growth in individual cups.
- Environmental conditions: The environmental conditions, both indoors and outdoors, play a significant role in determining the appropriate timing for transplanting pelargonium seedlings. The seedlings should be transplanted after the last frost date in your area when the weather is consistently warm and frost-free. Transplanting them too early can result in cold damage or shock.
- Availability of space: If the seedlings have outgrown their current containers or are becoming overcrowded, it is a clear indication that they need to be transplanted into individual cups. Transplanting them at the right time ensures that each seedling has enough space to grow and thrive.
By considering these factors, you can determine the appropriate timing for transplanting your pelargonium seedlings into individual cups. This ensures their successful growth and development in their new containers.
Choosing the Right Cups for Transplanting
When it comes to transplanting your pelargonium seedlings into individual cups, it is important to choose the right type of cups that will provide the best environment for their growth. Here are some factors to consider when selecting cups:
1. Size
The size of the cups is crucial for the healthy development of your seedlings. Look for cups that are deep enough to accommodate the growing root system of the pelargonium plants. A cup with a capacity of at least 4 inches in depth should be sufficient.
2. Material
The material of the cups is also important. Plastic cups are commonly used for transplanting seedlings due to their durability, cost-effectiveness, and ability to retain moisture. Ensure that the cups are made of food-grade plastic to avoid any potential leaching of harmful substances into the soil.
3. Drainage
Good drainage is essential to prevent waterlogged soil which can lead to root rot. Choose cups with drainage holes at the bottom to allow excess water to escape. Alternatively, you can also create drainage holes by puncturing the bottom of the cups with a small knife or a hot nail.
4. Transparency
Transparent cups are beneficial for monitoring the moisture levels of the soil and observing root growth. This can help you determine when it is time to water or if the plants need more or less sunlight. Opt for cups that are clear or translucent.
5. Quantity
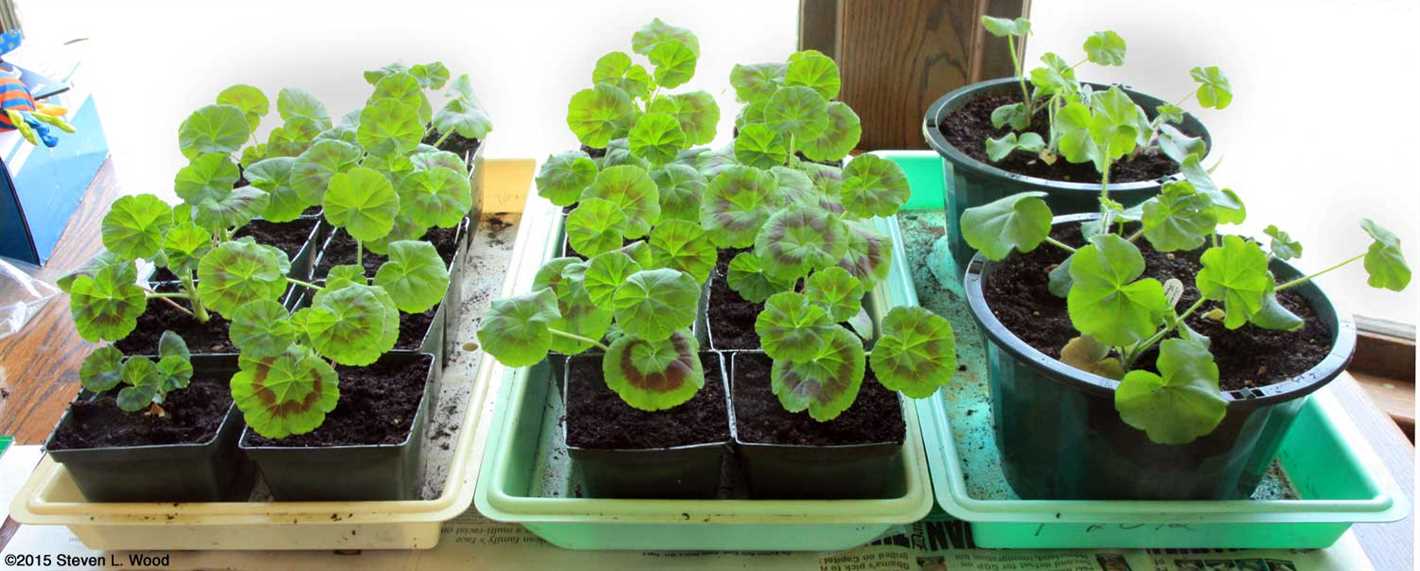
Consider the number of seedlings you have and the space you have available for transplanting. It is advisable to have extra cups on hand in case some of the seedlings fail to thrive or if you want to propagate more plants in the future.
6. Eco-Friendly Options
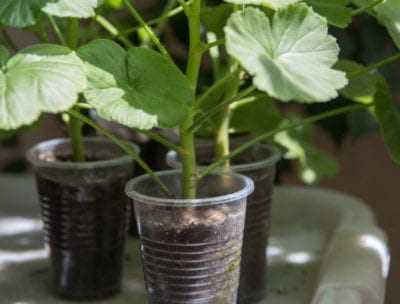
If you are environmentally conscious, you can explore eco-friendly options such as biodegradable pots made from materials like peat, coconut coir, or rice husks. These pots can be directly planted into the ground, minimizing waste and reducing transplant shock.
By considering these factors, you can ensure that you choose the right cups for transplanting your pelargonium seedlings into individual cups. This will provide them with a conducive environment for their growth and increase their chances of thriving into healthy plants.
Preparing the Cups for Transplanting
Before transplanting your pelargonium seedlings into individual cups, it’s essential to prepare the cups to provide the appropriate growing environment. Follow these steps to prepare the cups:
- Clean the cups: Ensure that the cups are clean and free from any previous debris or residues. Wash them with warm water and soap, thoroughly rinsing off any soap residue.
- Drainage holes: Use a sharp object, such as a nail or a small knife, to create drainage holes at the bottom of each cup. These holes will allow excess water to drain, preventing waterlogging and root rot.
- Select cups with drainage trays: If possible, choose cups that come with separate drainage trays. These trays will catch the excess water that drains from the cups, preventing it from pooling on the surface and potentially damaging the roots.
- Label the cups: To keep track of the different varieties or stages of your pelargonium seedlings, label each cup with the appropriate information. This will help you identify and care for each plant accordingly.
- Prepare the potting mix: Fill each cup with a well-draining potting mix. You can use a commercial potting mix or make your own by combining equal parts of peat moss, perlite, and vermiculite.
- Moisten the potting mix: Before transplanting the seedlings, moisten the potting mix in the cups with water. This will help the seedlings establish their roots and reduce transplant shock.
Once you have prepared the cups, you are ready to transplant your pelargonium seedlings into individual cups. Be sure to handle the seedlings gently and avoid damaging the roots during the transplanting process.
Transplanting Pelargonium Seedlings Step-by-Step
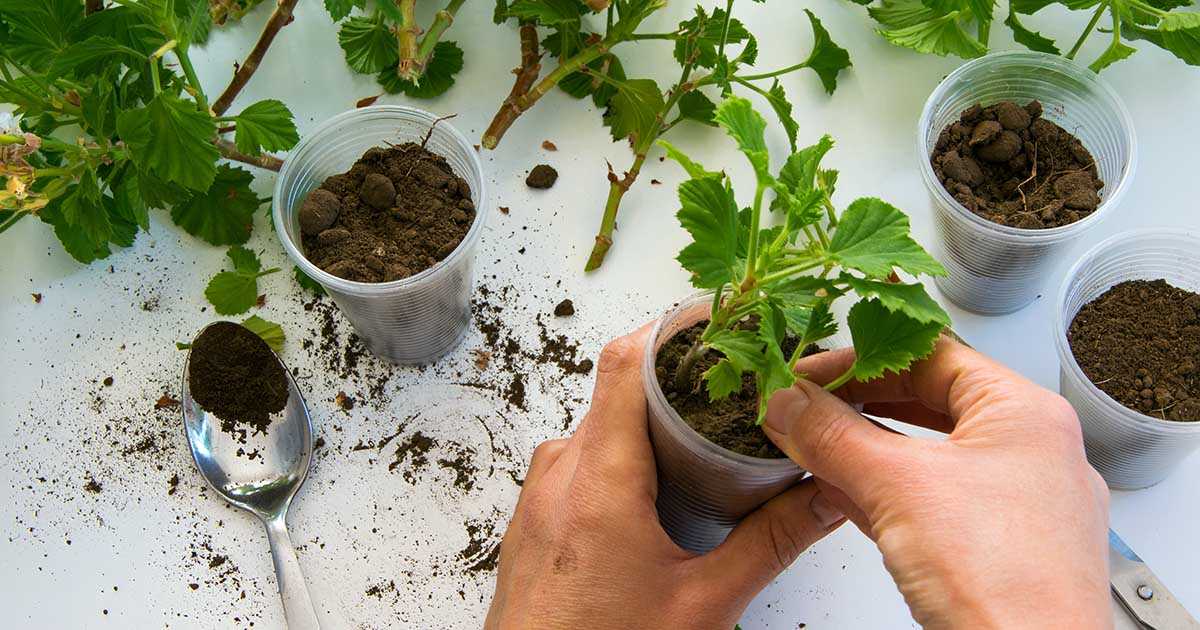
If you want to propagate pelargonium plants, one of the methods is to start with seedlings and transplant them into individual cups. Transplanting seedlings allows each plant to have its own space, ensuring optimal growth and development. Here is a step-by-step guide on how to transplant pelargonium seedlings into individual cups:
Step 1: Prepare the Individual Cups
Before transplanting the seedlings, make sure to prepare the individual cups. These should be clean and have drainage holes at the bottom to prevent waterlogging. Fill each cup with a well-draining potting mix, such as a mixture of peat moss, perlite, and vermiculite.
Step 2: Water the Seedlings
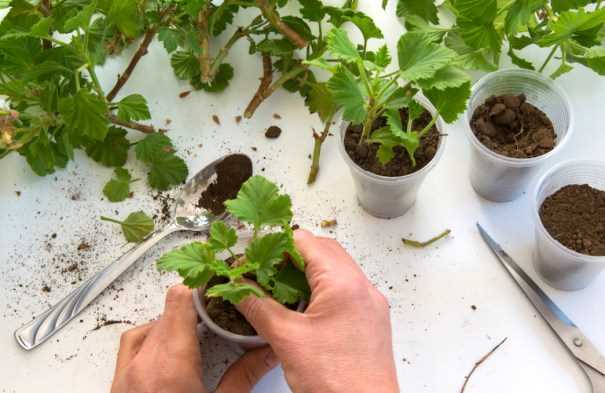
Prior to transplanting, water the seedlings thoroughly to ensure that the roots are well-hydrated. This will help the seedlings withstand the transplant shock and adapt to their new environment more easily.
Step 3: Loosen the Soil
Gently loosen the soil around the seedlings to make it easier to remove them from their original container. Be careful not to damage the delicate roots while doing this.
Step 4: Remove the Seedlings
Carefully remove each seedling from its original container by gently holding the base of the stem and tipping it upside down. Gently tap or squeeze the sides of the container to help loosen the seedling and slide it out without damaging the roots.
Step 5: Transplant into Cups
Place each seedling in an individual cup, making sure that the roots are well-spread and not tangled. Position the seedling at the same depth it was originally planted, pressing the soil lightly around the base of the stem to secure it in place. Avoid burying the stem too deep to prevent rotting.
Step 6: Water the Transplanted Seedlings
After transplanting, water the seedlings gently but thoroughly. This will help settle the soil and ensure good root-to-soil contact. Avoid overwatering, as excess moisture can lead to root rot.
Step 7: Provide Proper Care
Place the transplanted seedlings in a location with bright, indirect sunlight. Maintain a temperature of around 65-75°F (18-24°C) and keep the soil moist but not soggy. As the seedlings continue to grow, provide regular fertilization according to the package instructions of a balanced liquid fertilizer formulated for seedlings.
Following these steps will help ensure successful transplantation of pelargonium seedlings into individual cups. With proper care, your pelargoniums will continue to thrive and develop into healthy plants.
Providing the Proper Care for Transplanted Seedlings
Once you have successfully transplanted your pelargonium seedlings into individual cups, it is important to provide them with the proper care to ensure their continued growth and development. Here are some important steps to follow:
Watering
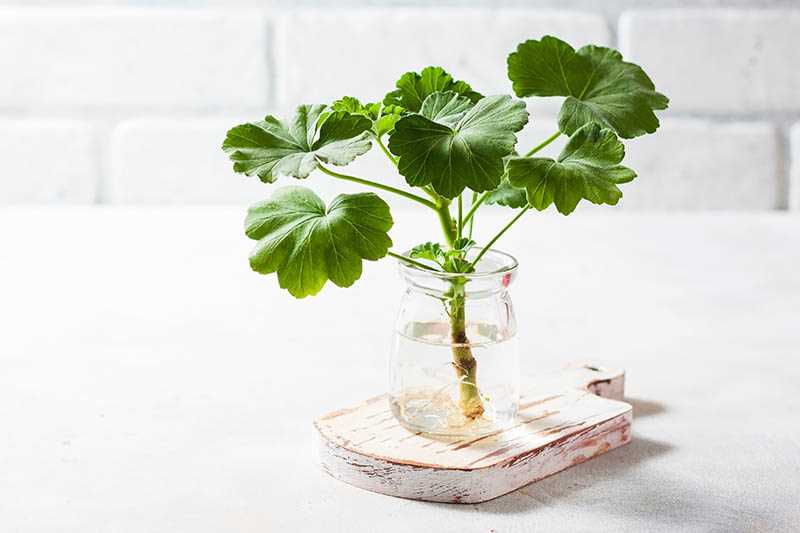
- Water the transplanted seedlings immediately after transplanting to help settle the soil and remove any air pockets.
- Water them regularly, ensuring that the soil stays consistently moist but not overly waterlogged. Avoid letting the soil dry out completely between waterings.
- Water from the base of the cup to avoid wetting the foliage, as this can lead to disease and fungal issues.
- Monitor the moisture levels of the soil regularly to ensure the plants are receiving adequate water.
Light and Temperature
- Place the transplanted seedlings in a location that receives bright, indirect sunlight for at least six hours a day.
- Avoid exposing them to direct sunlight, as this can scorch their delicate leaves.
- Maintain a temperature of around 65-75 degrees Fahrenheit during the day and slightly cooler temperatures at night.
- Avoid exposing the seedlings to drafts or extreme temperature fluctuations, as this can cause stress and hinder their growth.
Fertilization
- Start fertilizing the transplanted seedlings with a balanced, water-soluble fertilizer once they have established their root systems. Follow the recommended dosage instructions on the fertilizer packaging.
- Continue fertilizing every 2-3 weeks throughout the growing season to provide the plants with essential nutrients for healthy growth.
Pest and Disease Control
- Monitor the leaves and stems of the transplanted seedlings regularly for any signs of pests or diseases.
- If you notice any pests, such as aphids or spider mites, treat the affected plants with an appropriate insecticide or insecticidal soap solution.
- Preventive measures, such as maintaining proper air circulation and avoiding overwatering, can help prevent the development of fungal diseases.
Transplanting into Larger Containers
If the seedlings outgrow their individual cups and require more space, you can transplant them into larger containers or directly into the garden. Follow the same transplanting process and provide them with the same care as when they were initially transplanted into the cups.
By providing the proper care and following these guidelines, you can ensure the successful growth and development of your transplanted pelargonium seedlings.
Troubleshooting Transplanting Issues
Transplanting seedlings can sometimes be a challenging process, and issues may arise during or after the transplant. Here are some common problems that can occur when transplanting pelargonium seedlings and how to troubleshoot them:
1. Root Damage
One of the main issues during transplanting is root damage. If the roots are not carefully handled, they can become injured or torn, leading to transplant shock and poor growth. To avoid root damage, follow these tips:
- Handle the seedlings gently, taking care not to pull or tug on the roots.
- Transplant seedlings when they have a developed root system but are not yet root-bound.
- Use a sharp, clean tool to carefully lift the seedling from its original container.
2. Transplant Shock
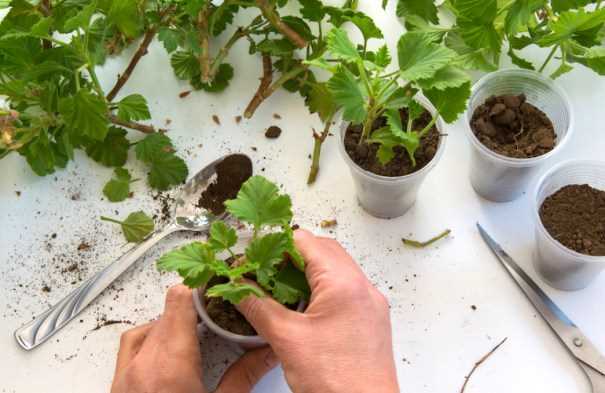
Transplant shock can occur when the seedlings are moved to a new environment. This can cause wilting, slow growth, or even death of the plant. To minimize transplant shock:
- Water the seedlings thoroughly before transplanting to ensure they are hydrated.
- Choose an appropriate location for transplanting with the right amount of sunlight and temperature.
- Use a well-draining soil mix to prevent waterlogged roots.
3. Nutrient Deficiencies
If seedlings are not provided with adequate nutrients after transplanting, they may show signs of nutrient deficiencies. Look out for yellowing leaves, stunted growth, or discolored foliage. To prevent nutrient deficiencies:
- Ensure the soil has a balanced nutrient composition by using a quality potting mix.
- Fertilize the seedlings with a balanced fertilizer according to the package instructions.
- Monitor the plant’s growth and appearance to identify any signs of nutrient deficiencies and adjust fertilization as needed.
4. Over-Watering or Under-Watering
Proper watering is crucial for the success of transplanted seedlings. Over-watering can lead to root rot, while under-watering can cause wilting and stunted growth. To achieve optimal watering:
- Water the seedlings thoroughly after transplanting to settle the soil and ensure good root-to-soil contact.
- Monitor the moisture level of the soil and water when the top inch feels dry.
- Avoid waterlogging the roots by ensuring proper drainage.
By addressing these common transplanting issues, you can improve the success rate of transplanting pelargonium seedlings and ensure healthy growth and development.
Q&A:
What is pelargonium propagation?
Pelargonium propagation is the process of reproducing pelargonium plants by growing new plants from seeds or cuttings.
Why should I propagate pelargonium?
Propagating pelargonium allows you to create new plants from your existing ones, which can be a cost-effective way to expand your garden or share plants with others.
How do I transplant pelargonium seedlings into individual cups?
To transplant pelargonium seedlings into individual cups, gently remove the seedlings from the original container, loosen the roots, and place each seedling into its own cup filled with potting soil. Water the seedlings thoroughly after transplanting.
When should I transplant pelargonium seedlings into individual cups?
Pelargonium seedlings can be transplanted into individual cups once they have developed a good root system and are large enough to handle. This is typically around 4-6 weeks after sowing the seeds.
What type of potting soil should I use for transplanting pelargonium seedlings?
For transplanting pelargonium seedlings, it is best to use a well-draining potting soil mix. Adding perlite or vermiculite can help improve drainage.
Can I transplant pelargonium seedlings directly into the garden instead of individual cups?
Yes, you can transplant pelargonium seedlings directly into the garden instead of individual cups if the weather and soil conditions are suitable for planting. However, starting them in individual cups gives you more control over their growth and allows you to monitor their progress more closely.
Video:
How to easily propagate & grow a Scented Geranium aka Citronella (Mosquito) plant

