- Choosing the Right Cutting
- 1. Stem Cuttings
- 2. Leaf Cuttings
- 3. Aerial Root Cuttings
- Proper Cutting Techniques
- Preparing the Potting Medium
- Materials Needed:
- Steps:
- Creating a Suitable Environment
- Light
- Temperature
- Humidity
- Soil
- Watering
- Propagation Container
- Timing
- Watering and Fertilizing
- Watering
- Fertilizing
- Monitoring and Slowing Root Growth
- 1. Regularly check the root development
- 2. Prune the roots
- 3. Repot the plant
- 4. Adjust watering and fertilizing
- 5. Provide adequate spacing
- Transplanting and Caring for New Plants
- 1. Choosing the right container
- 2. Potting mix
- 3. Transplanting process
- 4. Watering
- 5. Light and temperature
- 6. Fertilizing
- 7. Pruning
- Troubleshooting
- 1. Root rot
- 2. Mold or fungus growth
- 3. Leaf drop
- 4. Stunted growth
- 5. Pests
- Q&A:
- What is the best time to propagate schefflera?
- What are the steps for propagating schefflera from cuttings?
- Can I propagate schefflera in water?
- How long does it take for schefflera cuttings to root?
- What are some common problems when propagating schefflera from cuttings?
- How big should the pot be for propagating schefflera cuttings?
- Can I use any type of soil for propagating schefflera cuttings?
- Video: How to grow Schefflera plant from single leaf cuttings | Propagate Schefflera plants | Umbrella Tree
Schefflera, also known as umbrella tree, is a popular houseplant known for its attractive foliage and easy care requirements. While many people opt to purchase mature schefflera plants from a nursery, propagating schefflera from cuttings can be a rewarding and cost-effective way to expand your collection or share plants with friends and family.
In this complete guide, we will take you through the step-by-step process of propagating schefflera from cuttings. We will discuss the best time to take cuttings, the tools and materials you will need, and the various propagation methods available. Additionally, we will provide tips for successful rooting and caring for your new schefflera plants.
Propagating schefflera from cuttings is a straightforward process that can be done by gardeners of all skill levels. By following the techniques outlined in this guide, you can easily grow new schefflera plants that will add beauty and greenery to your indoor or outdoor space. So, let’s get started and learn how to propagate schefflera from cuttings!
Choosing the Right Cutting
When propagating Schefflera from cuttings, it is important to choose the right type of cutting to ensure successful growth. Here are a few considerations to keep in mind:
1. Stem Cuttings
Stem cuttings are the most common type of cutting used for propagating Schefflera. They are taken from healthy, mature stems that are at least 4-6 inches long. Look for stems that are firm and have plenty of leaf nodes. Leaf nodes are the points where leaves emerge from the stem and are important for root development. Avoid using stems that are old, woody, or diseased.
2. Leaf Cuttings
Leaf cuttings can also be used to propagate Schefflera, but they are less common and less successful than stem cuttings. Leaf cuttings should be taken from healthy leaves with intact petioles. Cut the leaf at the base of the petiole and remove the lower leaves. Place the leaf cuttings in a rooting hormone and plant them in a well-draining potting mix. Be aware that the success rate for leaf cuttings is lower compared to stem cuttings.
3. Aerial Root Cuttings
Schefflera plants often develop aerial roots, which are roots that grow above the soil surface. These roots can be used for propagation. Cut off a section of the stem that includes both the aerial root and a leaf node. Place the cutting in a rooting hormone and plant it in a well-draining potting mix. Aerial root cuttings have a higher success rate compared to leaf cuttings, but they are less commonly used.
Regardless of the type of cutting you choose, it is important to make a clean and precise cut using a sharp, sterile knife or pruners. This will ensure that the cutting has the best chance of rooting and developing into a healthy plant.
Proper Cutting Techniques
When it comes to propagating Schefflera, proper cutting techniques are crucial for success. Here are some essential steps to follow:
- Choose the right time: The best time to take cuttings from a Schefflera plant is in the spring or early summer when the plant is actively growing. This is when the plant has the highest chance of successfully rooting.
- Select healthy branches: Look for healthy, non-flowering branches that are at least 6 inches long. Avoid using new growth or branches that have already started to wilt or show signs of disease.
- Prepare your tools: Use sharp and clean pruning shears or a sharp knife to make a clean cut. Disinfect the tools before using them to prevent the spread of diseases.
- Take the cuttings: Cut a 6-8 inch section of the branch just below a leaf node. Make a clean sloping cut and remove any leaves or side branches from the lower part of the cutting.
- Apply rooting hormone (optional): To increase the chances of successful rooting, you can dip the cut end of the stem in rooting hormone powder or gel. This helps the cutting develop roots more quickly.
- Prepare the potting mix: Fill a small pot or container with a well-draining potting mix. You can mix equal parts of perlite and peat moss or use a commercially available potting mix specifically formulated for cuttings.
- Plant the cutting: Make a hole in the potting mix and gently place the cut end of the cutting into it. Firmly press the soil around the base of the cutting to ensure good contact.
- Provide the right conditions: Place the container in a warm and humid location with bright, indirect light. Maintain a temperature of around 70-75°F (21-24°C) and keep the soil moist but not waterlogged.
- Monitor rooting: It may take several weeks for the cutting to develop roots. Keep an eye on the cutting and look for signs of new growth or root development. Avoid disturbing the cutting during this time.
- Transplanting: Once the cutting has developed a strong root system, it can be transplanted into a larger pot or into the ground. Provide proper care and continue to monitor its growth.
Preparing the Potting Medium
Before propagating Schefflera cuttings, it’s important to prepare the right potting medium to ensure successful growth. The potting medium should provide the right balance of moisture retention and drainage to support root development.
Materials Needed:
- Peat-based potting mix
- Perlite or vermiculite
- Coarse sand
- Container or pot
- Watering can or spray bottle
Steps:
- Start by preparing a well-draining potting mix. A peat-based potting mix is ideal for Schefflera cuttings as it provides good moisture retention while allowing excess water to drain away.
- Add perlite or vermiculite to the potting mix. These materials help improve drainage and prevent the potting mix from becoming too compacted.
- If available, add coarse sand to the potting mix to further improve drainage. This is especially important if the potting mix tends to hold too much moisture.
- Thoroughly mix the components together to ensure an even distribution of materials.
- Fill a clean container or pot with the prepared potting mix, leaving about an inch of space at the top.
- Water the potting mix lightly to moisten it without causing waterlogging.
Now that the potting medium is prepared, it’s time to move on to the next step of propagating Schefflera cuttings: taking the cuttings from the parent plant.
Creating a Suitable Environment
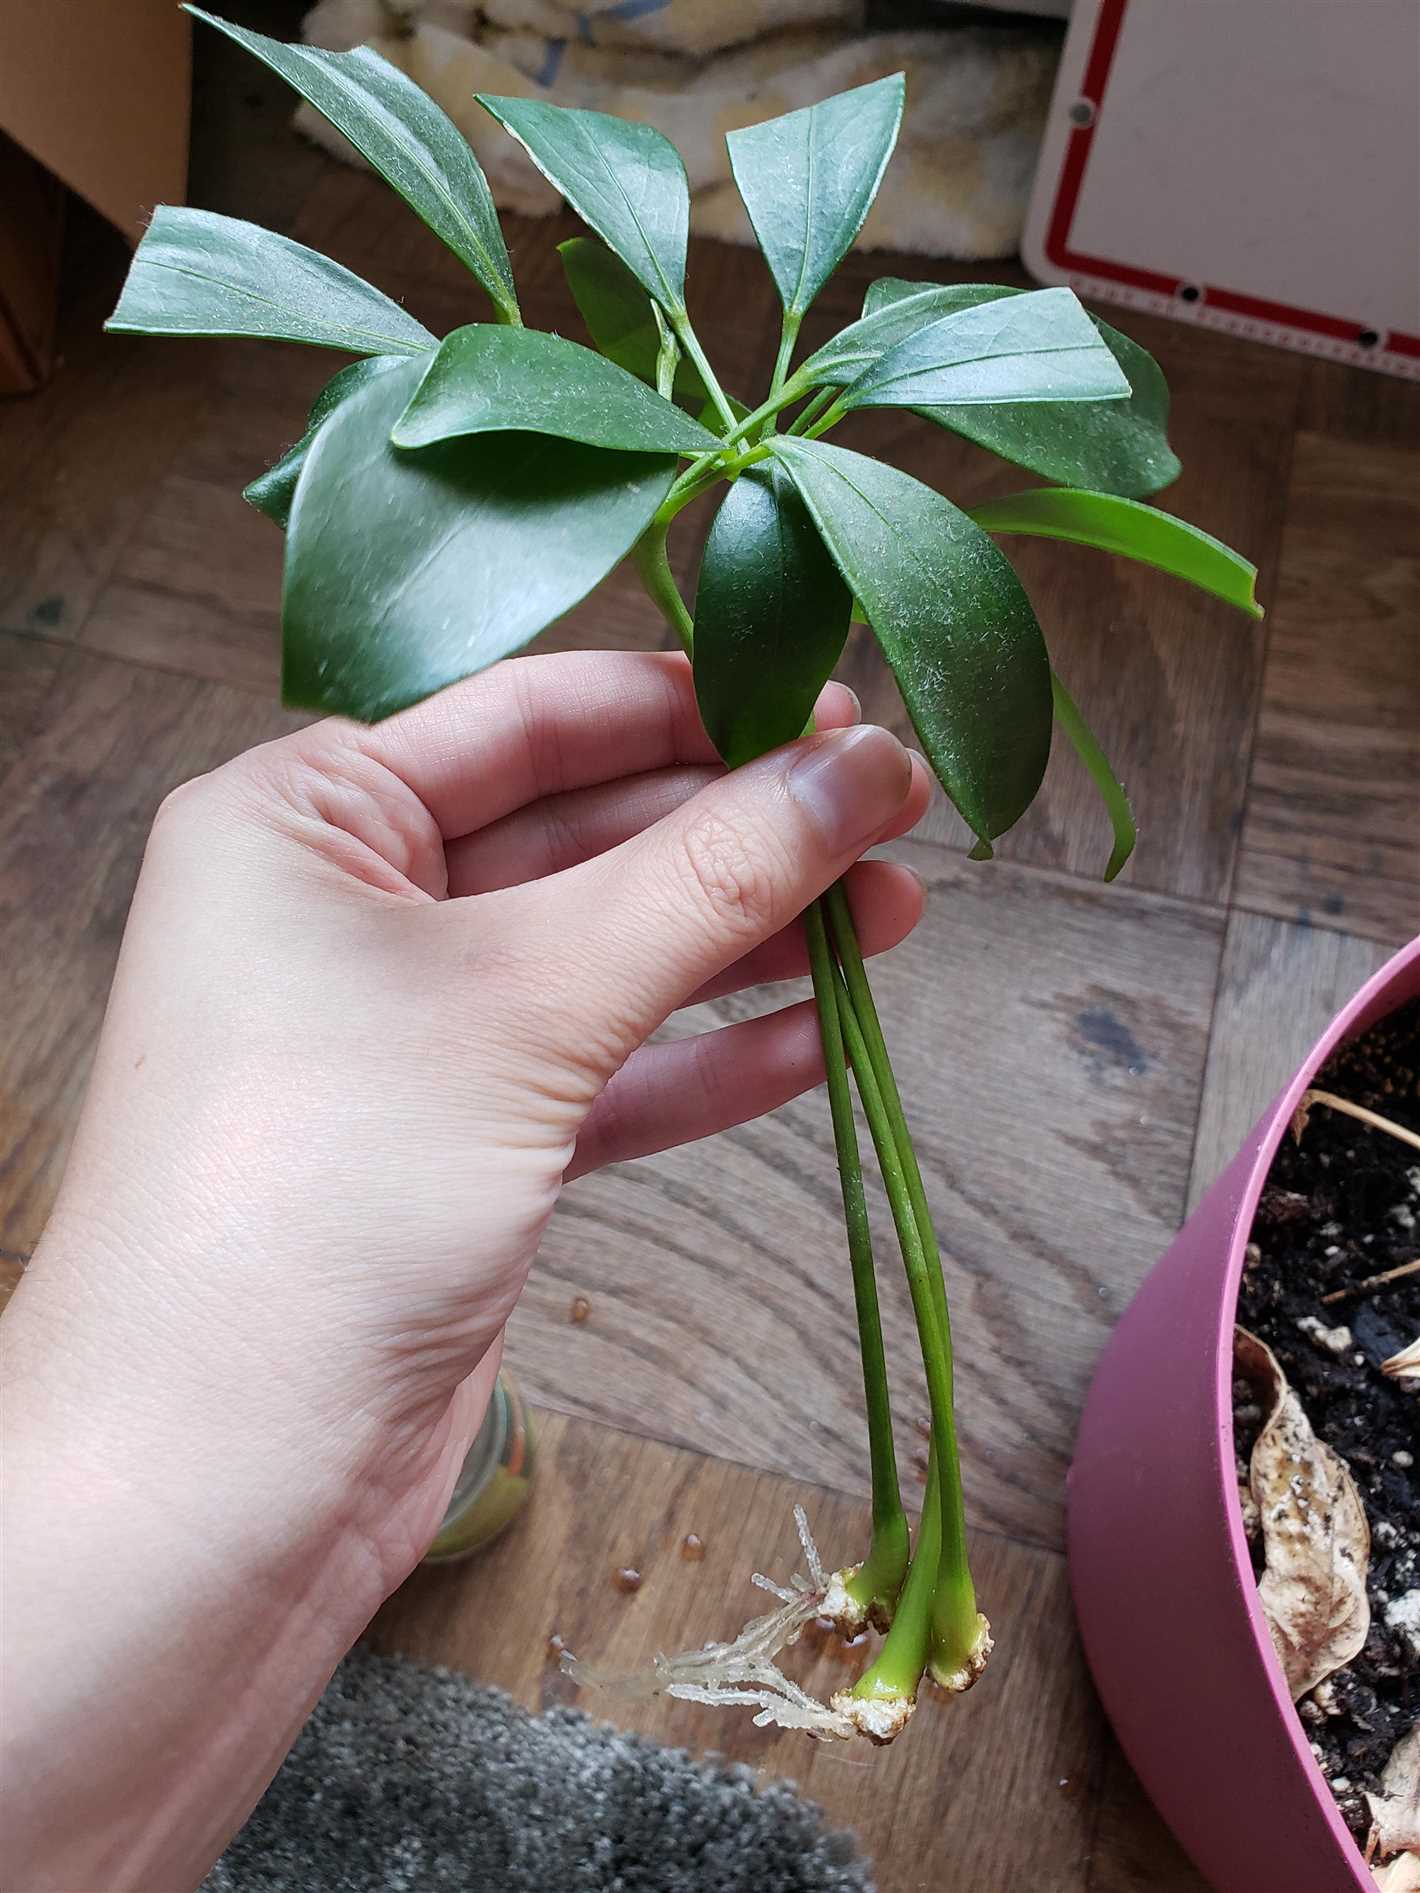
When propagating Schefflera from cuttings, creating a suitable environment is crucial for success. Here are some factors to consider:
Light
Schefflera cuttings require bright, indirect light to thrive. Place them near a window with filtered sunlight or use artificial grow lights. Avoid exposing the cuttings to direct sunlight, as this can cause their leaves to burn.
Temperature
Scheffleras prefer a temperature range between 60-80°F (16-27°C). Keep the cuttings in a warm area, away from drafts, extreme heat, or cold temperatures. Consistent temperatures promote healthy growth.
Humidity
High humidity is beneficial for Schefflera cuttings. You can increase humidity by placing the cuttings in a tray filled with water and pebbles or by using a humidifier. Alternatively, you can create a mini greenhouse by covering the cuttings with a clear plastic bag.
Soil
Use well-draining soil for Schefflera cuttings. A mixture of peat moss, perlite, and vermiculite works well. Avoid using heavy, compacted soils that retain too much moisture.
Watering
Water the cuttings thoroughly and allow the top inch of soil to dry before watering again. Overwatering can cause root rot, while underwatering can lead to drying out of the cuttings. Maintain moist, but not soggy, soil conditions.
Propagation Container
Choose a clean container with drainage holes for the cuttings. A small pot or tray is sufficient for rooting the cuttings. Ensure the container is sterilized to prevent disease or fungus from harming the cuttings.
Timing
Spring or early summer is the best time to propagate Schefflera from cuttings. This is when the plant’s growth is most active and rooting will be more successful.
By creating a suitable environment with the right light, temperature, humidity, soil, watering, container, and timing, you can give your Schefflera cuttings the best chance of thriving and establishing roots.
Watering and Fertilizing
Proper watering and fertilizing are essential for the successful propagation of Schefflera cuttings. Here are some guidelines to follow:
Watering
- Keep the soil consistently moist, but not waterlogged. Overwatering can lead to root rot, while underwatering can cause the cuttings to dry out and fail to root.
- Water the cuttings thoroughly, allowing excess water to drain out of the pot. Empty the saucer underneath to prevent water from pooling.
- Use room temperature water to avoid shocking the cuttings with cold or hot water.
Fertilizing
- Begin fertilizing after the cuttings have rooted and started to grow. This is usually around 4-8 weeks after planting.
- Use a balanced liquid fertilizer with an N-P-K ratio of 10-10-10 or 20-20-20.
- Dilute the fertilizer to half strength and apply it every 2-3 weeks during the growing season.
- Avoid over-fertilizing, as this can cause fertilizer burn and harm the young plants.
Remember to always read and follow the instructions on the fertilizer packaging for accurate dilution rates and application methods.
Monitoring and Slowing Root Growth
Once you have successfully propagated schefflera cuttings and the roots have started to grow, it is important to monitor their growth and take steps to slow it down if necessary. As the roots continue to develop, they will require more space and nutrients to sustain the plant. If left unchecked, the roots may quickly outgrow their container, leading to a stunted or unhealthy plant.
Here are some techniques to help you monitor and slow down root growth:
1. Regularly check the root development
Inspect the roots periodically to assess their growth. Gently remove the plant from its container and examine the root system. If you notice excessive root growth or overcrowding, it is time to take action.
2. Prune the roots
If the roots are becoming congested or overgrown, carefully trim them back. Use sterile scissors or pruning shears to avoid introducing any infections. Focus on removing any tangled or circling roots that may inhibit the healthy growth of the plant.
3. Repot the plant
If pruning alone isn’t enough to control root growth, it may be necessary to repot the plant into a larger container. Choose a pot that is slightly bigger than the current one, and use a well-draining potting mix. Gently loosen the roots before placing them in the new container and backfill with soil.
4. Adjust watering and fertilizing
Root growth is stimulated by moisture and nutrients, so adjusting the frequency and amount of watering and fertilizing can help slow it down. Be careful not to overwater or over-fertilize the plant, as this can lead to root rot or nutrient burn.
5. Provide adequate spacing
When planting multiple schefflera plants, ensure they are spaced properly to prevent overcrowding. Each plant should have enough room for its roots to grow without competing for space.
By monitoring the root growth and taking appropriate measures to slow it down, you can ensure the healthy development of your propagated schefflera plants. Remember to provide them with the right conditions and care as they continue to grow.
Transplanting and Caring for New Plants
Once the Schefflera cuttings have rooted and developed a healthy root system, it’s time to transplant them into their permanent containers. Here are some guidelines for transplanting and caring for new Schefflera plants:
1. Choosing the right container
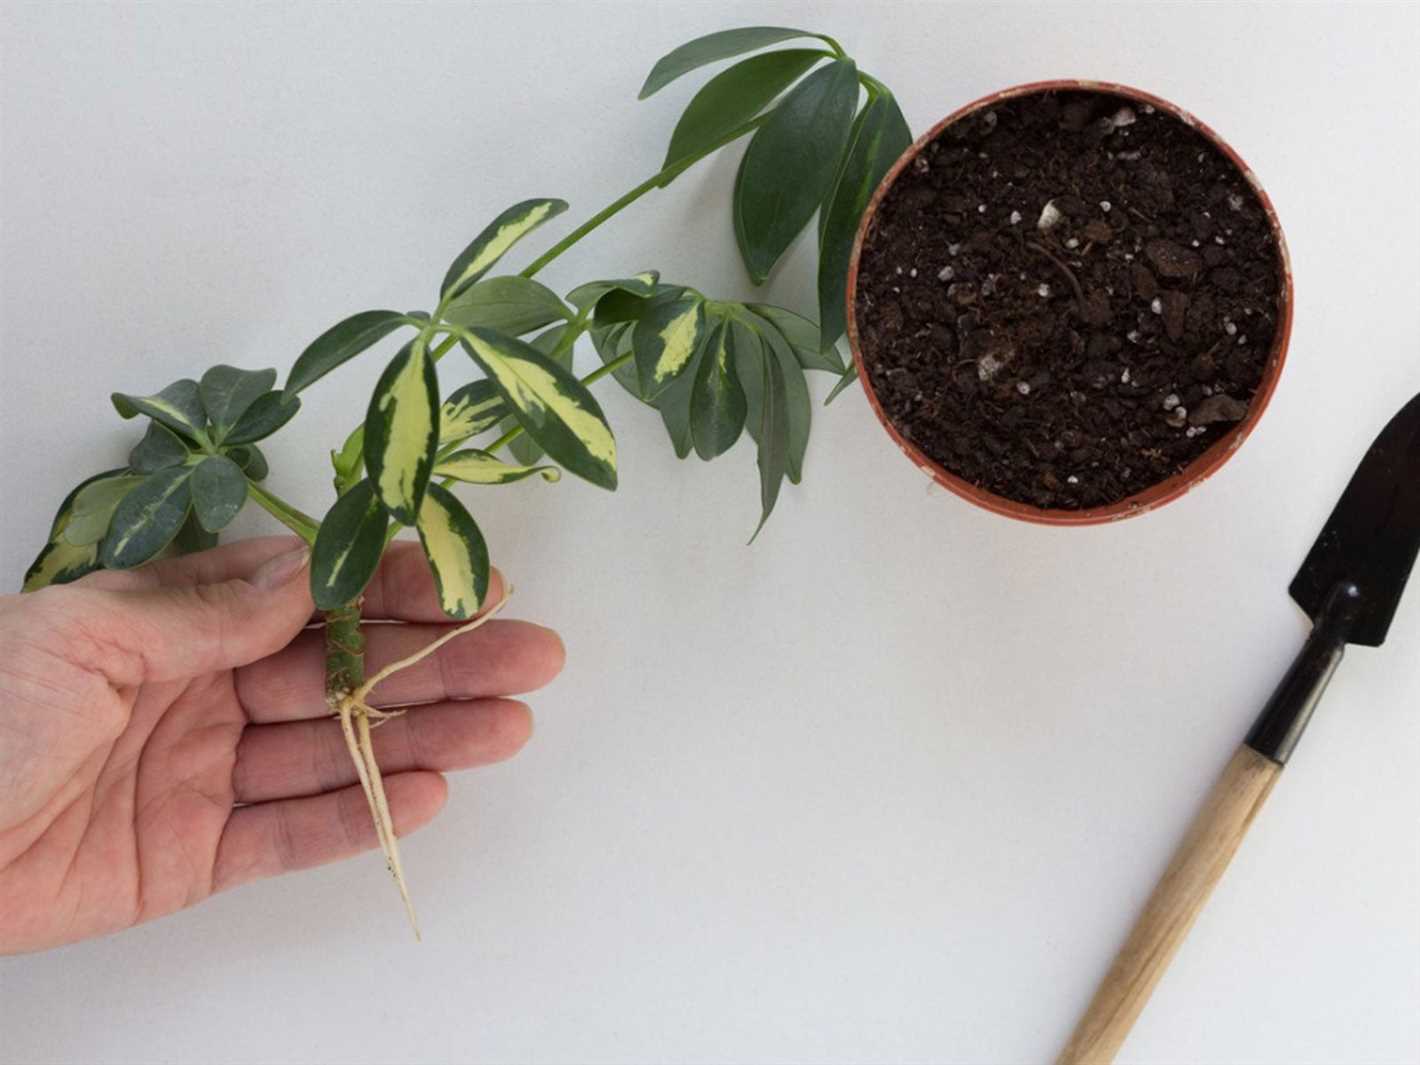
- Select a container with drainage holes to prevent waterlogged soil.
- Ensure the container is large enough to accommodate the plant’s root system and allows for future growth.
2. Potting mix
- Use a well-draining potting mix that is rich in organic matter.
- Mix perlite or vermiculite into the potting mix to improve aeration and drainage.
3. Transplanting process
- Gently remove the rooted cutting from its current container or propagation tray.
- Place a layer of potting mix at the bottom of the new container.
- Position the cutting in the center of the container and fill the remaining space with potting mix, ensuring the roots are covered.
- Press the potting mix gently around the base of the cutting to secure it in place.
4. Watering
- After transplanting, water the plant thoroughly to settle the soil and promote root establishment.
- Water the plant when the top inch of soil feels dry, as Schefflera prefers slightly moist but not soggy soil.
- Avoid overwatering, as it can lead to root rot.
5. Light and temperature
- Place the newly transplanted Schefflera in a bright location with indirect sunlight.
- Avoid exposing the plant to direct sunlight, as it can scorch the leaves.
- Maintain a temperature range of 65-85°F (18-29°C) for optimal growth.
6. Fertilizing
- Feed the new Schefflera plant with a balanced, water-soluble fertilizer every 4-6 weeks during the growing season.
- Follow the recommended dosage on the fertilizer packaging to avoid overfertilization.
7. Pruning
- As the plant grows, periodically prune back leggy or overgrown branches to maintain a compact shape.
- Use clean, sharp pruning shears to make clean cuts just above a leaf node.
By following these transplantation and care guidelines, you can ensure that your new Schefflera plants thrive and beautify your indoor or outdoor space.
Troubleshooting
While propagating Schefflera from cuttings is generally an easy process, some problems can arise. Here are some common issues and how to troubleshoot them:
1. Root rot
One of the most common problems when propagating Schefflera is root rot, which occurs when the roots are consistently overwatered and have insufficient drainage. To prevent root rot, make sure to use well-draining soil and water the cuttings sparingly, allowing the top few inches of soil to dry out between waterings.
2. Mold or fungus growth
If you notice mold or fungus growing on the soil surface or on the leaves of your Schefflera cuttings, it could indicate excess moisture. To prevent this issue, avoid overwatering and make sure the cuttings are placed in an area with good air circulation.
3. Leaf drop
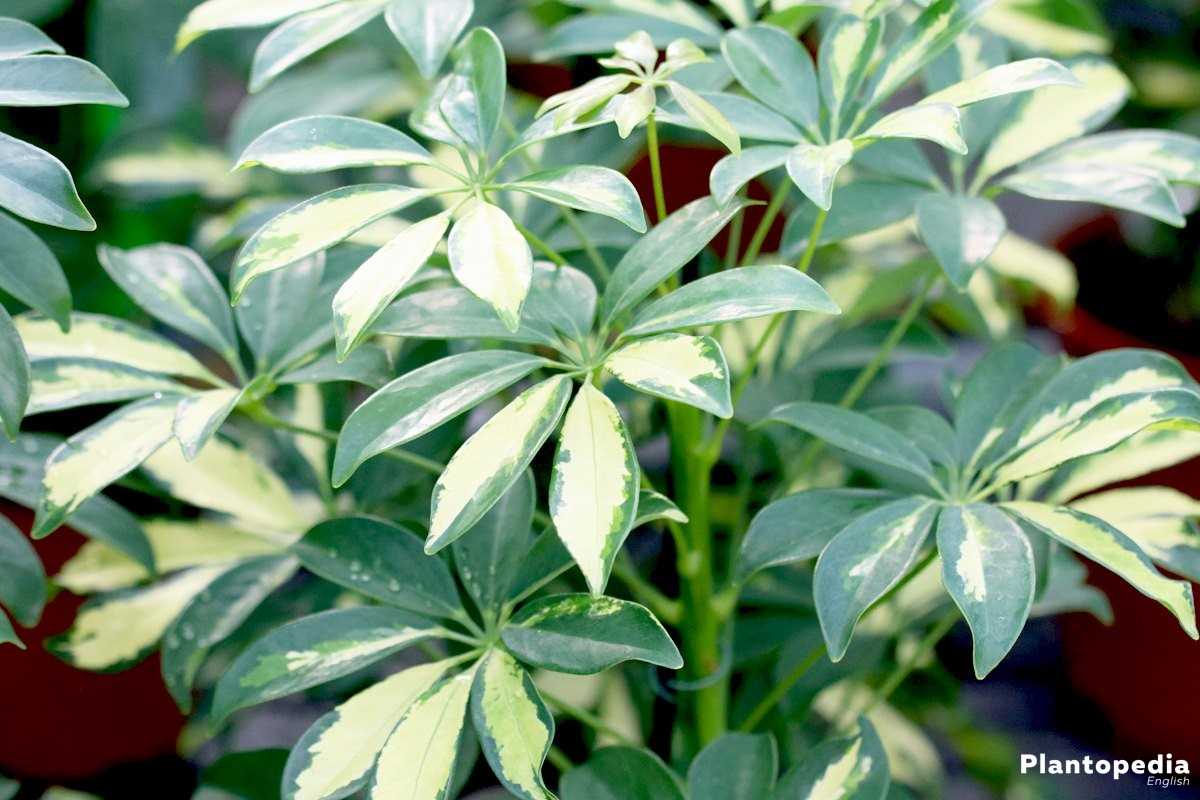
Leaf drop can occur for various reasons, such as incorrect lighting, overwatering, or sudden changes in environmental conditions. Make sure your cuttings are placed in a well-lit area but avoid direct sunlight. Additionally, ensure that you are not overwatering and maintain consistent environmental conditions.
4. Stunted growth
If your Schefflera cuttings are not showing signs of growth or are growing slowly, it could be due to insufficient nutrients. Consider fertilizing the cuttings with a balanced, water-soluble fertilizer diluted to half strength. Be careful not to over-fertilize, as this can cause nutrient burn.
5. Pests

Schefflera cuttings can be susceptible to pests such as aphids, spider mites, and scale insects. If you notice any signs of pests, such as small insects, webbing, or yellowing leaves, treat the cuttings with a suitable insecticide or insecticidal soap. Make sure to follow the instructions on the product label.
By troubleshooting these common issues, you can ensure the successful propagation of Schefflera cuttings and enjoy the growth of healthy new plants.
Q&A:
What is the best time to propagate schefflera?
The best time to propagate schefflera is during the spring or early summer when the plant is actively growing.
What are the steps for propagating schefflera from cuttings?
The steps for propagating schefflera from cuttings are as follows: 1) Choose a healthy parent plant. 2) Select a stem cutting with 3-4 leaves. 3) Remove the bottom leaves. 4) Dip the cut end in rooting hormone. 5) Plant the cutting in a pot with well-draining soil. 6) Keep the soil moist and provide indirect sunlight. 7) Wait for the cutting to take root and start growing.
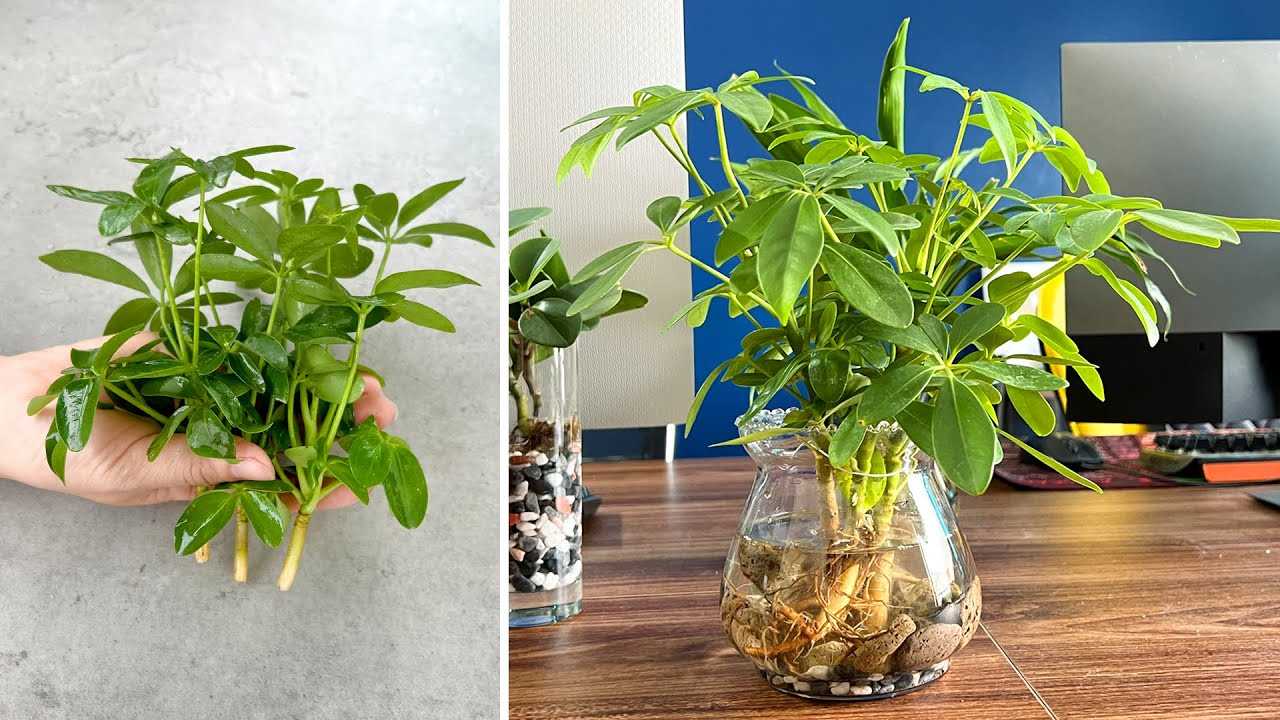
Can I propagate schefflera in water?
Yes, you can propagate schefflera in water. Simply cut a stem from the parent plant and place it in a glass of water. Change the water every few days to prevent it from becoming stagnant. Once the cutting has developed roots, you can transfer it to a pot with soil.
How long does it take for schefflera cuttings to root?
It typically takes schefflera cuttings about 4-6 weeks to develop roots. However, the time may vary depending on the environmental conditions and the health of the cutting.
What are some common problems when propagating schefflera from cuttings?
Some common problems when propagating schefflera from cuttings include rotting of the cutting due to over-watering, lack of root development, and failure to take root. To avoid these issues, it is important to provide the right amount of moisture and make sure the cutting has access to indirect sunlight.
How big should the pot be for propagating schefflera cuttings?
The pot for propagating schefflera cuttings should be small and shallow. A pot with a diameter of 4-6 inches is usually sufficient. This allows for better control of moisture and prevents the cutting from being overwhelmed by a large amount of soil.
Can I use any type of soil for propagating schefflera cuttings?
For propagating schefflera cuttings, it is best to use a well-draining soil mix. A mixture of potting soil, perlite, and sand works well. This allows excess water to drain away, preventing the cutting from sitting in wet soil, which can lead to rot.
Video:
How to grow Schefflera plant from single leaf cuttings | Propagate Schefflera plants | Umbrella Tree

