- Choosing the Right Tea Bags for Sprouting
- 1. Material:
- 2. Size:
- 3. Shape:
- 4. Labeling:
- Preparing the Tea Bags for Sprouting
- Supplies you’ll need:
- 1. Choose your tea bags:
- 2. Prepare the seeds:
- 3. Pre-moisten the tea bags:
- Selecting the Perfect Seeds for Sprouting
- 1. Organic and Non-GMO
- 2. Variety
- 3. Germination Rate
- 4. Shelf Life
- 5. Supplier Reputation
- 6. Allergies and Dietary Restrictions
- Soaking and Rinsing the Seeds
- 1. Soaking the Seeds
- 2. Rinsing the Seeds
- 3. Draining the Seeds
- 4. Transferring the Seeds to Tea Bags
- 5. Storing the Tea Bags
- Planting the Seeds in the Tea Bags
- Proper Watering and Care for Sprouts
- Watering
- Care
- Harvesting
- Harvesting and Storing your Homegrown Sprouts
- Harvesting sprouts:
- Storing sprouts:
- Tips for prolonging sprout freshness:
- Delicious Recipes Using Homegrown Sprouts
- 1. Sprout Salad
- 2. Sprout Wraps
- 3. Sprout Omelette
- 4. Sprout Stir-Fry
- 5. Sprout Sandwich
- 6. Sprout Smoothie
- Questions and Answers:
- How do I grow sprouts in tea bags?
- What types of tea bags can I use?
- How long does it take for sprouts to grow in tea bags?
- Can I reuse the tea bags after growing sprouts?
- What are the benefits of growing sprouts?
- Are there any precautions I should take when growing sprouts in tea bags?
- Videos: HOW TO SPROUT SEEDS | EASY GUIDE | Foolproof Method
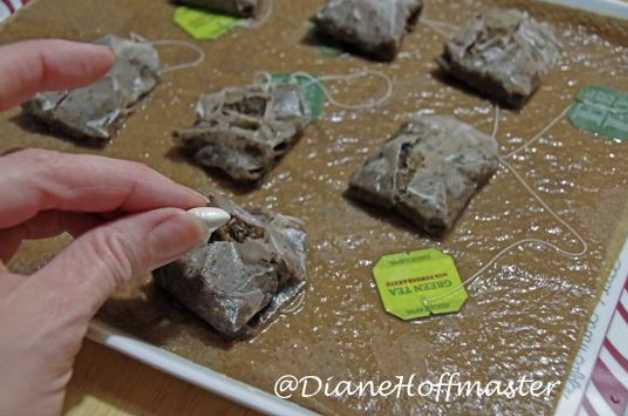
Are you looking for a quick and easy way to grow your own delicious greens? Look no further than sprouts in tea bags! This simple and innovative method allows you to grow a variety of nutritious sprouts right in your kitchen.
Why sprouts, you may ask? Well, sprouts are packed with nutrients and are incredibly healthy. They are a great source of vitamins, minerals, and antioxidants. Not only that, but sprouts are also low in calories and high in fiber, making them a perfect addition to any diet. Plus, the process of growing sprouts in tea bags is so easy that anyone can do it, even if you don’t have a green thumb!
So how does it work? All you need are some tea bags, seeds of your choice, and water. Simply dampen the tea bag, sprinkle your seeds inside, and keep it in a warm and dark place. Within a few days, you will start to see tiny sprouts emerging from the tea bag. Just make sure to rinse them daily to prevent mold and bacteria growth.
Once your sprouts are ready, you can add them to salads, sandwiches, smoothies, or enjoy them on their own. The possibilities are endless! So why not give sprouts in tea bags a try and start growing your own delicious and nutritious greens today?
Choosing the Right Tea Bags for Sprouting
When it comes to sprouting seeds in tea bags, it’s important to choose the right type of tea bags. The type of tea bags you choose can affect the sprouting process and the flavor of the sprouts. Here are some factors to consider when selecting tea bags for sprouting:
1. Material:
- Choose tea bags made from natural materials, such as unbleached paper or cotton. Avoid tea bags made from synthetic materials, as they may not provide the ideal environment for sprouting.
- Ensure that the tea bags are free from any chemicals or contaminants that could potentially harm the sprouts.
2. Size:
- Opt for larger-sized tea bags to allow enough space for the sprouts to grow.
- Avoid tea bags that are too small or tightly packed, as this can hinder the sprouting process.
3. Shape:
While most tea bags are typically rectangular or square in shape, consider using pyramid-shaped tea bags for sprouting. The unique shape of pyramid tea bags allows for better water circulation and air flow, promoting healthy sprouting.
4. Labeling:
Make sure that the tea bags you choose are free from any additional flavorings, oils, or additives. These can alter the taste of the sprouts and potentially inhibit their growth.
Overall, the key is to select tea bags that provide a safe and suitable environment for sprouting seeds. Taking note of the material, size, shape, and labeling of the tea bags will help ensure successful sprouting and delicious, flavorful sprouts.
Preparing the Tea Bags for Sprouting
To start growing sprouts in tea bags, you’ll need a few supplies and some preparation. Follow these steps to get your tea bags ready for sprouting:
Supplies you’ll need:
- Tea bags
- Sprout seeds
- A container with a lid
- Water
- A spray bottle
- A tray or plate
1. Choose your tea bags:
Use empty tea bags or purchase ones specifically designed for sprouting. Make sure they are made of natural materials like cotton or hemp and are free of any chemicals or dyes.
2. Prepare the seeds:


Choose sprout seeds that are suitable for tea bag sprouting, such as alfalfa, broccoli, or radish seeds. Rinse the seeds thoroughly under running water to remove any dirt or debris.
3. Pre-moisten the tea bags:
Place the tea bags in a container with a lid and pour enough water to fully satur
Selecting the Perfect Seeds for Sprouting
When it comes to sprouting, selecting the right seeds is crucial for a successful harvest. Here are a few factors to consider when choosing the perfect seeds:
1. Organic and Non-GMO


Opt for organic and non-GMO (genetically modified organism) seeds. Organic seeds are grown without synthetic pesticides, herbicides, or chemical fertilizers, ensuring that your sprouts are free from harmful chemicals. Non-GMO seeds have not been genetically modified, so you can be confident that you are growing sprouts in their natural state.
2. Variety
Consider the variety of sprouts you want to grow. There are various types of sprouts available, each with its own unique flavor and nutritional profile. Some popular options include broccoli, alfalfa, radish, and mung bean sprouts. Experiment with different varieties to find your favorites.
3. Germination Rate
Check the germination rate of the seeds before purchasing. The germination rate indicates the percentage of seeds that are likely to sprout successfully. Look for seeds with a high germination rate to maximize your sprouting success.
4. Shelf Life
Consider the shelf life of the seeds. Some seeds have a longer shelf life than others, and it’s important to choose seeds that are fresh and have a higher chance of sprouting. Check the packaging for the expiration date or the date of when the seeds were harvested.
5. Supplier Reputation
Choose seeds from a reputable supplier. Look for suppliers that specialize in sprouting seeds and have a good track record. Reading customer reviews and checking for certifications can help you determine the reputation of a supplier.
6. Allergies and Dietary Restrictions
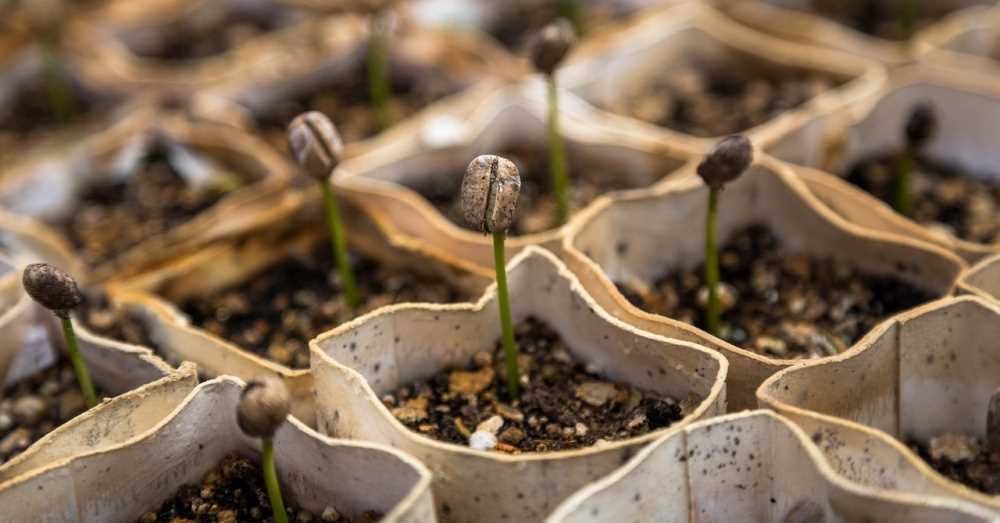

Take into account any allergies or dietary restrictions when selecting sprouting seeds. Some seeds may cause allergic reactions in certain individuals, so it’s important to be aware of any potential allergens. Additionally, if you follow a specific diet, such as a gluten-free or vegan diet, make sure the seeds you choose align with your dietary needs.
By considering these factors, you can choose the perfect seeds for sprouting and enjoy a bountiful crop of delicious and nutritious sprouts.
Soaking and Rinsing the Seeds
Before you can start growing sprouts in tea bags, you need to properly prepare the seeds. Soaking and rinsing the seeds is an essential step in the sprouting process. Here’s how to do it:
1. Soaking the Seeds
Start by measuring out the desired amount of seeds for your sprouting project. It’s important to use seeds that are specifically designated for sprouting, as regular seeds may have been treated with chemicals that can hinder the sprouting process.
Add the seeds to a bowl or a wide-mouthed jar, then cover them with clean, filtered water. The seeds should be fully submerged in the water. Allow the seeds to soak for the recommended amount of time, which can vary depending on the type of seeds you are using. In general, most seeds require soaking for 6 to 12 hours.
During the soaking period, the seeds will absorb water and start to swell. This activates enzymes within the seeds and initiates the sprouting process.
2. Rinsing the Seeds
After the seeds have finished soaking, it’s time to rinse them. Rinsing helps remove any impurities and encourages the growth of healthy sprouts.
To rinse the seeds, simply drain off the soaking water and rinse them with fresh, cool water. You can use a fine-mesh sieve or a colander for this step. Gently agitate the seeds while rinsing to ensure all surfaces are rinsed thoroughly.
3. Draining the Seeds
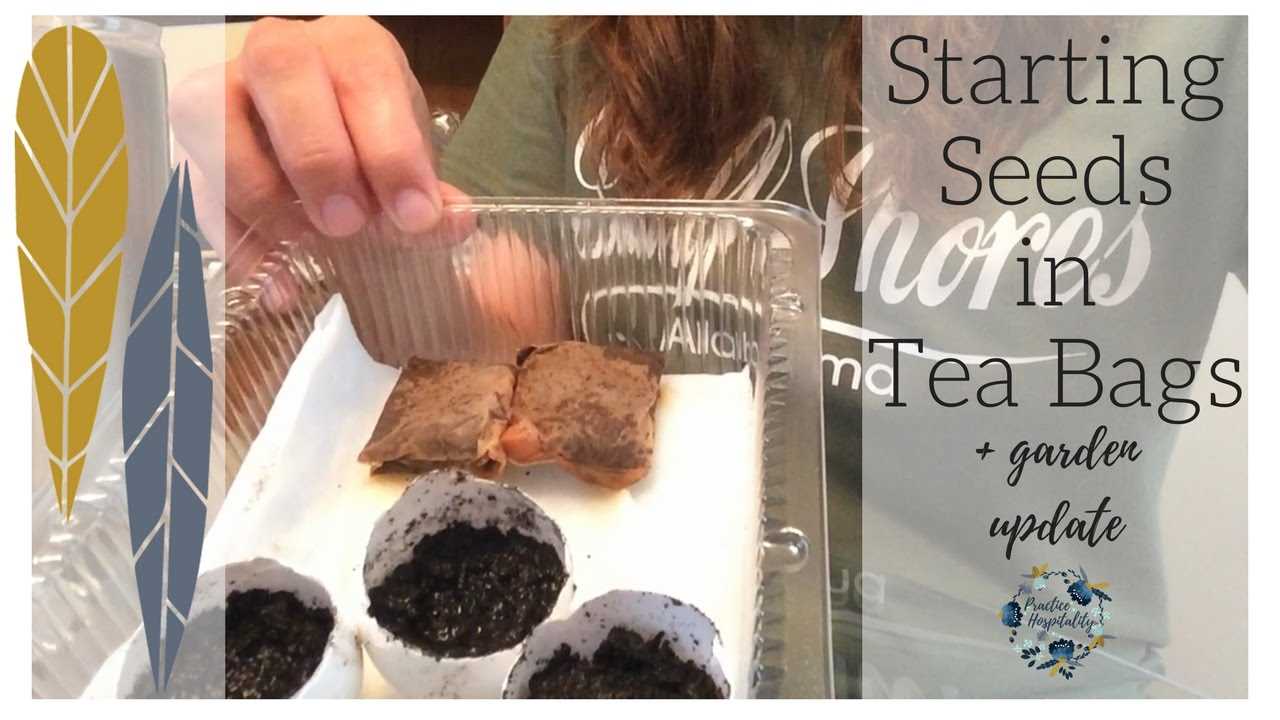

Once the seeds are rinsed, they need to be properly drained. Excess water can lead to mold or rot, so it’s important to allow the seeds to drain completely before placing them in the tea bags.
Place the rinsed seeds in a colander or mesh strainer and gently shake off any excess water. Then, spread the seeds out on a clean towel or paper towel and allow them to air dry for a few minutes.
4. Transferring the Seeds to Tea Bags


Once the seeds are properly drained, you can transfer them to the tea bags. Fill each tea bag with a small amount of seeds, making sure not to overcrowd them. The sprouts need space to grow and expand.
After filling the tea bags, gently fold or twist the tops of the bags to secure the seeds inside. You can use a twist tie or a rubber band to keep them closed.
5. Storing the Tea Bags
Store the tea bags containing the seeds in a clean, well-ventilated area. Make sure to keep the tea bags away from direct sunlight, as excessive heat can inhibit sprout growth. It’s also important to check the tea bags daily to ensure they remain moist but not overly wet. If the bags start to dry out, you can gently mist them with water to maintain optimal moisture levels.
Following these soaking and rinsing steps will help ensure that your seeds are properly prepared for sprouting. With just a little effort, you’ll soon be enjoying delicious, homegrown sprouts that you can add to your salads, sandwiches, and other dishes!
Planting the Seeds in the Tea Bags
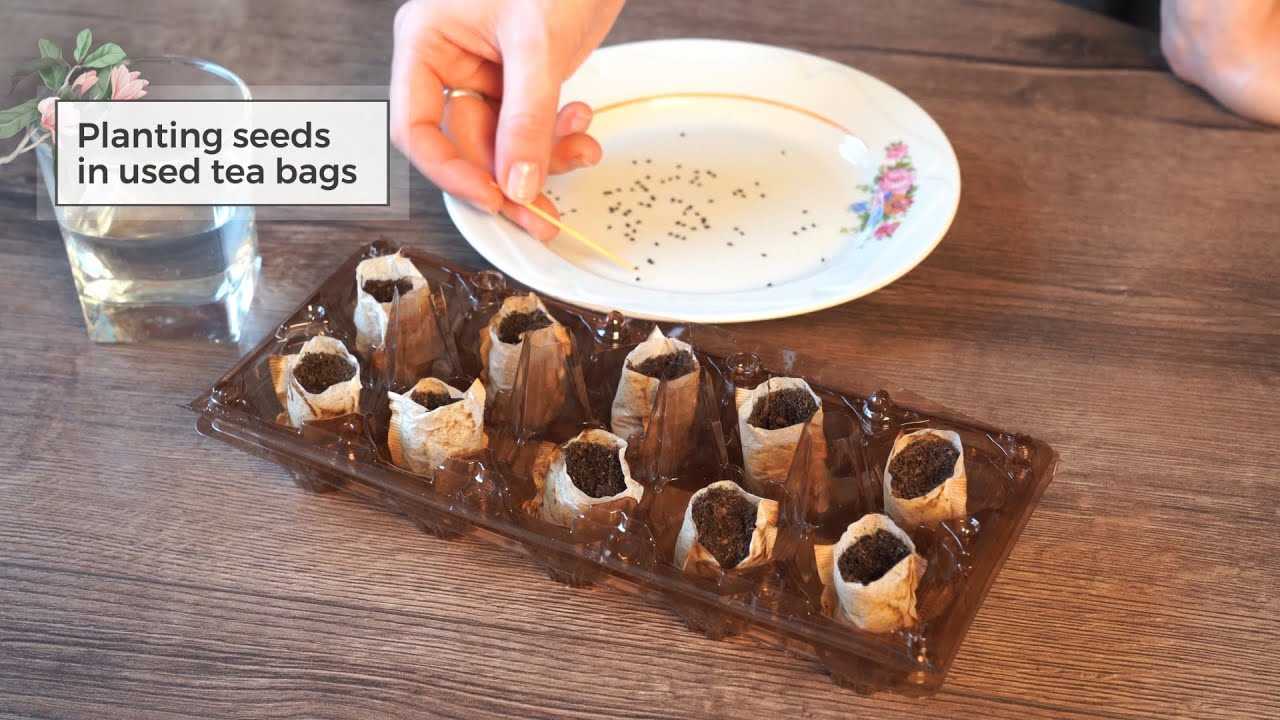

Once you have gathered all the necessary supplies for growing sprouts in tea bags, it’s time to start planting the seeds. Follow these simple steps to get your sprouts growing:
- Prepare the tea bags: Open up the tea bags and remove the tea leaves. Make sure you choose tea bags that are made of natural materials, such as cotton or muslin, to allow for proper aeration.
- Moisten the tea bags: Dampen the tea bags with water, but make sure they are not sopping wet. Excess moisture can lead to mold growth.
- Add the sprout seeds: Sprinkle a thin layer of sprout seeds onto the moistened tea bags. Spread them evenly to ensure proper growth and avoid overcrowding.
- Mist with water: Use a spray bottle to mist the seeds with water. This will help them to germinate and provide the necessary moisture for growth.
- Cover with a plastic lid or wrap: Place a plastic lid or wrap over the tea bags to create a greenhouse effect, trapping moisture and heat inside. This will promote faster germination.
- Place in a warm and dark location: Find a warm spot in your home where the tea bags can be left undisturbed. Avoid direct sunlight as it can overheat the sprouts.
- Water regularly: Check the tea bags every day and mist them with water as needed to keep the seeds moist. Avoid overwatering, as excess moisture can cause the sprouts to rot.
- Remove the cover once sprouts appear: After a few days, you will start to see tiny sprouts emerging from the seeds. At this point, remove the plastic cover to allow for proper air circulation.
- Continue watering: Water the sprouts regularly, keeping the tea bags moist but not soaked. This will ensure healthy growth and prevent drying out.
- Harvest the sprouts: Once the sprouts have reached the desired size, usually within 5-7 days, they are ready to be harvested. Simply cut them just above the tea bag and enjoy!
By following these simple steps, you can easily grow delicious and nutritious sprouts in tea bags right at home. It’s a fun and convenient way to enjoy fresh greens year-round!
Proper Watering and Care for Sprouts
Watering
Proper watering is essential for the healthy growth of sprouts. Here are some important tips to keep in mind:
- Use a spray bottle or mister to water the sprouts gently. This helps avoid disturbing the delicate roots.
- Maintain moisture in the soil by misting it lightly every day. Be careful not to overwater, as this can lead to rotting.
- Check the moisture level by touching the soil with your finger. If it feels dry, then it’s time to water the sprouts.
- Use filtered or distilled water to prevent any chemicals or contaminants from affecting the sprouts.
- Ensure that the water reaches the entire depth of the soil to provide adequate moisture for the roots.
Care
In addition to proper watering, sprouts require careful attention to ensure their health and vitality. Here are some care tips to follow:
- Place the tea bags with sprouts in a warm and well-lit location, preferably near a window where they can receive at least 6-8 hours of sunlight per day.
- Rotate the tea bags daily to ensure that all sides receive equal exposure to sunlight, promoting even growth.
- Monitor the temperature in the area where the sprouts are placed. They thrive in temperatures between 65°F and 75°F (18°C and 24°C).
- Protect the sprouts from extreme temperatures, both hot and cold, as they can negatively impact their growth.
- Keep an eye out for any signs of pests or diseases. If you notice any, take immediate action to prevent them from spreading and damaging your sprouts.
Harvesting
When the sprouts have reached the desired length, typically around 3-5 inches, it’s time to harvest them. Simply cut them just above the soil level using clean scissors or a sharp knife. Rinse the sprouts thoroughly before using them in your favorite dishes or adding them to salads.
Harvesting and Storing your Homegrown Sprouts
Once your sprouts have grown to the desired length, it’s time to harvest them and enjoy their fresh, crunchy goodness. Follow these simple steps to harvest and store your homegrown sprouts.
Harvesting sprouts:
- Prepare a clean container or bowl to collect your sprouts in.
- Gently remove the sprouts from the tea bags or sprouting tray. Be careful not to damage the delicate roots.
- Rinse the sprouts thoroughly under cool running water to remove any remaining seed hulls or dirt.
- Shake off any excess water and allow the sprouts to drain for a few minutes.
Storing sprouts:


Proper storage is crucial to maintain the freshness and quality of your sprouts.
- Transfer the sprouts to a clean, dry container or resealable bag lined with a paper towel. This will help absorb any excess moisture.
- Store the sprouts in the refrigerator. They can last for up to 5-7 days when stored properly.
- Make sure to check the sprouts for any signs of spoilage or mold before consuming.
- Before using the sprouts, give them a quick rinse under cool water to refresh them.
Tips for prolonging sprout freshness:
- Harvest and store your sprouts as soon as they reach the desired length to prevent overgrowth.
- Always use clean containers and utensils to handle sprouts to prevent contamination.
- Store sprouts separately from other fruits and vegetables to prevent cross-contamination.
- If you have excess sprouts, consider freezing them. Blanche the sprouts in boiling water for 2-3 minutes, then transfer them to an ice bath. Once cooled, drain the sprouts, pat them dry, and store them in a freezer-safe container or bag for up to 6 months.
By following these simple guidelines, you can enjoy the delicious taste and nutritional benefits of your homegrown sprouts for an extended period.
Delicious Recipes Using Homegrown Sprouts
If you’ve successfully grown your own sprouts using tea bags, you’re probably looking for ways to enjoy them in delicious recipes. Here are a few ideas to get you started:
1. Sprout Salad
Mix your homegrown sprouts with fresh vegetables like cherry tomatoes, cucumber, and shredded carrots. Add a drizzle of olive oil and a squeeze of lemon juice for a refreshing and healthy salad.
2. Sprout Wraps
Take a large lettuce leaf or a tortilla wrap and fill it with your favorite protein such as grilled chicken or tofu, along with a handful of sprouts. Add some sliced avocado, shredded cheese, and a dollop of sauce for a satisfying and nutritious meal.
3. Sprout Omelette
Whisk together eggs with a splash of milk and season with salt and pepper. Pour the mixture into a hot pan and sprinkle a generous amount of sprouts on top. Cook until the omelette is set and serve with a side of whole wheat toast for a protein-rich breakfast.
4. Sprout Stir-Fry


Heat some sesame oil in a wok or a large skillet and stir-fry your homegrown sprouts with your choice of vegetables like bell peppers, broccoli, and snow peas. Add a splash of soy sauce and sprinkle with sesame seeds for an easy and delicious side dish.
5. Sprout Sandwich

Spread some hummus or cream cheese on your favorite bread and top it with a handful of sprouts. Add slices of avocado, tomato, and cucumber for a nutritious and crunchy sandwich that’s perfect for lunch.
6. Sprout Smoothie
Add a handful of sprouts to your favorite fruit smoothie for an extra boost of nutrients. Blend together fruits like bananas, berries, and spinach with yogurt or almond milk. The sprouts will add a subtle crunch and a burst of freshness to your beverage.
Note: Make sure to wash your homegrown sprouts thoroughly before using them in any recipe to remove any dirt or bacteria. Enjoy your delicious creations using the nutritious sprouts you’ve grown!
Questions and Answers:
How do I grow sprouts in tea bags?
To grow sprouts in tea bags, start by dampening the empty tea bags. Then, fill them with the sprout seeds of your choice and moisten them again. Place the tea bags in a dark and warm place for a few days, making sure to keep them moist. Once the sprouts have grown to your desired length, harvest and enjoy!
What types of tea bags can I use?
You can use any type of tea bags as long as they are made from natural fibers that can hold moisture. Examples include green tea bags, black tea bags, or even empty herbal tea bags. Just make sure they are clean and empty before using them for sprouting.
How long does it take for sprouts to grow in tea bags?
The time it takes for sprouts to grow in tea bags can vary depending on the type of sprout and the growing conditions. In general, it takes about 3-7 days for sprouts to grow to a harvestable length. However, some sprouts may take longer or shorter periods of time. It is important to regularly check on the sprouts and adjust the growing conditions as needed.
Can I reuse the tea bags after growing sprouts?
Yes, you can reuse the tea bags after growing sprouts. Simply empty out any remaining sprouts and rinse the tea bags thoroughly to remove any residue. Afterward, allow them to dry completely before storing them. You can then reuse the tea bags for another round of sprout growing or for brewing tea.
What are the benefits of growing sprouts?
Growing sprouts at home has several benefits. Firstly, sprouts are packed with nutrients and can be a great addition to a healthy diet. They are also easy and quick to grow, requiring minimal space and resources. Additionally, growing sprouts allows you to have fresh greens at your disposal, reducing the need to buy them from stores.
Are there any precautions I should take when growing sprouts in tea bags?
While growing sprouts in tea bags is a simple and fun process, there are a few precautions you should take. Make sure to use clean tea bags that are free from any chemicals or residues. Additionally, ensure that the tea bags are thoroughly moistened and regularly checked for mold or bacterial growth. If you notice any signs of spoilage, it is best to discard the tea bags to prevent any potential health risks.


