- Selection of Healthy Vine
- Cutting Preparation
- 1. Selecting the Right Cutting
- 2. Timing
- 3. Tools and Materials
- 4. Cutting Length
- 5. Treating the Cuttings
- 6. Storing the Cuttings
- 7. Preparing the Growth Medium
- 8. Planting the Cuttings
- 9. Providing Proper Care
- Timing
- Choosing the Season
- Avoiding Extreme Temperatures
- Considering Local Climate
- Timing for Rooting
- Removing Leaves and Buds
- Applying Rooting Hormone
- Creating the Planting Hole
- Planting the Cuttings
- Caring for the Rooted Cuttings
- 1. Transplanting
- 2. Watering
- 3. Sunlight
- 4. Support
- 5. Pruning
- 6. Fertilizing
- 7. Disease and Pest Control
- Question-answer:
- What is the best time to take grape cuttings for rooting?
- How do I choose healthy grape vines for making cuttings?
- What tools do I need to prepare grape cuttings for rooting?
- Do I need to remove any leaves from the grape cuttings?
- How long should the grape cuttings be for rooting?
- What should I do after preparing the grape cuttings?
- How long does it take for grape cuttings to root?
- Video: Grow Grape Vines from Cuttings: Hardwood Propagation
Grapes are a popular fruit that can be grown in a variety of climates, making them a great addition to any garden or vineyard. One of the most effective ways to propagate grapes is through stem cuttings. By taking a cutting from a healthy grapevine and preparing it correctly, you can create a new plant that will produce delicious grapes in just a few years.
Step 1: Select the Right Grapevine
Before you start taking cuttings, it’s important to choose a grapevine that is healthy and disease-free. Look for a vine that has a good structure, with strong, well-developed canes. Avoid vines that show signs of disease or insect damage, as these can affect the success of your cuttings.
Step 2: Prepare the Cuttings
Using clean, sharp pruning shears, cut a section of vine that is approximately 12 to 18 inches long. Make the cut at a 45-degree angle, just below a node. Nodes are the points on the vine where leaves, buds, or branches emerge. Remove any leaves from the lower half of the cutting, leaving only a few at the top to help with photosynthesis.
Step 3: Dip in Rooting Hormone
To improve the chances of successful rooting, it’s advisable to dip the bottom end of the cutting in a powdered rooting hormone. This hormone stimulates root development and helps the cutting to establish itself more quickly. Follow the instructions on the rooting hormone packaging for the best results.
Step 4: Plant the Cuttings
Fill a container or pot with a well-draining rooting medium, such as a mixture of sand and peat moss. Make a hole in the medium with a pencil or your finger and insert the cutting, making sure that at least one node is covered by the medium. Firmly press the medium around the cutting to hold it in place.
Step 5: Provide the Right Conditions
Place the container in a warm, sunny location, such as a greenhouse or a south-facing window. Water the cutting regularly, keeping the rooting medium moist but not overly wet. After a few weeks, you should start to see new growth emerging from the cutting, a sign that rooting has occurred.
By following these steps, you can successfully prepare grape cuttings for rooting and start your own grapevines. With a little patience and care, you’ll be enjoying the fruits of your labor in no time!
Selection of Healthy Vine
Before preparing grape cuttings for rooting, it is important to select a healthy vine from which to take the cuttings. Here are some tips for selecting a healthy vine:
- Choose a mature vine: Select a vine that is at least two years old. Younger vines may not have reached a sufficient level of maturity to produce viable cuttings.
- Look for disease-free vines: Inspect the vine for any signs of disease or pests. Avoid selecting vines that show symptoms such as discoloration, spots, or physical damage.
- Check for vigorous growth: Choose a vine that has demonstrated healthy and vigorous growth. Look for strong and well-developed canes and healthy leaves.
- Consider the variety: Different grape varieties have different rooting capabilities. It is important to choose a vine from a variety that is known to be easily rootable.
- Avoid vines that have been recently treated: If possible, avoid selecting vines that have been recently treated with chemicals or pesticides, as these may affect the success of the rooting process.
By selecting a healthy vine, you are giving your grape cuttings the best chance of successful rooting and growth.
Cutting Preparation
Before you start the process of rooting grape cuttings, it’s essential to properly prepare them to increase the chances of success:
1. Selecting the Right Cutting
Choose healthy grape canes that are one-year-old and have a diameter of about 1/4 to 1/2 inch. Look for canes that are disease-free, free from pests, and have a straight shape.
2. Timing
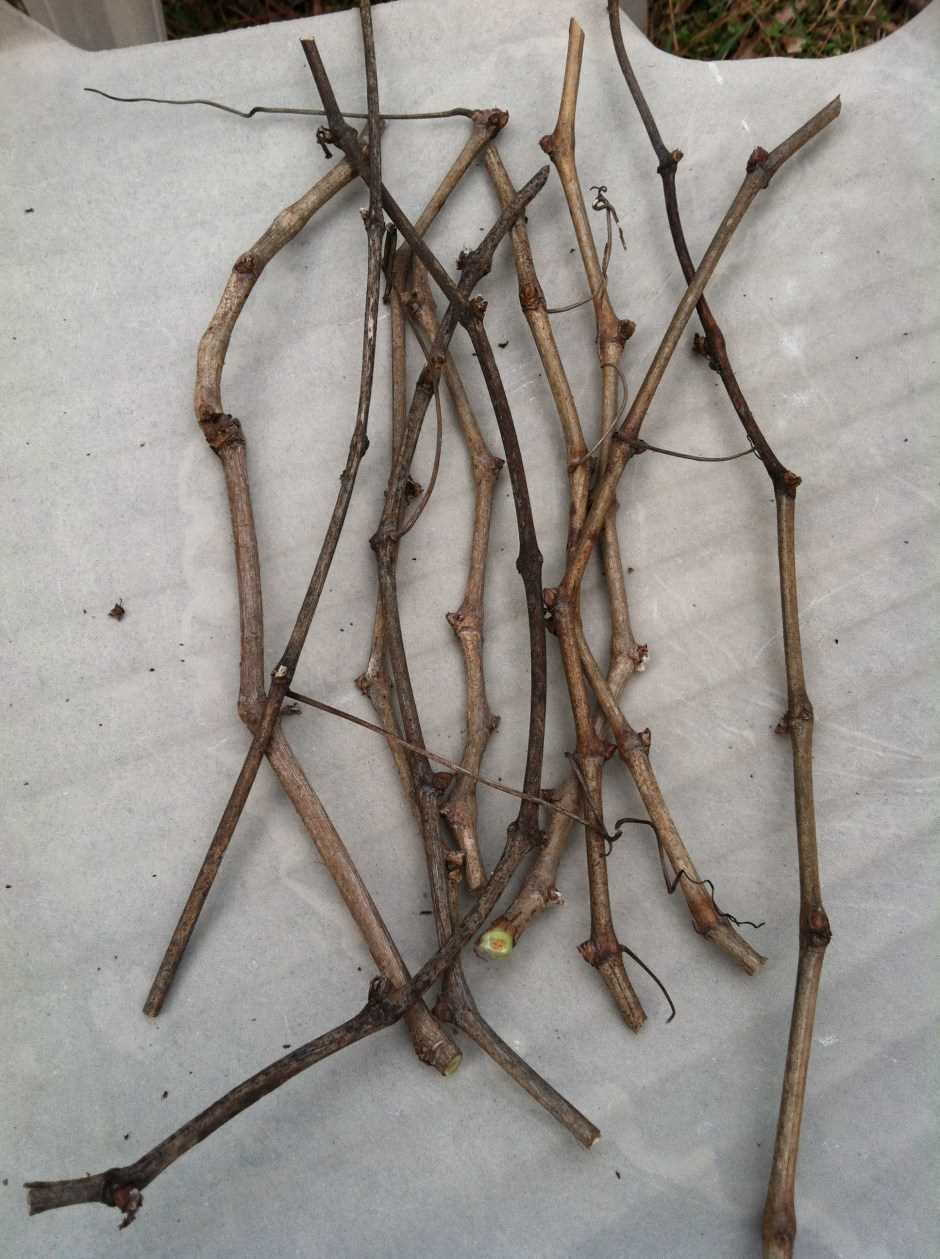
The best time to take grape cuttings is during late winter or early spring, while the grapevine is dormant. This ensures that the plant has enough stored energy to support the growth of new roots.
3. Tools and Materials

Gather all the necessary tools and materials before you start the cutting preparation. You will need a sharp and sterilized pruning shear, rooting hormone powder, a clean container for water, and well-draining growth medium.
4. Cutting Length
Trim the grape cuttings to a length of about 8 to 12 inches. Make a clean, slanted cut just below a bud or node. Remove any lateral shoots or side branches from the lower two-thirds of the cutting.
5. Treating the Cuttings
Dip the bottom end of the cuttings into a rooting hormone powder. Ensure that the powder covers the wounded area well. The rooting hormone stimulates root development and improves the chances of successful rooting.
6. Storing the Cuttings
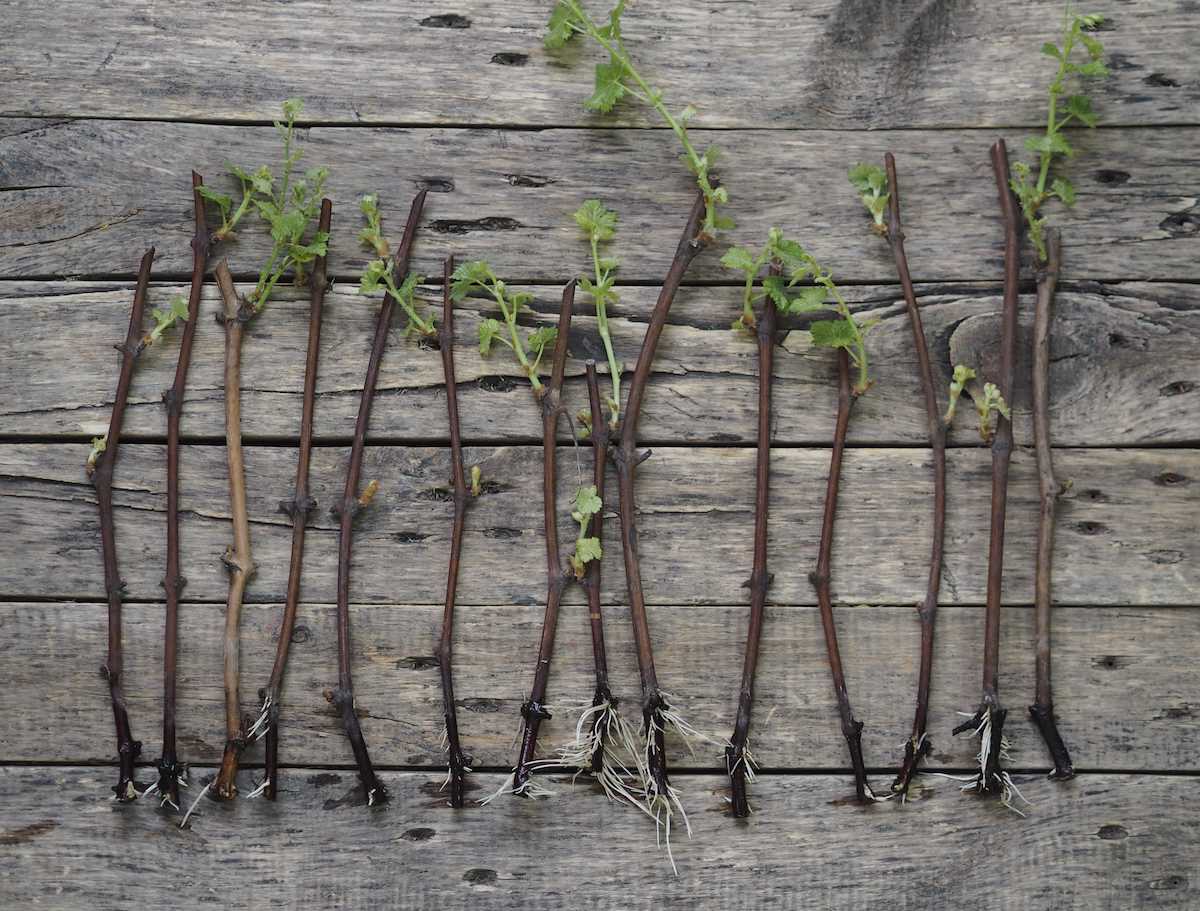
Place the treated grape cuttings in a container filled with fresh water. Store them in a cool and dark location for a few hours to allow the cut ends to take up water and hydrate.
7. Preparing the Growth Medium
While the cuttings are hydrating, prepare the growth medium by mixing equal parts of perlite and peat moss. This mixture provides good aeration and moisture retention for the developing roots.
8. Planting the Cuttings
Once the cuttings are hydrated, remove them from the water and plant them in the prepared growth medium. Make sure to insert the cuttings about two-thirds of their length into the medium and firm the soil around them.
9. Providing Proper Care
After planting, water the cuttings thoroughly and place them in a warm and humid environment. Make sure to keep the soil consistently moist but not waterlogged. Provide indirect sunlight and protect the cuttings from extreme temperatures.
Following these steps will help ensure that your grape cuttings are well-prepared for rooting and increase the chances of successful propagation.
Timing
Timing is an important factor when preparing grape cuttings for rooting. It is essential to choose the right time of year to ensure the success of the propagation process.
Choosing the Season
It is recommended to take grape cuttings during the dormant season, which is typically in late winter or early spring, when the grapevine is dormant and has no active growth. This allows the cutting to have enough stored energy to successfully root and establish itself.
Avoiding Extreme Temperatures
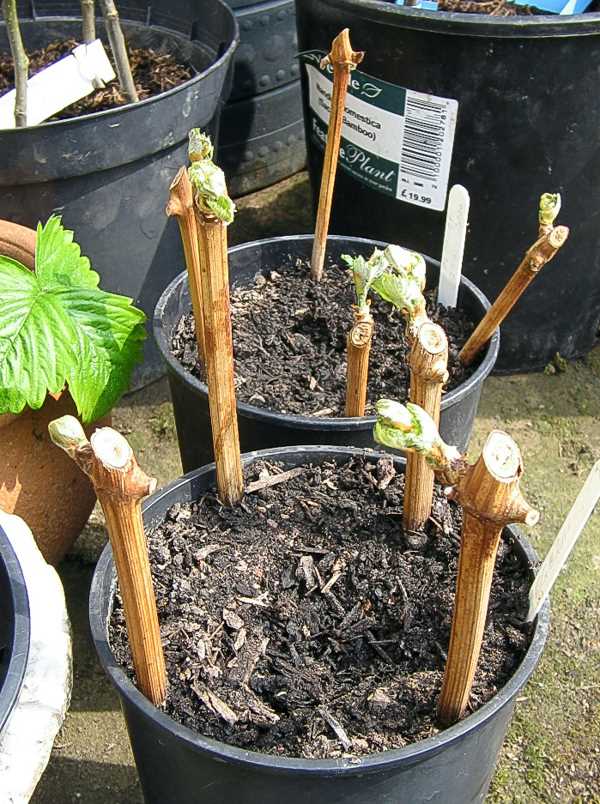
Avoid taking cuttings during periods of extreme temperatures, such as during the hot summer or freezing winter months. These extreme conditions can increase the stress on the cuttings and make it more difficult for them to successfully root.
Considering Local Climate

It is important to take into account the local climate and growing conditions when deciding on the timing for grape cuttings. Different grape varieties may have specific requirements, so it is recommended to consult local gardening resources or experts to determine the best time for taking cuttings in your specific region.
Timing for Rooting
Once the cuttings are prepared, they are typically kept in a controlled environment with high humidity to encourage root growth. The cuttings are often placed in rooting hormone and inserted into a rooting medium, such as a mixture of perlite and peat moss. The rooting process usually takes several weeks to a few months, depending on the variety and environmental conditions.
Overall, timing plays a crucial role in the success of grape cutting propagation. By choosing the right season, avoiding extreme temperatures, and considering local climate factors, you can increase the chances of successful rooting and establish healthy grapevines.
Removing Leaves and Buds
Before rooting grape cuttings, it is important to remove the leaves and buds from the cuttings. This helps the cuttings focus their energy on developing roots rather than supporting the growth of leaves and buds.
To remove the leaves and buds, follow these steps:
- Gather the necessary tools: You will need a pair of sharp pruning shears or scissors to remove the leaves and buds.
- Inspect the cutting: Examine the cutting to identify any leaves or buds that need to be removed.
- Start with the leaves: Begin by cutting off the larger leaves near the top of the cutting. Make a clean cut close to the stem without damaging the stem itself.
- Work your way down: Continue to remove the leaves progressively, working your way down the cutting towards the bottom. Remove any leaves that are damaged or yellowing.
- Remove the buds: Once all the leaves have been removed, inspect the cutting for any buds. Using the shears or scissors, carefully cut off any buds that you find.
- Dispose of the removed foliage: Collect all the removed leaves and buds and properly dispose of them.
By removing the leaves and buds, you are helping to promote root growth and increase the chances of successful rooting for your grape cuttings.
Applying Rooting Hormone
After preparing the grape cuttings, the next step is to apply rooting hormone. Rooting hormone is a substance that aids in the development of roots in plant cuttings. It can be a synthetic hormone or a natural one derived from plants.
Here is a step-by-step guide on how to apply rooting hormone to your grape cuttings:
- Prepare the rooting hormone: Mix the rooting hormone according to the instructions on the product packaging. Some rooting hormones come in powder form, while others come in gel or liquid form.
- Dip the cut ends of the grape cuttings: Take each grape cutting and dip the bottom 1-2 inches of the stem into the rooting hormone. Make sure to coat the stem evenly with the hormone.
- Tap off excess hormone: Gently tap the cutting against the edge of the container to remove any excess hormone. This will prevent the hormone from clumping and causing issues with root development.
- Plant the grape cuttings: After applying the rooting hormone, plant the grape cuttings into the rooting medium. Make a hole in the medium using a pencil, and insert the cutting, making sure that at least one or two buds are above the surface.
- Water the cuttings: After planting the cuttings, water them lightly to settle the rooting medium and ensure proper hydration.
Applying rooting hormone to your grape cuttings can increase the chances of successful root development and improve overall plant growth. It is an optional step, so if you prefer not to use rooting hormone, you can still try rooting the cuttings without it. However, using rooting hormone can often lead to faster and more robust root development.
Note: When working with rooting hormone, always follow the instructions provided by the manufacturer. Different products may have varying application methods and concentrations, so it’s essential to read and understand the specific guidelines for the rooting hormone you are using.
Creating the Planting Hole
Once you have selected a suitable location for planting your grape cuttings, it’s time to prepare the planting hole. Follow these steps:
- Using a shovel or garden trowel, dig a hole that is approximately 6-8 inches deep.
- Make sure that the hole is wide enough to accommodate the entire length of the grape cutting, with some extra space around it.
- Loosen the soil at the bottom of the hole to ensure good drainage.
- If the soil in your area is heavy and clayey, consider adding organic matter such as compost or well-rotted manure to improve its texture and fertility.
- Remove any weeds or grass that may be growing in the area, as they can compete with the grape cuttings for nutrients and water.
- Once the hole is prepared, carefully place the grape cutting into the hole, ensuring that at least two nodes are buried in the soil.
- Gently backfill the hole with soil, making sure to eliminate any air pockets around the cutting.
- Press the soil around the cutting firmly to ensure good root-to-soil contact.
- Water the newly planted grape cutting thoroughly to settle the soil and provide moisture.
- Apply a layer of mulch around the base of the cutting to help conserve moisture and suppress weed growth.
Now that you have successfully created the planting hole, your grape cutting is ready to start rooting and grow into a healthy grape vine.
Planting the Cuttings
After preparing the grape cuttings for rooting, it’s time to plant them in the desired location. Follow these steps to properly plant the cuttings:
- Choose a suitable location: Select a spot in your garden or vineyard that receives full sun and has well-draining soil.
- Prepare the soil: Remove any weeds or grass from the chosen area and loosen the soil using a garden fork or tiller.
- Make planting holes: Dig holes that are approximately 6 inches deep and 1 inch wide using a garden trowel. Space the holes at least 6 feet apart.
- Insert the cuttings: Take the prepared grape cuttings and gently place them into the planting holes. Make sure that at least two buds are above the soil surface. Tamp the soil lightly around the base of each cutting to secure them in place.
- Water the cuttings: Give the newly planted grape cuttings a thorough watering to settle the soil and provide moisture. Be careful not to overwater, as excessive moisture can rot the cuttings.
- Protect the cuttings: Cover the planted cuttings with a layer of mulch to conserve moisture and suppress weed growth. Use organic mulch like straw or wood chips.
It’s important to regularly monitor the moisture levels and provide water as needed to keep the soil evenly moist but not waterlogged. The grape cuttings should start to develop roots within a few weeks to a few months, depending on the variety and growing conditions.
Once the cuttings have established a strong root system, they can be transplanted into their permanent location or grafted onto rootstock. Follow the appropriate steps for transplanting or grafting according to your specific needs and goals.
Caring for the Rooted Cuttings
After the grape cuttings have successfully rooted, it is important to provide them with proper care and attention to ensure their continued growth and development.
1. Transplanting
Once the cuttings have developed a strong root system, they can be transplanted into individual pots or planted directly into the ground. Prepare a well-draining soil mix that is rich in organic matter to promote healthy growth.
2. Watering
Water the newly transplanted cuttings thoroughly, making sure the soil is evenly moist but not waterlogged. Avoid overwatering, as this can lead to root rot. Check the soil moisture regularly and adjust the watering schedule accordingly.
3. Sunlight
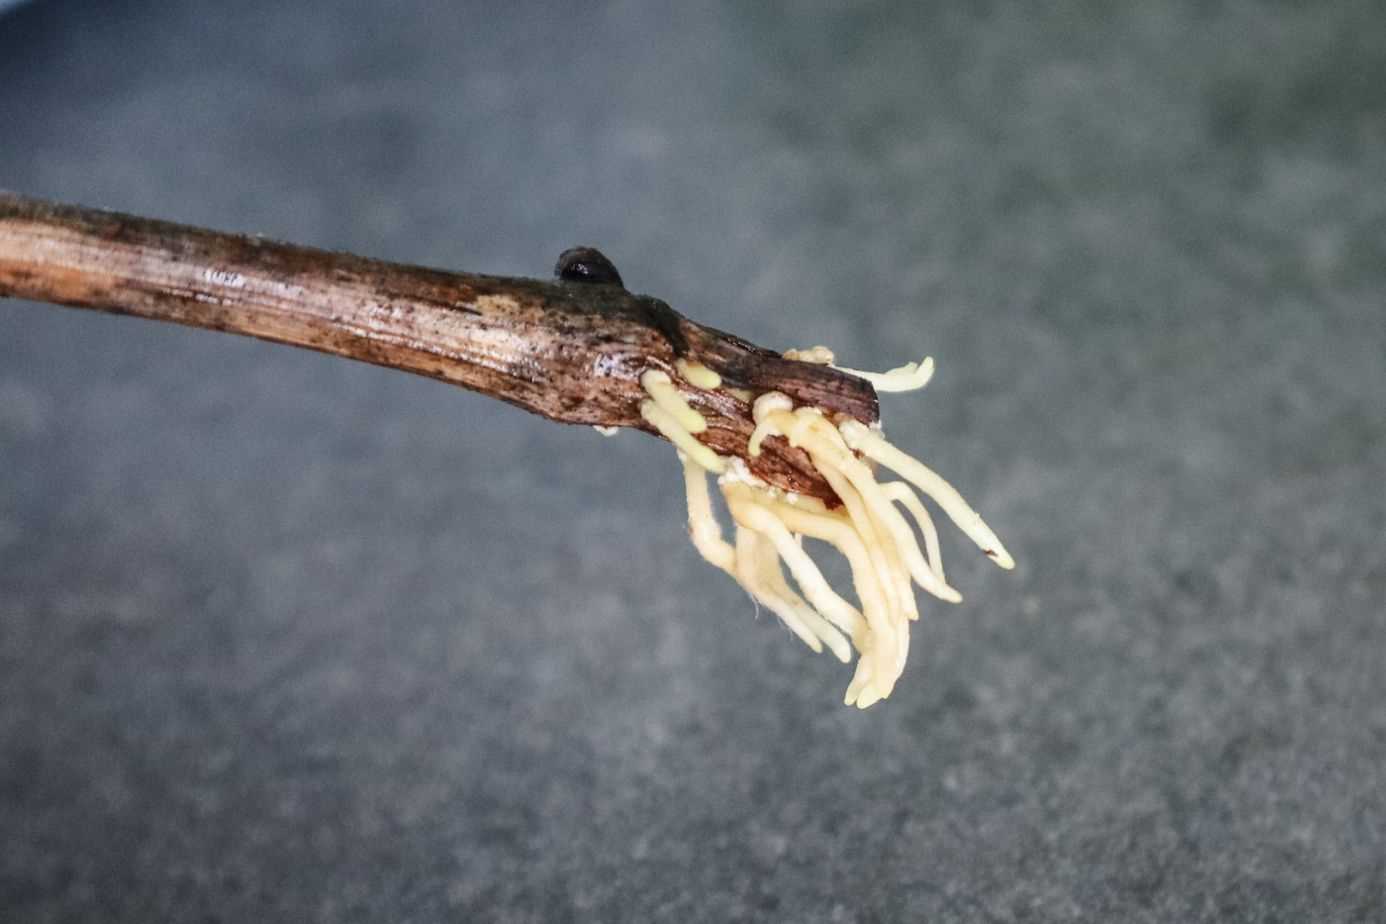
Place the rooted cuttings in a location that receives full sun for at least 6-8 hours a day. Grape vines require ample sunlight to grow and produce healthy fruit. If growing indoors, provide supplemental lighting using grow lights.
4. Support
As the vines start to grow, provide them with a sturdy support system such as a trellis or fence. This will help to train the vines and support their weight as they mature.
5. Pruning
Regular pruning is essential for maintaining the health and productivity of grape vines. Remove any dead or damaged wood, and prune the vines to promote good air circulation and light penetration.
6. Fertilizing
Apply a balanced fertilizer to the soil around the grape vines during the growing season to provide them with necessary nutrients. Follow the manufacturer’s instructions for application rates and timing.
7. Disease and Pest Control
Monitor the plants regularly for any signs of disease or pest infestation. Take appropriate measures to prevent and control common grape diseases such as powdery mildew or fungal infections. Use organic or chemical treatments as needed.
By following these care guidelines, you can ensure the successful establishment and growth of your rooted grape cuttings. With proper care, your plants will thrive and eventually produce delicious grapes for you to enjoy!
Question-answer:
What is the best time to take grape cuttings for rooting?
The best time to take grape cuttings for rooting is in late winter or early spring, when the vines are still dormant.
How do I choose healthy grape vines for making cuttings?
When choosing grape vines for making cuttings, look for healthy, disease-free vines with straight, thick shoots that are at least one-year-old.
What tools do I need to prepare grape cuttings for rooting?
To prepare grape cuttings for rooting, you will need sharp pruning shears or a knife, a rooting hormone powder, a clean container or bag, a misting bottle, and a well-draining rooting medium.
Do I need to remove any leaves from the grape cuttings?
Yes, it is recommended to remove all the leaves from the lower half of the grape cuttings, as this will reduce moisture loss and encourage root growth.
How long should the grape cuttings be for rooting?
The grape cuttings should be around 8 to 12 inches long, with at least 3 to 4 buds on each cutting.
What should I do after preparing the grape cuttings?
After preparing the grape cuttings, you should dip the basal end of each cutting into a rooting hormone powder and then plant them in a well-draining rooting medium. Mist the cuttings regularly and keep them in a warm and humid environment, away from direct sunlight.
How long does it take for grape cuttings to root?
It usually takes about 2 to 4 weeks for grape cuttings to root, depending on the variety and environmental conditions. Once the cuttings have rooted, they can be transplanted into pots or directly into the ground.
