- Choosing the Right Varieties
- 1. Bloom Time
- 2. Height
- 3. Color
- 4. Flower Form
- 5. Special Features
- Planting Tulip Bulbs
- Choose the Right Time and Location
- Prepare the Soil
- Planting Depth and Spacing
- Proper Watering
- Maintenance and Care
- Providing Proper Watering
- 1. Consistent Moisture
- 2. Frequency of Watering
- 3. Morning Watering
- 4. Drip Irrigation or Soaker Hoses
- 5. Avoid Overwatering
- 6. Mulching
- 7. Rainwater
- Fertilizing Tulips
- 1. When to fertilize
- 2. Choosing the right fertilizer
- 3. Applying the fertilizer
- 4. Frequency of fertilizing
- 5. Avoid over-fertilizing
- 6. Additional tips
- Dealing with Pests and Diseases
- Pests
- Diseases
- Deadheading and Pruning Tulips
- Why Deadhead Tulips?
- How to Deadhead Tulips
- Pruning Tulip Foliage
- Winterizing Your Tulip Garden
- Mulch and Insulate
- Remove Foliage
- Watering
- Protect from Pests
- Division and Transplanting
- Monitor for Diseases
- Spring Care
- Questions and Answers:
- When is the best time to plant tulips?
- How deep should I plant tulip bulbs?
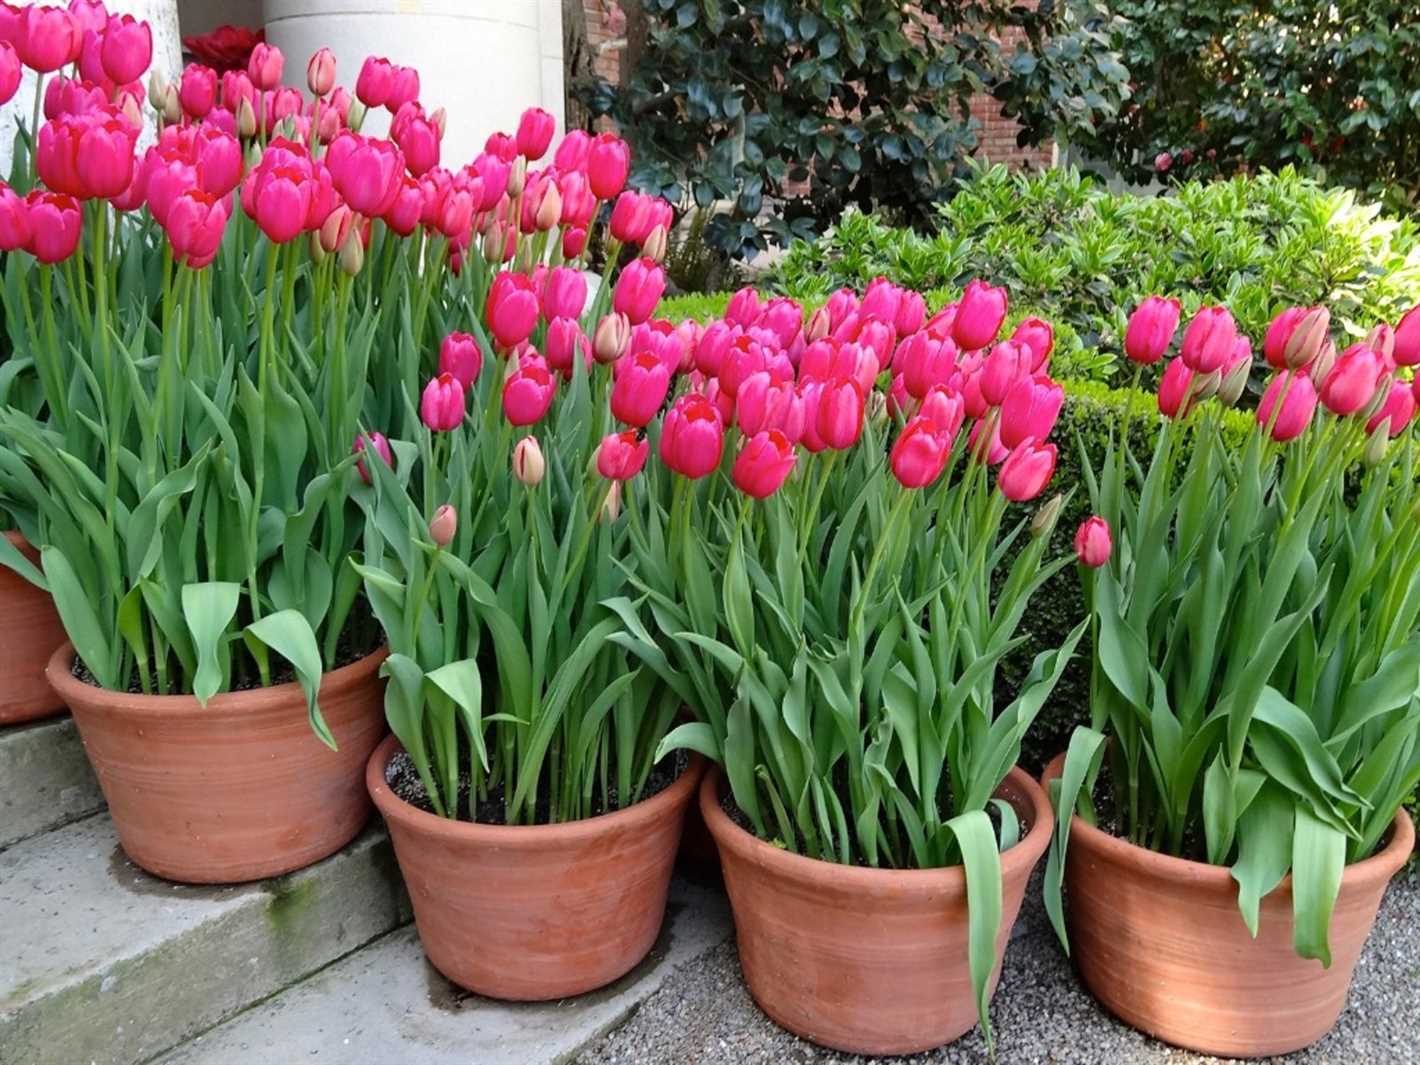
- Can I plant tulips in pots or containers?
- How often should I water tulips?
- Do tulips need fertilizer?
- What should I do after tulips have finished blooming?
- Can I leave tulip bulbs in the ground over winter?
- Videos: TULIPS 101: GROWING TULIPS FOR BEGINNERS
Tulips are beloved by gardeners for their vibrant colors and elegant beauty. If you’re planning to grow tulips in your garden, it’s important to provide them with the care they need to thrive. From planting to pruning, here are some essential tips to help your tulips flourish.
1. Choose the Right Location
Before planting your tulip bulbs, choose a location in your garden that receives full sun or at least six hours of direct sunlight each day. Tulips need plenty of sunlight to grow and bloom. Avoid planting them in shaded areas or near trees that might compete for nutrients and water.
Pro Tip: Tulips also need well-draining soil to prevent rot and disease. If your soil is heavy or clay-based, consider adding compost or sand to improve the drainage.
2. Plant at the Right Time
Tulips are typically planted in the fall, about 6-8 weeks before the first frost. This allows the bulbs to establish their root system before winter. If you missed the fall planting window, you can still plant tulips in the spring, but they may not bloom as vigorously.
Pro Tip: When planting tulip bulbs, dig a hole that is about 6-8 inches deep and space the bulbs apart according to the instructions on the packaging. Place the bulbs with the pointed side facing up and cover them with soil.
3. Provide Adequate Watering
Tulips need regular watering, especially during their growing and blooming stages. However, be careful not to overwater them, as this can cause the bulbs to rot. Water the tulips when the top inch of soil feels dry, and make sure the water reaches the bulb’s roots.
Pro Tip: Mulching around your tulips can help retain moisture in the soil and prevent weed growth. Use a layer of organic mulch, such as shredded bark or straw, but keep it away from the base of the plants to avoid rot.
4. Prune and Deadhead
After the tulips have finished blooming, remove the spent flowers to prevent them from going to seed. This process, called deadheading, encourages the plant to redirect its energy towards developing stronger bulbs for the following year. Allow the foliage to die naturally, as it helps nourish the bulbs.
Pro Tip: To maintain the health of your tulips, it’s recommended to dig up and divide the bulbs every 3-4 years. This prevents overcrowding and allows the bulbs to have enough space to grow.
By following these essential care tips, you can enjoy a spectacular display of tulips in your garden. From choosing the right location to providing adequate water and pruning, taking care of tulips will reward you with stunning blooms year after year.
Choosing the Right Varieties
When it comes to choosing tulip varieties for your garden, there are a few factors to consider. Here are some tips to help you make the right choice:
1. Bloom Time
Consider the bloom time of the tulip varieties you are interested in. Tulips come in early spring, mid-spring, and late spring varieties. If you want to have a long-lasting display of tulips, choose varieties that bloom at different times.
2. Height
Tulips come in different heights, ranging from short to tall varieties. Before selecting tulips for your garden, think about where you plan to plant them. If you want to create a layered effect with different heights, choose tulips of various heights.
3. Color

Tulips come in a wide range of colors, including red, yellow, pink, purple, and white. Consider the color scheme of your garden and choose tulips that complement the existing plants and flowers. You can also mix and match different tulip colors to create beautiful patterns and combinations.
4. Flower Form
Tulips come in various flower forms, including single, double, fringed, and parrot. Each flower form has its own unique charm. Consider the overall style and theme of your garden when choosing tulip flower forms.
5. Special Features

Some tulip varieties have special features, such as variegated leaves or unique petal patterns. If you want to add a touch of uniqueness to your garden, look for tulip varieties with special features.
By considering these factors, you can choose the right tulip varieties that will thrive in your garden and create a stunning display of colorful blooms.
Planting Tulip Bulbs
Planting tulip bulbs is an important step in ensuring beautiful and vibrant flowers in your garden. Follow these essential care tips to make sure your tulips thrive:
Choose the Right Time and Location
- Plant tulip bulbs in the fall, ideally before the first frost.
- Choose a location with well-drained soil and full sun exposure. Tulips need at least 6-8 hours of sunlight daily.
- Ensure that the chosen area has good air circulation.
Prepare the Soil
- Loosen the soil to a depth of 12-15 inches using a garden fork or shovel.
- Remove any weeds or debris from the planting area.
- Add organic matter such as compost or well-rotted manure to improve the soil’s fertility and drainage.
- Check the pH level of the soil. Tulips prefer a slightly acidic to neutral pH (6.0-7.0).
Planting Depth and Spacing
- Plant tulip bulbs at a depth of 6-8 inches, measured from the base of the bulb to the soil surface.
- Space the bulbs about 4-6 inches apart to allow for proper growth and development.
- If planting in clusters, ensure there is enough space between each cluster for the plants to expand.
Proper Watering

- Water the newly planted tulip bulbs thoroughly after planting.
- Keep the soil consistently moist, but not waterlogged, until the ground freezes.
- During dry spells in the spring, water the tulips once a week.
Maintenance and Care
- Apply a layer of mulch, such as straw or wood chips, around the tulips to conserve moisture and suppress weeds.
- Remove any faded flowers to prevent seed production and promote energy allocation to bulb development.
- Avoid excessive fertilizer application as it can lead to floppy and weak stems.
- Consider adding a bulb booster fertilizer in the fall to enhance the bulbs’ performance next season.
By following these planting tips, your tulips will have the best chance to thrive and provide a stunning display of color in your garden. Remember to provide them with the appropriate care throughout the growing season for optimal results.
Providing Proper Watering
Proper watering is essential for the health and vitality of your tulips. Here are some important tips to keep in mind:
1. Consistent Moisture
Tulips require consistent moisture throughout their growing period, especially during dry periods. Ideally, the soil should be evenly moist but not saturated.
2. Frequency of Watering
Water your tulips deeply once a week, providing enough water to penetrate the soil to a depth of 6 to 8 inches. This will encourage the roots to grow deeply and establish a strong foundation.
3. Morning Watering
It’s best to water your tulips in the morning, as this allows the foliage to dry out during the day. Wet foliage can promote the growth of diseases, so it’s important to avoid watering in the evening.
4. Drip Irrigation or Soaker Hoses
Consider using drip irrigation or soaker hoses to provide a slow and steady supply of water directly to the roots. This helps to minimize water loss through evaporation and ensures that the water reaches the plants’ roots where it is needed most.
5. Avoid Overwatering

Avoid overwatering your tulips, as excessive moisture can cause the bulbs to rot. Always check the soil moisture before watering and adjust the frequency accordingly.
6. Mulching
Applying a layer of organic mulch around your tulips can help to conserve moisture in the soil and reduce weed growth. However, make sure not to mulch too close to the base of the plants, as this can cause moisture-related issues.
7. Rainwater

If possible, use rainwater to irrigate your tulips. Rainwater is free of chemicals and has a pH that is more suitable for the plants compared to tap water, which may contain chlorine or other chemicals.
By following these watering tips, you can ensure that your tulips receive the right amount of moisture and thrive in your garden.
Fertilizing Tulips

Tulips are beautiful and vibrant flowers that can enhance any garden. To ensure that your tulips grow healthy and strong, it is essential to provide them with the right nutrients. Fertilizing tulips can help promote their growth, improve their overall health, and enhance the vibrancy of their blooms.
1. When to fertilize
- It is best to fertilize tulips in the spring, before they start blooming.
- Wait until the soil has thawed and dried out slightly before applying fertilizer.
2. Choosing the right fertilizer
- Use a balanced, slow-release fertilizer with a nitrogen-phosphorus-potassium (NPK) ratio of 10-10-10 or 14-14-14.
- Alternatively, you can use a specialized bulb fertilizer that is formulated specifically for tulips.
3. Applying the fertilizer
- Spread the fertilizer evenly over the soil surface around the tulip bulbs.
- Avoid direct contact between the fertilizer and the bulbs, as this can cause damage.
- Gently work the fertilizer into the top layer of soil, ensuring that it is well incorporated.
- Water the area thoroughly after applying the fertilizer to help it soak into the soil.
4. Frequency of fertilizing
- For established tulips, fertilize once a year in the spring before blooming.
- For newly planted tulips, apply fertilizer at planting time and again in the spring.
5. Avoid over-fertilizing
- Over-fertilizing tulips can result in excessive foliage growth with fewer blooms.
- Follow the manufacturer’s instructions on the fertilizer package and avoid applying more than the recommended amount.
6. Additional tips

- Avoid fertilizing tulips after they have finished blooming, as this can disrupt their natural growth cycle.
- Regularly monitor the health and growth of your tulips to determine if additional fertilization is necessary.
- Remember to water your tulips regularly, as proper watering is essential for nutrient absorption.
By following these fertilizing tips, you can ensure that your tulips receive the nutrients they need to thrive and produce stunning blooms year after year.
Dealing with Pests and Diseases
Tulips can be vulnerable to a few common pests and diseases. Here are some tips for identifying and overcoming these issues:
Pests
- Aphids: These tiny insects can cause damage by sucking the sap out of tulip leaves and stems. To control aphids, you can spray the plants with a mixture of water and a mild soap solution.
- Slugs and Snails: These slimy creatures can eat the leaves and flowers of tulips. To keep them away, consider placing copper tape around the base of the plants or set up beer traps. You can also handpick them and relocate them far from your garden.
- Deer and Rodents: Deer and rodents are known to feed on tulips. To protect your plants, you can use fencing or wire mesh around your garden. Another option is to plant companion plants that repel these animals, such as marigolds or daffodils.
Diseases
Here are some common diseases that can affect tulips:
- Botrytis Blight: This fungal disease causes gray mold on the leaves and flowers. To prevent botrytis blight, make sure to plant tulips in well-draining soil and provide adequate air circulation. Remove and dispose of any infected plant material.
- Tulip Fire: Tulip fire is caused by the fungus Botrytis tulipae and results in distorted growth, grayish lesions, and blackened stems. Infected plants should be removed and destroyed. To prevent tulip fire, avoid overhead watering and ensure proper spacing between plants.
- Root Rots: Excess moisture can lead to root rot diseases in tulips. Ensure that the soil has good drainage and avoid overwatering. If root rot is a recurring issue, consider lifting and dividing the bulbs every few years.
| Pest/Disease | Symptoms | Prevention | Treatment |
|---|---|---|---|
| Aphids | Sap-sucking insects on leaves and stems | Spray with water and mild soap solution | Apply insecticidal soap or neem oil |
| Slugs and Snails | Irregular holes in leaves; slime trails | Use copper tape or beer traps | Handpick or use organic slug and snail pellets |
| Deer and Rodents | Missing flower buds and chewed foliage | Install fencing or use companion plants | Use deterrent sprays or motion-activated devices |
| Botrytis Blight | Gray mold on leaves and flowers | Plant in well-draining soil; provide air circulation | Remove infected plant material; apply fungicide |
| Tulip Fire | Distorted growth, gray lesions, blackened stems | Avoid overhead watering; proper spacing | Remove and destroy infected plants; apply fungicide |
| Root Rots | Wilting, stunted growth, discolored roots | Ensure good drainage; avoid overwatering | Improve soil drainage; lift and divide bulbs |
By being aware of these common pests and diseases, you can take proactive measures to protect your tulips and ensure their health and beauty in your garden.
Deadheading and Pruning Tulips
Deadheading and pruning tulips is an important part of their care routine. By removing spent flowers and cutting back foliage, you can help promote healthy growth and maintain the beauty of your tulip garden.
Why Deadhead Tulips?

Deadheading tulips involves removing the faded flowers from the plant. This is beneficial for several reasons:
- Prevents seed production: Deadheading prevents tulips from producing seeds. By removing the spent flowers, the plant can redirect its energy towards storing nutrients for the next growing season.
- Promotes re-blooming: Deadheading tulips encourages the bulb to produce more flowers in the future. The plant will focus on creating new buds instead of diverting energy to seed production.
- Maintains garden aesthetics: Removing faded flowers keeps the garden looking neat and tidy. It also prevents the formation of seed pods, which can be visually unappealing.
How to Deadhead Tulips
To deadhead tulips, follow these simple steps:
- Wait until the flowers have faded and the petals have fallen.
- Gently hold the stem of the faded flower and trace it down to the base of the plant.
- Using sharp garden shears or scissors, make a clean cut just above a set of healthy leaves or a leaf node.
- Discard the faded flowers in the compost or dispose of them properly.
It is important to note that you should avoid cutting the foliage of tulips immediately after flowering. The leaves are essential for providing energy to the bulb for future growth. Wait until the foliage has turned yellow and withered before pruning.
Pruning Tulip Foliage
After the foliage has turned yellow and withered, it is time to prune the tulip plants. Pruning helps to tidy up the garden and prevents the spread of diseases.
Follow these steps to prune tulip foliage:
- Wait until the foliage has turned completely yellow or brown.
- Gently grasp the yellowed foliage near the base of the plant.
- Using pruning shears or scissors, cut the yellowed foliage back to ground level.
- Remove the pruned foliage from the garden and dispose of it properly.
By properly deadheading and pruning your tulips, you can help ensure their health and longevity. Remember to always use clean, sharp tools to avoid damaging the plants, and dispose of the cuttings properly to prevent the spread of diseases.
Winterizing Your Tulip Garden
As winter approaches, it’s important to take steps to protect your tulip garden and help ensure the health and longevity of your tulip bulbs. Here are some essential tips for winterizing your tulip garden:
Mulch and Insulate
Apply a layer of mulch, such as straw or wood chips, around your tulip bulbs once the ground has frozen. This layer of insulation will help protect the bulbs from extreme temperature fluctuations and prevent them from heaving out of the ground during freeze-thaw cycles.
Remove Foliage
After the first frost has blackened the foliage, carefully remove the leaves from your tulip plants. This will help prevent the spread of diseases and discourage pests from overwintering in your garden.
Watering
In most cases, there is no need to water your tulip garden during the winter months. However, if your area experiences a particularly dry winter, you may need to provide some supplemental watering to prevent the bulbs from drying out.
Protect from Pests
Use protective measures to deter pests, such as rodents, from feasting on your tulip bulbs. You can surround the bulbs with wire mesh or place them in protective bulb cages to prevent damage. Additionally, you may consider using natural repellents, such as garlic or cayenne pepper, to deter pests from your garden.
Division and Transplanting
If you’re planning to divide or transplant your tulip bulbs, winter is the ideal time to do so. Wait until the foliage has withered and died back completely before digging up the bulbs. Store them in a cool, dry location until you’re ready to replant them in the spring.
Monitor for Diseases
During the winter months, keep an eye out for any signs of diseases, such as mold or rot, on your tulip bulbs. If you notice any issues, it’s important to take action to prevent the spread of disease. Remove and discard any affected bulbs and treat the remaining bulbs with a fungicide if necessary.
Spring Care

In early spring, as the ground begins to thaw, remove the mulch from your tulip garden. This will allow the soil to warm up more quickly and encourage the bulbs to emerge. Continue to monitor for pests and diseases and provide regular watering as needed to help your tulips thrive.
By following these winterizing tips, you can help protect your tulip garden during the colder months and ensure a beautiful display of blooms come spring.
Questions and Answers:
When is the best time to plant tulips?
The best time to plant tulips is in the fall, usually around October or November. This allows the bulbs to establish a root system before the cold winter months.
How deep should I plant tulip bulbs?
Tulip bulbs should be planted approximately 6 to 8 inches deep. This will ensure that they are protected from frost and have enough room to grow.
Can I plant tulips in pots or containers?
Yes, you can plant tulips in pots or containers. Make sure the containers have good drainage and use a well-draining soil mix. It’s also important to place the pots in a location that receives at least 6 hours of sunlight per day.
How often should I water tulips?
Tulips need moderate watering, especially during their active growth period. Water them thoroughly once a week, or whenever the top inch of soil feels dry. Be careful not to overwater, as this can cause the bulbs to rot.
Do tulips need fertilizer?
Tulips benefit from a balanced fertilizer applied in early spring, just as new growth begins. Use a slow-release granular fertilizer or a liquid fertilizer diluted according to the package instructions.
What should I do after tulips have finished blooming?
After tulips have finished blooming, it’s important to let the foliage die back naturally. This allows the bulbs to store energy for the following year’s growth. Once the foliage has turned brown and dried up, you can remove it.
Can I leave tulip bulbs in the ground over winter?
Tulip bulbs are generally not winter hardy and may rot or freeze if left in the ground over winter. It’s recommended to lift the bulbs after the foliage has died back and store them in a cool, dry place until the next planting season.


