- Tulips: A Complete Guide
- Introduction
- Types of Tulips
- Planting Tulips
- Caring for Tulips
- Digging Up Tulips
- Conclusion
- Growing Beautiful Tulips in Your Garden
- Choosing the Right Tulip Varieties
- Planting Tulips
- Aftercare and Maintenance
- Enjoying your Tulips
- Tulip Varieties: Choosing the Right Bulbs
- Consider the Height
- Think About Color
- Timing and Bloom Period
- Consider the Growing Conditions
- Disease Resistance
- Consider the Purpose
- Planting Tulips: Best Practices for Success
- Choose the Right Time to Plant
- Prepare the Soil
- Select a Sunny Spot
- Plant at the Right Depth
- Water and Mulch
- Protect from Pests
- Fertilize for Next Year’s Blooms
- Caring for Your Tulips: Watering and Fertilizing
- Watering
- Fertilizing
- Protecting Tulips from Pests and Diseases
- 1. Aphids
- 2. Slugs and Snails
- 3. Botrytis Blight
- 4. Tulip Fire
- When to Dig Up Tulip Bulbs: Harvesting and Storing
- Timing
- Harvesting
- Storing
- Troubleshooting Common Tulip Problems
- Pests
- Diseases
- Yellowing Leaves
- Stunted Growth
- Deformed Flowers
- Preventive Measures
- Conclusion
- Creating Stunning Tulip Displays: Design Ideas
- Color Combinations
- Layered Planting
- Patterns and Shapes
- Container Planting
- Companion Planting
- Questions and Answers:
- When is the best time to plant tulips?
- How deep should I plant tulip bulbs?
- Can I plant tulips in containers?
- How long do tulips take to bloom?
- Should I fertilize tulips?
- When should I dig up tulip bulbs?
- Can tulips be grown in warm climates?
- Videos: How to Store Tulips to Plant Again – Tulip storage
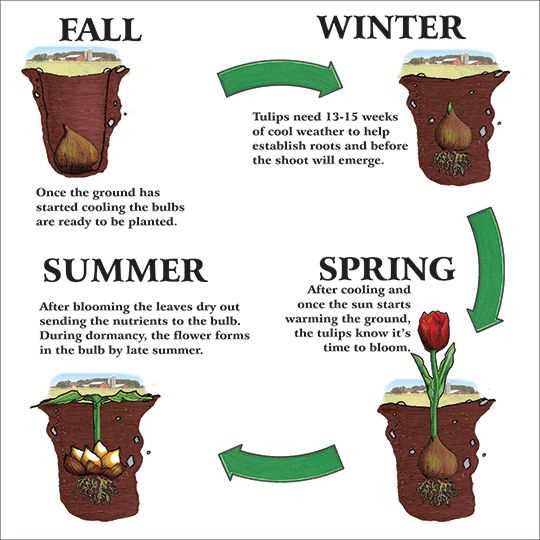
Tulips are one of the most popular flowers to grow in the garden. Known for their vibrant colors and elegant shape, tulips add beauty and elegance to any landscape. Whether you are an experienced gardener or just starting out, tulips are a great choice for any garden.
When it comes to planting tulips, timing is essential. Tulip bulbs are typically planted in the fall, before the ground freezes. This allows the bulbs to establish roots before winter and ensures they are ready to bloom in the spring. It is important to choose a location that receives full sun, as tulips require at least six hours of direct sunlight each day to thrive.
When planting tulip bulbs, it is recommended to dig a hole that is about two to three times the height of the bulb. The hole should be deep enough to cover the bulb completely with soil, but not so deep that it is difficult for the bulb to sprout. Once the hole is prepared, place the bulb in the hole with the pointed end facing up, and cover it with soil. Water the area well after planting to ensure the soil is moist.
In the spring, tulips will begin to emerge from the ground and bloom into beautiful flowers. To enjoy tulips year after year, it is important to dig up the bulbs after they have finished blooming. This should be done when the foliage has turned yellow and died back. Gently dig up the bulbs, taking care not to damage them, and store them in a cool, dry place until you are ready to replant them in the fall.
Growing tulips in the garden can be a rewarding experience. With proper planting and care, these stunning flowers will add color and beauty to your outdoor space. Whether you are a seasoned gardener or a beginner, tulips are a versatile and easy-to-grow flower that will bring joy year after year.
Tulips: A Complete Guide
Introduction
If you want to add a burst of color and beauty to your garden, look no further than tulips. These vibrant flowers are a popular choice for gardeners around the world.
Types of Tulips


Tulips come in a wide variety of colors and shapes, allowing you to create the perfect garden display. Some popular types of tulips include:
- Single early tulips
- Double tulips
- Triumph tulips
- Parrot tulips
- Rembrandt tulips
Planting Tulips
Tulips are typically planted in the fall, before the first frost. The bulbs should be planted about 6-8 inches deep in well-draining soil. Make sure to space the bulbs about 4-6 inches apart to allow for proper growth.
Caring for Tulips
Once planted, tulips require minimal care. However, there are a few things you can do to ensure they thrive:
- Water regularly, especially during dry periods
- Apply a slow-release fertilizer in the spring
- Remove faded flowers to encourage more blooms
- Protect bulbs from rodents and pests
Digging Up Tulips
Tulip bulbs can be dug up after the foliage has turned yellow and died back. Gently lift the bulbs using a garden fork, being careful not to damage them. Once dug up, clean the bulbs and store them in a cool, dry place until the next planting season.
Conclusion
Tulips are a beautiful addition to any garden. With a wide range of colors and shapes to choose from, you can create a stunning display that will delight you year after year.
Growing Beautiful Tulips in Your Garden
Choosing the Right Tulip Varieties
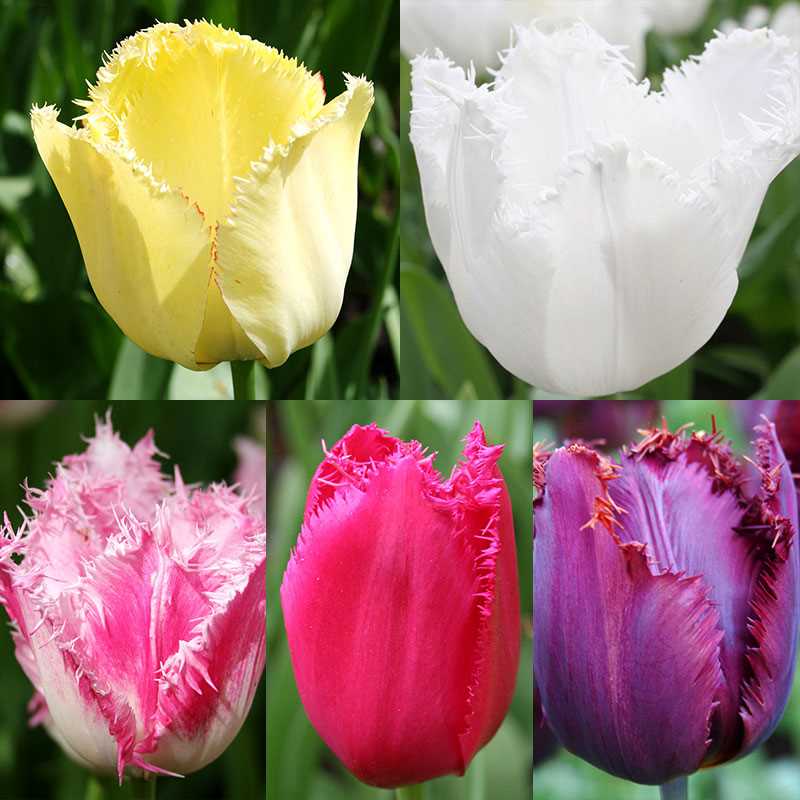

Tulips come in a wide range of colors and varieties, so it’s important to choose the right ones for your garden. Some popular varieties include:
- Single Early Tulips: These tulips bloom early in the season and have a single layer of petals. They come in a variety of colors.
- Double Late Tulips: These tulips bloom later in the season and have double or triple layers of petals. They are known for their full and ruffled appearance.
- Parrot Tulips: These tulips have fringed and ruffled petals, often with contrasting colors. They add a unique and exotic touch to any garden.
Planting Tulips
Tulips should be planted in the fall, about 6-8 weeks before the ground freezes. Follow these steps for successful planting:
- Choose a well-draining location with full sunlight. Tulips prefer soil that is rich and slightly acidic.
- Dig a hole that is 6-8 inches deep, depending on the size of the tulip bulb. The hole should be wide enough to accommodate the bulb and allow for good air circulation.
- Place the bulb in the hole, with the pointed end facing upward. Backfill the hole with soil, firming it gently around the bulb.
- Water the newly planted tulip bulbs thoroughly and keep the soil evenly moist throughout the fall and winter.
Aftercare and Maintenance
Proper care and maintenance will help your tulips thrive and produce beautiful blooms year after year:
- Watering: Tulips need regular watering, especially during dry periods. Keep the soil evenly moist, but not waterlogged.
- Deadheading: Remove faded flowers to prevent the plant from diverting energy to seed production. This will encourage the tulip to produce more blooms the following year.
- Dividing: Over time, tulip bulbs can become crowded and produce smaller blooms. Every 3-4 years, dig up the bulbs after the foliage has died back and replant them with more space between each bulb.
- Protecting: Tulips may be susceptible to pests such as squirrels, rabbits, and deer. Use fencing or repellents to protect your tulips from being eaten.
Enjoying your Tulips
Once your tulips bloom, you can enjoy their beauty and fragrance in your garden. Cut them for floral arrangements, but leave the foliage intact until it turns yellow and withers. This allows the bulb to store energy for next year’s blooms. With proper care, your tulips will continue to bring color and joy to your garden for years to come.
Tulip Varieties: Choosing the Right Bulbs
Tulips are one of the most popular and beloved spring flowers, known for their vibrant colors and elegant shapes. With so many different varieties to choose from, it can be difficult to decide which ones are best for your garden. Here are some tips on how to choose the right tulip bulbs for your needs.
Consider the Height
Tulips come in a range of heights, from short and petite to tall and stately. Consider the overall look you want to achieve in your garden and choose tulip varieties that will complement your other plants. Taller varieties are great for adding height and drama, while shorter varieties work well as borders or in containers.
Think About Color
Tulips are available in a wide range of colors, from classic red and yellow to more unique hues like black, purple, and white. Consider the color scheme of your garden and choose tulips that will enhance or contrast with the existing plants. You can also create stunning combinations by planting tulips of different colors together.
Timing and Bloom Period
Tulips have different bloom periods, ranging from early to late spring. If you want a continuous display of tulips throughout the season, choose varieties with different bloom periods. This way, you can enjoy the beauty of tulips for a longer period of time.
Consider the Growing Conditions
Tulips have different requirements for sunlight and soil conditions. Some varieties prefer full sun, while others can tolerate partial shade. Make sure to choose tulips that will thrive in the specific conditions of your garden. Additionally, consider the type of soil you have and choose tulips that are suited to it.
Disease Resistance
Some tulip varieties are more resistant to diseases such as tulip fire and tulip breaking virus. If you want to reduce the risk of your tulips getting infected, choose varieties that are known for their disease resistance.
Consider the Purpose


Think about how you plan to use your tulips. Are they for cut flowers to brighten up your home? Or are they primarily for garden display? Different tulip varieties have different characteristics that make them suitable for specific purposes. Some varieties have long stems and large flowers that are perfect for cutting, while others are better suited for garden beds.
By considering these factors, you can choose the right tulip bulbs that will bring beauty and joy to your garden. Whether you prefer vibrant and bold colors or delicate pastels, there is a tulip variety out there that is perfect for you.
Planting Tulips: Best Practices for Success
Tulips are popular spring-blooming flowers that add color and beauty to any garden. To ensure successful growth and beautiful blooms, it’s important to follow these best practices when planting tulips:
Choose the Right Time to Plant
Tulip bulbs should be planted in the fall, before the first frost. This allows the bulbs to establish roots before the cold winter sets in. Aim to plant tulips about 6 to 8 weeks before the ground freezes.
Prepare the Soil
Tulips thrive in well-drained soil that is rich in organic matter. Before planting, amend the soil with compost or well-rotted manure to improve its texture and fertility. Tulips prefer a soil pH between 6 and 7.
Select a Sunny Spot
Tulips require at least 6 hours of direct sunlight each day to bloom to their full potential. Choose a spot in your garden that receives ample sunlight, preferably in the morning or early afternoon.
Plant at the Right Depth
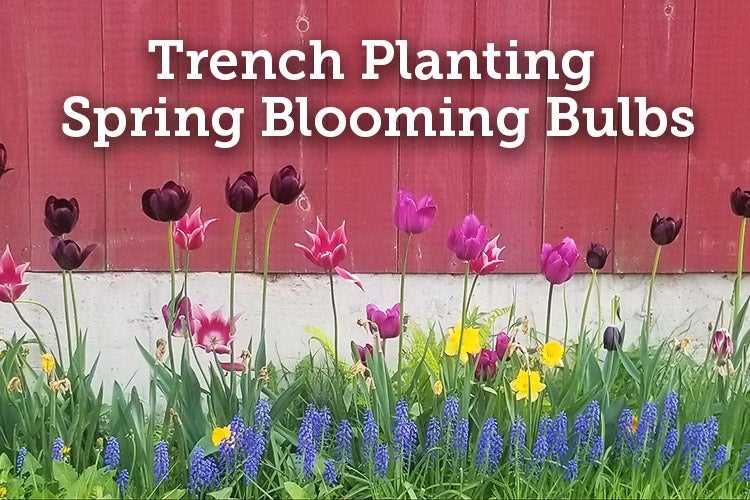

When planting tulip bulbs, dig a hole that is about 3 times as deep as the height of the bulb. For example, if the bulb is 2 inches tall, dig a hole that is 6 inches deep. Place the bulb in the hole with the pointed end facing up, and cover it with soil.
Water and Mulch
After planting, water the bulbs thoroughly to help settle the soil and promote root growth. Apply a layer of mulch, such as straw or shredded leaves, to help conserve moisture and regulate soil temperature.
Protect from Pests
Tulip bulbs are sometimes enjoyed by rodents, such as squirrels and mice. To prevent damage, consider covering the planted area with a wire mesh or using repellents to deter pests.
Fertilize for Next Year’s Blooms
After the tulips have finished blooming, it’s important to fertilize the plants to ensure they have enough nutrients for next year’s blooms. Apply a balanced fertilizer according to the package instructions.
By following these best practices, you can enjoy a beautiful display of tulips in your garden year after year. Remember to plan ahead, prepare the soil, and provide the right conditions for your tulips to thrive and bloom.
Caring for Your Tulips: Watering and Fertilizing
Watering and fertilizing are important aspects of caring for your tulips in order to ensure they grow healthy and vibrant. Proper water and nutrient management can help your tulips thrive and produce beautiful flowers year after year.
Watering
Tulips require regular watering, especially during times of dry weather. The key is to keep the soil consistently moist, but not waterlogged. Overwatering can lead to root rot and other problems, so it’s important to strike the right balance.
Here are some tips for watering your tulips:
- Water deeply once a week, providing enough water to penetrate the soil to a depth of at least 6 inches.
- Use a soaker hose or drip irrigation system to water directly at the root zone, avoiding wetting the leaves and flowers.
- Avoid frequent light watering as it can lead to shallow root development.
- Monitor the soil moisture level regularly and adjust watering frequency accordingly.
Fertilizing
Fertilizing tulips is essential to provide them with the necessary nutrients for growth and flowering. The right balance of fertilizers can promote strong stems, bright flowers, and overall plant health.
Consider the following guidelines for fertilizing your tulips:
- Apply a balanced fertilizer, such as a 10-10-10 or 14-14-14 formula, in early spring before the tulips start to bloom.
- Follow the manufacturer’s instructions for application rates based on the size of your garden and the specific fertilizer used.
- Avoid applying too much fertilizer, as it can burn the roots and damage the plants.
- Water the tulips well after applying fertilizer to ensure proper nutrient uptake.
- Avoid fertilizing tulips after they have finished blooming, as this can lead to excessive foliage growth at the expense of bulb development.
By following these watering and fertilizing guidelines, you can provide your tulips with the care they need to thrive and enhance your garden with their colorful blooms. Remember to adjust your watering and fertilizing practices based on the specific needs of your tulip varieties and the growing conditions in your garden.
Protecting Tulips from Pests and Diseases
Tulips are beautiful and vibrant flowers that can be susceptible to various pests and diseases. However, with proper care and attention, you can protect your tulips and ensure their healthy growth. Here are some tips:
1. Aphids
Aphids are small insects that can infest tulips and leave them weakened and distorted. To combat aphids:
- Spray a mild solution of soapy water on the affected tulips to deter aphids.
- Attract natural predators such as ladybugs and lacewings that feed on aphids.
2. Slugs and Snails
Slugs and snails are common pests that can damage tulip leaves and blooms. To prevent slug and snail infestations:
- Remove debris and leaf litter from the garden to eliminate hiding places for slugs and snails.
- Place copper tape around tulip beds to create a barrier that slugs and snails won’t cross.
3. Botrytis Blight
Botrytis blight, caused by the fungus Botrytis tulipae, can cause brown spots and decay on tulip petals and leaves. To prevent botrytis blight:
- Avoid overcrowding tulips and provide adequate air circulation.
- Remove and destroy any infected tulip debris to prevent the spread of the fungus.
4. Tulip Fire
Tulip fire, caused by the fungus Botrytis tulipae, can cause distorted and discolored growth, as well as browning and wilting of tulip foliage. To prevent tulip fire:
- Avoid overhead watering and water tulips at the base to prevent moisture on the foliage.
- Plant tulips in well-draining soil to reduce the risk of fungal infections.
By following these tips and regularly inspecting your tulips for signs of pests and diseases, you can help ensure their health and longevity in your garden.
When to Dig Up Tulip Bulbs: Harvesting and Storing
When the tulip blooms begin to fade and the petals fall off, it’s time to start thinking about digging up the tulip bulbs. Digging up tulip bulbs is necessary if you want to store and reuse them for the following year’s growth.
Timing
The best time to dig up tulip bulbs is when the foliage starts to turn yellow or brown. This typically occurs 4-6 weeks after the flowers have bloomed. Digging up the bulbs too early may result in underdeveloped bulbs, while leaving them in the ground for too long may cause the bulbs to rot.
It’s important to note that tulip bulbs should be dug up after the leaves have completely withered and dried out. This allows the bulbs to store the energy necessary for next year’s growth.
Harvesting
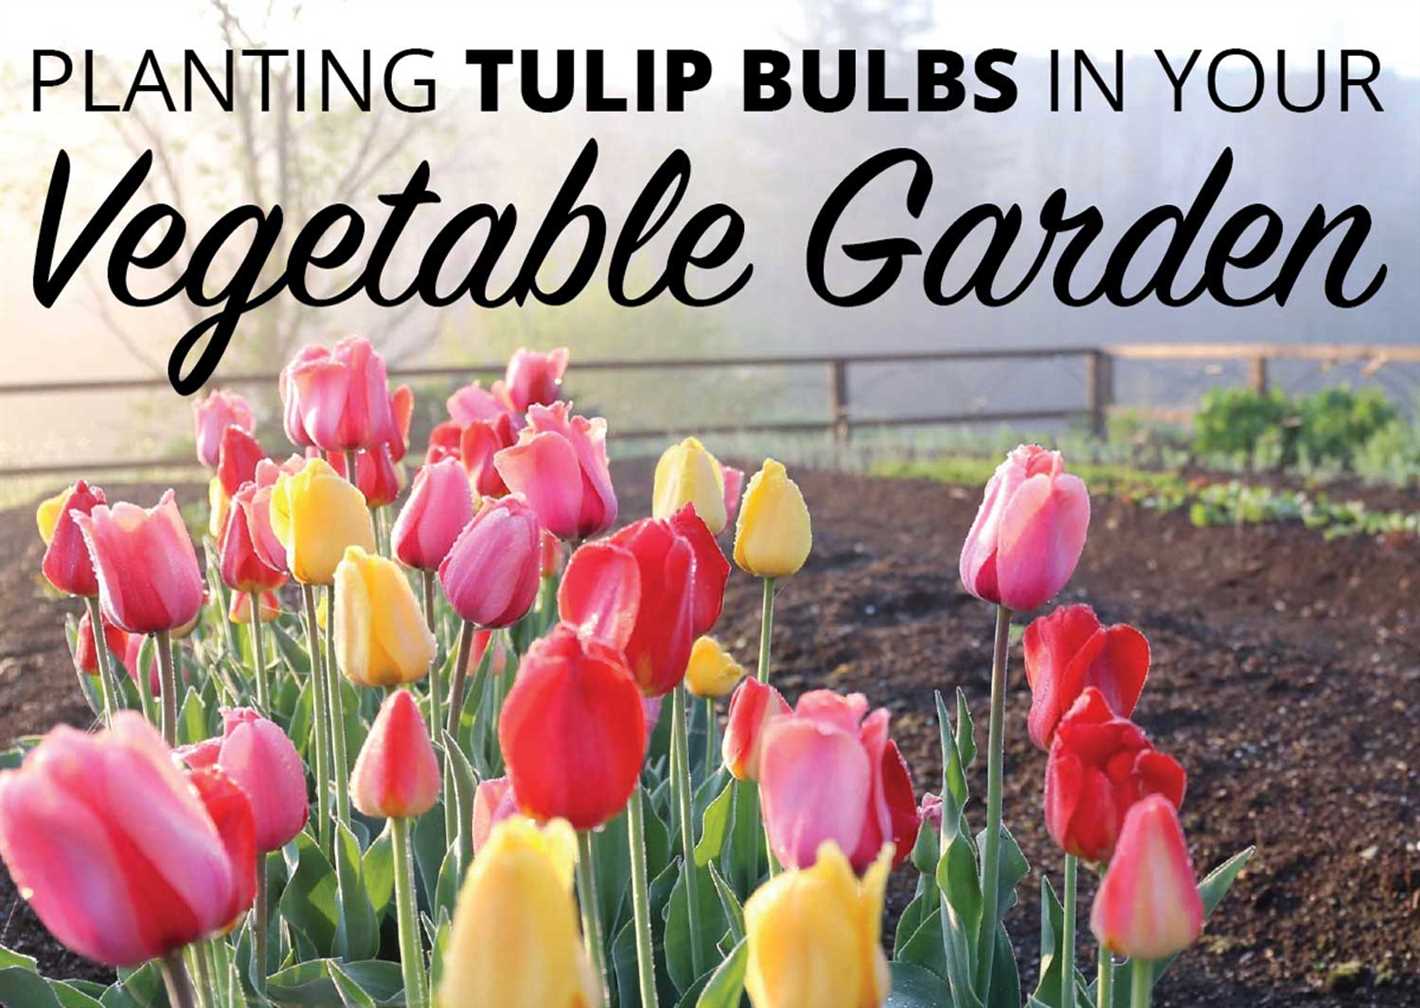

To dig up the tulip bulbs, start by using a garden fork or spade to loosen the soil around the bulbs. Be careful not to damage or sever the bulbs while digging. Once the soil is loosened, gently lift the bulbs out of the ground.
Shake off any excess soil and remove any dead or decaying foliage attached to the bulbs. It’s also recommended to trim the roots to about an inch long. Avoid washing the bulbs as this can remove the protective outer layer.
Storing


After harvesting, the tulip bulbs need to be stored properly to ensure their survival and future growth. Here are the steps to follow:
- Air dry the bulbs: Lay the bulbs in a cool, dry, and well-ventilated area for about a week. This allows them to dry completely and helps prevent mold or rot.
- Clean and inspect the bulbs: Once the bulbs are dry, gently brush off any remaining soil. Inspect each bulb for any signs of damage or disease. Discard any bulbs that appear unhealthy.
- Choose a suitable storage container: Select a breathable container such as a mesh bag, paper bag, or wooden crate. Avoid using plastic bags or containers as they can trap moisture and promote rot.
- Fill the container with a suitable medium: Place a layer of dry peat moss, sawdust, or vermiculite at the bottom of the container. Place the bulbs on top, making sure they are not touching each other.
- Store in a cool, dark place: Keep the container of bulbs in a cool and dark place with a temperature of around 45-50°F (7-10°C). Avoid storing the bulbs near fruits or vegetables as they release ethylene gas, which can damage the bulbs.
By following these steps, you can successfully dig up and store your tulip bulbs, ensuring their health and vitality for the following growing season.
Troubleshooting Common Tulip Problems
Pests
Tulips can be susceptible to various pests that can damage the bulbs and leaves. Some common pests include:
- Aphids: These small insects can suck the sap from the leaves, causing them to curl and turn yellow.
- Slugs and snails: These slimy pests can eat through tulip leaves and flowers.
- Wireworms: These pests are the larvae of click beetles and can eat through tulip bulbs.
Diseases
Tulips can also be prone to various diseases that can affect their overall health and appearance. Some common diseases include:
- Botrytis blight: This fungal disease causes brown spots on the leaves and flowers.
- Tulip fire: This bacterial disease leads to distorted, discolored leaves and flowers.
- Gray mold: This fungal disease causes a fuzzy gray mold to develop on the leaves and flowers.
Yellowing Leaves
If your tulip leaves are turning yellow, it could be due to a variety of reasons:
- Overwatering can cause the bulbs to rot and the leaves to turn yellow.
- Lack of nutrients in the soil can result in yellowing leaves.
- Fungal diseases such as Botrytis blight can cause the leaves to yellow and die.
Stunted Growth
If your tulips are not growing as expected, there are a few potential causes:
- Planting the bulbs too shallow can result in stunted growth.
- Not enough sunlight can cause the tulips to grow weak and small.
- Insufficient nutrients in the soil can also lead to stunted growth.
Deformed Flowers
If your tulip flowers are coming out deformed, it may be due to:
- Viruses can cause the flowers to be distorted and discolored.
- Poor planting techniques, such as not planting the bulbs deep enough, can result in deformed flowers.
- Extreme temperature fluctuations can also cause tulip flowers to become deformed.
Preventive Measures
To prevent these common tulip problems, you can take the following measures:
- Inspect your tulips regularly for signs of pests or diseases.
- Remove any infected or damaged plants to prevent the spread of diseases.
- Apply organic or chemical pest control methods if necessary.
- Ensure your tulips are planted in well-draining soil to avoid overwatering.
- Provide your tulips with adequate sunlight and nutrients.
- Plant your tulip bulbs at the appropriate depth and time.
- Avoid extreme temperature fluctuations by planting in a sheltered location if possible.
Conclusion
Tulips can face various problems, including pests, diseases, yellowing leaves, stunted growth, and deformed flowers. By identifying and addressing these issues early on, you can help ensure healthy and beautiful tulips in your garden.
Creating Stunning Tulip Displays: Design Ideas
Planting tulips in your garden not only adds vibrant colors but also creates stunning displays that can make your garden the envy of the neighborhood. Here are some design ideas to help you create beautiful tulip displays:
Color Combinations
One way to create a visually appealing tulip display is by combining different colors. Consider planting tulips in complementary colors such as red and yellow, or contrasting colors like purple and white. The contrasting colors will create a striking effect that catches the eye.
Layered Planting
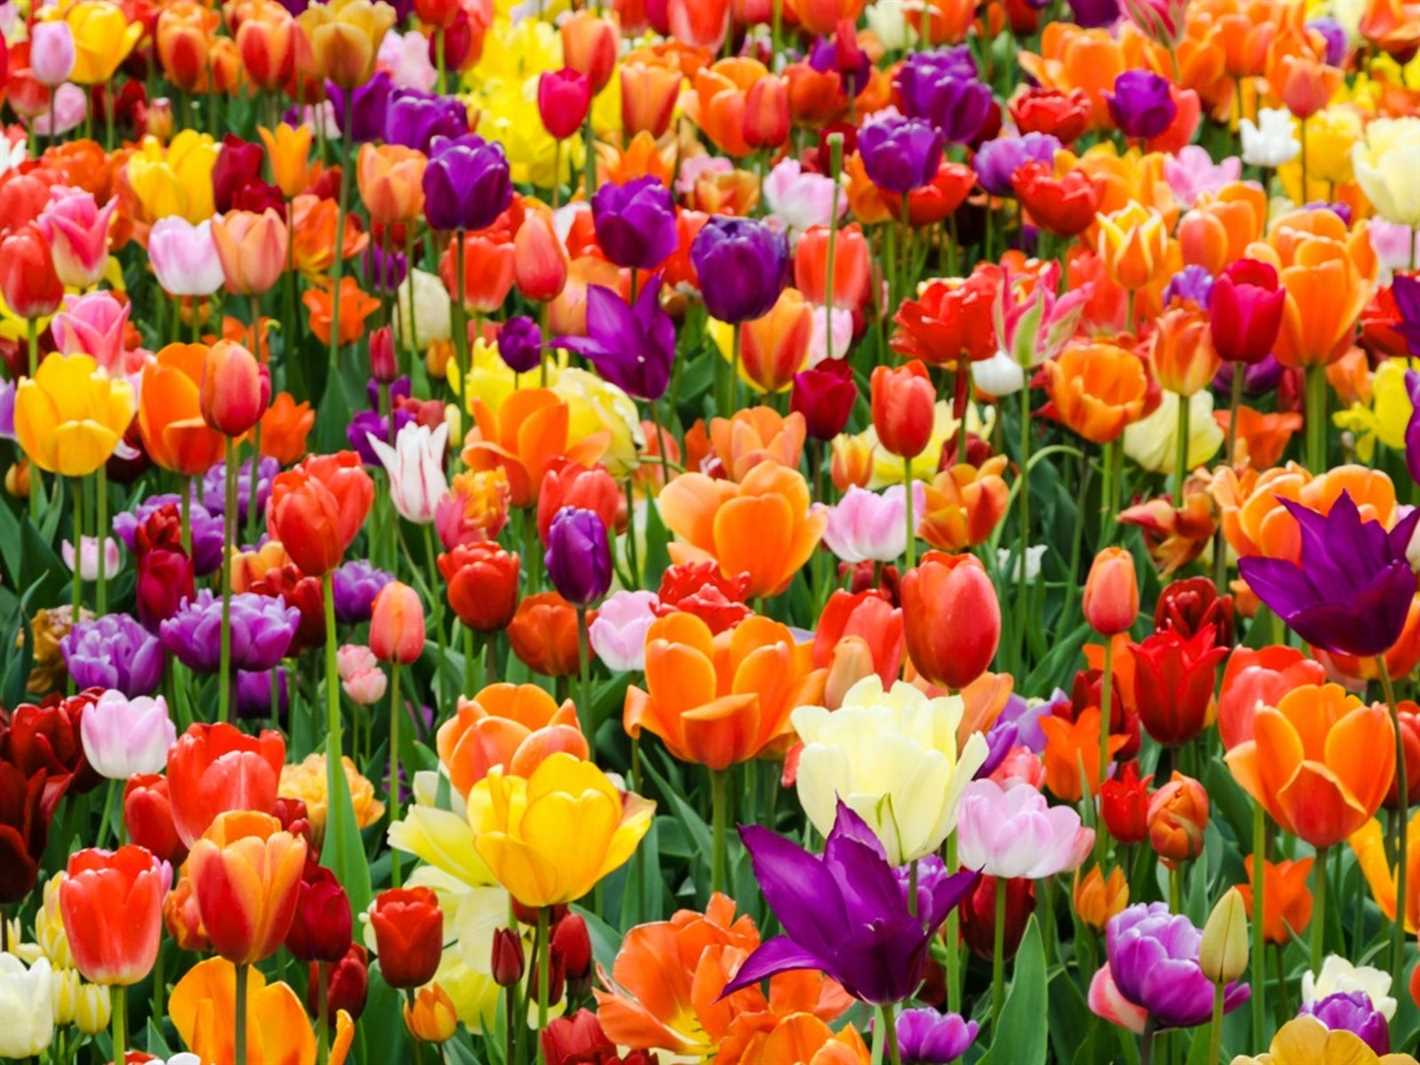

To create a layered effect, plant tulips of different heights. Start by planting the tallest tulip variety at the back, followed by medium-height tulips in the middle, and finally, the shortest variety in the front. This layering technique adds dimension and depth to your tulip display.
Patterns and Shapes
Another way to make your tulip display visually interesting is by creating patterns and shapes. Plant a row of tulips in a curve or wave-like pattern, or arrange them in a circular shape. You can also plant tulips in clusters of the same color to create focal points or use them to outline paths or borders.
Container Planting
If you don’t have a garden or want to create tulip displays on your patio or balcony, consider using containers. Choose containers of different sizes and shapes, and plant tulips in them using various color combinations and layering techniques. This way, you can easily move the containers around and create stunning displays wherever you want.
Companion Planting
To enhance the beauty of your tulip displays, consider companion planting. Plant tulips alongside perennial flowers or other spring-blooming bulbs, such as daffodils or hyacinths. The combination of different flowers will add texture, variety, and a longer blooming period to your garden.
By using these design ideas, you can create stunning tulip displays that will showcase the beauty of these vibrant flowers and elevate the overall aesthetic of your garden or outdoor space.
Questions and Answers:
When is the best time to plant tulips?
The best time to plant tulips is in the fall, typically in late September or early October. This allows the bulbs to establish roots before winter and ensures they have a better chance of blooming in the spring.
How deep should I plant tulip bulbs?
Tulip bulbs should be planted about 6 to 8 inches deep in the soil. This allows them to be protected from frost during the winter months and provides enough depth for the roots to develop properly.
Can I plant tulips in containers?
Yes, tulips can be planted in containers. Use a well-draining potting soil and make sure the container has drainage holes. Plant the bulbs at the same depth as you would in the ground, and place the container in a location that receives at least 6 hours of sunlight per day.
How long do tulips take to bloom?
Tulips typically take about 1-3 weeks to bloom after planting, depending on the variety. Some early blooming varieties may bloom even earlier, while late blooming varieties can take longer.
Should I fertilize tulips?
Yes, it is recommended to fertilize tulips when planting them. Use a balanced fertilizer that is specifically formulated for bulbs, following the instructions on the package. Fertilize again in the spring when the leaves start to emerge.
When should I dig up tulip bulbs?
Tulip bulbs can be dug up after the foliage has turned yellow and died back. This usually occurs in late spring or early summer. Allow the bulbs to dry and cure for a few days before storing them in a cool, dry place until it’s time to plant them again in the fall.
Can tulips be grown in warm climates?
Tulips are typically grown in cold climates with a period of winter dormancy. While it is possible to grow tulips in warm climates, it can be more challenging. You may need to refrigerate the bulbs for a period of time before planting and provide extra care to ensure they receive enough cold exposure.


