- What are violets?
- Why should you multiply your violet plants?
- Two methods for multiplying violets
- 1. Leaf Propagation
- 2. Division
- Method 1: Leaf Cutting
- Step 1: Choose a Healthy Leaf
- Step 2: Cut the Leaf
- Step 3: Prepare the Potting Mix
- Step 4: Plant the Leaf Cutting
- Step 5: Provide Proper Care
- Step 6: Wait for Root Development
- Step 7: Pot up the New Plant
- Step 1: Choosing the right leaf
- Step 2: Preparing the cutting
- Step 3: Rooting the cutting
- Materials needed:
- Instructions:
- Step 4: Transplanting the new plant
- Materials you’ll need:
- Instructions:
- Method 2: Division
- Step 1: Preparing the parent plant
- Q&A:
- Can violets be multiplied from just one leaf?
- What are the steps for multiplying violets with one leaf?
- What are the ideal conditions for multiplying violets with one leaf?
- How long does it take for violets to multiply from one leaf?
- Can all types of violets be multiplied from one leaf?
- Video: African Violets – LEAF PROPAGATION – When and How I Separate Babies from Mother Leaf
If you are a fan of violets and want to expand your collection without spending a fortune, then you will be delighted to learn that violets can easily be multiplied with just one leaf. This simple and cost-effective technique will allow you to grow more plants and enjoy the beauty of violets in your garden or home.
Propagation by leaf cutting is a popular method among violet enthusiasts and experienced growers. It is a reliable way to produce new plants that are genetically identical to the parent plant. This means that you can preserve the characteristics you love, such as the color of the flowers and the shape of the leaves.
To begin the process, choose a healthy and mature leaf from your existing violet plant. Make a clean cut near the base of the leaf, ensuring that you have a stem of at least an inch in length. Remove any lower leaves from the stem, leaving just a few at the top to photosynthesize and provide energy for the cutting.
Note: It is important to use a sharp, sterile knife or shears when taking leaf cuttings to prevent the spread of disease. Additionally, make sure to disinfect your tools before and after use.
Next, prepare a potting mixture that is well-draining and enriched with nutrients. A mixture of perlite, vermiculite, and peat moss is often recommended for violets. Plant the cutting in the potting mixture, burying the stem about an inch deep. Gently press the soil around the stem to provide support.
What are violets?
Violets are small flowering plants that belong to the genus Viola. They are native to the temperate regions of the northern hemisphere, including both North America and Europe. These delicate flowers are known for their vibrant colors, ranging from shades of blue and purple to yellow and white.
Violets are perennial plants, meaning they can live for more than two years. They have heart-shaped leaves with a smooth or slightly wavy edge, and their flowers have five petals. Some species of violets have a sweet scent, while others are scentless.
Violets are popular among gardeners for their beauty and adaptability. They can be grown in flower beds, containers, or hanging baskets. Violets thrive in both full sun and partial shade, making them versatile for different garden settings.
One interesting fact about violets is that they have a long history of medicinal use. The ancient Greeks and Romans believed that violets could help with various health issues, including headaches and respiratory problems. Today, violets are still used in alternative medicine for their potential anti-inflammatory and soothing properties.
Overall, violets are charming plants that add a touch of color and beauty to any garden. Whether you’re an experienced gardener or a beginner, growing violets can be a rewarding and enjoyable experience.
Why should you multiply your violet plants?
Violets are beautiful, delicate plants that can bring color and life to any indoor or outdoor space. Multiplying your violet plants can have several benefits, including:
- Increasing your plant collection: Multiplying your violet plants allows you to expand your collection and have more variety in your garden or home. With each new plant, you can enjoy different colors, patterns, and sizes of violets.
- Sharing with others: Multiplying your violet plants also gives you the opportunity to share the beauty of violets with your friends and family. You can give them as gifts or trade them for other plants, fostering a sense of community and connection among fellow gardeners.
- Saving money: Buying new violet plants from a nursery or garden center can be expensive. By multiplying your plants, you can save money and have a continuous supply of violets without breaking the bank.
- Preserving rare or unique varieties: If you have a rare or unique variety of violet that you want to preserve, multiplying your plants can help ensure its survival. By creating new plants from its leaves, you can propagate and maintain these special violets for years to come.
Overall, multiplying your violet plants is a rewarding and cost-effective way to expand your collection, share with others, and preserve rare varieties. Whether you’re a seasoned gardener or just starting out, learning how to propagate violets can bring you joy and satisfaction for years to come.
Two methods for multiplying violets
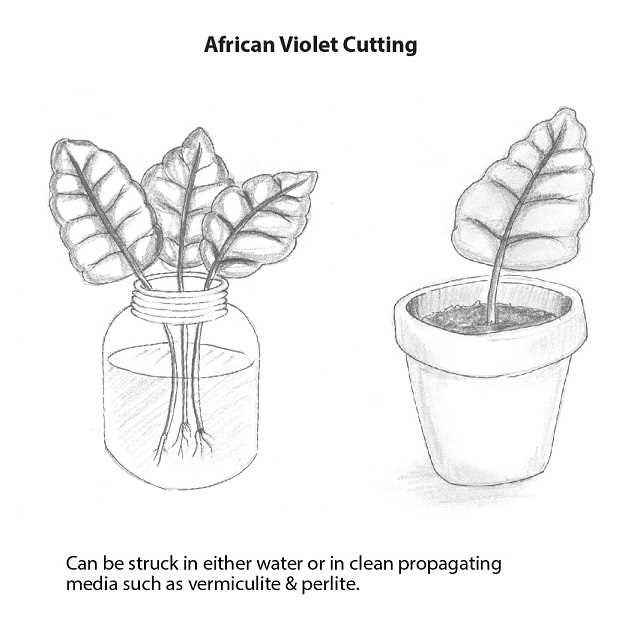
If you want to multiply your violets, there are two methods you can try: leaf propagation and division.
1. Leaf Propagation
Leaf propagation is a simple and effective way to multiply your violets. Here’s how you can do it:
- Select a healthy and mature violet leaf. Make sure it’s free from any damage or disease.
- Cut the leaf stem to about 2-3 inches in length.
- Prepare a small pot with fresh potting mix. Moisten the soil lightly.
- Make a small hole in the soil with your finger or a pencil.
- Insert the cut end of the leaf stem into the hole, ensuring that the bottom of the stem is in contact with the soil.
- Gently pat down the soil around the stem to secure it in place.
- Water the pot lightly to settle the soil. Avoid overwatering, as it can lead to root rot.
- Place the pot in a warm, bright location, but away from direct sunlight.
- Keep the soil lightly moist and mist the leaf occasionally to provide humidity.
- After a few weeks, you should start to see new plantlets emerging from the base of the leaf. Once these plantlets have grown several leaves, you can carefully separate them from the mother leaf and pot them individually.
2. Division
If your violet has grown into a large clump, division is another method you can use to multiply your plants. Follow these steps:
- Carefully lift the violet from its pot or garden bed.
- Shake off any excess soil and gently separate the clump into smaller sections. You can use your hands or a clean, sharp knife to divide the clump.
- Ensure that each section has a good root system and several leaves.
- Prepare individual pots or new planting locations with fresh potting mix or garden soil.
- Plant each section into its own pot or spacing them out in the garden bed.
- Water the newly divided plants and keep the soil moist until they establish roots.
- Place the pots or garden bed in a suitable location with enough light for violets to thrive.
- Continue to care for the plants as you would with any other violet, providing regular watering and occasional fertilizing.
By using leaf propagation or division, you can easily multiply your violets and enjoy a beautiful collection of these lovely flowers.
Method 1: Leaf Cutting
If you want to multiply your violets, one method you can try is leaf cutting. This simple propagation technique is a great way to create new plants from a single leaf.
Step 1: Choose a Healthy Leaf
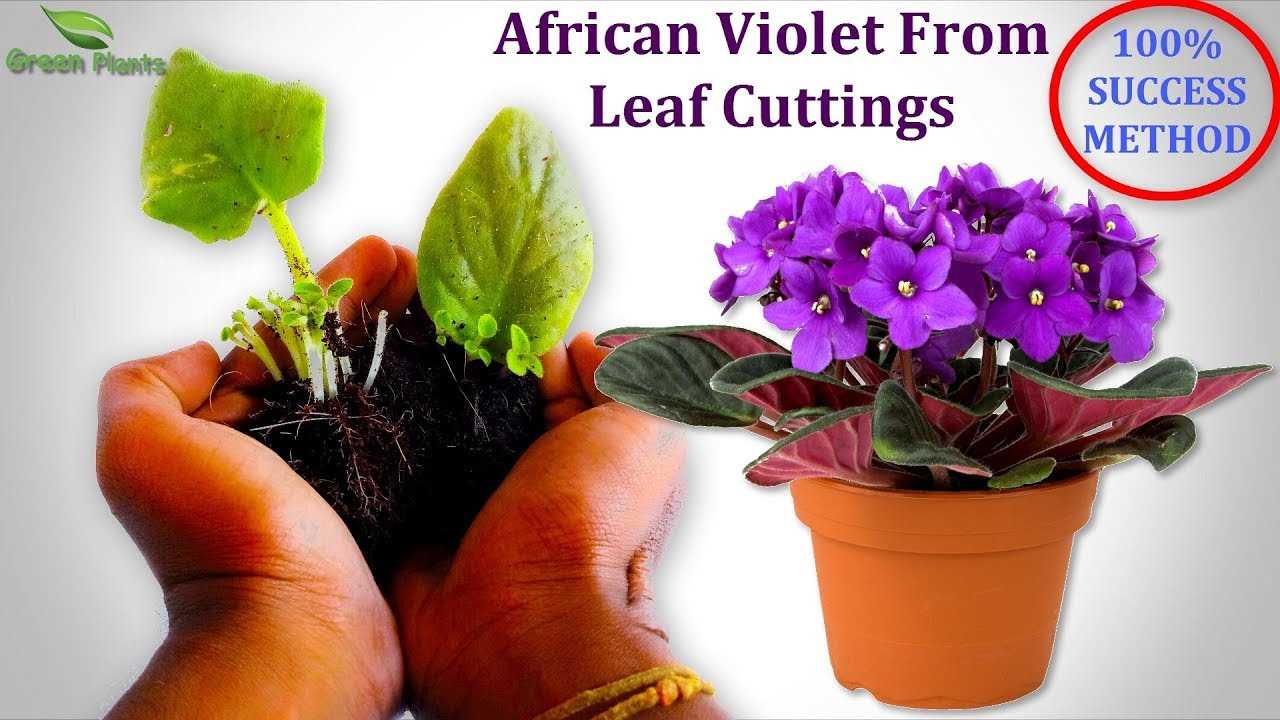
Start by selecting a healthy leaf from your existing violet plant. Look for a leaf that is mature and free from any signs of disease or damage. This will give you the best chance of successful propagation.
Step 2: Cut the Leaf

Using a sharp, clean pair of scissors or a knife, carefully cut the leaf stem. Make sure to cut just below a leaf node, as this is where the new roots will form.
Step 3: Prepare the Potting Mix
Prepare a well-draining potting mix for your new violet cuttings. A mixture of equal parts peat moss and perlite or vermiculite works well. Fill a small pot with the potting mix and moisten it slightly.
Step 4: Plant the Leaf Cutting
Gently insert the cut end of the leaf into the potting mix, positioning it so that the leaf node is just below the soil surface. Firmly press the soil around the base of the leaf to hold it in place.
Step 5: Provide Proper Care
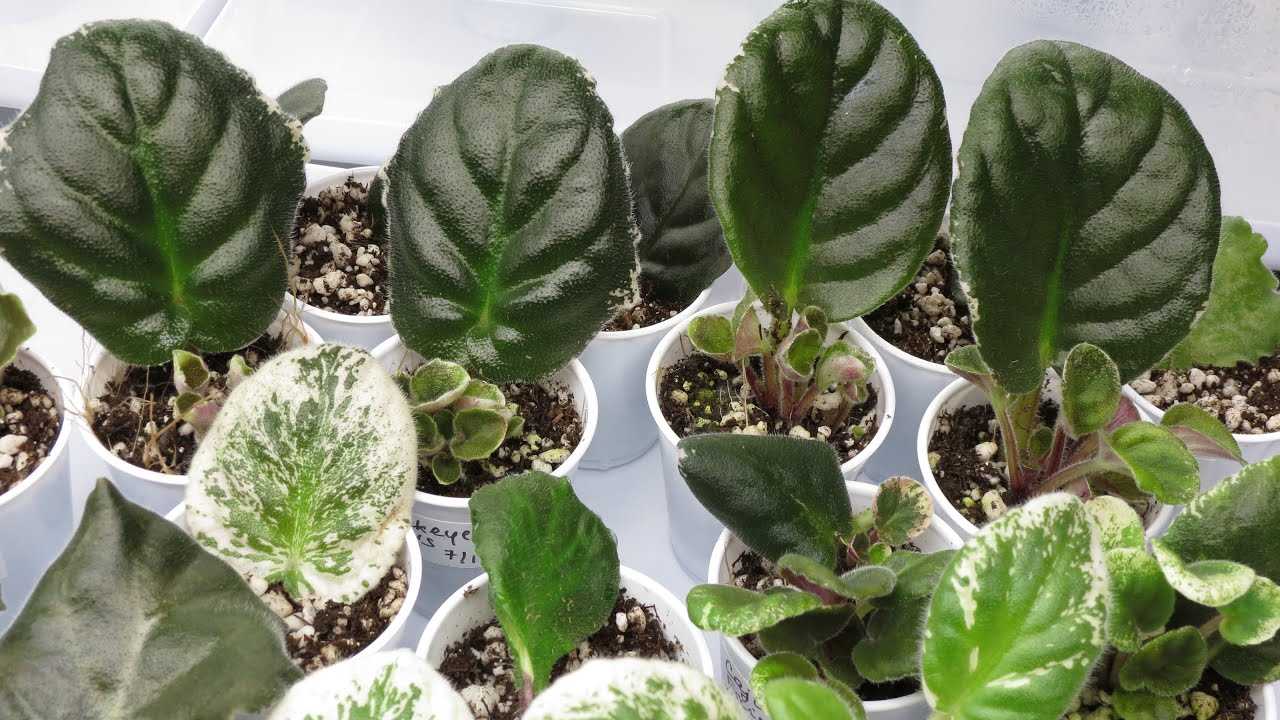
Place the pot in a bright, indirect light location. Avoid direct sunlight, as this can scorch the delicate leaf cutting. Keep the potting mix slightly moist, but not overly wet, as this can cause the cutting to rot. Mist the cutting regularly to maintain humidity.
Step 6: Wait for Root Development
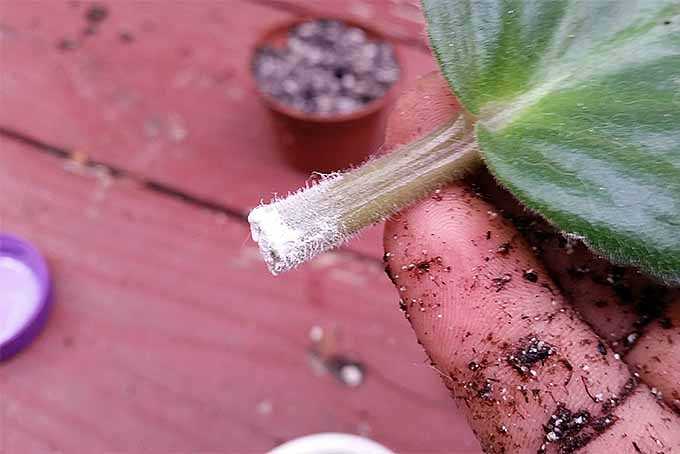
Over the next few weeks, keep an eye on the leaf cutting for signs of root development. New roots should begin to emerge from the leaf node and grow into the surrounding potting mix. Be patient, as this process can take several weeks.
Step 7: Pot up the New Plant
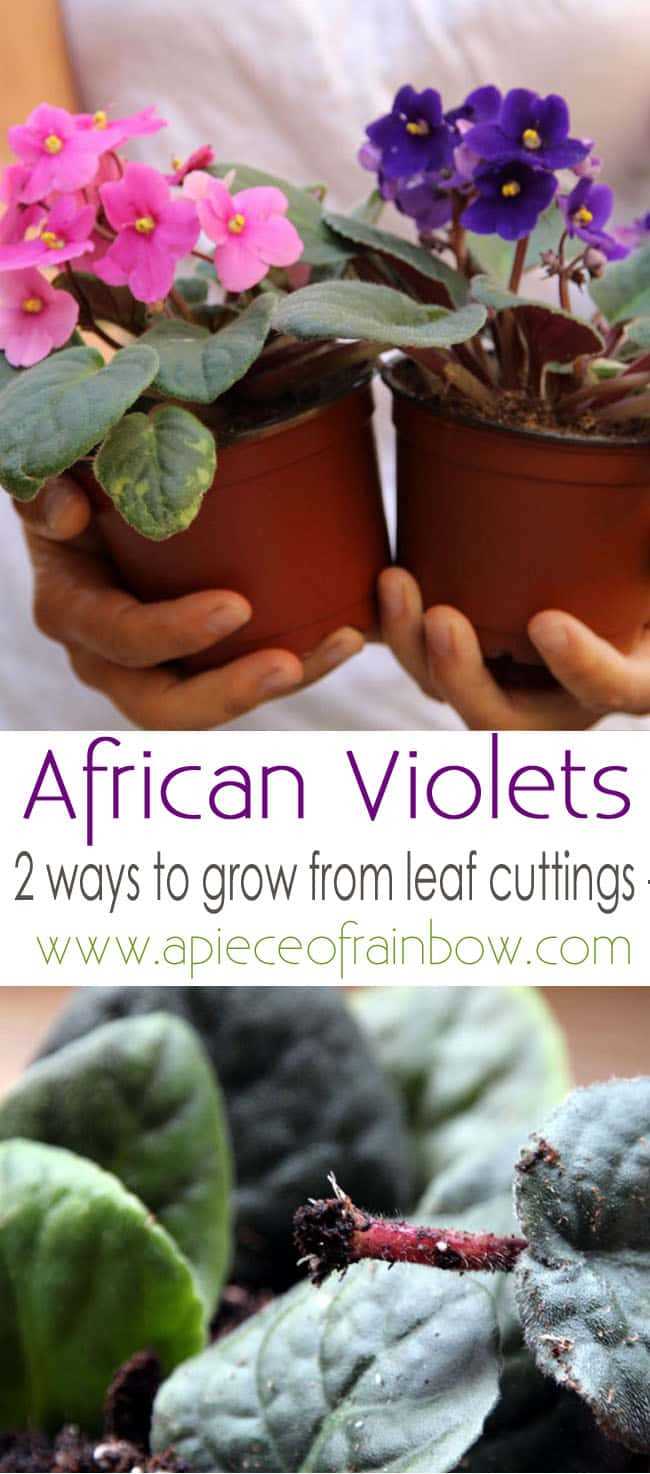
Once the leaf cutting has developed a good root system, you can pot it up into a larger container with well-draining potting soil. Treat it as you would any other violet plant, providing regular watering, fertilizing, and proper care.
By following this leaf cutting method, you can easily multiply your violets and have more plants to enjoy in your garden or share with friends.
Step 1: Choosing the right leaf
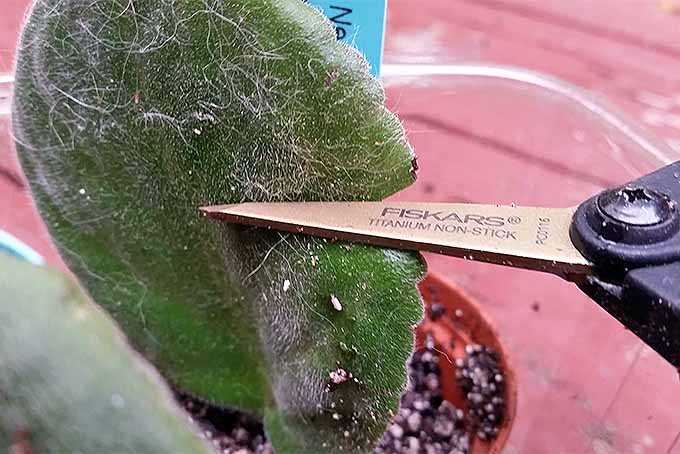
When propagating violets through leaf cuttings, it is important to choose the right leaf to ensure successful growth. Here are some tips to help you select the best leaf:
- Select a healthy leaf: Look for a leaf that is free from any signs of disease, damage, or pest infestation. A healthy leaf will have a vibrant color and no blemishes.
- Choose a mature leaf: Opt for a leaf that is fully grown and developed. A mature leaf is more likely to successfully root and produce new plants.
- Pick a leaf with a petiole: The petiole is the stem-like structure that connects the leaf to the main stem of the violet plant. Make sure the leaf you choose has a long enough petiole for easy handling and insertion into the soil.
- Avoid leaves with flowers: It’s best to choose a leaf that does not have any flowers or buds. This allows the leaf to focus all its energy on rooting and producing new plants.
- Consider leaf shape and size: Different violet varieties may have various leaf shapes and sizes. While the shape and size of the leaf doesn’t necessarily affect the success of propagation, you may prefer to choose a leaf that matches the characteristics of the parent plant.
By following these guidelines, you can ensure that you are starting with a healthy and suitable leaf for propagating your violets. This will increase your chances of success in multiplying your plants through leaf cuttings.
Step 2: Preparing the cutting
Once you have selected a healthy violet leaf for propagating, it’s time to prepare it for rooting. Follow these steps to ensure successful propagation:
- Remove the leaf: Gently twist the leaf at its base until it snaps off from the stem. Be careful not to damage the stem or any nearby leaves.
- Trim the leaf: Using a clean, sharp pair of scissors, trim off the bottom of the leaf, removing any excess stem and making a clean cut.
- Remove any flowers or buds: Check the leaf for any flowers or buds and remove them. This will help the cutting focus its energy on root development rather than flower production.
- Optional: Dip the cutting in rooting hormone: If you have rooting hormone available, you can dip the cut end of the leaf in it. This can help promote root growth and increase the chances of successful propagation.
Once you have completed these steps, you are now ready to move on to the next stage of propagating violets – rooting the cutting.
Step 3: Rooting the cutting
Rooting the cutting is an essential step in propagating violets from a leaf. This process allows the cutting to develop a root system, which is crucial for its survival and growth as an independent plant.
Materials needed:
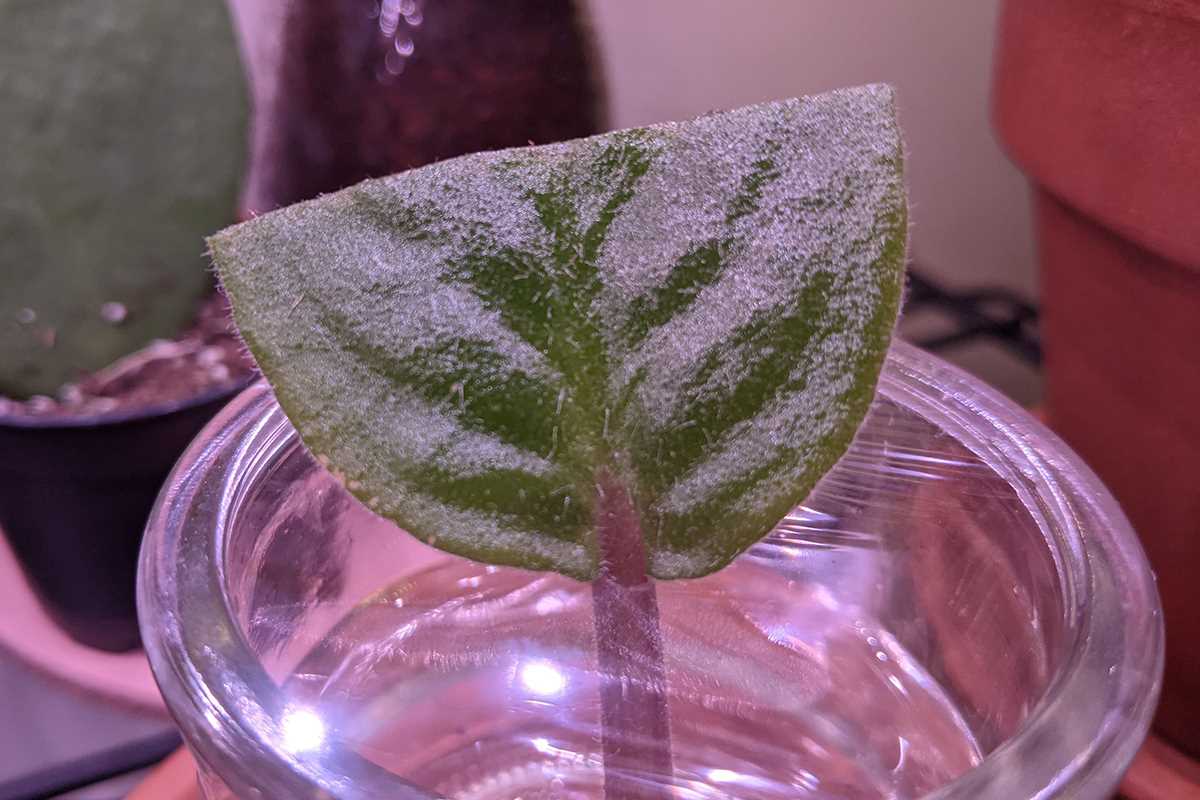
- Sharp scissors or a knife
- Clean and sterilized pot or container
- Potting mix or soil
- Water
- Clear plastic bag or plastic wrap
Instructions:
- Prepare a clean and sterilized pot or container with drainage holes at the bottom. This ensures proper drainage and prevents the cutting from sitting in water, which can lead to rot.
- Fill the container with a well-draining potting mix or a mixture of peat moss and perlite. Gently press the soil to remove any air pockets.
- Take the violet leaf cutting, ensuring that it has a clean and straight cut. Remove any excess foliage or flowers from the stem.
- Make a small hole in the soil using your finger or a pencil.
- Insert the leaf cutting into the hole, making sure that at least half of the stem is buried in the soil. Firmly press the soil around the cutting to secure it in place.
- Water the cutting thoroughly until the soil is moist but not waterlogged. Avoid overwatering, as this can rot the cutting.
- Cover the pot or container with a clear plastic bag or plastic wrap to create a mini greenhouse effect. This helps to retain moisture and increase humidity around the cutting.
- Place the pot or container in a warm and bright location, but avoid direct sunlight, as it can scorch the cutting.
- Check the cutting regularly to ensure that the soil remains moist. If necessary, water lightly to maintain moisture levels.
- After a few weeks, the cutting should start developing roots. You can gently tug on the cutting to check for root growth. Once the roots are established, you can remove the plastic covering and treat the cutting as a mature plant.
Rooting a violet cutting requires patience and consistent care. By following these steps, you can successfully root your violet cutting and grow it into a beautiful new plant.
Step 4: Transplanting the new plant
Once the new violet plant has established roots and is growing well in its temporary container, it is time to transplant it into a more permanent pot.
Materials you’ll need:
- A new pot
- Well-draining potting soil
- A trowel or small shovel
- Water
Instructions:
- Choose a new pot that is slightly larger than the temporary container. Violets prefer to be slightly root-bound, so a pot that is too big may negatively affect their growth.
- Fill the new pot with well-draining potting soil, leaving about an inch of space at the top.
- Carefully remove the violet plant from its temporary container. Gently tease apart the roots, being careful not to damage them.
- Place the plant into the new pot, ensuring that the roots are spread out and buried in the soil. The crown of the plant should be level with or slightly above the soil surface.
- Fill in any gaps around the plant with additional potting soil, gently pressing it down to secure the plant in place.
- Water the newly transplanted violet thoroughly until water flows out of the drainage holes at the bottom of the pot.
- Place the pot in a location that receives bright, indirect sunlight. Violets prefer temperatures between 65-75°F (18-24°C) and high humidity levels.
- Continue to water the plant regularly, allowing the soil to dry slightly between waterings. Be careful not to overwater, as this can lead to root rot.
Your newly transplanted violet plant should now be ready to thrive in its new pot. With proper care and attention, it will continue to produce beautiful flowers for years to come.
Method 2: Division
Another way to multiply your violet plants is through division. This method involves carefully separating the plant into smaller sections, each with its own root system. Here’s how you can do it:
- Prepare the plants: Before starting, make sure your violets are healthy and well established. Water them a day or two in advance to make the division process easier.
- Remove the plant: Gently remove the violet plant from its pot, being careful not to damage the fragile roots.
- Separate the sections: Look for natural divisions or clusters of growth in the plant. Carefully tease apart these divisions, ensuring that each section has its own roots.
- Trim the roots: If the roots are long and tangled, you can trim them slightly to make it easier to plant the divided sections. However, be careful not to cut too much, as the roots are important for the plant’s health.
- Plant the divisions: Place each divided section in its own pot or container with fresh potting soil. Make sure to keep the soil moist and provide proper lighting for the new plants.
- Care for the new plants: After dividing your violet plants, continue to provide them with regular care, including watering, fertilizing, and providing the appropriate amount of light.
This method of multiplying violets can be effective and is a great way to expand your collection or share plants with friends. With proper care, each divided section should develop into a new violet plant.
Step 1: Preparing the parent plant
Before you can start propagating violets from a leaf, you need to choose a healthy parent plant. Here are the steps to prepare the parent plant for leaf propagation:
- Select a mature plant: Look for a violet plant that is at least 6 months old. Younger plants may not have enough energy to produce viable leaf cuttings.
- Choose a healthy leaf: Look for a fully grown leaf that is free from damage or disease. Avoid leaves that have spots, discoloration, or signs of pests.
- Prepare the leaf for cutting: Use clean, sharp scissors or a knife to cut the leaf stem around 1 inch (2.5 cm) from the base of the plant. Make sure to make a clean, straight cut to minimize damage to the parent plant.
- Remove any flowers or buds: If the parent plant has any flowers or buds, it’s best to remove them. This will redirect the plant’s energy towards producing new roots instead of supporting the flowers.
By following these steps, you will ensure that the parent plant is in good health and ready to produce healthy leaf cuttings for propagation.
Q&A:
Can violets be multiplied from just one leaf?
Yes, violets can be multiplied from just one leaf. This process is known as leaf propagation. By taking a healthy leaf from a violet plant, placing it in water or soil, and providing the right conditions, new plants can be grown.
What are the steps for multiplying violets with one leaf?
The steps for multiplying violets with one leaf are as follows: 1. Select a healthy leaf from a violet plant. 2. Cut the leaf with a clean, sharp knife or scissors. 3. Place the leaf in water or soil, making sure the stem is submerged or inserted. 4. Keep the leaf in a warm and humid environment. 5. Wait for roots and new leaves to grow. 6. Once the new plant has established roots and leaves, it can be transferred to its own pot.
What are the ideal conditions for multiplying violets with one leaf?
The ideal conditions for multiplying violets with one leaf are: 1. Warm temperature: Violets prefer temperatures between 70-80°F (21-27°C). 2. Humidity: Violets thrive in environments with higher humidity, so misting or using a humidifier can help. 3. Indirect light: Violets should be placed in a location with bright, indirect light. 4. Moist soil or water: The leaf should be placed in moist soil or water to encourage root growth. 5. Clean environment: It’s important to keep the leaf and its surroundings clean to prevent any potential diseases or pests.
How long does it take for violets to multiply from one leaf?
The time it takes for violets to multiply from one leaf can vary, but it usually takes around 6-12 weeks. It may take longer or shorter depending on the specific conditions and care provided. Patience is key during this process, as it may require some time for roots and new leaves to grow.
Can all types of violets be multiplied from one leaf?
Most types of violets can be multiplied from one leaf using the leaf propagation method. However, it’s important to note that some varieties may have different requirements or may be more difficult to propagate. It’s always best to research the specific type of violet you have and follow any specialized instructions or recommendations.
Video:
African Violets – LEAF PROPAGATION – When and How I Separate Babies from Mother Leaf

