- Why Winter Propagation of Currants is Beneficial?
- Suitable Climate for Rooting Cuttings
- Increased Chances of Successful Propagation
- Cost-effective Method for Expanding Currant Collection
- Step 1: Select and Prepare the Cuttings
- Step 2: Prepare the Planting Medium
- Step 3: Plant the Cuttings
- Step 4: Care for the Cuttings
- Step 5: Transplant the Rooted Cuttings
- Step 6: Harden Off and Plant Out
- Preparing for Winter Propagation
- 1. Selecting the Cuttings
- 2. Gathering the Materials
- 3. Cutting the Branches
- 4. Applying Rooting Hormone
- 5. Planting the Cuttings
- 6. Creating a Humid Environment
- 7. Providing Adequate Light and Temperature
- 8. Monitoring and Care
- Choosing the Right Tools and Equipment
- Selecting Healthy and Disease-free Parent Plants
- Cutting and Preparing Currant Cuttings
- Identifying and Cutting the Right Type of Wood
- Making Proper Cuts and Preparing the Cuttings
- Making the Cuts
- Preparing the Cuttings
- Question-answer:
- Can currants be propagated in winter?
- How do I take cuttings from currant plants in winter?
- What is the best rooting medium for currant cuttings?
- How long does it take for currant cuttings to root in winter?
- Can currant cuttings be rooted in water?
- Can I use bottom heat to speed up rooting of currant cuttings in winter?
- What are some common problems when propagating currant cuttings in winter?
- Video: Propagating Redcurrants and Whitecurrants from hardwood cuttings
Winter is a great time to propagate currant plants through cuttings. This method is widely used by gardeners and is known to be an effective way of expanding your currant patch. By taking cuttings from mature plants during the dormant season and providing them with the right conditions, you can easily grow new currant plants.
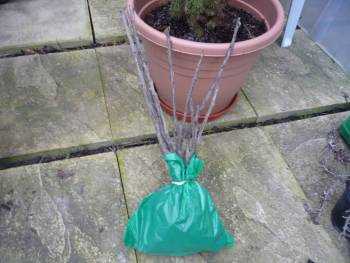
Before you start cutting, it’s important to choose the right currant varieties. Look for healthy and disease-resistant plants with strong stems. Once you have selected the plants, it’s time to start the cutting process. Use sharp, clean pruning shears to take cuttings that are about 6-8 inches long. Make sure to cut just below a bud and remove any leaves from the bottom half of the cutting.
After taking the cuttings, it’s time to prepare them for rooting. Dip the bottom end of each cutting in rooting hormone to encourage root growth. Then, place the cuttings in a soilless mix or a mix of sand and peat moss, making sure that at least two buds are buried in the mix. Water the cuttings lightly and cover them with a plastic bag or a clear plastic container to create a humid environment. Keep the cuttings in a cool location (around 50°F) with indirect light.
Over the next few months, check on the cuttings regularly to make sure they stay moist but not wet. After a few weeks, you should start to see roots forming. Once the roots are well developed, you can transplant the cuttings into individual pots or directly into the garden. Make sure to gradually acclimate the new plants to outdoor conditions before planting them in their permanent location.
By propagating currants through winter cuttings, you can expand your currant patch and enjoy a bountiful harvest in the coming years. With the right care and attention, your new currant plants will thrive and provide you with delicious berries season after season.
Why Winter Propagation of Currants is Beneficial?
Growing currant plants through winter propagation can offer several benefits. Here are some reasons why winter propagation of currants is advantageous:
- Increased Success Rate: Winter propagation provides higher chances of successful root development compared to other propagation methods. The dormant season of currants, along with the cool temperatures, creates an ideal environment for root growth.
- Cost-effective: Propagating currants during winter requires minimal resources. It eliminates the need for expensive equipment or structures since the dormant cuttings can be easily rooted in pots or the ground.
- Early Harvest: By propagating currants in winter, you can expect to enjoy an early harvest. As the plants establish strong root systems during the cold months, they are ready to produce fruits sooner once spring arrives.
- Preserving Plant Characteristics: Winter propagation allows you to preserve the desirable characteristics of your currant plants. By selecting cuttings from healthy and productive parent plants, you can ensure that the new plants inherit the same qualities.
- Increasing Plant Stock: If you want to expand your currant plant collection or share them with friends and family, winter propagation offers a convenient method to increase your plant stock. With just a few cuttings, you can easily multiply your currant plants without much effort.
- Opportunity for Variety Selection: Propagating currants in winter gives you the chance to experiment with different varieties. By rooting cuttings from various cultivars, you can discover and grow new types of currants with unique flavors or colors.
In conclusion, winter propagation of currants provides several advantages, including increased success rate, cost-effectiveness, early harvest, preservation of plant characteristics, plant stock expansion, and variety selection. By taking advantage of the dormant season, you can successfully propagate currants and enjoy a bountiful harvest in the upcoming growing season.
Suitable Climate for Rooting Cuttings
When it comes to rooting cuttings of currant plants during winter propagation, the climate plays a crucial role in determining the success of the process. While currants are generally hardy plants, they still require specific conditions to root effectively. Here are some key factors to consider when determining if your climate is suitable for rooting currant cuttings.
- Temperature: Currant cuttings need a cool and consistent temperature to root properly. Ideally, the temperature should be around 24 to 45 degrees Fahrenheit (-4 to 7 degrees Celsius). Freezing temperatures should be avoided as they can damage the cuttings.
- Humidity: Proper humidity levels are essential for successful rooting. The ideal humidity range for rooting currant cuttings is between 80% and 90%. This high humidity helps to prevent the cuttings from drying out and promotes the development of roots.
- Light: While light is not as critical for rooting as temperature and humidity, providing some indirect light can be beneficial for the process. A location with bright but filtered light is sufficient. Avoid exposing the cuttings to direct sunlight, as it can cause excessive drying and overheating.
- Drought Stress: Rooting currant cuttings can be more challenging in areas with prolonged periods of drought or low humidity. If you live in such an area, it is important to create a microclimate that provides higher humidity levels and protects the cuttings from drying out.
- Air Circulation: Good air circulation is important for preventing the development of fungal diseases and ensuring the health of the cuttings. Avoid placing the cuttings in excessively stagnant or humid air, as it can lead to rotting or mold formation.
By considering these climate factors and providing the right conditions, you can significantly increase the chances of success when rooting currant cuttings during winter propagation.
Increased Chances of Successful Propagation
- Choose healthy and disease-free parent plants for taking cuttings. This will help ensure that the new plants will also be healthy and disease resistant.
- Take cuttings from the parent plants during the dormant season, which is usually in late winter or early spring. This is when the plants are less likely to be actively growing and the cuttings will be more successful in rooting.
- Make sure to use clean and sharp pruning shears to take the cuttings. This will minimize damage to the parent plant and improve the chances of successful rooting.
- When taking the cuttings, select branches that are about 1/4 to 1/2 inch thick and about 6 to 8 inches long. Cut at a 45-degree angle just below a bud or leaf node.
- Remove any leaves or buds from the lower half of the cutting. This will help the cutting focus its energy on root development instead of leaf and bud growth.
- Dip the cut end of the cutting in rooting hormone powder to promote root growth. This will increase the chances of successful rooting.
- Place the treated cuttings in pots filled with a well-draining rooting medium, such as a mixture of equal parts peat moss and perlite. Make sure to label the pots with the date and type of cutting.
- Water the cuttings thoroughly after planting and keep the soil consistently moist, but not overly wet. This will provide the necessary moisture for the cuttings to root successfully.
- Provide the cuttings with bright, indirect light and a warm environment. A temperature of around 70 to 75 degrees Fahrenheit is ideal for rooting currant cuttings.
- Monitor the cuttings regularly for signs of rooting, such as new growth or roots emerging from the bottom of the pot. This will indicate that the cuttings have successfully rooted.
- Once the cuttings have rooted, gradually acclimate them to outdoor conditions by placing them in a protected location with partial shade. After a few weeks, they can be transplanted into their permanent outdoor location.
Cost-effective Method for Expanding Currant Collection
Expanding your currant collection can be an exciting project for gardeners looking to diversify their fruit selections. However, purchasing new plants can be expensive. Luckily, there is a cost-effective method for expanding your currant collection: propagating currants from cuttings.
Step 1: Select and Prepare the Cuttings
- Choose healthy, disease-free branches from an established currant plant.
- Cut 6-8 inch long sections of the branches, making sure to use a clean and sharp pruner.
- Remove any leaves from the lower half of the cuttings.
- Optional: Apply a rooting hormone to the cut end to encourage root development.
Step 2: Prepare the Planting Medium
- Use a well-draining planting medium, such as a mixture of sand and peat moss.
- Fill a small container, such as a pot or seed tray, with the planting medium.
Step 3: Plant the Cuttings
- Make small holes in the planting medium using a pencil or similar tool.
- Place the cut end of each cutting into a hole, ensuring that the leaves are above the medium surface.
- Gently press the medium around the base of the cuttings to hold them in place.
Step 4: Care for the Cuttings
- Place the container in a location with bright, indirect light.
- Keep the planting medium evenly moist, but not waterlogged.
- Monitor the humidity around the cuttings and mist them if necessary.
Step 5: Transplant the Rooted Cuttings
- After 6-8 weeks, check for root development by gently tugging on the cuttings.
- If there is resistance, it means roots have formed.
- Transplant the rooted cuttings into individual pots filled with a suitable potting mix.
Step 6: Harden Off and Plant Out
- Gradually expose the newly rooted plants to outdoor conditions, starting with a sheltered location.
- After a week or two, move the plants to a sunny spot in the garden.
- Plant the hardened-off plants in well-prepared soil, with proper spacing.
By following these steps, gardeners can save money by expanding their currant collection through the propagation of cuttings. Not only is this method cost-effective, but it also allows for the selection of specific cultivars or varieties that may not be readily available for purchase.
Preparing for Winter Propagation
In order to successfully propagate currants during the winter, it is important to properly prepare the cuttings and provide them with the necessary conditions for rooting. Here are some steps to follow:
1. Selecting the Cuttings
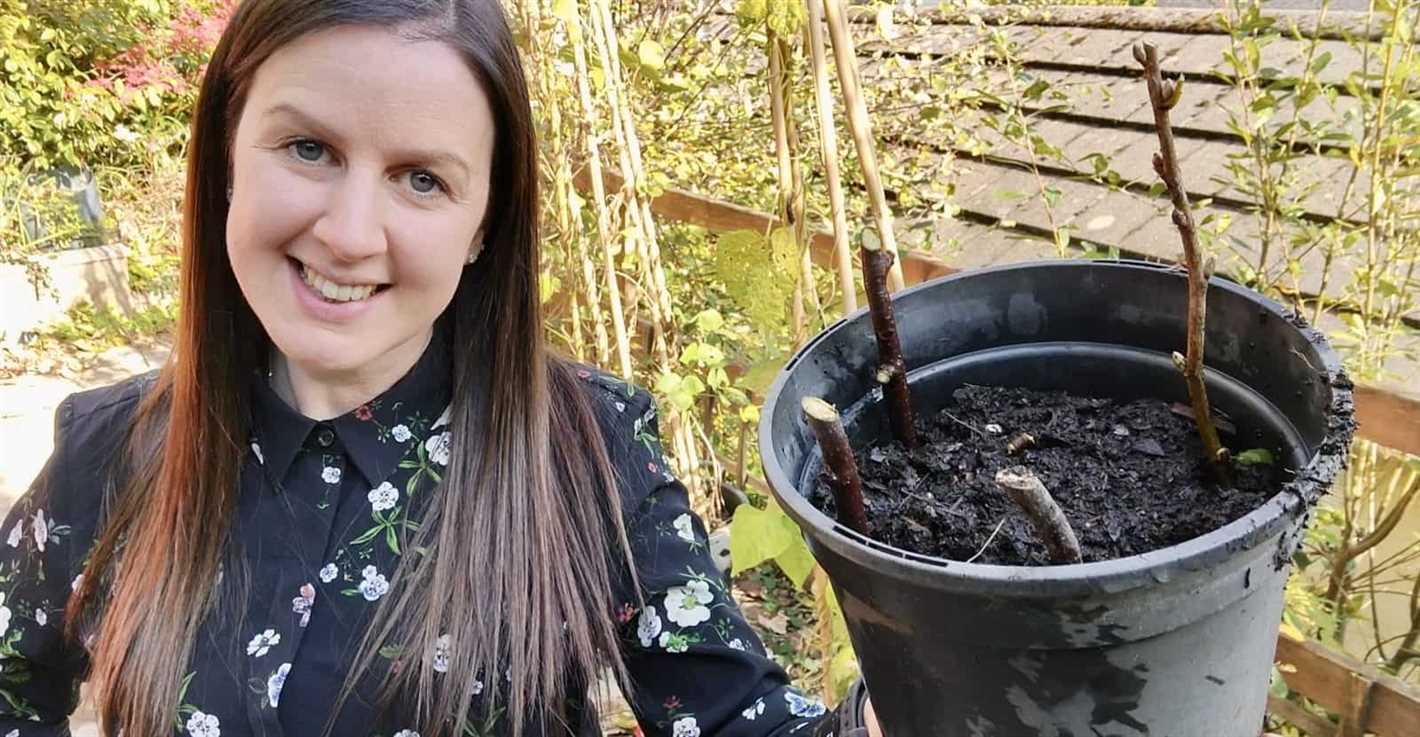
Choose healthy, disease-free branches from the current year’s growth. Look for branches that are about pencil thickness and at least 8 inches long. Make sure the branches have a few buds on them.
2. Gathering the Materials
- Sharp pruning shears or a knife for taking cuttings
- Rooting hormone powder
- Pots or containers for rooting the cuttings
- Potting mix or a mixture of perlite and peat moss
- Plastic bags or a propagator to create a humid environment
- Labels to keep track of the different varieties
3. Cutting the Branches
Using sharp pruning shears or a knife, take cuttings from the selected branches. Make clean cuts just below a bud and above another bud, leaving the cutting about 6-8 inches long.
4. Applying Rooting Hormone
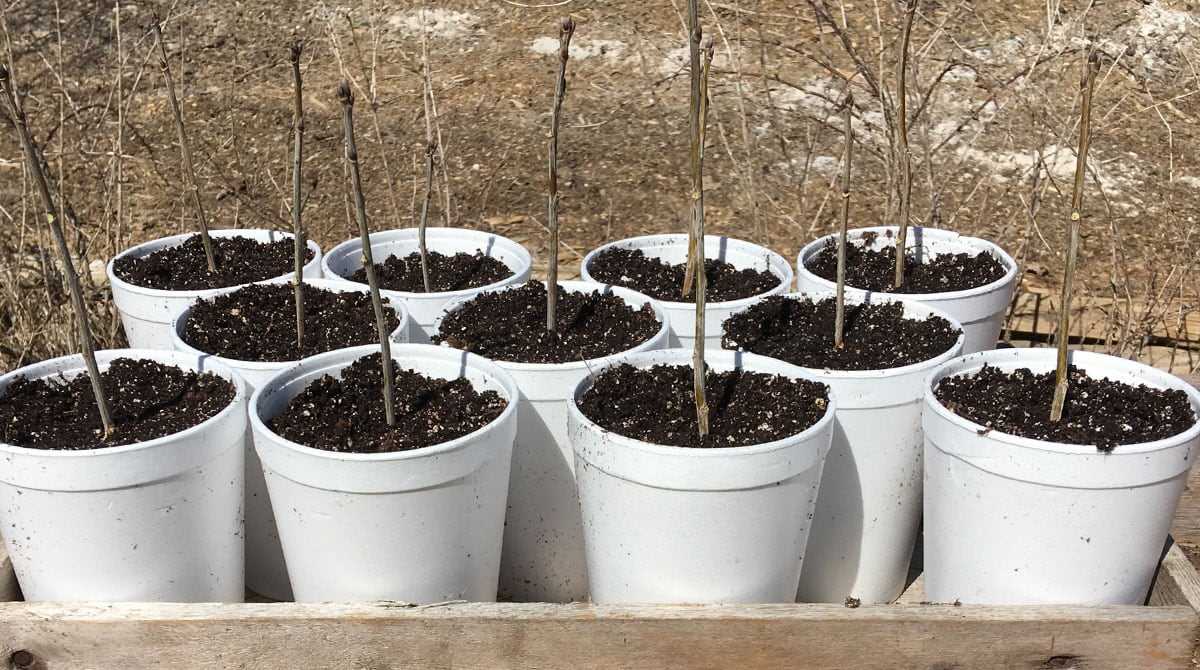
Dip the bottom 2 inches of each cutting into a rooting hormone powder to encourage root growth.
5. Planting the Cuttings
- Fill pots or containers with potting mix or a mixture of perlite and peat moss. Moisten the mix, but avoid making it waterlogged.
- Insert the cuttings into the pots, burying them about 2 inches deep. Make sure to space the cuttings adequately so they have room to grow.
- Firm the soil around the cuttings to provide stability.
6. Creating a Humid Environment
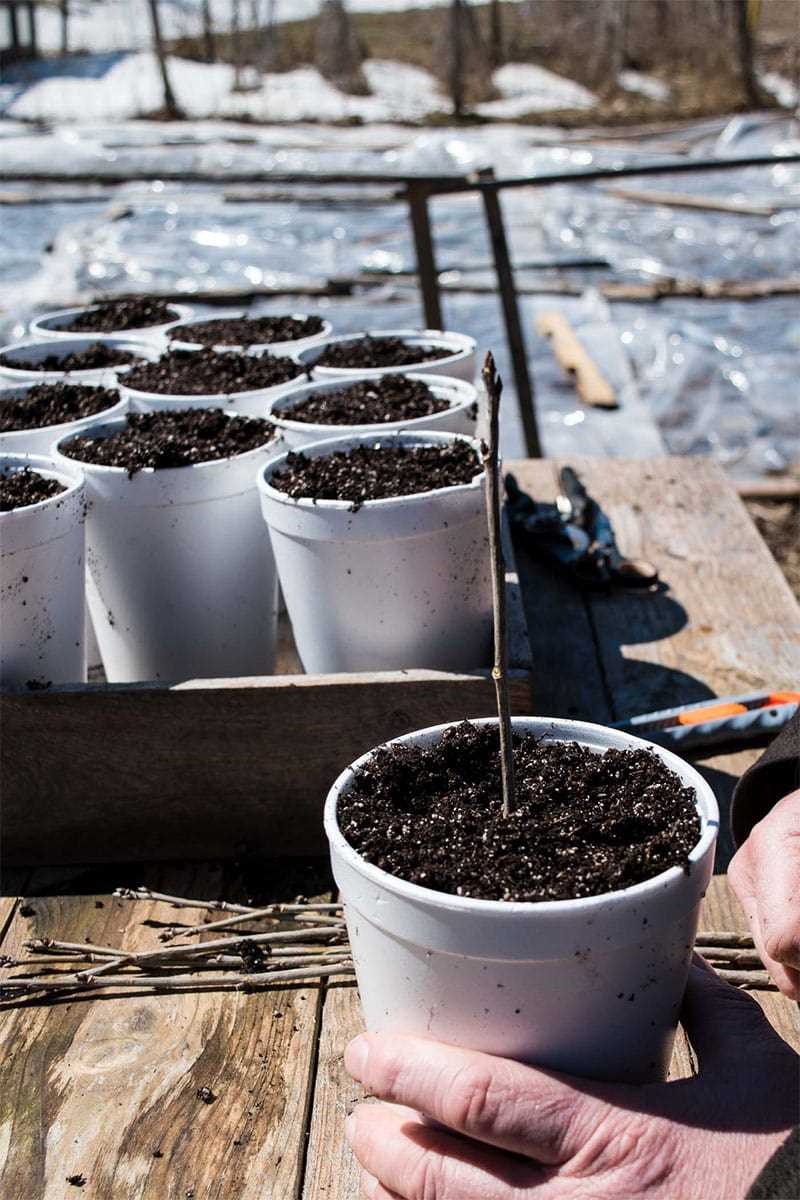
Cover the pots or containers with plastic bags or use a propagator to create a humid environment. This will help retain moisture and promote rooting.
7. Providing Adequate Light and Temperature
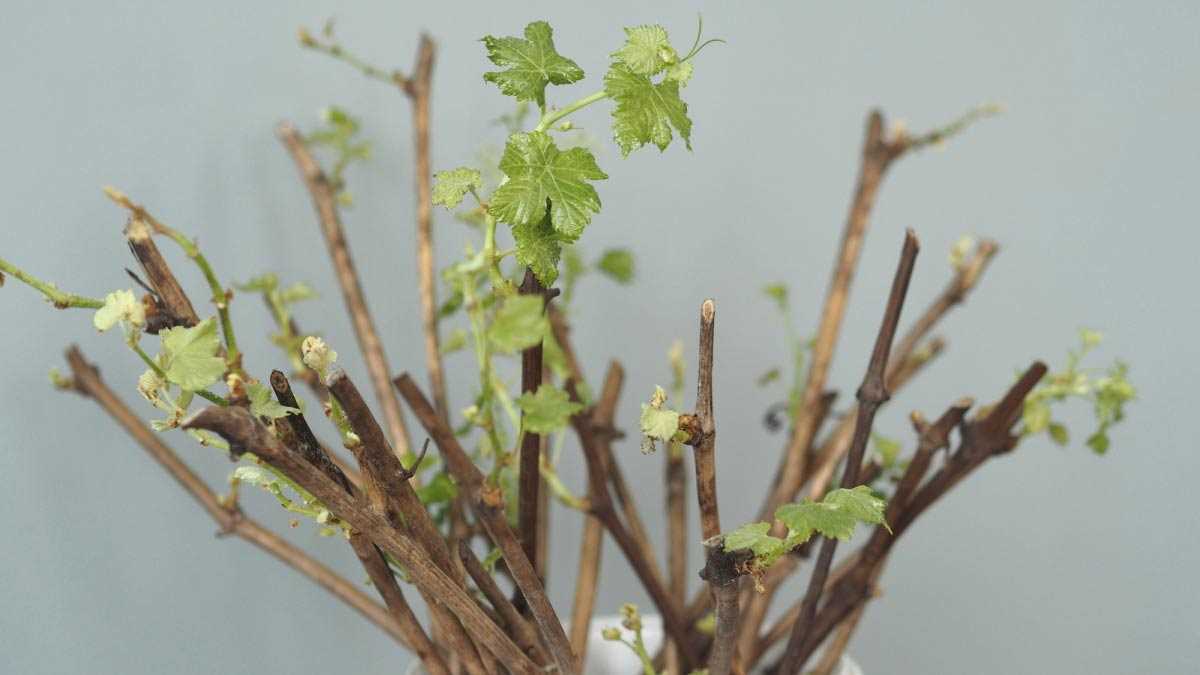
Place the pots in a cool location with indirect sunlight. Maintain a temperature of around 60-70°F (15-21°C) during the rooting period.
8. Monitoring and Care
- Check the moisture level of the potting mix regularly and water accordingly to keep it evenly moist, but not soggy.
- Monitor the cuttings for signs of root growth, such as new leaf growth or resistance when gently tugged.
- Remove any moldy or decaying cuttings to prevent the spread of disease.
By following these steps and providing the necessary care, you can increase the chances of successful winter propagation of currants. Once the cuttings have rooted, they can be transplanted to a permanent location in the spring.
Choosing the Right Tools and Equipment

When propagating currants during the winter, it is important to have the right tools and equipment. The following are some essential items that you will need:
- Pruning shears: These are used to cut the currant branches. Make sure they are sharp and clean to ensure a clean cut.
- Garden gloves: Protect your hands from thorns or any potential injuries while handling the plants.
- Rooting hormone: This is optional, but using a rooting hormone can help improve the success rate of rooting the cuttings.
- Rooting medium: You will need a suitable medium for rooting the cuttings. A mix of peat moss and perlite or vermiculite is commonly used.
- Pots or containers: Choose pots or containers that are the right size for the cuttings. They should have drainage holes to prevent waterlogging.
- Labels: It is important to label each cutting with the name of the variety to avoid confusion.
- Misting bottle or spray bottle: To keep the cuttings moist during the rooting process, you can use a misting or spray bottle.
- Clear plastic bags or propagator: To create a humid environment, you can cover the pots or containers with clear plastic bags or use a propagator.
Having the right tools and equipment will make the process of cutting and rooting currant cuttings much easier and more successful. Make sure to gather all the necessary items before starting the propagation process.
Selecting Healthy and Disease-free Parent Plants
When propagating currants through cuttings, it is crucial to start with healthy and disease-free parent plants. This ensures that the new plants will have the best chance of thriving and producing a healthy crop.
Here are some guidelines for selecting parent plants:
- Choose plants that are free from any visible signs of disease or pest infestation. Look for leaves that are vibrant, without spots, discoloration, or wilting.
- Inspect the stems and branches for any signs of damage or rot. Currants with healthy, sturdy stems are more likely to produce successful cuttings.
- Consider the overall health of the plant. Look for a well-established root system and a plant that has been actively growing.
- Avoid selecting plants that have recently been treated with pesticides or chemicals. These can negatively affect the success of the cuttings.
- Choose currant plants that have a history of producing high-quality fruit. This can be determined by talking to experienced gardeners or researching popular cultivars.
It’s important to note that selecting disease-free parent plants is only the first step in the propagation process. Proper care and maintenance of the cuttings, such as providing adequate moisture and light, will also contribute to their success.
Cutting and Preparing Currant Cuttings
Winter is an ideal time to propagate currant plants, as they are dormant and it’s easier to take cuttings. Here’s a step-by-step guide on how to cut and prepare currant cuttings:
- Select a healthy currant plant: Choose a mature, healthy currant plant as the source for your cuttings. Look for strong, disease-free branches.
- Gather necessary tools: You will need a pair of sharp, clean pruning shears, a clean container with water, and a clean work area.
- Choose the branches: Look for branches that are pencil-thick and about 8-12 inches long. They should have multiple nodes, which are the bumps along the stem where leaves and buds grow.
- Make the cut: Using the pruning shears, make a clean diagonal cut just below a node, about 1/4 inch below it. Avoid crushing or damaging the stem.
- Remove lower buds and leaves: Remove the lowest set of buds and leaves, leaving 2-3 sets of buds above the cut. This will encourage root growth.
- Store the cuttings: Immediately after cutting, place the cuttings in the container with water to keep them hydrated and prevent drying out. Keep the container in a cool, dark place until you’re ready to plant them.
- Prepare the rooting medium: Prepare a well-draining rooting medium, such as a mixture of peat moss and sand. Fill a clean container with the medium.
- Plant the cuttings: Remove the cuttings from the water and gently plant them in the rooting medium, burying about 2/3 of the cutting length. Ensure that at least one bud is above the soil surface.
- Provide proper care: Place the container in a bright location that receives indirect sunlight. Keep the soil moist but not waterlogged. Avoid overwatering to prevent rot.
- Monitor the progress: Check the cuttings regularly for signs of rooting, such as new growth or resistance when gently tugged. It may take several weeks for roots to form.
By following these steps, you can successfully cut and prepare currant cuttings for winter propagation. Good luck!
Identifying and Cutting the Right Type of Wood
When propagating currants during winter, it is important to identify and cut the right type of wood. The type of wood you choose will greatly affect the success of your cuttings.
1. One-year-old wood:
The best type of wood to use for currant cuttings is one-year-old wood. One-year-old wood is flexible, yet mature enough to have the necessary growth hormones for successful rooting.
2. Selecting healthy wood:
When choosing wood for cuttings, it is crucial to select healthy wood. Healthy wood should be free from diseases, pests, and any signs of damage. Look for wood that has a smooth bark and vibrant color.
3. Cuttings from the base of the plant:
The base of the plant often has more vigorous and healthier wood. Cutting from the base of the plant ensures that you are using the best quality wood for propagation.
4. Cutting length:
The ideal length for currant cuttings is around 8-10 inches. This length provides enough stem for potential root growth while also being manageable for planting and handling.
5. Cutting technique:
When cutting the wood, make a clean cut just below a bud. It is important to use sharp and clean pruning shears to avoid crushing or damaging the wood. Remove any side branches or leaves from the bottom half of the cutting.
6. Multiple cuttings:
It is recommended to take multiple cuttings to increase the chances of successful propagation. This way, even if some cuttings fail, you will still have others that might root and grow.
7. Labeling:
Label each cutting with the variety and date of cutting to keep track of different varieties and their success rates.
8. Timing:
Winter is the best time to take cuttings as the plants are dormant. Late winter or early spring is preferable as it allows the cuttings to root and grow in time for the growing season.
9. Prepare extras:
Prepare a container with a sterile rooting medium, such as perlite or a peat and sand mixture, to place the cuttings in after they are taken. This will provide the optimum conditions for rooting and growth.
10. Storage:
If you are unable to plant the cuttings immediately, store them in a cool and dark place wrapped in a damp paper towel or sealed plastic bag. This will help keep them hydrated and in a dormant state until you are ready to plant them.
Making Proper Cuts and Preparing the Cuttings
Winter propagation of currants involves taking cuttings from established plants and rooting them to create new plants. To ensure successful propagation, it is important to make proper cuts and prepare the cuttings correctly.
Making the Cuts
When making the cuts, there are a few important things to keep in mind:
- Use clean, sharp pruning shears to make clean and precise cuts. This reduces the risk of damaging the branches and increases the chances of successful rooting.
- Cuttings should be taken from healthy, disease-free branches. Avoid taking cuttings from plants that show signs of disease or pests.
- Make the cut at a 45-degree angle, just below a node or bud. This provides a larger surface area for rooting and promotes faster growth.
- Cuttings should be approximately 6-8 inches long, with at least 2-3 nodes. This provides enough space for roots to develop and ensures a healthy start for the new plant.
Preparing the Cuttings

Once the cuttings are made, they need to be properly prepared before they can be rooted:
- Remove any leaves from the lower third of the cutting. Leaves take up energy and moisture, and removing them encourages the plant to focus on root development.
- If the cuttings have large leaves, you can trim them in half to reduce water loss and help maintain the cutting’s moisture balance.
- Dip the cut end of each cutting into a rooting hormone. This helps stimulate root growth and improves the chances of successful rooting.
- Place the prepared cuttings in a mixture of equal parts peat moss and perlite or vermiculite. This provides a well-draining medium that retains moisture without becoming soggy.
- Water the cuttings thoroughly and allow the excess water to drain. Keep the cuttings consistently moist but not waterlogged throughout the rooting process.
By making proper cuts and preparing the cuttings correctly, you increase the chances of successful root development and the establishment of healthy new currant plants.
Question-answer:
Can currants be propagated in winter?
Yes, currants can be propagated in winter. In fact, winter is the best time to take cuttings from currant plants for propagation.
How do I take cuttings from currant plants in winter?
To take cuttings from currant plants in winter, you should first select healthy, dormant stems from the plant. Then, using sharp pruners, cut a 6-8 inch long stem from the plant. Make sure the cutting has at least 3-4 buds. Remove the bottom buds, and dip the cut end into rooting hormone. Plant the cutting in a pot or directly in the ground, and keep it moist until it roots.
What is the best rooting medium for currant cuttings?
The best rooting medium for currant cuttings is a mix of peat moss and sand. This mixture provides good drainage and aeration for the cuttings, which helps them root more successfully.
How long does it take for currant cuttings to root in winter?
In winter, it usually takes about 6-8 weeks for currant cuttings to root. However, this can vary depending on various factors such as temperature and humidity.
Can currant cuttings be rooted in water?
Yes, currant cuttings can be rooted in water. Simply place the cuttings in a glass or jar filled with water, making sure that at least one bud is submerged. Change the water every few days to keep it fresh, and wait for roots to develop before transplanting the cuttings to soil.
Can I use bottom heat to speed up rooting of currant cuttings in winter?
Yes, using bottom heat can help speed up the rooting of currant cuttings in winter. You can place the pots or trays with the cuttings on a heating mat or in a heated propagator to provide them with consistent warmth, which stimulates root growth.
What are some common problems when propagating currant cuttings in winter?
Some common problems when propagating currant cuttings in winter include fungal diseases such as damping off, which can cause the cuttings to rot. To prevent this, make sure to use a well-draining rooting medium and avoid overwatering. Another issue can be lack of rooting hormone, which can result in poor root development. Using rooting hormone can greatly increase the success rate of rooting currant cuttings.
