- Planting Potatoes: A Beginner’s Guide
- Step 1: Prepare the Soil
- Step 2: Choose the Right Seed Potatoes
- Step 3: Cut and Cure the Seed Potatoes
- Step 4: Planting the Potatoes
- Step 5: Watering and Mulching
- Step 6: Caring for Your Growing Potatoes
- Step 7: Harvesting Your Potatoes
- Selection of Potatoes for Planting
- 1. Disease Resistance
- 2. Adaptability
- 3. Yield and Harvest Time
- 4. Culinary Uses
- 5. Storage Life
- 6. Appearance
- Preparing the Seed Potatoes
- 1. Selecting the Seed Potatoes
- 2. Cutting the Seed Potatoes
- 3. Curing the Seed Potatoes
- 4. Pre-Sprouting the Seed Potatoes (Optional)
- 5. Treating the Seed Potatoes
- 6. Storing the Seed Potatoes
- Chitting Potatoes for Better Results
- Why Chitting Potatoes?
- How to Chit Potatoes
- When to Plant Chitted Potatoes
- Conclusion
- Soil Preparation for Potatoes
- Fertilizing Potatoes: What You Need to Know
- 1. Timing
- 2. Types of Fertilizer
- 3. Nitrogen Content
- 4. Application Rate
- 5. Side Dressing
- 6. Testing the Soil
- 7. Organic Alternatives
- 8. Watering After Fertilization
- Planting Potatoes: Tips for Success
- 1. Choose the Right Seed Potatoes
- 2. Prepare the Soil
- 3. Chit or Sprout the Seed Potatoes
- 4. Plant the Potatoes
- 5. Provide Adequate Water and Fertilization
- 6. Pest and Disease Control
- 7. Harvesting
- Maintaining Potatoes Throughout the Growing Season
- Watering
- Weeding
- Fertilizing
- Hilling
- Pest and Disease Control
- Harvesting
- Protecting Potatoes from Pests and Diseases
- Pest Control
- Disease Management
- Cultural Practices
- “Question-Answer”
- What is the best way to prepare potatoes for planting?
- Can I plant potatoes straight from the grocery store?
- How should I treat seed potatoes before planting?
- Do potatoes need any special care after planting?
- Can I grow potatoes in containers?
- “Video” Seed Potatoes 101: How To Prepare Potatoes For Planting!
Growing potatoes can be a rewarding and delicious experience. However, to ensure a successful harvest, it’s important to properly prepare and treat the potatoes before planting. This article will provide valuable tips and advice on how to maximize the potential of your potato crop.
First and foremost, when preparing potatoes for planting, it’s crucial to select healthy and disease-free potato seed. Look for seed potatoes that are firm, smooth, and free from any signs of decay or blemishes. Avoid using potatoes from the grocery store, as they may not be suitable for planting due to possible exposure to chemicals or diseases during storage.
Once you have obtained suitable seed potatoes, it’s essential to treat them before planting. One common method is to chit or sprout the potatoes. Place them in a cool, dry, and well-lit area for a few weeks prior to planting. This process encourages the potatoes to develop multiple sprouts, which will result in a higher yield.
In addition to chitting, it is also recommended to treat the potatoes with fungicide to prevent the spread of diseases. This step is particularly important if you have had issues with diseases such as potato blight in the past. Follow the instructions on the fungicide product carefully, as different products may have varying application methods and concentrations.
Taking the time to properly prepare and treat your potatoes before planting can greatly increase your chances of a successful harvest. By selecting healthy seed potatoes, chitting them, and using fungicide, you are setting the stage for a productive and disease-free potato crop. So roll up your sleeves and get ready to enjoy the fruits (or rather, tubers) of your labor!
Planting Potatoes: A Beginner’s Guide
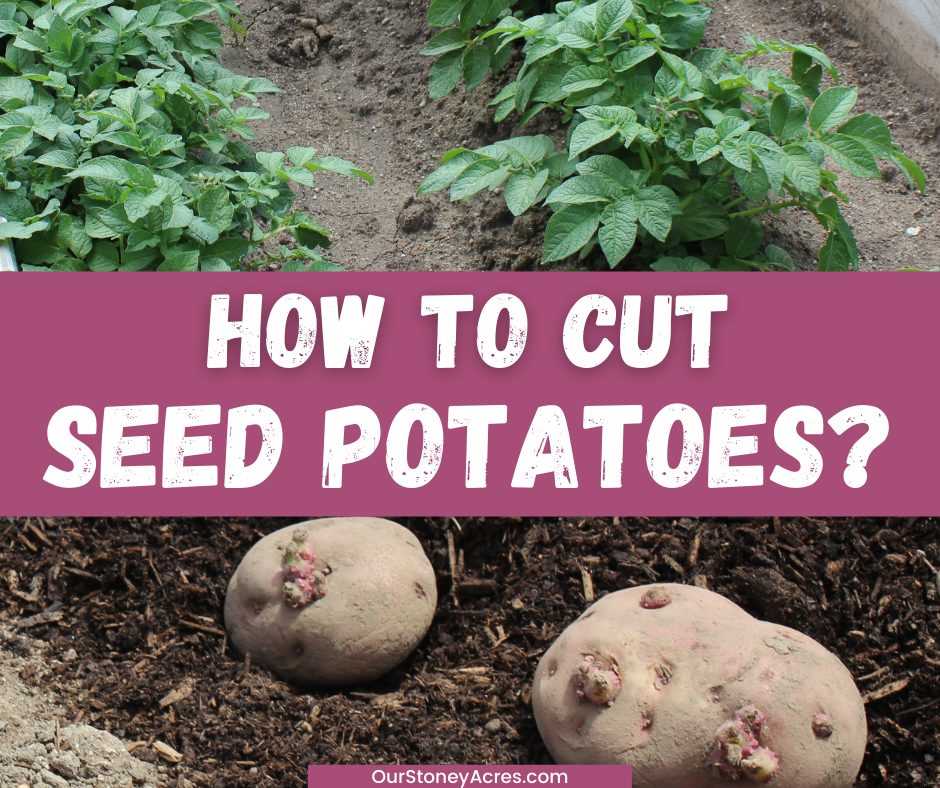
Introduction
- Planting potatoes can be a rewarding experience for beginners.
- By following these steps, you can grow your own potatoes at home.
Step 1: Prepare the Soil
Before planting potatoes, it’s important to prepare the soil properly.
- Choose a well-draining location in your garden.
- Remove any weeds or rocks from the area.
- Loosen the soil using a garden fork or a tiller, making sure it is free of clumps.
- Add compost or organic matter to improve the soil’s fertility.
Step 2: Choose the Right Seed Potatoes
The quality of your seed potatoes will determine the success of your potato crop.
- Purchase certified seed potatoes from a reputable supplier.
- Choose disease-free potatoes that are firm and have sprouts.
- Avoid using potatoes from the grocery store, as they may be treated with chemicals that can inhibit growth.
Step 3: Cut and Cure the Seed Potatoes
Preparing the seed potatoes before planting is essential for healthy growth.
- Cut larger seed potatoes into pieces, ensuring each piece has at least one sprout.
- Allow the cut seed potatoes to dry and form a thick skin, a process known as curing.
- This will help to prevent rot and diseases when planted in the soil.
Step 4: Planting the Potatoes
Now it’s time to plant your prepared seed potatoes.
- Dig trenches that are about 8-10 inches deep.
- Space the seed potatoes about 12-15 inches apart in the trenches.
- Ensure that the sprouts are facing upwards.
- Cover the potatoes with soil, leaving a small mound on top.
Step 5: Watering and Mulching
Maintaining the right moisture levels is crucial for potato growth.
- Water the potatoes thoroughly after planting.
- Keep the soil evenly moist but not waterlogged.
- Apply a layer of mulch such as straw or dried leaves to conserve moisture and suppress weeds.
Step 6: Caring for Your Growing Potatoes
As your potatoes grow, they will require proper care to ensure a bountiful harvest.
- Regularly check the soil moisture and water as needed.
- Hill up soil around the potato plants as they grow to encourage more tuber development.
- Monitor for pests and diseases, and take appropriate action if necessary.
Step 7: Harvesting Your Potatoes
After a few months, your potatoes should be ready for harvest.
| Signs of readiness: | Harvesting steps: |
|---|---|
| – The leaves turn yellow and start to die back | – Gently dig up the potatoes using a shovel or fork |
| – The skin of the potatoes is firm and not easily damaged | – Brush off excess soil and allow the potatoes to dry before storing |
Conclusion
By following these steps, you can enjoy the satisfaction of growing your own potatoes. With proper care and attention, you’ll be rewarded with a delicious harvest!
Selection of Potatoes for Planting
When selecting potatoes to plant, it is important to choose high-quality seed potatoes. These are potatoes that have been specifically grown and stored for the purpose of planting. Here are some factors to consider when selecting seed potatoes:
1. Disease Resistance
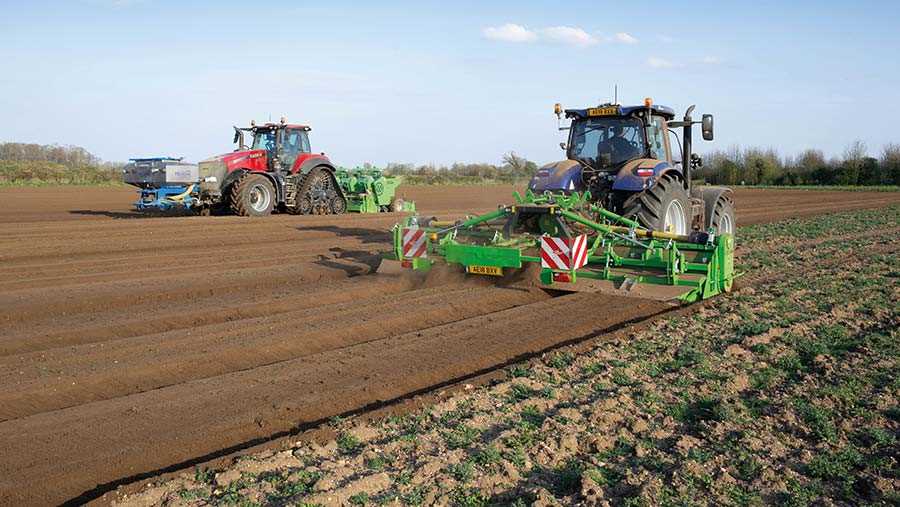
Look for varieties of potatoes that are resistant to common potato diseases, such as late blight, early blight, and scab. Disease-resistant varieties will have a better chance of surviving and producing a healthy crop.
2. Adaptability
Consider the climate and growing conditions in your area when selecting seed potatoes. Some varieties are better suited for cooler climates, while others thrive in warmer regions. Choose varieties that are known to perform well in your specific growing conditions.
3. Yield and Harvest Time
Depending on your needs, you may want to select seed potatoes that offer a high yield. Some varieties produce more potatoes per plant than others. Additionally, consider the harvest time of the potatoes. Some varieties mature faster than others, allowing for earlier harvesting.
4. Culinary Uses
Consider the culinary qualities of the potato varieties you are considering. Some potatoes are better suited for boiling or mashing, while others are best for baking or frying. Choose varieties that will meet your culinary preferences.
5. Storage Life
If you plan to store your harvested potatoes for an extended period of time, select varieties that have a longer storage life. Some potatoes store well and can last several months without spoiling, while others are best consumed shortly after harvest.
6. Appearance
Finally, consider the appearance of the seed potatoes. Look for firm, unblemished potatoes with few eyes or sprouts. Avoid potatoes that are soft, wrinkled, or have any signs of decay.
By carefully selecting high-quality seed potatoes that meet your specific criteria, you can increase the chances of a successful and abundant potato crop.
Preparing the Seed Potatoes
Before planting, it’s important to properly prepare the seed potatoes to ensure a successful crop. Follow these steps to prepare your seed potatoes:
1. Selecting the Seed Potatoes
Choose high-quality seed potatoes that are certified disease-free. Look for potatoes that are firm and free from any signs of decay or disease.
2. Cutting the Seed Potatoes
Cut the seed potatoes into chunks, ensuring that each chunk has at least one “eye” or bud. This will allow new growth to emerge from the chunk when planted.
3. Curing the Seed Potatoes
After cutting, it’s important to cure the seed potatoes for a few days. Place them in a cool, dry location with good air circulation. This will allow the cut surfaces to dry and callus over, reducing the risk of rotting after planting.
4. Pre-Sprouting the Seed Potatoes (Optional)
Some gardeners choose to pre-sprout their seed potatoes before planting. This involves placing the cut seed potatoes in a warm location with indirect light for a few weeks. This can help to jumpstart the growth process and result in earlier and more vigorous growth after planting.
5. Treating the Seed Potatoes
For added protection against disease, you can treat the seed potatoes with a fungicide or a natural alternative. This can help prevent the spread of common potato diseases such as blight.
6. Storing the Seed Potatoes
If you’re not planning to plant the seed potatoes immediately, store them in a cool, dark location to prevent them from sprouting prematurely. Make sure to check on them regularly to ensure they are not rotting or sprouting excessively.
Chitting Potatoes for Better Results
Chitting potatoes is a simple technique that can greatly improve the results of your potato crop. Chitting involves pre-sprouting seed potatoes before planting them, which helps to give them a head start in the growing process.
Why Chitting Potatoes?
Chitting potatoes can provide several benefits:
- Earlier Harvest: By chitting potatoes, you can encourage earlier growth and potentially achieve an earlier harvest.
- Bigger Yield: Chitted potatoes tend to produce more tubers, resulting in a larger yield.
- Uniform Growth: Chitting allows you to select the healthiest and most viable seed potatoes, ensuring more uniform growth.
How to Chit Potatoes
To chit potatoes, follow these simple steps:
- Select Seed Potatoes: Choose healthy, disease-free seed potatoes with ‘eyes’ or small sprouts.
- Prepare a Chitting Tray: Use an egg carton, seed tray, or shallow container to hold the potatoes.
- Place Potatoes: Position the seed potatoes in the tray with the ‘eyes’ facing up. Avoid overcrowding them.
- Find a Suitable Location: Place the chitting tray in a cool, light location, such as a windowsill, for a few weeks.
- Monitor Progress: Check on the potatoes regularly and remove any weak or moldy ones to prevent the spread of disease.
When to Plant Chitted Potatoes
After a few weeks of chitting, your potatoes should have healthy sprouts measuring around 1-2cm in length. At this stage, they are ready to be planted in the garden or containers.
Conclusion
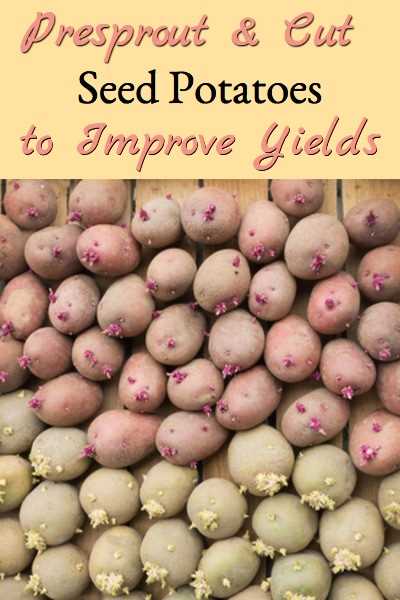
Chitting potatoes is a simple and effective method to boost the success of your potato crop. By pre-sprouting seed potatoes, you can enjoy an earlier harvest, a bigger yield, and more uniform growth. Give chitting a try this planting season and watch your potato plants thrive!
Soil Preparation for Potatoes
Before planting potatoes, it’s essential to properly prepare the soil to provide the best growing conditions for these tubers. Follow these steps to ensure a successful potato crop:
- Choose the Right Location: Select a sunny spot in your garden that receives at least six to eight hours of direct sunlight each day. Avoid areas that are prone to waterlogging or have heavy clay soils.
- Clear the Area: Remove any weeds, rocks, or other debris from the planting area. Potatoes need a clean and clear soil surface to grow properly.
- Loosen the Soil: Use a garden fork or tiller to loosen the soil to a depth of about 8-10 inches. This will provide the potato roots with enough space to grow and expand.
- Test the Soil: It’s crucial to know the pH level and nutrient content of your soil. Conduct a soil test to determine if any amendments are needed. Potatoes prefer a slightly acidic soil with a pH of 5.0 to 6.0.
- Amend the Soil: Based on the soil test results, add organic matter such as compost, well-rotted manure, or peat moss to improve soil fertility and drainage. Work the amendments into the soil evenly.
- Fertilize: Potatoes require adequate nutrients for good growth. Apply a complete fertilizer with a balanced ratio of nitrogen, phosphorus, and potassium to the soil according to the manufacturer’s recommendations.
- Address Drainage: Ensure that the soil has proper drainage and is not excessively compacted. If the soil tends to get waterlogged, consider raising the planting bed or creating a raised mound to prevent rotting of potato tubers.
- Consider Crop Rotation: If you grew potatoes in the same area the previous year, it’s best to rotate crops. Avoid planting potatoes in the same spot for consecutive seasons to reduce the risk of diseases and pests.
Following these steps will help create a suitable growing environment for your potatoes and increase the chances of a productive harvest.
Fertilizing Potatoes: What You Need to Know
1. Timing
Applying fertilizer to your potato plants at the right time is crucial for their growth and development. It is recommended to fertilize the soil before planting the potatoes. This allows the nutrients to be readily available to the plants when they need them the most.
2. Types of Fertilizer
There are various types of fertilizers that can be used for potatoes. The most common ones are organic fertilizers, such as compost and well-rotted manure, and synthetic fertilizers, which are chemically formulated. Organic fertilizers provide slow-release nutrients and improve soil structure, while synthetic fertilizers offer quick-release nutrients.
3. Nitrogen Content
Potatoes require a sufficient amount of nitrogen for their growth. When choosing a fertilizer, look for one with a higher nitrogen content. Nitrogen is essential for foliage development and can help increase the yield of potatoes. However, excessive nitrogen can promote excessive foliage growth at the expense of tuber development.
4. Application Rate
The application rate of fertilizer depends on the soil condition and the specific nutrient requirements of your potato plants. It is recommended to follow the instructions on the fertilizer packaging for the correct application rate. As a general rule, apply the fertilizer evenly over the soil surface, avoiding direct contact with the plant stems.
5. Side Dressing
Side dressing is the process of applying fertilizer to the soil around the potato plants after they have emerged. This can be done by creating a shallow trench along the row of plants and then applying the fertilizer in the trench. Side dressing helps provide additional nutrients to the growing plants and encourages healthy tuber development.
6. Testing the Soil
Before fertilizing your potato plants, it is beneficial to test the soil to determine its nutrient content. Soil testing can provide valuable information about the pH level, nutrient levels, and overall soil fertility. Based on the results of the soil test, you can adjust the type and amount of fertilizer to ensure optimal nutrient availability for your potatoes.
7. Organic Alternatives
If you prefer to use organic methods, there are several alternatives to synthetic fertilizers. Compost, well-rotted manure, bone meal, and fish emulsion are all natural sources of nutrients that can be used to fertilize potatoes. These organic alternatives not only provide essential nutrients but also improve soil health and sustainability.
8. Watering After Fertilization
After applying fertilizer to your potato plants, it is important to water the soil thoroughly. This helps to activate the fertilizer and allows the nutrients to penetrate the soil. Adequate moisture is necessary for the plants to absorb the nutrients effectively and promote healthy growth.
| Timing | Types of Fertilizer | Nitrogen Content | Application Rate | Side Dressing | Testing the Soil | Organic Alternatives | Watering After Fertilization |
|---|---|---|---|---|---|---|---|
| Before planting | Organic or synthetic | Higher nitrogen content | Follow instructions on packaging | Apply to soil after emergence | Beneficial for nutrient analysis | Compost, manure, bone meal, fish emulsion | Water thoroughly after application |
Planting Potatoes: Tips for Success
Planting potatoes can be a rewarding experience, but it requires proper preparation and care. Follow these tips to ensure success with your potato crop:
1. Choose the Right Seed Potatoes
- Select certified disease-free seed potatoes from a reputable supplier.
- Choose potato varieties that are well-suited to your climate and soil conditions.
2. Prepare the Soil
- Start by clearing the planting area of weeds and rocks.
- Loosen the soil with a garden fork or tiller to a depth of at least 8 inches.
- Amend the soil with organic matter, such as compost or well-rotted manure, to improve drainage and fertility.
3. Chit or Sprout the Seed Potatoes
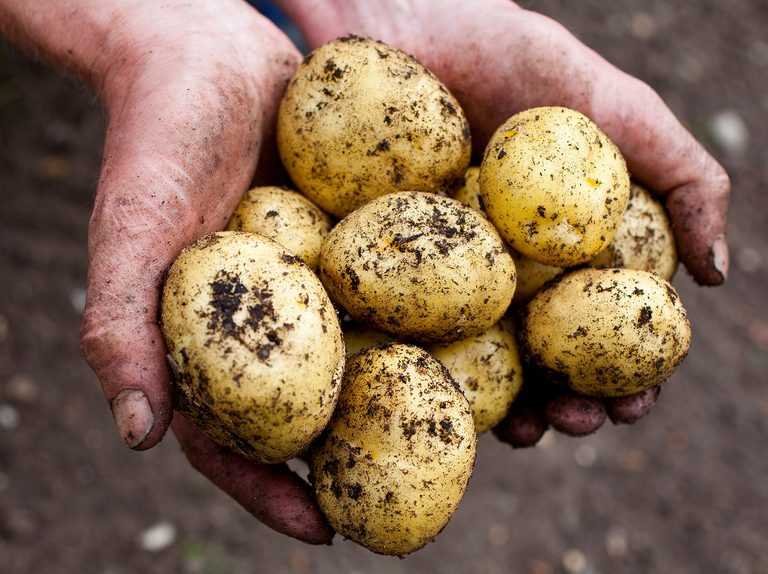
- Place the seed potatoes in a cool, well-lit area for a few weeks before planting.
- Position them upright with the “eyes” facing up.
- This process, known as chitting or sprouting, encourages the development of healthy shoots.
4. Plant the Potatoes
- Plant the sprouted seed potatoes in trenches or holes about 4 inches deep and 12-15 inches apart.
- Space the rows about 2-3 feet apart to allow for proper growth and air circulation.
- Ensure that each potato planting piece has at least one or two strong shoots.
- Cover the seed potatoes with soil, but avoid compacting it too firmly.
5. Provide Adequate Water and Fertilization
- Water the potato plants regularly, especially during dry spells, to keep the soil consistently moist.
- Apply a balanced fertilizer, such as a 10-10-10 formulation, according to the package instructions.
- Avoid over-fertilizing, as this can result in excessive foliage growth and reduced tuber development.
6. Pest and Disease Control
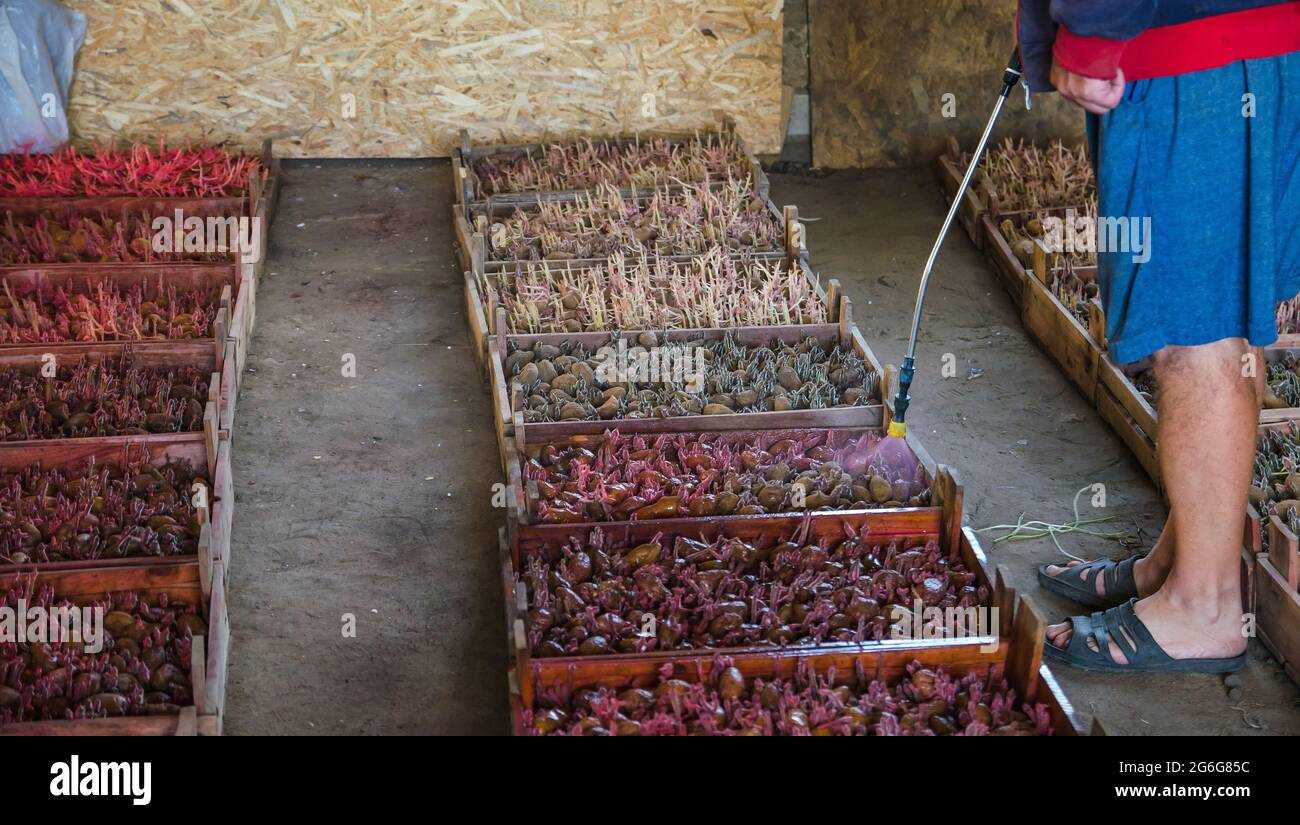
- Monitor your potato plants regularly for signs of pests and diseases, such as potato beetles, fungal infections, or viral infections.
- Use organic pest control methods whenever possible, such as handpicking pests or applying insecticidal soap.
- If necessary, use approved pesticides to control more severe infestations or diseases.
7. Harvesting
- Harvest your potatoes when the plants have died down and the skin of the tubers is firm.
- Carefully dig up the potatoes using a garden fork or shovel.
- Avoid damaging the tubers during the harvesting process.
By following these tips, you can increase the likelihood of a successful potato harvest and enjoy a bountiful crop of delicious potatoes
Maintaining Potatoes Throughout the Growing Season
Once you have successfully planted your potatoes, it is important to continue taking care of them throughout the growing season. Proper maintenance will help ensure a healthy crop and a successful harvest. Here are some tips for maintaining your potatoes:
Watering
Potatoes require consistent moisture to grow properly. It is important to water them regularly, especially during dry periods. Aim to provide about 1-2 inches of water per week, either through rainfall or irrigation. However, be careful not to overwater, as this can lead to rotting. Monitor the soil moisture levels and adjust your watering accordingly.
Weeding
Weeds can compete with potatoes for nutrients and moisture. It is important to keep the potato bed weed-free throughout the growing season. Regularly remove any weeds that emerge, preferably by hand to avoid damaging the potato plants. Mulching the potato bed can also help suppress weed growth.
Fertilizing
Potatoes are heavy feeders and require sufficient nutrients to grow. Prior to planting, incorporate organic matter such as compost or well-rotted manure into the soil. This will provide a good base of nutrients for the potatoes. As the plants grow, you can supplement with additional fertilizers, such as a balanced vegetable fertilizer, following the package instructions. Avoid overfertilizing, as this can lead to excessive foliage growth at the expense of tuber development.
Hilling
Hilling is an important step in growing potatoes. As the potato plants grow, they should be periodically “hilled” or covered with soil to encourage the formation of more tubers and protect them from sunlight. When the potato plants are around 6-8 inches tall, gently mound soil around the base of the plants, leaving only a few inches of foliage exposed. Repeat this process every few weeks as the plants continue to grow.
Pest and Disease Control
During the growing season, potatoes may be susceptible to pests and diseases. Common pests include potato beetles and aphids, which can be controlled through insecticides or organic methods such as handpicking. Diseases such as late blight and scab can be prevented by choosing disease-resistant potato varieties, rotating crops, and practicing good sanitation. Regularly inspect your plants for signs of pests or diseases and take appropriate action to control them.
Harvesting
Potatoes are typically ready to harvest when the foliage begins to die back and turn yellow. Carefully dig up the potatoes using a garden fork or spade. Be gentle to avoid damaging the tubers. Allow the harvested potatoes to dry in a cool, dark place for a few days before storing them in a cool, dry, and dark location.
By following these maintenance tips, you can ensure a successful potato crop and enjoy a bountiful harvest at the end of the growing season.
Protecting Potatoes from Pests and Diseases
Potatoes, like any other crop, are susceptible to a variety of pests and diseases. Without proper protection, these can significantly impact the yield and quality of your potato harvest. Here are some measures to protect your potatoes from common pests and diseases:
Pest Control
- Colorado Potato Beetle: These beetles can quickly defoliate the plants. Monitor your plants regularly and handpick the beetles. You can also use insecticides labeled for Colorado Potato Beetles.
- Aphids: These tiny insects can transmit viruses and cause wilting. Introduce natural predators like ladybugs or use insecticidal soap to control aphid populations. Regularly inspect plants for aphids and remove infected foliage.
- Wireworms: These larvae of click beetles feed on tubers and can be a significant problem. Rotate your potato crops every few years and control weeds that may harbor them. Also, consider using traps or baits to reduce wireworm populations.
Disease Management
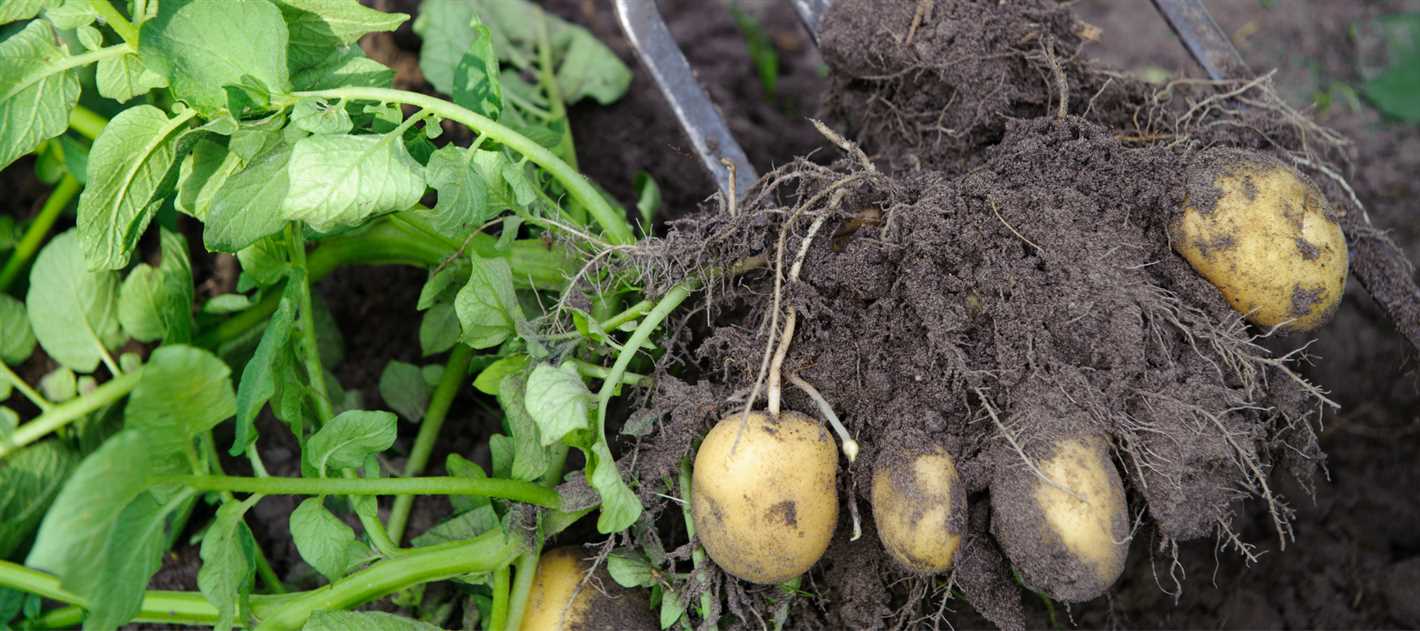
- Early Blight: This fungal disease causes brown spots on the leaves and stems. Plant resistant potato varieties and ensure good air circulation by spacing the plants adequately. Remove and destroy infected leaves and stems to prevent the spread of the disease.
- Late Blight: This devastating disease can cause complete crop loss. Monitor your plants regularly and apply fungicides if needed. Remove and destroy infected plants to prevent the spread of the disease to healthy plants.
- Verticillium Wilt: This soilborne fungus causes wilting and yellowing of leaves. Plant resistant potato varieties and avoid planting potatoes in fields with a history of Verticillium wilt. Crop rotation and soil solarization can also help reduce the fungus population.
Cultural Practices
- Crop Rotation: Rotate your potato crops with non-solanaceous plants like corn or beans to reduce the buildup of pests and diseases in the soil.
- Sanitation: Remove and destroy any infected plant debris to prevent the spread of diseases. Clean your tools and equipment regularly to avoid introducing pathogens.
- Proper Watering: Avoid overwatering, as excessive moisture can promote disease development. Use irrigation methods that minimize foliage wetness, such as drip irrigation.
- Fertilization: Provide balanced fertilization to ensure healthy plant growth. Avoid overfertilization, as it can lead to excessive foliage growth, making plants more susceptible to diseases.
By following these measures, you can protect your potato plants from pests and diseases, ensuring a successful and healthy potato harvest.
“Question-Answer”
What is the best way to prepare potatoes for planting?
The best way to prepare potatoes for planting is to start by chitting them. This involves placing the seed potatoes in a tray or egg carton with the end that has the most eyes facing upwards. Leave them in a cool, light place for four to six weeks to allow the shoots to grow. This will give your potatoes a head start when you plant them in the ground.
Can I plant potatoes straight from the grocery store?
While it is possible to plant potatoes straight from the grocery store, it is not recommended. Potatoes that are sold in stores are often treated with chemicals to prevent sprouting. These chemicals can inhibit the growth of the potato plant. It is best to use certified seed potatoes that are specifically grown for planting.
How should I treat seed potatoes before planting?
Before planting, it is important to treat seed potatoes to prevent diseases. One method is to dust the seed potatoes with a fungicide powder, such as sulfur or copper. This will help protect the potatoes from fungal infections. Another method is to soak the seed potatoes in a solution made from one part bleach to ten parts water. Soaking them for 20 minutes can help kill any bacteria or viruses on the potatoes.
Do potatoes need any special care after planting?
After planting, potatoes need to be hilled. This involves covering the plants with soil to encourage the development of more tubers and protect them from sunlight. As the plants grow, keep adding soil to the base of the plants so that only the top few leaves are visible. This will also help prevent the tubers from turning green due to exposure to sunlight. Regular watering is important to keep the soil moist, but be careful not to overwater as this can lead to rotting.
Can I grow potatoes in containers?
Yes, you can grow potatoes in containers. Choose a container that is at least 12 inches deep and has good drainage. Fill it with a mixture of potting soil and compost. Plant one or two seed potatoes per container, making sure they are covered with about 4 inches of soil. As the plants grow, add more soil to the container to cover the stems, leaving the top few inches of the plant exposed. Water regularly and harvest when the plants have died back.


