- Why composting is important
- 1. Waste reduction
- 2. Soil enrichment
- 3. Carbon sequestration
- 4. Water retention
- 5. Closing the loop
- Gathering materials
- Choosing the right ingredients
- Benefits of choosing the right ingredients
- Preparing the compost pile
- Creating the base layer
- Step 1: Choose the right location
- Step 2: Prepare the area
- Step 3: Use a barrier (optional)
- Step 4: Add a layer of coarse materials
- Step 5: Add some carbon-rich materials
- Step 6: Add some nitrogen-rich materials
- Step 7: Repeat the layers
- Step 8: Water the pile
- Layering compost materials
- Introduction
- Choosing the right materials
- Layering technique
- Moisture and aeration
- Conclusion
- Adding green and brown ingredients
- 1. Green ingredients
- 2. Brown ingredients
- Maintaining the compost pile
- 1. Turning the pile
- 2. Monitoring the moisture level
- 3. Balancing the carbon-to-nitrogen ratio
- 4. Managing pests and odor
- 5. Regularly adding materials
- 6. Keeping track of time
- Turning the pile regularly
- Harvesting and using compost
- 1. Gather the necessary tools
- 2. Locate the compost ready for harvesting
- 3. Start harvesting
- 4. Remove undecomposed materials
- 5. Use a screen or wire mesh to refine the compost
- 6. Store or use the compost
- “Question-Answer”
- What are the benefits of compost layering techniques?
- What materials can be used for the green layer?
- What is the purpose of the brown layer in compost layering?
- How thick should each layer be?
- Do I need to turn the compost pile?
- How long does it take for compost to be ready?
- Can I use finished compost directly in my garden?
- “Video” How to make Compost – The Simplest Easy Method To Compost Piles!
Creating compost is an important step in maintaining a healthy garden. It not only helps reduce waste and prevent pollution but also enriches the soil, providing essential nutrients for plant growth. However, composting is not as simple as throwing all your kitchen scraps into a pile and waiting for them to break down. To create high-quality compost, it’s important to use the correct layering techniques.
Layering is the process of arranging organic materials in a compost pile to optimize decomposition. The right balance of ingredients, moisture, and aeration can significantly speed up the composting process and result in nutrient-rich compost. By following these step-by-step layering techniques, you’ll be on your way to creating a successful compost pile.
Step 1: Gather your ingredients
Before you start layering your compost pile, gather all the necessary ingredients. These can include kitchen scraps like fruit and vegetable peelings, coffee grounds, and eggshells, as well as yard waste like grass clippings, leaves, and small branches. It’s important to have a good mix of “green” and “brown” materials to provide a balance of nitrogen and carbon, which are essential for decomposition.
Step 2: Prepare the site
Choose the location of your compost pile. It’s best to place it in a sunny area that is easily accessible. Lay a layer of coarse organic material like twigs or straw at the bottom to allow for proper drainage and aeration. This layer will also help prevent the compost pile from becoming too compacted.
Step 3: Start layering
Begin by adding a layer of “brown” materials, such as leaves or shredded paper, about 4-6 inches thick. This layer provides carbon, which is necessary to balance the nitrogen-rich “green” materials. Then, add a layer of “green” materials, like kitchen scraps or grass clippings, about 2-4 inches thick. Alternate these layers until you reach the desired height for your compost pile.
Why composting is important
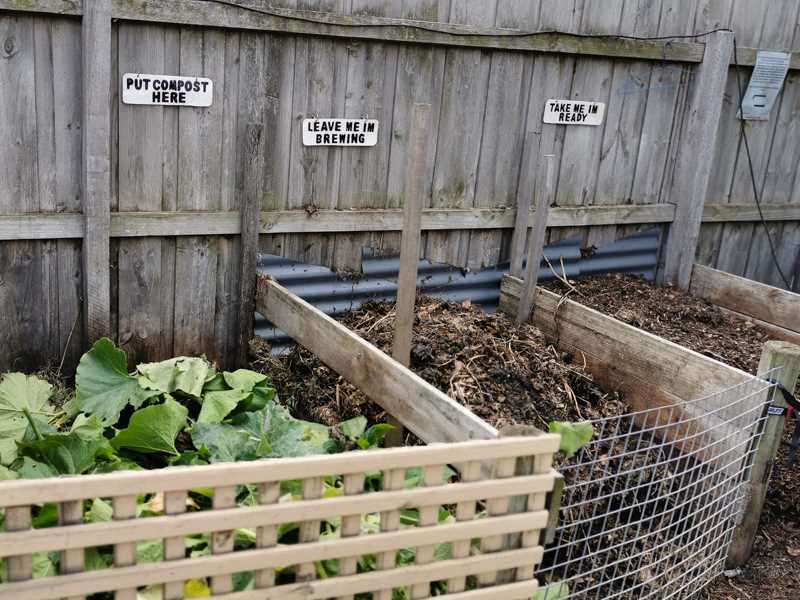
Composting is a natural process that involves decomposing organic materials such as food scraps, yard waste, and paper into nutrient-rich soil. It is an environmentally friendly way to reduce waste, improve soil health, and support sustainable gardening practices.
1. Waste reduction
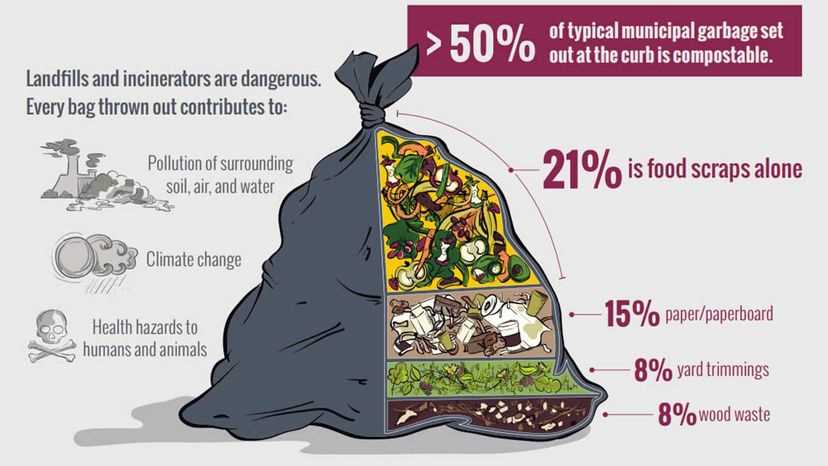
Composting diverts organic waste from being sent to landfills. In landfills, organic waste breaks down anaerobically, releasing methane gas, a potent greenhouse gas that contributes to climate change. By composting, we can significantly reduce methane emissions and minimize the amount of waste that ends up in landfills.
2. Soil enrichment
Compost is a valuable source of nutrients for plants. When added to soil, compost improves its structure, moisture-holding capacity, and nutrient content. It helps plants grow stronger, increases crop yields, and promotes the growth of beneficial microorganisms in the soil. Compost also acts as a natural fertilizer, reducing the need for chemical-based fertilizers that can harm the environment.
3. Carbon sequestration
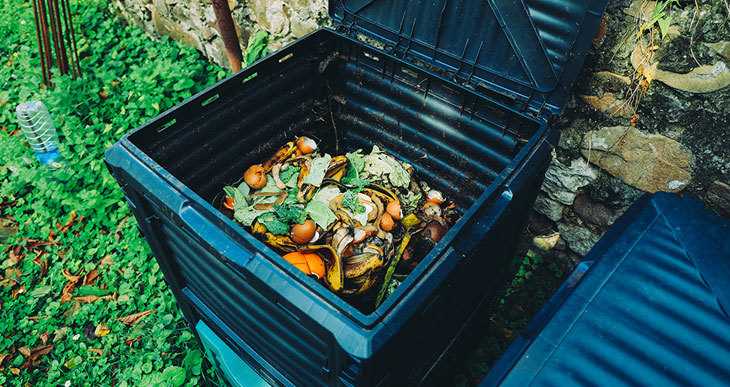
Composting helps to sequester carbon dioxide from the atmosphere. As organic materials decompose, carbon is stored in the resulting compost. This stored carbon remains in the soil and is not released back into the atmosphere as a greenhouse gas. By composting, we can contribute to efforts to combat climate change and reduce carbon emissions.
4. Water retention
Compost improves soil structure, making it more porous and allowing it to retain water more effectively. This is beneficial for both gardens and the environment. Improved water retention reduces the need for excessive watering, conserves water resources, and helps prevent soil erosion and runoff, which can pollute waterways.
5. Closing the loop
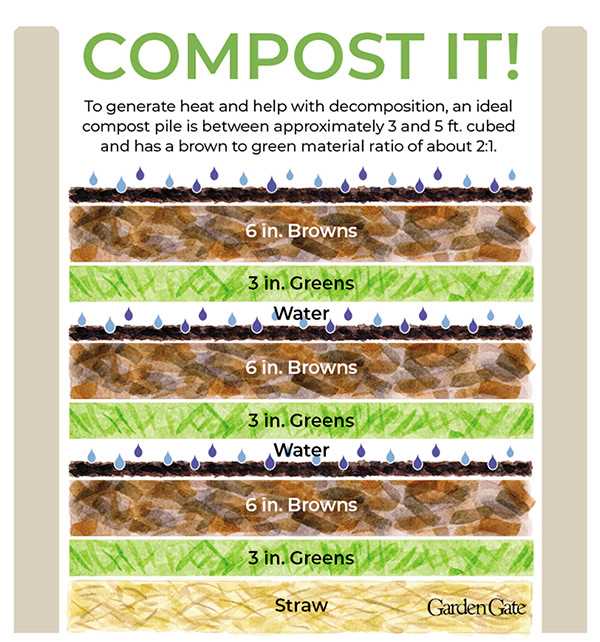
Composting completes the natural cycle of organic materials. By turning waste into nutrient-rich compost, we can return those nutrients back to the soil, where they can nourish future plants and continue the cycle of growth. It creates a sustainable and self-sufficient system that reduces our reliance on external inputs and minimizes waste.
In conclusion, composting is an essential practice for environmental sustainability. It reduces waste, enriches soil, sequesters carbon, improves water retention, and closes the loop in the natural cycle of organic materials. By composting, we can contribute to a healthier planet and create a more sustainable future for generations to come.
Gathering materials
Before you start composting, it’s important to gather all the necessary materials. Here are the things you will need:
- Organic waste: Collect biodegradable materials such as fruit and vegetable scraps, coffee grounds, eggshells, yard trimmings, and leaves. Avoid adding meat, dairy, oily foods, and anything treated with pesticides.
- Bulking agents: You will need carbon-rich materials to balance the nitrogen-rich organic waste. This includes dry leaves, straw, newspaper, cardboard, and wood chips. Shred them into smaller pieces for faster decomposition.
- Water: Composting requires the right amount of moisture. Keep a spray bottle or hose nearby to moisten the materials as needed. The compost pile should be moist but not soggy.
- Aeration tools: Proper airflow is essential for the breakdown of organic matter. Have a pitchfork or a compost turning tool to aerate the pile regularly and prevent it from becoming compacted.
- Compost bin or heap: Decide whether you want to use a compost bin or create a compost heap directly on the ground. A bin provides better containment and control over the composting process, while a heap allows for more flexibility.
Once you have gathered all the materials, you are ready to begin the composting process!
Choosing the right ingredients
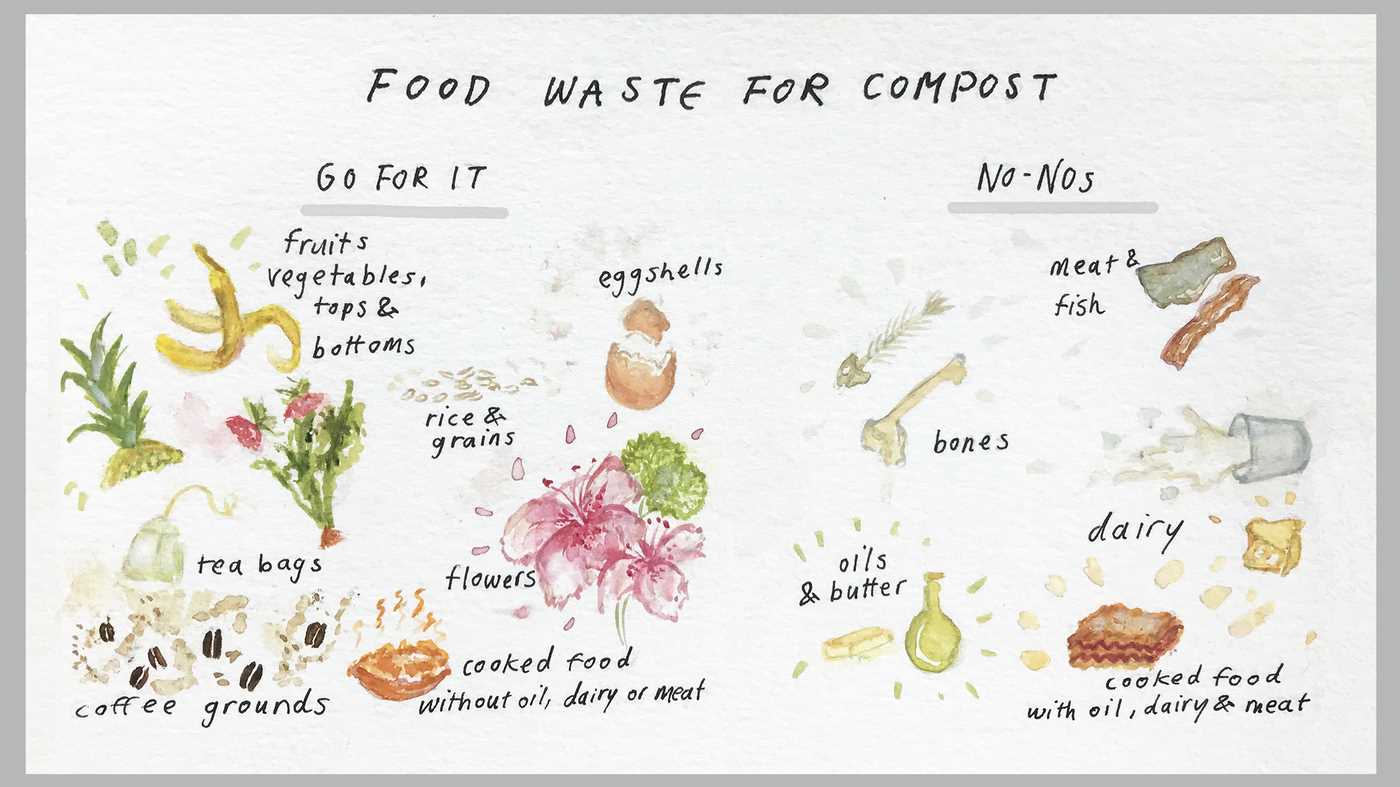
Choosing the right ingredients for your compost is essential to ensure a healthy and nutrient-rich compost pile. Here are some key factors to consider:
- Green materials: These materials provide nitrogen and moisture to the compost pile. Examples include fresh grass clippings, fruit and vegetable scraps, coffee grounds, and plant trimmings.
- Brown materials: These materials provide carbon and help create structure in the compost pile. Examples include dried leaves, straw, wood chips, and shredded paper.
- Avoid: It is important to avoid adding certain materials to your compost pile, such as meat, dairy products, oils, and pet waste. These materials can attract pests, create odor, and slow down the composting process.
It is recommended to aim for a balance of approximately 50% green materials and 50% brown materials in your compost pile. This balance will help create the optimal environment for decomposition and nutrient release.
Benefits of choosing the right ingredients
By choosing the right ingredients for your compost pile, you can enjoy the following benefits:
- Nutrient-rich compost: The right ingredients will provide a wide range of nutrients to your plants when the compost is fully decomposed.
- Improved soil structure: The organic matter in the compost will enhance the soil structure, making it more crumbly and easier to work with.
- Increased water retention: Compost helps the soil retain water, reducing the need for frequent watering.
- Reduced waste: Composting allows you to divert organic waste from landfills, reducing your carbon footprint.
- Cost savings: By creating your own compost, you can save money on commercial fertilizers and soil amendments.
By following these tips and choosing the right ingredients, you can create a successful compost pile that will provide numerous benefits for your garden and the environment.
Preparing the compost pile
Before you start layering your compost pile, it is important to prepare the area where the pile will be located.
- Choose a suitable location: Select a spot for your compost pile that is well-drained and gets plenty of sunlight. Avoid placing it too close to trees or structures.
- Clear the area: Remove any weeds, grass, or other vegetation from the area where the compost pile will be placed. This will prevent unwanted plants from growing in the pile.
- Prepare the base: Create a base for your compost pile by lining the bottom with twigs or straw. This will allow for air circulation and drainage.
- Ensure proper drainage: If your compost pile is going to be placed on a solid surface, such as concrete, it is important to elevate it slightly to allow for proper drainage. This can be done by placing bricks or blocks underneath the pile.
Once you have prepared the area for your compost pile, you are ready to start layering the organic materials. Remember to follow the appropriate composting ratios and alternate between green and brown materials for best results.
Creating the base layer
Composting is a natural process that involves the breakdown of organic materials into nutrient-rich compost. To ensure a successful composting process, it is important to start with a solid base layer.
Step 1: Choose the right location
The first step in creating the base layer is selecting the ideal location for your compost pile or bin. Look for a spot that is well-drained and receives a good amount of sunlight. It should also be easily accessible for adding materials and turning the compost.
Step 2: Prepare the area
Clear the area of any debris, weeds, or grass, and level the ground. This will provide a clean and even surface for building your compost pile or bin.
Step 3: Use a barrier (optional)
Consider using a barrier to separate the compost pile from the surrounding area. This can be a simple wooden or plastic frame, or even a pile of rocks or bricks. A barrier will help contain the compost and prevent it from spreading beyond the desired area.
Step 4: Add a layer of coarse materials
The base layer of your compost pile should consist of coarse materials, such as small twigs or straw. This will create airflow and drainage, ensuring that the compost pile does not become too compacted or waterlogged. Spread a layer of coarse materials at least 6 inches thick over the entire base area.
Step 5: Add some carbon-rich materials
On top of the base layer, add a layer of carbon-rich materials, also known as “browns”. This can include dried leaves, shredded paper, or cardboard. Aim for a layer that is about 6 inches thick. Carbon-rich materials provide a source of energy for the microorganisms that will break down the compost.
Step 6: Add some nitrogen-rich materials
Next, add a layer of nitrogen-rich materials, also known as “greens”. This can include fresh green waste, such as kitchen scraps or grass clippings. Aim for a layer that is about 6 inches thick. Nitrogen-rich materials provide the necessary nutrients for the microorganisms to thrive.
Step 7: Repeat the layers
Continue layering the compost pile with alternating layers of carbon-rich and nitrogen-rich materials until you reach the desired height. Remember to maintain a balance between the two types of materials to ensure proper decomposition.
Step 8: Water the pile
After each layer, lightly water the pile to ensure that it is adequately moist. The moisture content should be similar to that of a wrung-out sponge. This will help promote decomposition and keep the compost pile healthy.
Following these steps will help you create a solid base layer for your compost pile, setting the stage for a successful composting process. Remember to regularly turn the pile and monitor its moisture and temperature levels to ensure optimal conditions for decomposition.
Layering compost materials
Introduction
Layering compost materials is an essential technique in the composting process. It helps create a well-balanced nutrient mix while also ensuring proper decomposition. By carefully layering different organic materials, you can provide the right environment for the microorganisms and insects that break down the materials into nutrient-rich compost.
Choosing the right materials
Creating a balanced compost pile requires a mix of “green” and “brown” composting materials. “Green” materials are typically high in nitrogen and moisture, while “brown” materials are high in carbon and provide a source of energy for the decomposition process.
Examples of “green” materials include grass clippings, kitchen scraps, and fresh garden waste. “Brown” materials can consist of dried leaves, straw, shredded newspaper, or wood chips.
Layering technique
The key to successful compost layering is to alternate between layers of “green” and “brown” materials. This helps maintain a proper carbon to nitrogen ratio, which is essential for the decomposition process.
- Start with a layer of “brown” materials as the base. This helps with aeration and drainage.
- Add a layer of “green” materials on top of the “brown” layer. Make sure to spread them evenly.
- Continue layering, alternating between “brown” and “green” materials until you reach the desired height or the end of your compost pile.
Note: It’s important to avoid adding too much of one type of material, as it can disrupt the balance of the compost pile. Aim for a ratio of roughly 3 parts “brown” materials to 1 part “green” materials.
Moisture and aeration
Throughout the composting process, it’s crucial to maintain the right moisture and aeration levels. This helps the microorganisms thrive and break down the organic matter efficiently.
- Ensure the compost pile stays moist, similar to a damp sponge. If it becomes too dry, water it lightly. If it becomes too wet, add some dry “brown” materials to absorb the excess moisture.
- Turn or mix the compost pile regularly to provide proper aeration. This allows oxygen to reach the microorganisms and prevent the formation of unpleasant odors.
Conclusion
Layering compost materials is an effective technique for creating nutrient-rich compost. By following the right layering technique and maintaining the proper moisture and aeration levels, you can speed up the decomposition process and produce high-quality compost for your garden or plants.
Adding green and brown ingredients
Composting is all about achieving the right balance between green and brown ingredients. Green ingredients provide nitrogen and moisture, while brown ingredients provide carbon and structure. Here’s how to add these ingredients properly:
1. Green ingredients
- Fruit and vegetable scraps
- Grass clippings
- Coffee grounds
- Tea leaves
- Manure (only from herbivores)
- Seaweed
- Green leaves
These green materials are rich in nitrogen and help speed up the decomposition process. It’s important to chop or shred them into smaller pieces before adding them to the compost pile to accelerate decomposition.
2. Brown ingredients
- Dried leaves
- Straw
- Shredded newspaper
- Cardboard
- Hay
- Sawdust
- Corn stalks
Brown materials are rich in carbon and provide structure to the compost pile. They help create airflow and prevent the pile from becoming too compact. Tear or shred these ingredients into smaller pieces to speed up the decomposition process.
Aim for a ratio of roughly 3 parts brown materials to 1 part green materials. This balance will ensure proper decomposition, prevent odors, and create nutrient-rich compost.
Maintaining the compost pile
Once you have established your compost pile, it is important to maintain it properly to ensure the decomposition process is efficient and effective. Follow these steps to keep your compost pile in optimal condition:
1. Turning the pile
Regularly turning the compost pile is essential for proper aeration and decomposition. Use a pitchfork or a compost turner to mix the materials and introduce oxygen, which promotes the activity of aerobic bacteria. Aim to turn the pile every one to two weeks.
2. Monitoring the moisture level
The compost pile should be moist, but not overly wet or dry. Check the moisture level by grabbing a handful of the material and squeezing it. It should feel like a damp sponge. If the pile is too dry, add water using a watering can or a hose. If it is too wet, add dry materials such as sawdust or straw to absorb excess moisture.
3. Balancing the carbon-to-nitrogen ratio
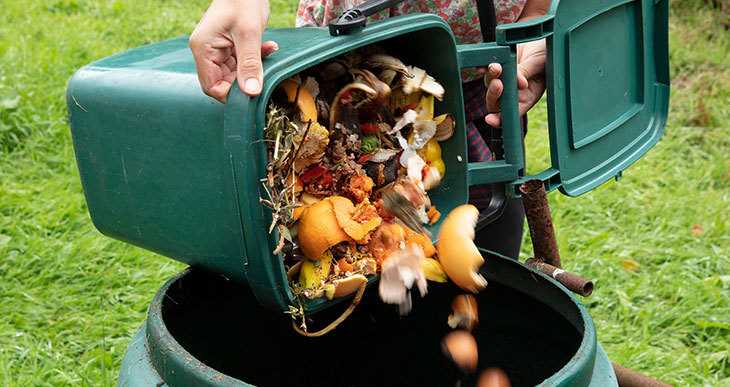
Ensure that your compost pile has a balanced ratio of carbon-rich (brown) and nitrogen-rich (green) materials. Too much of one or the other can slow down the decomposition process. Aim for a ratio of about 3 parts carbon to 1 part nitrogen. Add additional brown or green materials as needed to maintain the balance.
4. Managing pests and odor
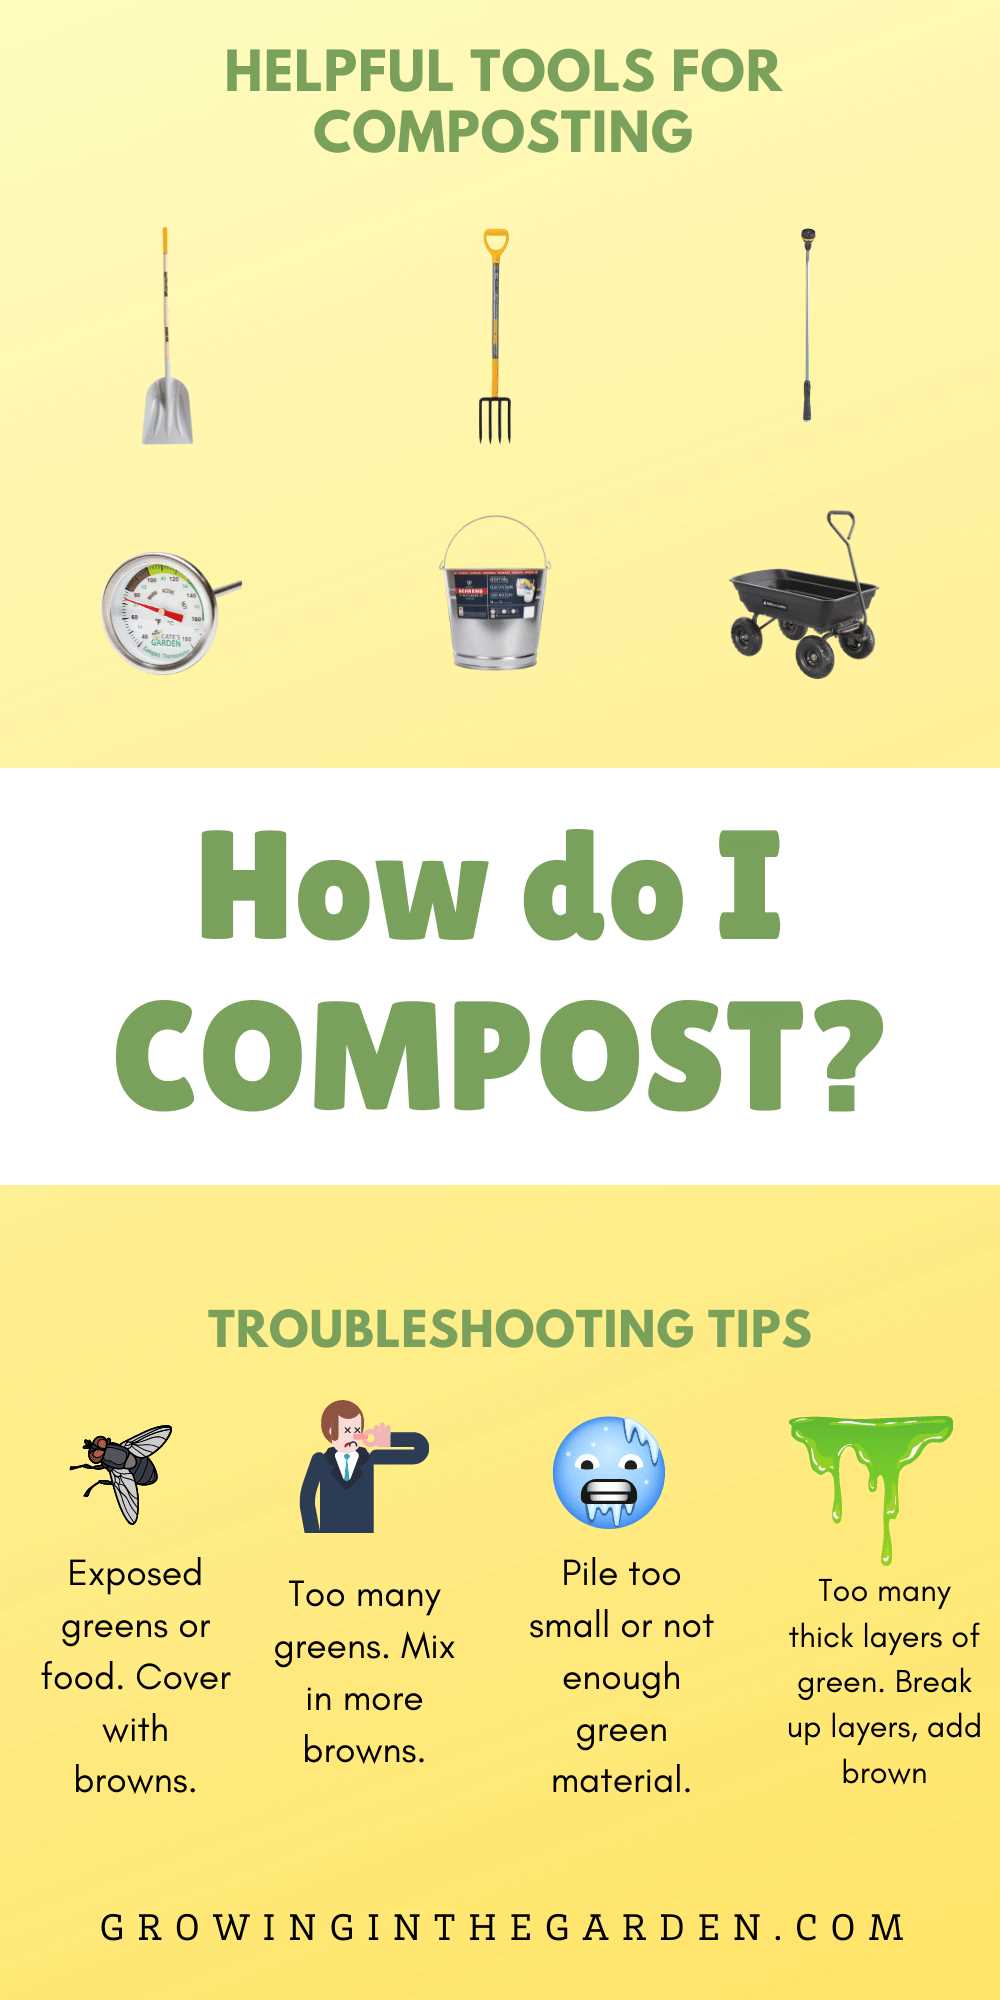
To prevent rodents and other pests from being attracted to your compost pile, avoid adding meat, dairy, or oily food waste. These can also cause unpleasant odors. If you do notice any foul smell, mix in dry materials and thoroughly turn the pile to help aerate the compost and reduce the odor.
5. Regularly adding materials
To keep the compost pile active and productive, continue adding organic materials as they become available. Collect kitchen scraps, yard waste, and other organic matter to feed the compost pile. Chop or shred large materials to aid in decomposition.
6. Keeping track of time
Composting is a natural process that takes time. Be patient and allow the microbes in the pile to do their work. Depending on the conditions and the materials used, it can take several months to a year for the compost to be fully decomposed and ready to use in your garden.
By following these steps, you can maintain a healthy compost pile that will eventually produce nutrient-rich humus to improve your soil and enhance plant growth.
Turning the pile regularly
One important step in composting is turning the pile regularly. This process helps to aerate the pile and distribute the materials evenly, promoting decomposition and preventing the build-up of odors. It also helps to mix the different layers of materials, ensuring that they break down properly.
Here are some steps to follow when turning the compost pile:
- Choose the right time: It is best to turn the pile when the materials in the center begin to break down and the pile starts to cool down. This is usually after 3-5 weeks of initial composting.
- Gather your tools: Before turning the pile, gather some essential tools like a pitchfork or a compost turning tool. These tools will help you to mix the materials effectively.
- Start from the outside: Begin by loosening the materials from the edges of the pile. This will create space for the more decomposed materials from the center to move to the edges.
- Mix from the bottom to the top: As you turn the pile, make sure to mix the materials from the bottom to the top. This will ensure that the fresher materials get mixed with the more decomposed ones, promoting a balanced decomposition process.
- Add water if necessary: While turning the pile, check the moisture level. If the pile feels dry, you may need to add some water. Moisture is crucial for the decomposition process, so make sure the pile is moist, but not overly saturated.
- Repeat regularly: Turning the pile should be done regularly, ideally every 1-2 weeks. This will ensure that the materials continue to decompose evenly and efficiently.
By regularly turning your compost pile, you can speed up the decomposition process and produce high-quality compost for your garden.
Harvesting and using compost
Once your composting materials have fully decomposed and transformed into dark, crumbly compost, it’s time to harvest and use it in your garden. Here’s a step-by-step guide on how to do it:
1. Gather the necessary tools
Before starting the harvesting process, gather the following tools:
- Shovel or garden fork
- Wheelbarrow or large container
- Screen or wire mesh
2. Locate the compost ready for harvesting
Identify the area or bin where your compost is fully decomposed and ready to be harvested. This could be a bottom layer of a compost bin or a designated compost pile for mature compost.
3. Start harvesting
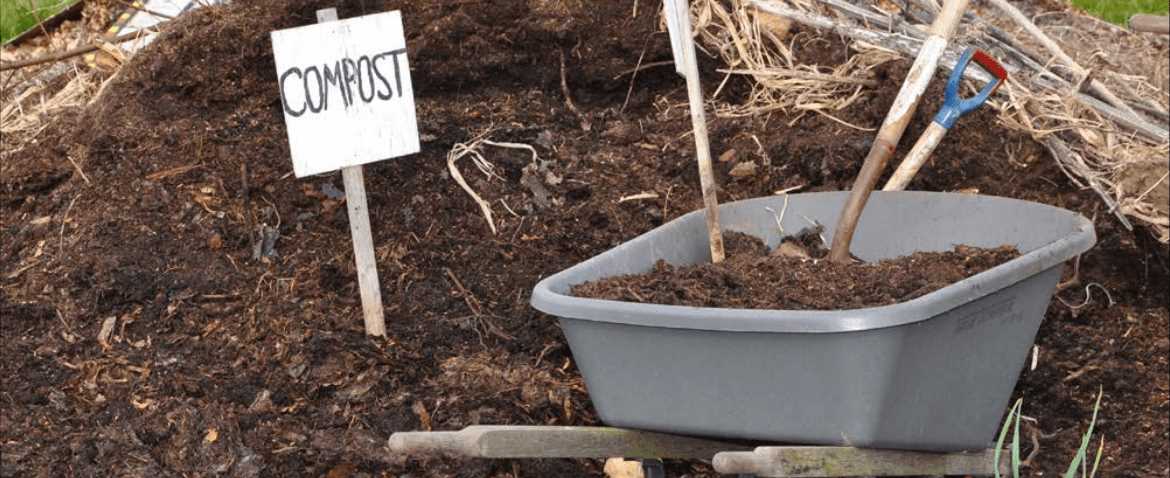
Using a shovel or garden fork, start turning and mixing the compost. This process will help break up any clumps and ensure that the compost is thoroughly mixed.
4. Remove undecomposed materials
While turning the compost, remove any undecomposed materials such as large twigs, branches, or recognizable food scraps. These can be added to a new compost pile or set aside to decompose further.
5. Use a screen or wire mesh to refine the compost
Place a screen or wire mesh over the wheelbarrow or large container. As you continue turning the compost, sift it through the screen to remove any remaining large chunks or foreign objects.
6. Store or use the compost
Once your compost has been refined, you can store it in a covered container or use it immediately in your garden. Spread a layer of compost over your garden beds or mix it into the soil to improve its fertility and structure.
Remember to always keep your compost moist and aerated to encourage further decomposition and continue adding organic materials to your compost system to maintain a healthy cycle of nutrient-rich soil.
“Question-Answer”
What are the benefits of compost layering techniques?
Compost layering techniques help to create a well-balanced compost pile by providing a mix of green and brown organic materials. This results in a faster decomposition process and produces nutrient-rich compost that is ideal for fertilizing garden soil.
What materials can be used for the green layer?
The green layer of the compost pile can consist of fresh grass clippings, fruit and vegetable scraps, coffee grounds, and other nitrogen-rich materials. Avoid using meat, dairy products, and oily materials as they can attract pests or create an unpleasant odor.
What is the purpose of the brown layer in compost layering?
The brown layer in compost layering provides carbon-rich materials that help to balance the nitrogen-rich green layer. It can include dried leaves, straw, shredded paper, sawdust, and other dry plant matter. The brown layer helps to prevent the compost pile from becoming too compacted and allows for better airflow.
How thick should each layer be?
Each layer in the compost pile should be approximately 4 to 6 inches thick. This allows for proper decomposition and ensures that the pile is not too compacted or too loose. If the layers are too thick, it may take longer for the composting process to occur.
Do I need to turn the compost pile?
Yes, it is recommended to turn the compost pile every 2 to 3 weeks in order to facilitate the decomposition process. Turning the pile helps to mix the different layers and provides oxygen to the microorganisms responsible for breaking down the organic matter. This promotes faster composting and prevents unpleasant odors.
How long does it take for compost to be ready?
The time required for compost to be fully ready depends on various factors, including the materials used, the size of the compost pile, and the environmental conditions. Generally, it can take anywhere from 2 to 12 months for compost to be fully ready. Regularly turning the pile and maintaining the correct compost layering techniques can speed up the process.
Can I use finished compost directly in my garden?
Yes, finished compost can be used directly in the garden. It is a valuable source of nutrients and helps to improve soil structure and fertility. Before applying the compost, make sure that it is fully decomposed and free of any large chunks or recognizable materials. It can be used as a top dressing, mixed into the soil, or as a component of potting mixtures.


