- Best Techniques for Spring Care of Winter Garlic
- 1. Remove Mulch
- 2. Check for Weed Growth
- 3. Fertilize
- 4. Watering
- 5. Monitor Pests and Diseases
- 6. Harvesting
- 7. Curing
- Planting winter garlic: timing is everything
- Determining the ideal planting time
- Considering local climate
- Preparing the soil
- Planting cloves
- Mulching and watering
- Mulching: protect your garlic from the elements
- 1. Choose the right mulch
- 2. Apply the mulch at the right time
- 3. Layer the mulch properly
- 4. Monitor moisture levels
- 5. Remove the mulch in spring
- Watering: finding the right balance
- Finding the right watering schedule
- Signs of overwatering or underwatering
- Conclusion
- Fertilizing: giving your garlic the nutrients it needs
- 1. Soil Testing
- 2. Organic Fertilizers
- 3. Timing
- 4. Nitrogen and Potassium
- 5. Mulching
- 6. Avoid Overfertilizing
- 7. Watering
- Controlling pests and diseases: keeping your garlic healthy
- Pest control
- Disease prevention
- General tips for pest and disease control
- Pruning: maximizing bulb development
- When to prune?
- How to prune?
- Benefits of pruning
- After pruning
- Harvesting: when and how to harvest your garlic
- 1. Timing
- 2. Signs of readiness
- 3. Harvesting technique
- 4. Storing your harvest
- Storing your garlic: preserving its freshness
- Maximize Your Harvest Potential!
- “Question-Answer”
- What are the best techniques for spring care of winter garlic?
- When should I start watering my winter garlic in spring?
- What kind of mulch should I use for winter garlic?
- How often should I fertilize my winter garlic in spring?
- What can I do to prevent pests and weeds in my winter garlic?
- “Video” Yes! You Can Plant Garlic Late Winter & Early Spring: All the Steps!
Garlic is a versatile and delicious crop that can be grown in almost any garden. If you planted winter garlic last fall, now is the time to start thinking about its spring care. Taking proper care of your winter garlic in the spring will help maximize its harvest potential and ensure you get the best bulbs possible.
One of the most important techniques for spring care of winter garlic is proper watering. Garlic needs consistent moisture to grow, but it also needs good drainage to prevent rot. You should water your garlic when the top inch of soil feels dry, but be careful not to overwater. Too much water can lead to fungus and disease, which can damage your garlic crop.
Another important technique is to keep your garlic bed weed-free. Weeds can compete with garlic for nutrients and water, reducing its growth and potential yield. Regularly hoe or hand-pull any weeds that appear in your garlic bed, being careful not to disturb the garlic plants.
Finally, don’t forget to fertilize your winter garlic in the spring. Garlic is a heavy feeder and requires regular fertilization to produce big, healthy bulbs. Use a balanced organic fertilizer or compost to provide the nutrients your garlic needs. Apply the fertilizer according to the package instructions, being careful not to over-fertilize, as this can burn the garlic plants.
By following these best techniques for spring care of winter garlic, you can maximize your harvest potential and enjoy a bountiful crop of delicious garlic bulbs. With proper watering, weed control, and fertilization, your winter garlic will thrive and reward you with big, flavorful bulbs that are perfect for cooking and enjoying throughout the year.
Best Techniques for Spring Care of Winter Garlic
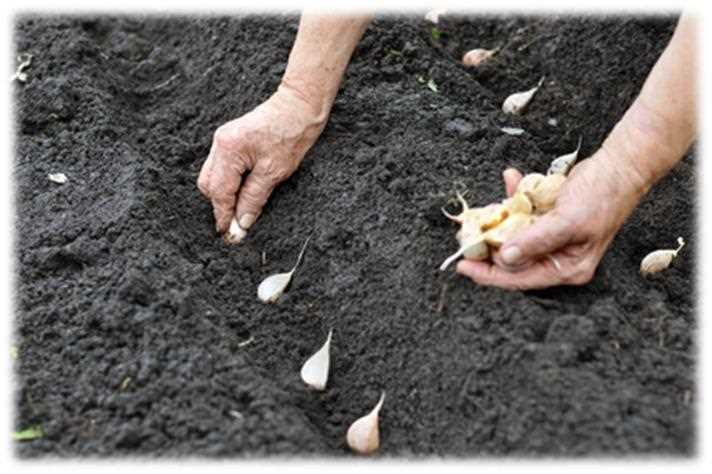
Growing winter garlic is a rewarding experience, but proper care is essential to maximize your harvest potential. Here are some of the best techniques to ensure your winter garlic thrives in the spring:
1. Remove Mulch
In early spring, it is important to remove any mulch or coverings that you used to protect your garlic during the winter. This allows the soil and garlic plants to warm up faster, promoting quicker growth.
2. Check for Weed Growth
Inspect your garlic patch for any weed growth. Weeds compete with your garlic plants for nutrients and can hinder their growth. Carefully remove any weeds by hand or use a small hand tool to avoid damaging the garlic plants.
3. Fertilize
Apply a balanced organic fertilizer to provide your garlic plants with essential nutrients. A slow-release fertilizer is ideal as it will provide a steady supply of nutrients throughout the growing season.
4. Watering
Garlic requires consistent moisture for optimal growth. Water your garlic plants deeply but infrequently, ensuring the soil is evenly moist. Avoid overwatering, as it can lead to rot and disease.
5. Monitor Pests and Diseases
Regularly inspect your garlic plants for any signs of pests or diseases. Common pests that affect garlic include aphids, onion flies, and nematodes. If detected, take appropriate measures to control or prevent infestations.
6. Harvesting
Knowing when to harvest your garlic is important to ensure maximum flavor and storage potential. Harvest your garlic when the tops have turned brown but are still standing upright. Carefully dig up the bulbs using a garden fork, taking care not to bruise or damage them.
7. Curing
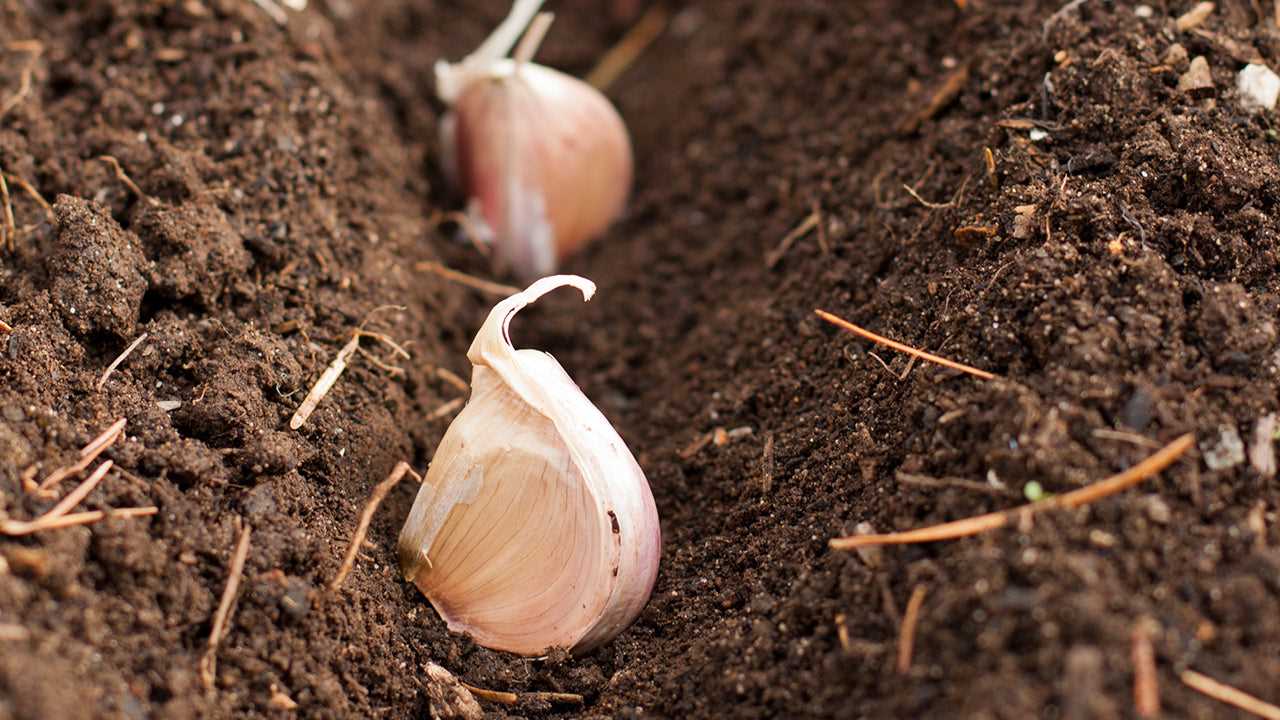
After harvesting, it is important to cure your garlic to enhance its flavor and storage life. Lay the garlic bulbs in a dry, well-ventilated area for 2-3 weeks, allowing the outer layers to dry and the flavors to develop. Once cured, trim the roots and tops before storing.
By following these best techniques for spring care of winter garlic, you can maximize your harvest potential and enjoy a bountiful crop of flavorful garlic.
Planting winter garlic: timing is everything
One of the most important factors in successfully growing winter garlic is planting it at the right time. The timing of planting can vary depending on your location and climate, so it is crucial to understand the optimal planting window for your area.
Determining the ideal planting time
The ideal time to plant winter garlic is typically in the fall, before the ground freezes. For most areas, this means planting in September or early October. However, it is recommended to consult with local gardening experts or agricultural extension offices to determine the best planting time specific to your region.
Considering local climate
The local climate plays a significant role in determining the planting time for winter garlic. Garlic plants require a period of cold temperatures, known as vernalization, to develop properly. The length of cold period required varies between garlic varieties, so it is essential to select a variety suitable for your climate.
Preparing the soil
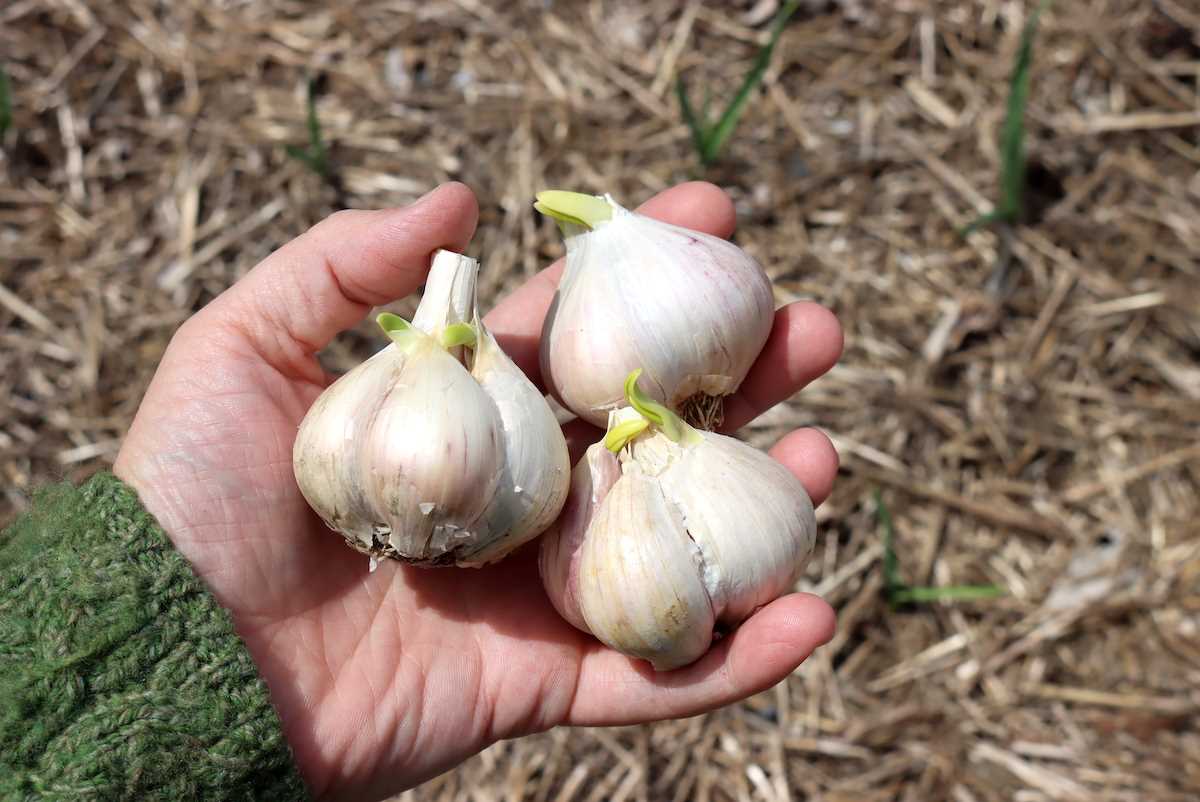
Before planting your winter garlic, it is important to prepare the soil properly. Garlic thrives in well-drained soil, rich in organic matter. Amend the soil with compost or aged manure to improve its fertility. Additionally, remove any weeds or debris from the planting area to minimize competition for nutrients and water.
Planting cloves
To plant winter garlic, separate the cloves from the bulb and plant them individually, pointed end up, about 2 inches deep and 4-6 inches apart. Create rows with a spacing of 12-18 inches between them to allow for proper airflow and sunlight penetration.
Mulching and watering
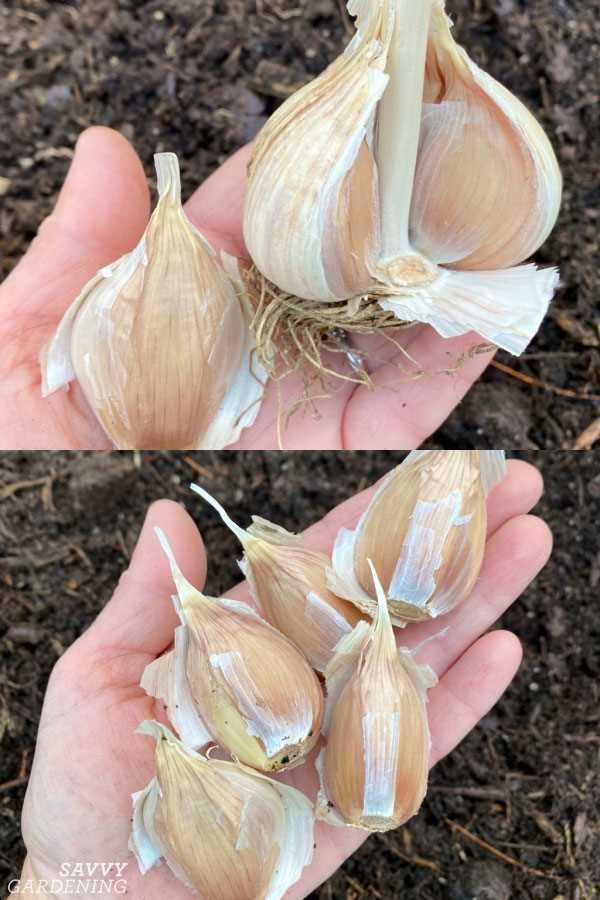
After planting, apply a layer of organic mulch, such as straw or dried leaves, over the garlic bed. This will help regulate soil temperature, conserve moisture, and suppress weed growth. Water the garlic lightly after planting and ensure that the soil remains consistently moist throughout the winter.
- Monitor for pests and diseases
- Remove any weeds
- Provide adequate water
- Fertilize as needed
- Harvest at the right time
Mulching: protect your garlic from the elements
Mulching is an important step in ensuring the health and productivity of your winter garlic. By protecting the plants from extreme weather conditions and maintaining moisture levels in the soil, mulching can help maximize your harvest potential. Here are some tips to mulch effectively:
1. Choose the right mulch
Select a mulch material that will provide adequate insulation and moisture retention. Organic mulches such as straw, hay, or wood chips are popular choices for garlic. These materials not only protect the plants but also break down over time, enriching the soil with valuable nutrients.
2. Apply the mulch at the right time
Wait until the soil has cooled down before applying mulch. This will allow your garlic plants to establish strong roots. Generally, mulch should be applied in late fall or early winter when the soil temperature drops below 50°F (10°C).
3. Layer the mulch properly
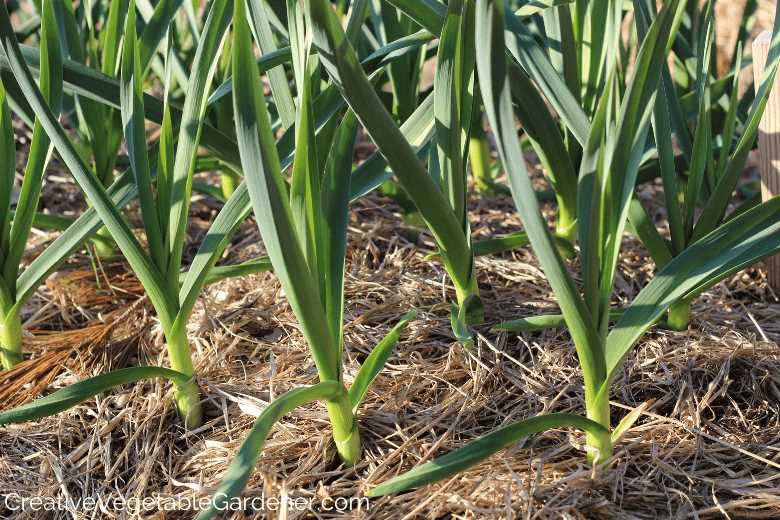
Apply a layer of mulch about 4-6 inches (10-15 cm) thick around your garlic plants. Make sure to cover the entire bed uniformly, leaving no gaps. Avoid applying mulch too close to the garlic stems to prevent rotting.
4. Monitor moisture levels
Check the moisture levels in the soil regularly. If the mulch becomes too wet, it may lead to rotting or fungal diseases. Conversely, if the mulch becomes too dry, it will not effectively retain moisture. Adjust the mulch thickness accordingly to maintain optimal moisture levels.
5. Remove the mulch in spring
In early spring when the weather starts to warm up, gradually remove the mulch. This will allow the soil to warm up faster and provide space for the garlic plants to emerge and grow. Be careful not to damage the emerging shoots when removing the mulch.
Mulching is a simple yet effective technique that can greatly benefit your winter garlic crop. By providing protection from the elements and maintaining a favorable growing environment, mulching can help you maximize the potential of your harvest.
Watering: finding the right balance
Watering is a critical aspect of caring for winter garlic. Proper watering ensures that your garlic plants have enough moisture to thrive, but it’s also important to avoid overwatering, which can lead to root rot and other diseases.
Finding the right watering schedule
When it comes to watering winter garlic, the key is to find the right balance. Garlic plants need consistent moisture, but they also need well-draining soil to prevent waterlogged conditions. Here are some tips for finding the right watering schedule:
- Check the soil moisture regularly: Use your finger or a small shovel to check the moisture level of the soil. If it feels dry up to a couple of inches below the surface, it’s time to water.
- Water deeply and infrequently: When you do water, it’s important to give your garlic plants a thorough soaking. This encourages the roots to grow deeper into the soil, which promotes healthier plants. Avoid shallow watering that only wets the surface.
- Consider the weather conditions: Adjust your watering schedule based on the weather conditions. If it’s been raining, you may need to water less frequently. On hot, dry days, your garlic plants may need more water to compensate for the increased evaporation.
- Use mulch to conserve moisture: Applying a layer of organic mulch around your garlic plants can help to conserve moisture in the soil. Mulch also helps to suppress weeds, which can compete with your garlic plants for water and nutrients.
Signs of overwatering or underwatering
It’s important to monitor your garlic plants for signs of overwatering or underwatering. Here are some common signs to look out for:
- Overwatering: Yellowing leaves, wilting despite moist soil, and a foul odor are all signs of overwatering. If you notice any of these signs, reduce your watering frequency and ensure that the soil has proper drainage.
- Underwatering: Dry, brown leaves and soil that feels consistently dry are signs of underwatering. If your garlic plants are not receiving enough water, increase your watering frequency or adjust the amount of water you provide.
Conclusion
Watering winter garlic requires finding the right balance between providing enough moisture for the plants to thrive and avoiding overwatering. By checking the soil moisture regularly, watering deeply and infrequently, considering weather conditions, and using mulch, you can ensure that your garlic plants receive the proper amount of water for optimal growth. Monitoring your plants for signs of overwatering or underwatering is also essential for maintaining their health.
Fertilizing: giving your garlic the nutrients it needs
Proper fertilizing is crucial for ensuring the optimal growth and development of your winter garlic. By providing the right nutrients at the right time, you can maximize your harvest potential. Here are some best practices for fertilizing your garlic:
1. Soil Testing
Before applying any fertilizer, it’s important to test your soil to determine its nutrient composition. This will help you identify any deficiencies or imbalances that need to be addressed. A soil testing kit can be used to measure the pH level, as well as the levels of nitrogen, phosphorus, potassium, and other essential nutrients.
2. Organic Fertilizers
Organic fertilizers are the best option for feeding your garlic, as they provide a slow release of nutrients and promote soil health. Examples of organic fertilizers include compost, well-rotted manure, bone meal, and seaweed extract. These fertilizers not only supply essential nutrients but also improve soil structure and increase microbial activity.
3. Timing
When it comes to fertilizing garlic, timing is critical. Apply fertilizer in early spring, just before the garlic starts its rapid growth phase. This ensures that the nutrients are available when the plant needs them the most. Avoid fertilizing too late in the season, as this can lead to delayed bulb development.
4. Nitrogen and Potassium
Garlic requires a good supply of nitrogen and potassium for healthy growth. Nitrogen promotes leafy growth, while potassium helps with bulb development. Use a balanced organic fertilizer with a higher nitrogen and potassium content to meet these requirements.
5. Mulching
Mulching around your garlic plants can help conserve moisture and regulate soil temperature, while also preventing weed growth. Organic mulches, such as straw or leaves, can also break down over time and release nutrients into the soil.
6. Avoid Overfertilizing
While it’s important to provide your garlic with the necessary nutrients, overfertilizing can do more harm than good. Excessive fertilizer can lead to nutrient imbalances or burn the plants’ roots. Follow the recommended application rates and avoid applying fertilizer too frequently.
7. Watering
Proper watering is essential for nutrient uptake by the garlic plants. Ensure that your garlic receives adequate water, especially during dry periods. Water deeply and infrequently to encourage deep root growth.
By following these fertilizing techniques, you can ensure that your winter garlic receives the nutrients it needs for optimal growth and maximize your harvest potential.
Controlling pests and diseases: keeping your garlic healthy
Garlic can be susceptible to several pests and diseases, which can have a negative impact on its growth and overall health. However, with proper care and attention, you can control and prevent these issues, ensuring that your garlic plants thrive.
Pest control
- Aphids: These small, soft-bodied insects can cause damage by sucking the sap from garlic leaves and transmitting diseases. Regularly inspect your plants for aphid infestations and use insecticidal soap or neem oil to control them.
- Thrips: Thrips feed on garlic leaves, causing silvery streaks and distortion. Remove and destroy affected leaves and use organic insecticides to control their population.
- Nematodes: These microscopic roundworms can attack garlic roots, leading to stunted growth and reduced yield. Rotate your crops with non-host plants and apply beneficial nematodes to control their population.
- Garlic bulb fly: The larvae of this fly can burrow into garlic bulbs, causing significant damage. Cover your garlic plants with row covers to prevent adult flies from laying eggs and apply spinosad-based insecticides if necessary.
Disease prevention
- Fungal diseases: Garlic is prone to fungal diseases such as white rot, downy mildew, and rust. To prevent these diseases, ensure proper spacing between plants for good air circulation, avoid overhead watering, and remove and destroy infected plant material.
- Bacterial diseases: Garlic can be affected by bacterial diseases like bacterial leaf blight and soft rot. Practice crop rotation, avoid overwatering, and promptly remove and destroy infected plants to prevent the spread of these diseases.
- Viral diseases: Viruses can cause yellowing, stunting, and leaf distortion in garlic plants. Use virus-free planting material, control aphids, and remove infected plants to reduce the risk of viral diseases.
General tips for pest and disease control
- Sanitation: Keep your garden free from plant debris and weeds, as they can harbor pests and diseases.
- Crop rotation: Rotate your garlic crops with non-host plants to break the life cycle of pests and reduce the risk of disease buildup in the soil.
- Companion planting: Planting garlic alongside pest-repellent plants like marigold and chives can help deter pests.
- Monitoring: Regularly inspect your garlic plants for signs of pests and diseases, and take prompt actions to control them.
- Organic solutions: Whenever possible, use organic and environmentally friendly methods to control pests and diseases in your garlic garden.
By implementing these pest and disease control measures, you can ensure that your garlic stays healthy and productive, maximizing your harvest potential.
Pruning: maximizing bulb development
Pruning is an essential technique for maximizing bulb development in winter garlic. By removing some of the foliage during the spring, you can redirect the plant’s energy towards bulb development, resulting in larger and more flavorful cloves.
When to prune?
Pruning should be done when the foliage reaches a height of around 6-8 inches. At this stage, the plant has gained enough energy from photosynthesis to support bulb development, and removing some of the foliage will not harm the plant’s overall health.
How to prune?
Start by selecting the largest and healthiest leaves for pruning. These leaves should be green, free from any diseases or pests. Use clean and sharp pruning shears to make clean cuts, and avoid tearing or damaging the foliage.
Remove about one-third of the foliage, focusing on the outer leaves. Leave the inner, younger leaves intact, as they are still contributing to energy production through photosynthesis.
Benefits of pruning
Pruning has several benefits for winter garlic bulb development:
- Increased bulb size: By redirecting the plant’s energy towards bulb development, pruning allows the cloves to grow larger.
- Improved flavor: The energy concentration in fewer cloves results in a more concentrated and intense flavor.
- Improved air circulation: Pruning helps to improve air circulation within the plant, reducing the risk of fungal diseases.
- Reduced competition: By removing some of the foliage, you reduce the competition for nutrients and water, ensuring that the bulbs receive sufficient resources for their development.
After pruning
After pruning, it’s important to continue providing the garlic plants with adequate care. Make sure to water them regularly, especially during dry periods, and keep the area around the plants free from weeds to minimize competition for nutrients.
It’s also recommended to fertilize the garlic plants with a balanced fertilizer to provide them with the necessary nutrients for bulb development.
| Step | Timing | Technique |
|---|---|---|
| 1 | When foliage reaches 6-8 inches | Select and remove one-third of the largest, healthiest leaves |
| 2 | After pruning | Continue regular watering and weed control |
| 3 | After pruning | Fertilize with a balanced fertilizer |
Harvesting: when and how to harvest your garlic
Harvesting garlic at the right time is crucial to ensure a bountiful and flavorful crop. Here are some guidelines to help you determine when and how to harvest your winter garlic:
1. Timing
Winter garlic is usually ready to be harvested in late spring or early summer, depending on the variety. The key is to wait until the lower leaves turn yellow and start to dry up, while the upper leaves remain green. This indicates that the bulbs have reached maturity and are ready to be harvested.
2. Signs of readiness
Aside from the yellowing lower leaves, there are a few other signs that your garlic is ready for harvest:
- The garlic bulbs will have developed a firm and intact outer skin.
- The garlic foliage will start to lean over or collapse slightly.
- You may notice a strong, distinct garlic smell when you brush against the plants.
3. Harvesting technique
To harvest your garlic, follow these steps:
- Loosen the soil around the bulbs using a garden fork or shovel, being careful not to damage the bulbs in the process.
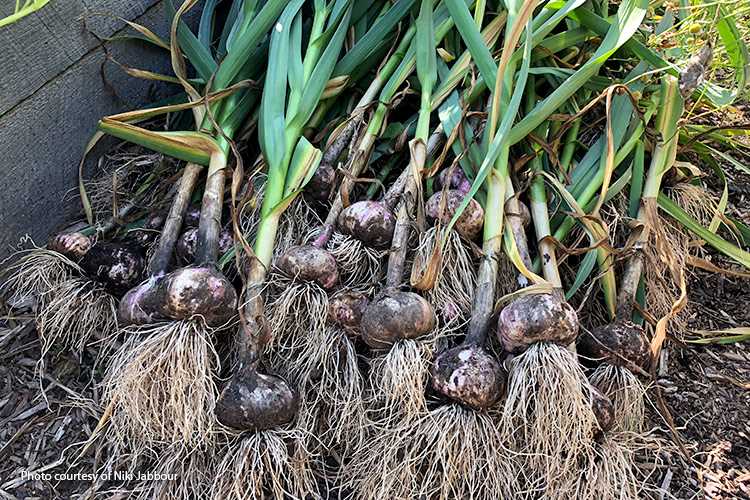
- Gently lift the bulbs out of the soil, making sure to preserve as much of the stalk as possible.
- Brush off excess soil from the bulbs, but do not wash them as this can increase the risk of rotting during curing.
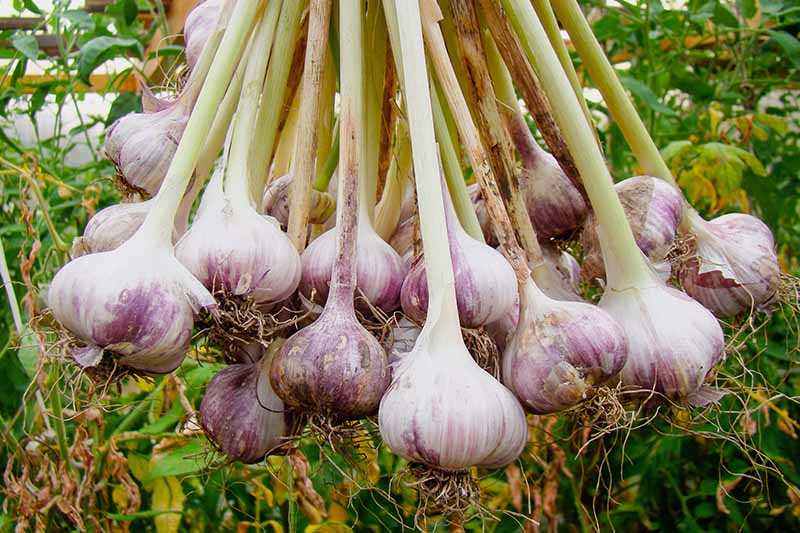
- Create bundles of garlic by tying the stalks together, and hang them upside down in a cool, dry, and well-ventilated area.
- Allow the garlic to cure for 2-4 weeks until the stalks and outer skins become dry and papery.
4. Storing your harvest
Once the garlic has properly cured, trim the stalks to about an inch above the bulbs and store them in a cool, dry place. Avoid storing garlic in the refrigerator, as the moisture can cause the bulbs to sprout or go bad prematurely.
By following these guidelines, you can ensure a successful garlic harvest and enjoy the rewards of your hard work in the garden!
Storing your garlic: preserving its freshness
After a successful harvest, it’s important to store your garlic correctly to ensure its freshness and quality are preserved for as long as possible. Here are some best practices for storing your garlic:
- Curing: After harvesting, it’s essential to cure your garlic bulbs before storing them. Curing involves allowing the bulbs to dry in a warm and well-ventilated area for a few weeks. This process helps to toughen the skin and extend the garlic’s shelf life.
- Trimming: Before storing, trim the roots and remove any excess dirt or damaged outer layers of skin. Avoid removing too many layers, as this can expose the cloves and reduce their shelf life.
- Temperature and humidity: Garlic should be stored in a cool, dry place with low humidity. Ideal storage conditions are between 50-60°F (10-15°C) with humidity levels of 60-70%. Avoid storing garlic in the refrigerator, as the cold and humid environment can cause the cloves to sprout and lose flavor.
- Air circulation: Ensure that there is proper air circulation around the garlic bulbs. This helps prevent moisture buildup and reduces the likelihood of rot or mold.
- Container: Store garlic in a breathable container such as mesh bags, nylon netting, or paper bags. Avoid using plastic bags or airtight containers, as they can trap moisture and speed up the sprouting process.
- Away from other produce: Garlic emits a strong odor that can affect the flavor of nearby fruits and vegetables. Store garlic away from other produce to prevent this from happening.
By following these storage tips, you can ensure that your garlic remains fresh and flavorful for several months, allowing you to enjoy the fruits of your labor well beyond the harvest season.
Maximize Your Harvest Potential!
To make the most of your garlic harvest, follow these techniques and tips:
1. Optimal Planting Time: Garlic should be planted in the fall, about six to eight weeks before the ground freezes. This allows the garlic cloves to establish a strong root system before winter.
2. Proper Bed Preparation: Prepare the garlic bed by removing any weeds and adding organic matter, like compost or well-rotted manure. This will provide the garlic plants with the necessary nutrients for healthy growth.
3. Planting Depth and Spacing: Plant each garlic clove about 2 inches deep and 4-6 inches apart. This allows enough space for each plant to develop its bulb properly.
4. Mulching: After planting, apply a layer of mulch, such as straw or shredded leaves, to protect the garlic cloves from extreme temperatures and weed growth. Mulching also helps retain moisture in the soil.
5. Regular Watering: Garlic requires consistent moisture throughout its growing season. Water the plants regularly, especially during dry periods, but avoid overwatering to prevent fungal diseases.
6. Fertilizing: Feed your garlic plants with a balanced organic fertilizer, such as compost or a slow-release fertilizer, during early spring. This provides essential nutrients for bulb development.
7. Pruning and Removing Scapes: As the garlic plants grow, they may produce scapes. These curly flower stems should be pruned to divert the plant’s energy towards bulb growth. Use the scapes in cooking or remove them to avoid weakening the plants.
8. Weed Control: Keep the garlic bed weed-free, as weeds compete with the plants for nutrients and moisture. Hand-pull weeds or use organic weed control methods to minimize damage to the garlic crop.
9. Harvesting: When the lower leaves start to yellow and dry, it’s time to harvest the garlic bulbs. Gently dig out the bulbs from the ground, being careful not to damage them. Cure the garlic bulbs in a dry, well-ventilated area for a few weeks before storing.
10. Rotating Crops: To avoid soil-borne diseases and pests, rotate your garlic crop with other plants from different families, such as legumes or brassicas, every year.
By following these techniques, you can maximize the harvest potential of your winter garlic and enjoy a bountiful crop of flavorful, homegrown goodness!
“Question-Answer”
What are the best techniques for spring care of winter garlic?
The best techniques for spring care of winter garlic include watering, mulching, fertilizing, and removing pests and weeds.
When should I start watering my winter garlic in spring?
You should start watering your winter garlic in spring when the soil starts to dry out. Be careful not to overwater, as garlic prefers moist but not waterlogged soil.
What kind of mulch should I use for winter garlic?
You can use various types of mulch for winter garlic, such as straw, leaves, or compost. The mulch helps retain moisture, suppresses weeds, and regulates soil temperature.
How often should I fertilize my winter garlic in spring?
You should fertilize your winter garlic in spring every 4-6 weeks. Use a balanced fertilizer high in nitrogen to promote leaf growth.
What can I do to prevent pests and weeds in my winter garlic?
To prevent pests and weeds in your winter garlic, you can use natural pest control methods such as neem oil or garlic spray, and regularly remove any weeds that compete with the garlic for nutrients.


