- Step 1: Choosing the Right Tomato Variety
- Step 2: Harvesting Ripe Tomatoes
- Step 3: Preparing the Tomatoes for Seed Extraction
- Step 4: Extracting the Tomato Seeds
- Materials Needed:
- Instructions:
- Step 5: Washing and Drying the Tomato Seeds
- Materials Needed:
- Step 6: Storing Tomato Seeds
- 1. Dry the Seeds:
- 2. Label the Storage Container:
- 3. Store in a Cool, Dry Place:
- 4. Check for Moisture Regularly:
- 5. Re-testing Germination:
- 6. Record Keeping:
- Tips for Successful Tomato Seed Planting
- “Question-Answer”
- Why should I collect tomato seeds for planting?
- When is the best time to collect tomato seeds?
- What is the process of collecting tomato seeds?
- How long do tomato seeds last?
- Can I collect seeds from hybrid tomatoes?
- “Video” Growing a Peach Tree From Seed – Super Easy! How To Grow Peaches From Pit
Tomatoes are a popular garden staple, loved for their versatility and delicious flavor. Growing your own tomatoes can be a rewarding experience, and one way to ensure success is by collecting and saving tomato seeds. Saving seeds allows you to preserve the characteristics of your favorite tomato varieties and also saves money on purchasing new seeds each year.
Collecting tomato seeds is a simple process that anyone can do, even if you are a beginner. The first step is to choose a ripe, healthy tomato fruit. Look for a tomato that is fully mature, with a vibrant color and no signs of disease or damage. This will ensure that the seeds are healthy and able to produce strong plants.
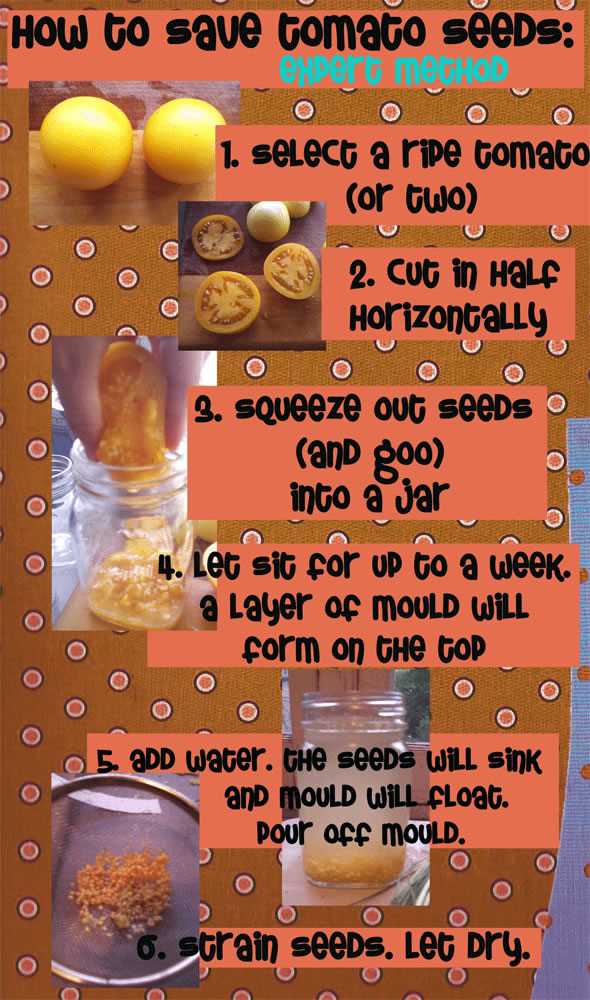
To collect the seeds, start by cutting the tomato in half horizontally. Use a spoon or your fingers to scoop out the seeds and the gelatinous substance that surrounds them. Place the seeds and gel into a container, such as a small glass jar or a plastic bag. Add a small amount of water to the container, enough to cover the seeds.
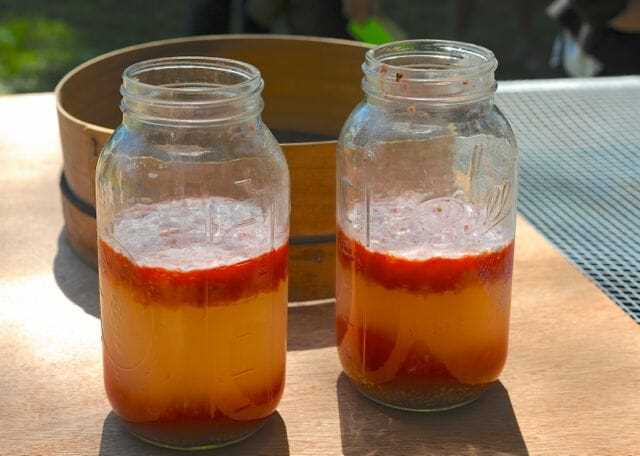
Next, you will need to ferment the seeds. Fermentation is a natural process that helps to remove the gelatinous coating from the seeds, which can inhibit germination. Simply cover the container with a breathable material, such as a coffee filter or a cloth, and let it sit at room temperature for about three days. During this time, the seeds will start to ferment and the gel will break down.
Once the fermentation process is complete, it’s time to clean and dry the seeds. Pour the contents of the container into a fine-mesh sieve or strainer and rinse the seeds thoroughly with water. Gently rub the seeds against the mesh to remove any remaining gel. Then, spread the seeds out on a labeled plate or tray to dry. Choose a warm, well-ventilated spot and allow the seeds to air dry completely before storing them in a cool, dark place for future use.
Collecting tomato seeds is a simple and rewarding process that can be enjoyed by gardeners of all skill levels. By following these steps, you can ensure that you have a steady supply of high-quality seeds for successful tomato planting year after year.
Step 1: Choosing the Right Tomato Variety
Choosing the right tomato variety is an important first step in collecting tomato seeds. Different tomato varieties have different flavors, sizes, and growth habits, so it’s important to choose one that suits your preferences and growing conditions.
Here are some factors to consider when choosing a tomato variety:
- Taste: Do you prefer sweet or tangy tomatoes? Some varieties have a sweeter flavor, while others are more acidic.
- Size: Do you want large tomatoes for slicing, or smaller ones for snacking and salads? Tomato varieties come in a range of sizes, from cherry tomatoes to beefsteak tomatoes.
- Growth habit: Some tomato varieties are determinate, meaning they grow to a certain height and produce all their fruit at once. Indeterminate varieties, on the other hand, continue to grow and produce fruit throughout the season.
- Resistance to diseases: Some tomato varieties are more resistant to common tomato diseases, such as blight or wilt. If you’ve had issues with disease in the past, look for disease-resistant varieties.
It’s also a good idea to consider your local climate and growing conditions. Some tomato varieties are better suited to hot climates, while others perform well in cooler regions.
Once you’ve chosen the right tomato variety, you can move on to the next step: harvesting the tomatoes and saving the seeds for planting.
Step 2: Harvesting Ripe Tomatoes
Harvesting ripe tomatoes is a crucial step in collecting seeds that will result in successful planting. Follow these steps to ensure you gather the best quality seeds from your tomatoes:
- Choose ripe tomatoes: Select tomatoes that are fully ripe and show no signs of rot or disease. A ripe tomato should have a vibrant color and be slightly soft to the touch.
- Prepare materials: Before harvesting, gather clean containers, such as glass or plastic jars, and paper towels or plates to place the tomatoes on.
- Remove tomatoes from the plant: Gently twist or cut the stem of the tomato to detach it from the plant.
- Wash the tomatoes: Rinse the tomatoes with water to remove any dirt or debris. Dry them thoroughly with a paper towel or cloth.
- Cut the tomato: Use a sharp knife to cut the tomato horizontally in half.
- Extract the seeds: With a spoon or your fingers, scoop out the gelatinous substance surrounding the seeds and place it in a separate container.
- Ferment the seeds: To remove the gel coating and promote seed germination, place the container with the gel and seeds in a warm and dark location for 2-4 days. Stir the mixture daily to prevent mold growth.
- Rinse and dry the seeds: After fermentation, pour the mixture into a fine-mesh sieve and rinse the seeds thoroughly with water. Spread them out on a paper towel or plate to dry for about a week.
- Store the seeds: Once the seeds are completely dry, transfer them to a labeled envelope or airtight container. Store them in a cool and dry place until you are ready to plant the following season.
Remember, when harvesting tomatoes for seed collection, it’s important to choose heirloom or open-pollinated varieties, as hybrid tomatoes may not produce true-to-type plants from their seeds. Happy seed saving!
Step 3: Preparing the Tomatoes for Seed Extraction
Before you can extract the seeds from your tomatoes, you need to prepare them properly to ensure the best results. Follow these steps to prepare your tomatoes for seed extraction:
- Select ripe and healthy tomatoes: Choose tomatoes that are fully mature and have not shown any signs of disease or rot. Ripe tomatoes will have a deep, vibrant color and will be slightly soft to the touch.
- Wash the tomatoes: Gently rinse the tomatoes under cool running water to remove any dirt or debris from the surface. Pat them dry with a clean towel.
- Cut the tomatoes: Using a sharp knife, carefully slice the tomatoes in half horizontally. This will expose the inner pulp and seeds.
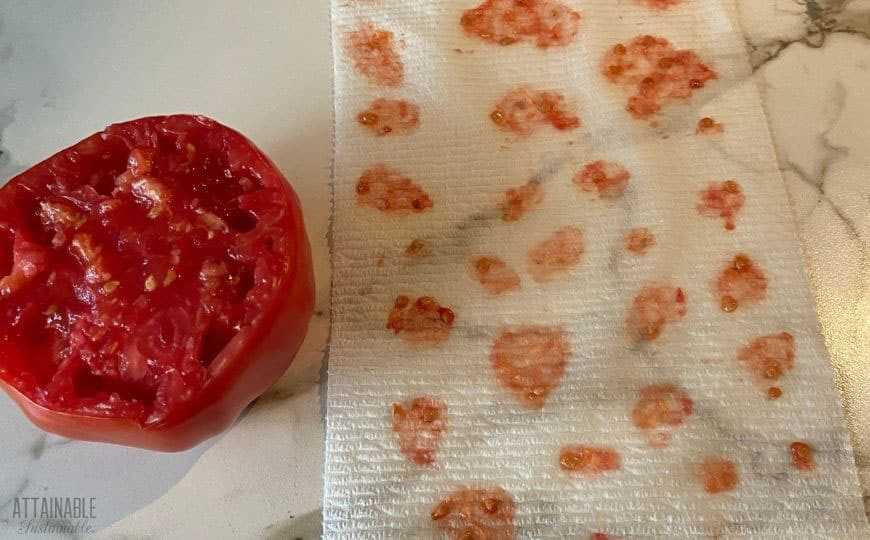
- Remove the seeds: Hold each tomato half over a container or a plate, and use your fingers or a spoon to scoop out the seeds along with the gel-like pulp. Place the seeds and pulp into the container.
- Separate the seeds from the pulp: Fill the container with water and let it sit for a few days. The pulp will ferment and float to the top, while the viable seeds will sink to the bottom. Carefully pour off the fermented pulp, using a sieve or fine mesh strainer if necessary, and collect the settled seeds.
- Rinse and dry the seeds: To remove any remaining pulp residue, rinse the collected seeds with clean water. Spread the seeds out on a paper towel or a fine mesh screen to dry naturally. Make sure to keep them in a well-ventilated area away from direct sunlight.
By following these steps, you can ensure that your tomato seeds are properly prepared for planting. Once dried, store the seeds in a cool, dry place in a sealed container until you are ready to plant them.
Step 4: Extracting the Tomato Seeds
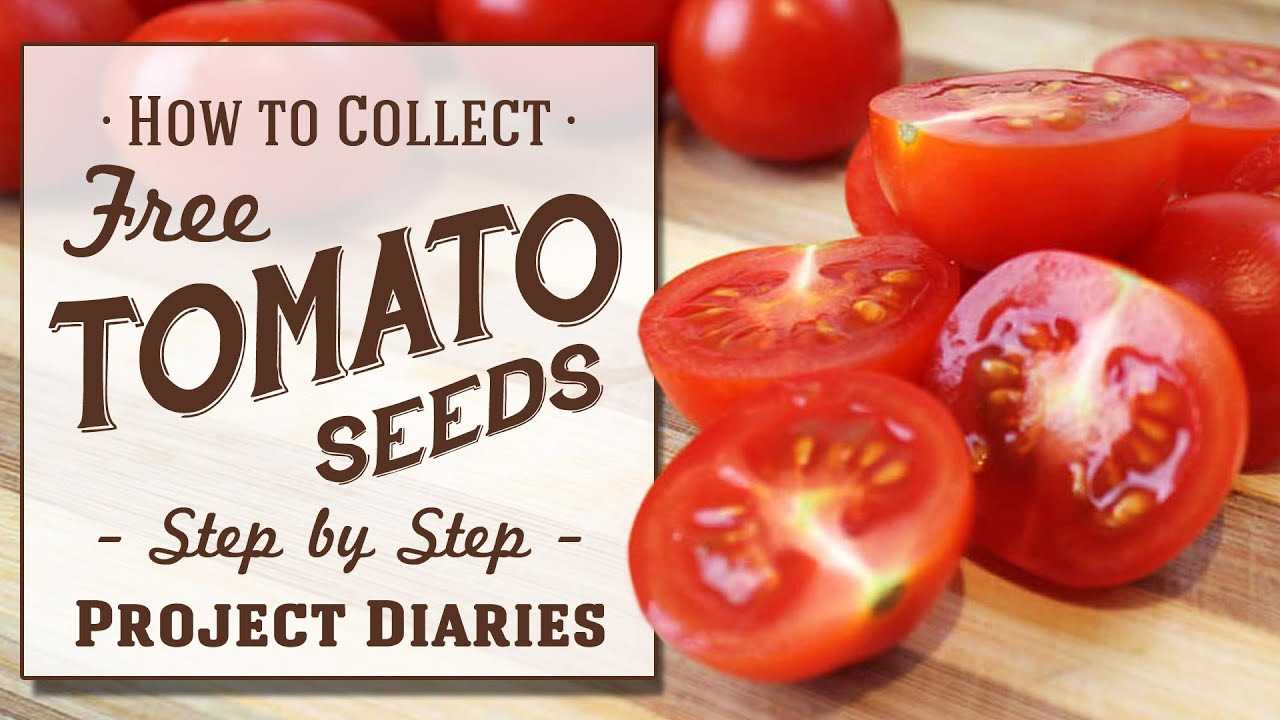
Once you have collected the ripe tomatoes, it’s time to extract the seeds. This step is important to ensure that the seeds are properly separated from the pulp and are ready for planting.
Materials Needed:

- A bowl or container
- A spoon or knife
Instructions:
- Start by cutting the tomato into halves or quarters, depending on the size of the tomato.
- Hold each tomato half over the bowl or container.
- Using a spoon, scoop out the seed mass along with the surrounding gel and drop it into the bowl.
- Repeat the process for all the tomato halves.
- Once you have extracted all the seed masses, use the spoon to gently mix the seeds and gel together in the bowl.
- Leave the mixture undisturbed for 2-3 days to allow fermentation to occur. This fermentation process helps to separate the seeds from the gel and prevent any potential diseases.
- After the fermentation period, pour water into the bowl to fill it about halfway.
- Give the mixture a gentle stir to help separate the seeds from the remaining gel.
- The viable seeds, which are heavy and sink to the bottom, can be collected.
- Use a mesh strainer or your hands to carefully separate the seeds from the water.
- Drain the water and spread the seeds out on a paper towel or a glass surface to dry. Make sure the seeds are evenly spread and not touching each other.
- Allow the seeds to dry completely, which usually takes around one week. Make sure they are kept in a cool and dry place away from direct sunlight.
- Once fully dry, store the tomato seeds in small paper envelopes or sealed containers. Label each envelope or container with the tomato variety and the date of collection.
Now that you have successfully extracted and prepared your tomato seeds, you are ready to plant them and grow your own tomato plants!
Step 5: Washing and Drying the Tomato Seeds
After fermenting the tomato seeds, it is necessary to wash and dry them before storing or planting. This step is important for removing any remaining pulp or residue and ensuring the seeds are clean and ready for future use.
Materials Needed:
- Colander or fine mesh str
Step 6: Storing Tomato Seeds

After collecting tomato seeds, it is important to store them properly to ensure their viability for future planting. Follow these steps to store tomato seeds:
1. Dry the Seeds:
Spread the collected tomato seeds in a single layer on a paper towel or a labeled plate. Make sure to separate any clingy seeds to prevent them from clumping together. Leave the seeds to dry in a cool and well-ventilated area for about one to two weeks. Avoid exposing the seeds to direct sunlight, as it can damage their viability.
2. Label the Storage Container:

Prepare a small airtight storage container, such as a glass jar or a resealable plastic bag. Label the container with the tomato variety, the date of collection, and any other relevant information, such as the location or specific growing conditions.
3. Store in a Cool, Dry Place:
Place the dried tomato seeds in the labeled container and seal it tightly. Store the container in a cool and dry place, away from direct sunlight and extreme temperatures. The ideal storage temperature for tomato seeds is around 40-50°F (4-10°C) with low humidity.
4. Check for Moisture Regularly:
Periodically check the stored tomato seeds for any signs of moisture or mold. If you notice any moisture, remove the affected seeds immediately to prevent them from spoiling the entire batch. It is also recommended to place a desiccant packet or silica gel inside the container to absorb any excess moisture.
5. Re-testing Germination:
Before planting the stored tomato seeds, it is advisable to conduct a germination test. Take a small sample of seeds and place them in a moist paper towel. Keep the paper towel warm and check for germination after a week or so. If a significant number of seeds fail to germinate, it may be necessary to obtain fresh seeds.
6. Record Keeping:
Maintain a record of the stored tomato seeds, including the variety, collection date, and any observations. This information will be invaluable for future reference and seed-saving efforts.
By following these storage guidelines, you can increase the longevity and viability of your collected tomato seeds, ensuring a successful planting season in the future.
Tips for Successful Tomato Seed Planting

- Choose healthy tomatoes: Select fully ripe and disease-free tomatoes for seed collection. Avoid using tomatoes that are overripe or have signs of decay or disease.
- Properly extract the seeds: Cut the tomato horizontally and gently squeeze the seeds and jelly-like substance onto a plate. Try to remove as much of the jelly as possible, as it can inhibit germination.
- Prepare a seed tray: Fill a seed tray or small pots with a well-draining seed starting mix. Ensure the mix is moist but not soaking wet before planting the seeds.
- Plant the seeds: Place the tomato seeds about half an inch apart and cover them with a thin layer of seed starting mix. Lightly press the mix to ensure good seed-to-soil contact.
- Provide adequate warmth and moisture: Tomato seeds require warm temperatures (around 70-80°F or 21-27°C) for germination. Keep the seeds consistently moist by misting them with water or covering the tray with a plastic wrap to create a mini greenhouse effect.
- Transplant seedlings: Once the seedlings have grown their second set of true leaves, they can be transplanted into individual pots or a larger container for further growth.
- Provide sufficient light: After transplanting, place the seedlings in a location that receives at least 6-8 hours of sunlight per day, or provide them with artificial grow lights if natural light is limited.
- Water and fertilize regularly: Water the tomato plants regularly, keeping the soil evenly moist. Fertilize the plants every 2-3 weeks with a balanced tomato fertilizer to promote healthy growth.
- Prune and support the plants: As the tomato plants grow, remove any suckers or side shoots that develop in the leaf axils. Also, provide support such as stakes or cages to keep the plants upright and prevent them from sprawling.
- Monitor for pests and diseases: Regularly inspect the tomato plants for signs of pests or diseases, such as aphids, caterpillars, or fungal infections. Take appropriate measures to control and prevent further damage.
- Harvest and save seeds: Once the tomatoes have ripened, select the healthiest and tastiest fruits for seed saving. Extract the seeds following the same process mentioned in the beginner’s guide, and store them in a cool, dry place for future planting.
By following these tips, you can increase the chances of successfully planting tomato seeds and enjoying a bountiful harvest of delicious homegrown tomatoes.
“Question-Answer”
Why should I collect tomato seeds for planting?
Collecting tomato seeds for planting allows you to save money on buying new seeds every year and also gives you the opportunity to select and grow plants with specific characteristics that you prefer.
When is the best time to collect tomato seeds?
The best time to collect tomato seeds is when the tomatoes are ripe and ready to eat. Ensure that the tomatoes are fully matured before harvesting the seeds.
What is the process of collecting tomato seeds?
The process of collecting tomato seeds involves scooping out the seeds from the ripe tomatoes, placing them in a jar with some water, allowing them to ferment for a few days, rinsing the seeds to remove the gelatinous coating, and then drying them thoroughly before storing.
How long do tomato seeds last?
Properly stored tomato seeds can last for several years. It is recommended to keep them in a cool and dry place, away from direct sunlight.
Can I collect seeds from hybrid tomatoes?
While it is possible to collect seeds from hybrid tomatoes, the resulting plants may not possess the same characteristics as the parent plant. It is generally recommended to collect seeds from open-pollinated or heirloom tomatoes for better results.
“Video”
Growing a Peach Tree From Seed – Super Easy! How To Grow Peaches From Pit
