- Steps to Growing Turnips from Seeds in the Vegetable Garden
- 1. Prepare the Soil
- 2. Choose the Right Variety
- 3. Sow the Seeds
- 4. Water Consistently
- 5. Thin the Seedlings
- 6. Fertilize as Needed
- 7. Monitor for Pests and Diseases
- 8. Harvesting
- 9. Storage
- 10. Enjoy!
- Choosing the Ideal Location for Growing Turnips
- Sunlight
- Soil
- Space
- Watering
- Protection from Harsh Weather
- Selecting the Right Varieties of Turnips for Your Garden
- 1. Size
- 2. Shape
- 3. Flavor
- 4. Storage
- 5. Disease Resistance
- Preparing the Soil for Turnip Planting
- 1. Clear the area
- 2. Test the soil
- 3. Add organic matter
- 4. Loosen the soil
- 5. Remove large clumps and rocks
- 6. Level the soil
- 7. Consider adding fertilizer
- Sowing Turnip Seeds: Best Practices
- 1. Timing:
- 2. Location:
- 3. Soil Preparation:
- 4. Seed Sowing:
- 5. Watering:
- 6. Thinning:
- 7. Fertilizing:
- 8. Pest and Disease Control:
- 9. Harvesting:
- Watering and Fertilizing Turnip Plants
- Watering
- Fertilizing
- Caring for Turnip Plants as They Grow
- Watering
- Thinning
- Weeding
- Mulching
- Fertilizing
- Pest and Disease Control
- Harvesting Turnips
- Harvesting Turnips: When and How to Pick Them
- When to Harvest Turnips
- How to Pick Turnips
- Storing and Using Turnips for Your Culinary Delight
- “Question-Answer”
- What are turnips?
- Why should I grow turnips in my vegetable garden?
- When should I start sowing turnip seeds?
- What are some popular turnip varieties?
- How long does it take for turnips to grow from seeds?
- “Video” The 10 Most Productive Crops to Sow in July
If you’re looking to add a versatile and easy-to-grow vegetable to your garden, turnips are a great option. This root vegetable is not only delicious, but it also has a variety of uses both in the kitchen and in the garden. In this article, we will explore how to grow turnips from seeds in your vegetable garden and discuss some popular turnip varieties.
Growing turnips from seeds is a straightforward process that can be done by gardeners of all skill levels. The first step is to choose a suitable location for your turnip bed. Turnips prefer well-drained soil that has been amended with organic matter. They also like full sun, although they can tolerate some shade. Once you have selected the right spot, prepare the soil by removing any weeds and breaking up any clumps.
Next, it’s time to plant your turnip seeds. Sow the seeds directly into the soil, spacing them about 1 inch apart. You can plant them in rows or in a grid pattern, depending on your preference. After planting, gently press the seeds into the soil and then cover them with a thin layer of soil or compost. Water the bed thoroughly after planting to ensure good germination.
As your turnip plants grow, be sure to keep an eye on them for signs of pests or disease. Turnips can be susceptible to a variety of pests, including flea beetles and root maggots. If you notice any damage, treat your plants promptly to prevent further infestation. Regularly check the soil moisture levels and water as needed, as turnips need consistent moisture to grow properly. Harvest your turnips when they reach the desired size, typically around 2-3 inches in diameter.
In terms of turnip varieties, there are many to choose from. The most common is the Purple Top variety, which has a white root with a purple crown. This variety is known for its sweet and crisp flavor. Another popular choice is the Tokyo Cross, which is a white turnip with a mild and sweet flavor. If you’re looking for a unique twist, consider growing the Scarlet Queen, which has a bright red skin and a crisp, slightly spicy flavor.
In conclusion, turnips are a wonderful addition to any vegetable garden. With a few simple steps, you can easily grow these versatile root vegetables from seeds. Whether you choose to grow the classic Purple Top variety or experiment with something new like the Scarlet Queen, you’re sure to enjoy the fresh and flavorful harvest that turnips provide.
Steps to Growing Turnips from Seeds in the Vegetable Garden
1. Prepare the Soil
Before planting turnip seeds, prepare the soil by removing any weeds or debris and breaking up any large clumps. Turnips prefer well-draining soil with a pH level between 6.0 and 7.0. Consider adding organic matter or compost to enrich the soil and improve drainage.
2. Choose the Right Variety
There are various varieties of turnips available, each with their own unique characteristics. Consider factors such as taste, size, and maturity time when selecting a variety that suits your preferences. Popular turnip varieties include Purple Top White Globe, Tokyo Cross, and Scarlet Queen.
3. Sow the Seeds
When sowing turnip seeds, follow the spacing instructions on the seed packet. Typically, turnip seeds should be planted about 1/2 inch deep and spaced about 2 inches apart. If planting in rows, space the rows about 12 to 18 inches apart to allow for easy access and growth.
4. Water Consistently
Turnips require consistent moisture throughout their growth cycle. Water the plants regularly, keeping the soil evenly moist. Avoid overwatering, as this can lead to rot and disease. Consider watering in the early morning or evening to minimize water loss through evaporation.
5. Thin the Seedlings
Once the turnip seedlings have emerged, thin them out to provide adequate spacing for growth. Thin the seedlings to about 4 to 6 inches apart. This will give the remaining plants room to develop healthy roots and produce larger turnips.
6. Fertilize as Needed
If your soil lacks nutrients, consider fertilizing the turnips with a balanced fertilizer. Follow the instructions on the fertilizer package to determine the appropriate amount and frequency of application. Avoid over-fertilizing, as this can result in excessive leaf growth and smaller turnips.
7. Monitor for Pests and Diseases
Regularly inspect the turnip plants for pests, such as aphids or flea beetles, and diseases, such as clubroot or powdery mildew. Treat any infestations or infections promptly to prevent damage to the plants. Consider practicing crop rotation to reduce the risk of diseases.
8. Harvesting
Turnips are typically ready for harvest within 30 to 60 days, depending on the variety and desired size. Harvest turnips when they reach the desired size, usually around 2 to 3 inches in diameter. Gently pull or dig them out of the soil, taking care not to damage the tops or roots.
9. Storage
After harvest, remove the tops from the turnips, leaving about an inch of stem. Store the turnips in a cool, dark place, such as a root cellar or refrigerator, to prolong their freshness. Turnips can be stored for several weeks to months, depending on the variety and storage conditions.
10. Enjoy!
Once your turnips are harvested and stored, enjoy them in a variety of culinary dishes. Turnips can be boiled, roasted, mashed, or added to soups and stews. Their crisp texture and mildly sweet flavor make them a versatile and delicious addition to any meal.
Choosing the Ideal Location for Growing Turnips
When it comes to growing turnips, choosing the right location is crucial for their successful growth and development. Here are some factors to consider when selecting the ideal spot for your turnip patch:
Sunlight
Turnips thrive in full sun, so it is important to choose a location that receives at least 6 to 8 hours of direct sunlight each day. This will ensure that the plants get the energy they need for photosynthesis and optimal growth.
Soil
Turnips prefer well-draining soil with a pH level between 6.0 and 7.0. They can tolerate a range of soil types, including sandy, loamy, and clay soils, but they grow best in fertile soil that is rich in organic matter. Before planting, it is recommended to amend the soil with compost or well-rotted manure to improve its fertility and drainage.
Space
Turnips need space to grow and develop their roots. Make sure to choose an area that provides enough room for the plants to spread out. The space between turnip rows should be about 6 inches (15 cm), while the distance between individual plants should be around 3 to 4 inches (7.5 to 10 cm).
Watering
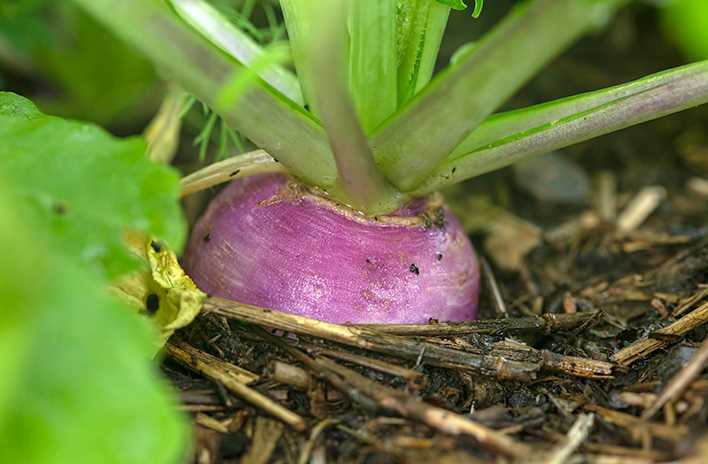
Turnips require consistent moisture to grow properly. Therefore, it is important to choose a location that allows for easy access to water. Consider proximity to a water source or the ability to set up an irrigation system to ensure that your turnips receive regular watering.
Protection from Harsh Weather
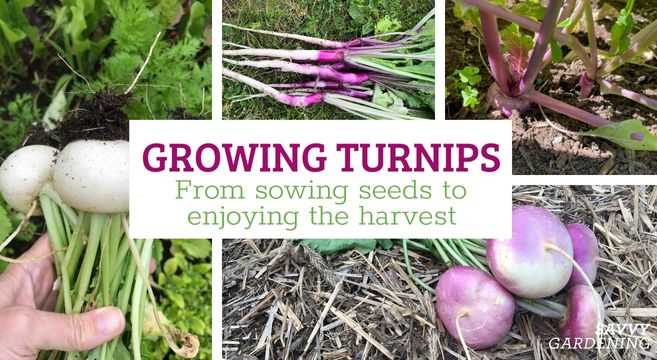
Turnips are cool-season crops that can tolerate light frosts. However, they may suffer damage or fail to grow properly in extreme weather conditions, such as heavy frosts or intense heat. Choose a location that offers some protection from these harsh weather conditions, such as a spot with natural windbreaks or the ability to provide shade during hot summer days.
By considering these factors, you can choose the ideal location for growing turnips and ensure a healthy and abundant harvest.
Selecting the Right Varieties of Turnips for Your Garden
When it comes to selecting the right varieties of turnips for your garden, there are several factors to consider. Different varieties have different qualities, such as size, shape, flavor, and storage abilities. Here are a few things to keep in mind when choosing the best turnip varieties for your garden:
1. Size
Consider what size turnips you prefer. Some varieties, like the ‘Tokyo Cross’ turnip, produce small to medium-sized roots that are great for fresh eating and salads. On the other hand, larger turnips like the ‘Purple Top White Globe’ variety are better suited for cooking and canning.
2. Shape
Turnips come in various shapes, including round, globe, and cylindrical. Round turnips are classic in shape and are good for both eating raw and cooking. Globe-shaped turnips tend to be larger and are often used in soups and stews. Cylindrical turnips are longer and slender, making them excellent for slicing and pickling.
3. Flavor
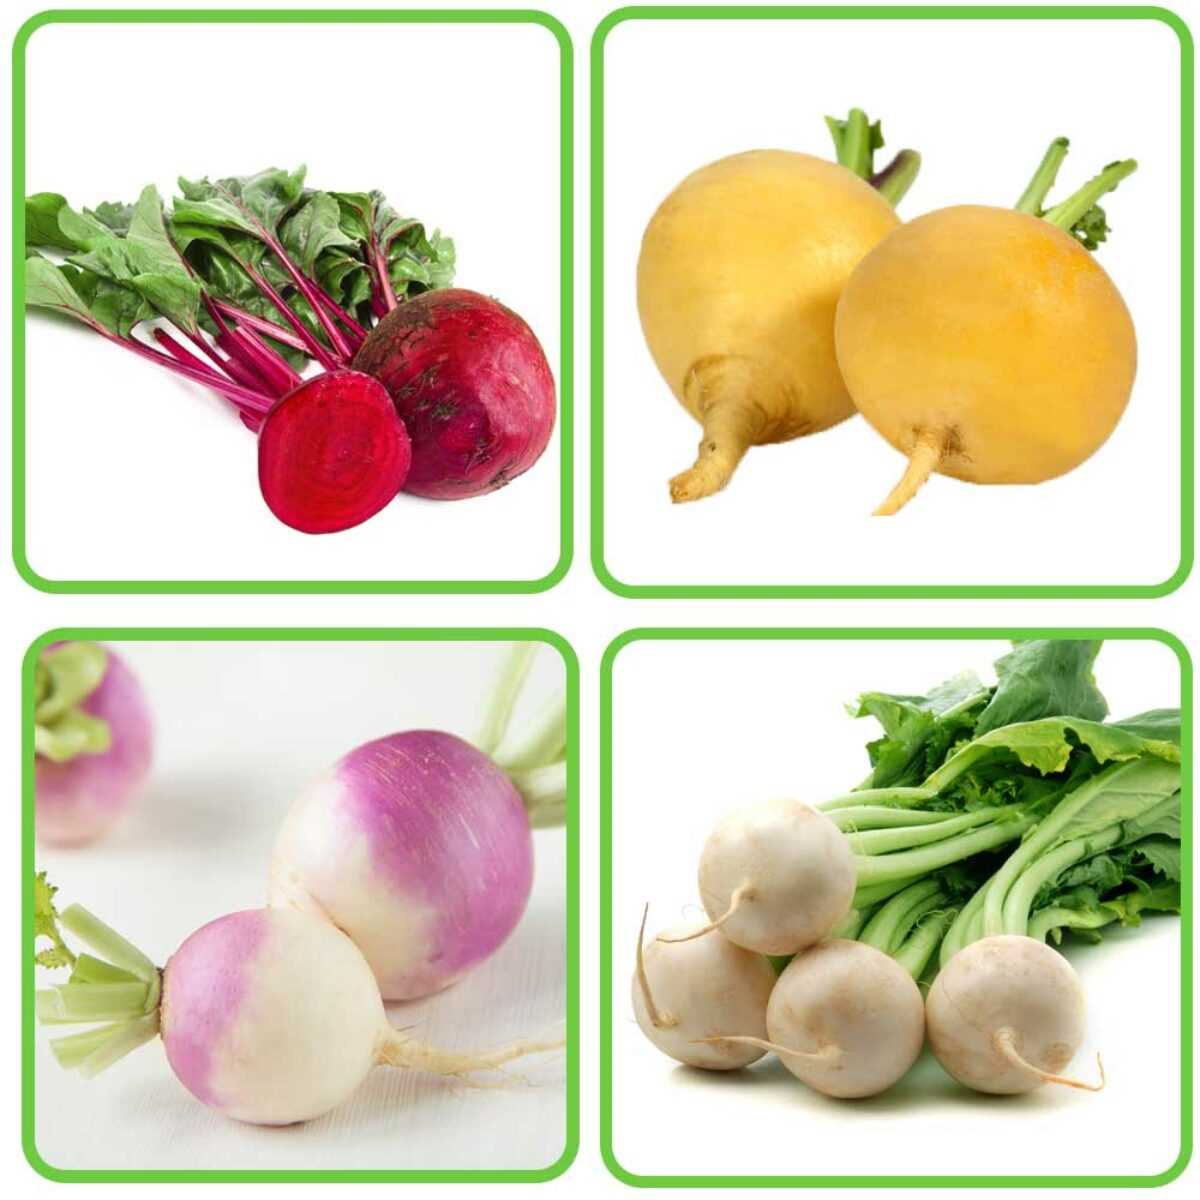
The flavor of turnips can vary widely between varieties. Some turnips have a mild and sweet taste, while others have a stronger, more peppery flavor. Consider the flavor profile you prefer when selecting turnip varieties for your garden.
4. Storage
If you want to store your turnips for an extended period, choose varieties that have good storage capabilities. Some turnips, like the ‘Snowball’ variety, are known for their excellent storing abilities and can be stored for several months under the right conditions.
5. Disease Resistance
Lastly, consider the disease resistance of the turnip varieties you are considering. Some varieties are more resistant to common turnip diseases, such as clubroot and downy mildew. Choosing disease-resistant varieties can help ensure a successful harvest.
By considering these factors and doing some research on specific turnip varieties, you can select the best varieties that will thrive in your garden and meet your culinary preferences and storage needs.
Preparing the Soil for Turnip Planting
Before planting turnip seeds in your vegetable garden, it is important to properly prepare the soil. By doing so, you can create a favorable environment for turnip growth and ensure a successful harvest. Here are some steps to follow when preparing the soil for turnip planting:
1. Clear the area
Start by clearing the area where you plan to plant the turnips. Remove any weeds, stones, or debris that may be present. Clearing the area will provide a clean slate for turnip growth and prevent competition for nutrients from unwanted plants.
2. Test the soil
It is a good idea to test the soil before planting turnip seeds. A simple soil test will help determine the pH level and nutrient content of your soil. Turnips prefer a slightly acidic soil with a pH range of 6.0 to 7.0. Adjust the pH level if necessary by adding lime to raise it or sulfur to lower it.
3. Add organic matter
Turnips benefit from soil that is rich in organic matter. Add compost, well-rotted manure, or other organic materials to improve the soil structure and fertility. Spread a layer of organic matter on top of the soil and work it into the top few inches using a garden fork or tiller.
4. Loosen the soil
Turnips have a taproot that requires loose soil for proper growth. Use a garden fork or tiller to loosen the soil to a depth of at least 8 inches. This will allow the roots to penetrate easily and access water and nutrients. Avoid compacting the soil by stepping on it or using heavy machinery.
5. Remove large clumps and rocks
Large clumps of soil and rocks can interfere with turnip growth and make it difficult for the roots to develop properly. Remove any large clumps or rocks that you encounter while preparing the soil. Breaking up the soil into smaller particles will create a more suitable environment for the turnip seeds to germinate and grow.
6. Level the soil
After loosening the soil, use a rake or garden leveling tool to even out the surface. This will help promote uniform moisture distribution and prevent water from pooling in certain areas. Aim for a smooth and level soil surface before planting the turnip seeds.
7. Consider adding fertilizer
Depending on the nutrient content of your soil, you may need to add fertilizer before planting turnips. A soil test will help determine the specific nutrient requirements. If necessary, apply a balanced fertilizer with equal amounts of nitrogen, phosphorus, and potassium. Follow the recommended rates and guidelines for application.
By following these steps, you can prepare the soil for turnip planting and create an optimal growing environment. This will increase the chances of a successful turnip harvest and ensure healthy, vigorous plants.
Sowing Turnip Seeds: Best Practices
Turnips are a versatile and easy-to-grow vegetable that can be sown directly from seeds in the vegetable garden. Here are some best practices to follow when sowing turnip seeds:
1. Timing:
Sow turnip seeds in early spring or late summer to avoid the extreme heat of summer. The ideal soil temperature for turnip seed germination is between 50°F and 85°F (10°C and 29°C).
2. Location:
Choose a sunny or partially shaded spot in your vegetable garden for sowing turnip seeds. Ensure that the soil is well-drained and loose, as turnips prefer loose soil for optimal root development.
3. Soil Preparation:
Before sowing the seeds, prepare the soil by removing any weeds and incorporating organic matter such as compost or well-rotted manure. Turnips prefer a slightly acidic soil with a pH level between 6.0 and 7.0.
4. Seed Sowing:
Scatter turnip seeds thinly over the prepared soil, spacing them about 1 inch (2.5 cm) apart. Alternatively, you can also sow the seeds in rows, keeping a distance of 4-6 inches (10-15 cm) between each row. Lightly cover the seeds with soil, about 1/4 to 1/2 inch (0.6 to 1.3 cm) deep.
5. Watering:
After sowing the seeds, water the soil gently to keep it consistently moist. Avoid over-watering, as it can lead to poor germination and rotting of the seeds. Provide water whenever the top inch (2.5 cm) of soil feels dry to the touch.
6. Thinning:
Once the turnip seedlings have emerged and reached about 2 inches (5 cm) in height, thin them out to avoid overcrowding. Space the seedlings about 4-6 inches (10-15 cm) apart to allow enough room for the roots to grow.
7. Fertilizing:
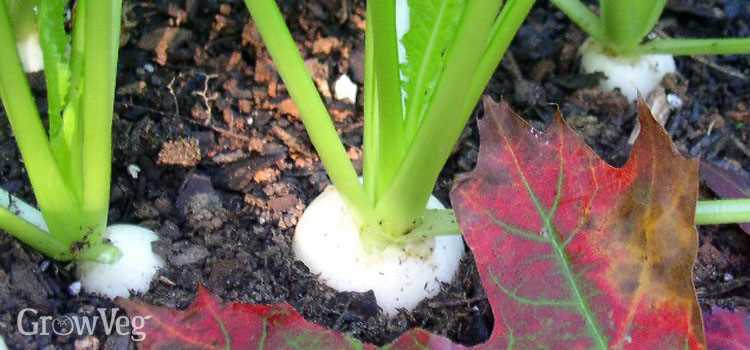
Apply a balanced fertilizer or compost around the turnip plants once they have established a strong root system. Follow the instructions on the fertilizer packaging for the correct application rate.
8. Pest and Disease Control:
Monitor your turnip plants regularly for pests such as flea beetles, aphids, and cabbage worms. Practice crop rotation and remove any damaged or diseased plants immediately to prevent the spread of diseases.
9. Harvesting:
Harvest turnips when they reach the desired size, usually around 2-3 inches (5-8 cm) in diameter. Use a garden fork or trowel to carefully loosen the soil around the turnips and lift them out of the ground. They can be stored in a cool, dry place for several weeks.
By following these best practices, you can successfully sow turnip seeds in your vegetable garden and enjoy a bountiful harvest of nutritious and delicious turnips.
Watering and Fertilizing Turnip Plants
Watering and fertilizing are important aspects of growing healthy turnip plants. Proper irrigation and nutrient levels can help promote optimal growth and a bountiful harvest. Here are some tips to help you water and fertilize your turnip plants effectively:
Watering
- Turnips require consistent moisture to thrive, so it’s important to water them regularly.
- Provide enough water to keep the soil evenly moist but not waterlogged. Overly wet soil can lead to root rot.
- Water deeply, thoroughly soaking the soil to encourage deep root growth.
- Avoid overhead watering if possible to prevent leaf diseases. Instead, use a drip irrigation system or water directly at the base of the plants.
- Monitor the weather and adjust watering frequency as needed. In hot and dry conditions, turnips may require more frequent watering.
Fertilizing
- Before planting turnip seeds, incorporate compost or well-rotted manure into the soil to improve fertility.
- Turnips benefit from a balanced fertilizer with equal or slightly higher amounts of nitrogen (N), phosphorus (P), and potassium (K).
- Apply the fertilizer according to package instructions, typically around 2-3 weeks after planting.
- Avoid over-fertilizing turnips, as excessive nutrients can lead to lush foliage but poor root development.
- Consider performing a soil test to determine nutrient deficiencies or imbalances and adjust the fertilizer application accordingly.
By providing adequate water and nutrients, you can ensure healthy and vigorous turnip plants that produce abundant and flavorful roots. Remember to monitor your plants regularly and make adjustments as needed to maintain optimal growing conditions.
Caring for Turnip Plants as They Grow
Once your turnip seeds have germinated and the seedlings have emerged, it’s time to start caring for your turnip plants as they grow. Here are some important tasks to consider:
Watering
Water your turnip plants regularly, especially during dry spells. Keep the soil consistently moist, but be careful not to overwater as this can cause root rot. Watering deeply and infrequently is usually sufficient.
Thinning
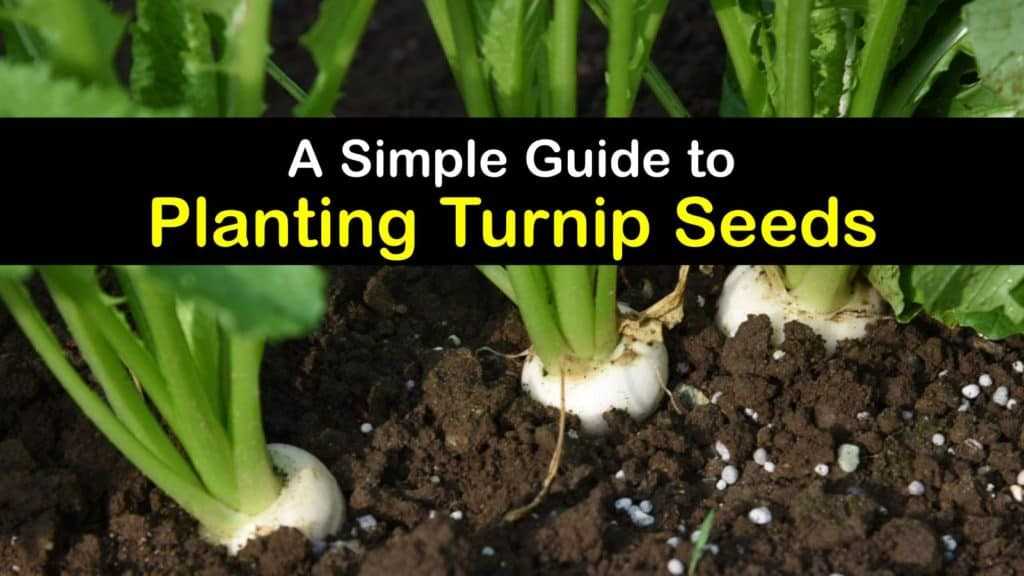
After the turnip seedlings have grown a few inches tall, it’s important to thin them out. Crowded plants compete for nutrients and space, leading to smaller roots. Thin the seedlings to about 4-6 inches apart to give each plant enough room to grow.
Weeding
Regularly remove weeds from around your turnip plants to prevent them from competing for nutrients and sunlight. Use caution when weeding to avoid damaging the turnip roots.
Mulching
Applying a layer of mulch around your turnip plants can help conserve moisture, suppress weed growth, and regulate soil temperature. Organic mulches like straw or wood chips work well for turnips.
Fertilizing
Turnip plants are not heavy feeders, but applying a balanced fertilizer (such as a 10-10-10 or 5-10-10 formula) during planting or as a side dressing can help promote healthy growth. Follow the package instructions for application rates.
Pest and Disease Control
Monitor your turnip plants for signs of pests or diseases such as flea beetles, aphids, or powdery mildew. Use organic pest control methods or consult a gardening professional for appropriate treatments if necessary.
Harvesting Turnips
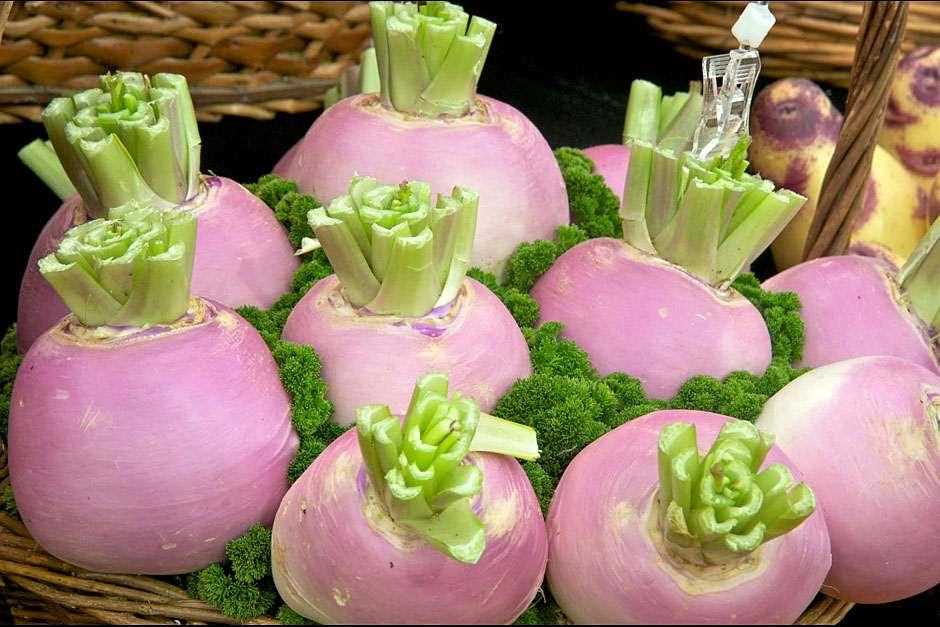
Turnips can be harvested when they have reached the desired size, usually around 2-3 inches in diameter. Gently pull the turnip from the ground, being careful not to damage the roots. Harvesting can typically begin within 6-8 weeks of planting the seeds.
By following these care tips, you can ensure that your turnip plants grow healthy and produce a bountiful harvest of flavorful roots.
Harvesting Turnips: When and How to Pick Them
Knowing when to harvest turnips is essential to ensure you get the best flavor and texture from your crop. Let’s take a closer look at when and how to pick turnips.
When to Harvest Turnips
The timing for harvesting turnips depends on the variety you planted and your desired size. Most turnip varieties are ready to harvest within 30-60 days after planting. Here are some cues to look for:
- Size: Turnips are typically harvested when they reach a desirable size, around 2-3 inches in diameter for baby turnips and 3-4 inches for larger ones. Check the size of the turnip by gently pushing aside the soil around the root.
- Color: Mature turnips have a vibrant color, usually white, with a smooth and firm skin. They should not have any spots or blemishes.
- Growth: Pay attention to the growing time mentioned on the seed packet or the specific variety’s instructions. This will give you an estimate of when the turnips should be ready to harvest.
How to Pick Turnips
Once your turnips are ready to harvest, follow these steps to pick them:
- Loosening the soil: Before pulling out the turnips, use a garden fork or a trowel to gently loosen the soil around the roots. This will make it easier to lift the turnip without damaging it.
- Gently pull: Grasp the turnip leaves at the base of the plant and give it a gentle, steady pull upwards. The turnip should come out easily from the soil.
- Remove soil: Once you’ve pulled out the turnip, gently remove excess soil clinging to the roots by lightly shaking or brushing it off. Avoid washing the turnip until you are ready to use it.
- Trimming: If your turnips have long greens attached, you can trim them down to about 1 inch above the root. This will help the turnips stay fresh for a longer period.
Remember to store harvested turnips in a cool, dark place with proper ventilation to maintain their freshness. Enjoy your freshly harvested turnips in a variety of delicious recipes!
Storing and Using Turnips for Your Culinary Delight
Storing Turnips:
- Harvest turnips when they reach their ideal size, usually about 2-3 inches in diameter.
- Remove the greens from the turnips, leaving about an inch of the stem intact.
- Wash the turnips gently to remove any dirt or debris.
- Store turnips in a cool, dark place with a temperature around 32°F to 40°F (0°C to 4°C).
- You can store turnips in the refrigerator wrapped in a damp paper towel or in a perforated plastic bag for up to a month.
Using Turnips:
- Turnips can be enjoyed both raw and cooked.
- Raw turnips have a crisp and slightly peppery flavor, perfect for adding a refreshing crunch to salads or slaws.
- Cooked turnips have a milder and sweeter taste, making them a great addition to soups, stews, and stir-fries.
- Boiling or steaming turnips until they are tender can help to soften their texture and reduce their bitterness.
- You can also roast turnips with other root vegetables, like carrots and potatoes, to bring out their natural sweetness.
- Turnip greens are edible and can be cooked like spinach or kale.
Turnip Recipe Ideas:
- Turnip and Potato Mash: Boil equal parts of turnips and potatoes until tender, then mash them together with butter, salt, and pepper.
- Turnip Fries: Cut turnips into thin strips, toss them with olive oil, salt, and pepper, and bake in the oven until crispy.
- Turnip Soup: Saute diced turnips, onions, and garlic in a pot, then add vegetable broth and simmer until the turnips are soft. Blend the mixture until smooth and season with salt, pepper, and herbs.
- Turnip and Apple Slaw: Shred turnips and apples, then toss them with a dressing made of olive oil, lemon juice, honey, and Dijon mustard.
Conclusion:
Turnips are versatile root vegetables that can be stored for weeks and used in a variety of delicious recipes. Whether raw or cooked, turnips add a unique flavor and texture to your culinary creations. So go ahead and try them in your next meal!
“Question-Answer”
What are turnips?
Turnips are root vegetables that belong to the Brassicaceae family. They have a round shape and come in various colors, including white, purple, and yellow.
Why should I grow turnips in my vegetable garden?
Growing turnips in your vegetable garden can be beneficial for several reasons. They are easy to grow, require minimal care, and have a short growing season. Turnips are also a nutritious vegetable that can be used in various dishes.
When should I start sowing turnip seeds?
The best time to start sowing turnip seeds is in early spring or late summer. Turnips prefer cool weather and can tolerate light frosts, so planting them during these seasons will result in the best growth.
What are some popular turnip varieties?
There are several popular turnip varieties available, including Purple Top White Globe, Tokyo Cross, Purple Top Yellow Aberdeen, and Golden Ball. These varieties differ in color, shape, and taste, so you can choose the one that suits your preferences.
How long does it take for turnips to grow from seeds?
The time it takes for turnips to grow from seeds depends on the variety and growing conditions. On average, turnips can be harvested within 30 to 60 days after sowing the seeds.


