- DIY EM-Container: A Step-by-Step Guide to Making a Cheap Compost Container at Home
- Materials Needed:
- Steps:
- Tips:
- Gather Materials
- Materials Needed:
- Choosing the Right Container:
- Drilling or Creating Holes:
- Compost Starter:
- Food Scraps:
- Straw or Shredded Newspaper:
- Shovel or Garden Fork:
- Spray Bottle for Water:
- Choose the Right Location
- Sunlight
- Drainage
- Accessibility
- Away from Structures
- Odor and Aesthetics
- Build the Frame
- Materials Needed:
- Instructions:
- Tips:
- Add Pallets for Airflow
- Line the Container
- Start Composting
- Maintain Your EM-Container
- Regular Inspection
- Turning the Compost
- Monitoring Moisture Levels
- Controlling Temperature
- Avoiding Non-Compostable Materials
- Harvesting the Compost
- Keeping a Record
- Harvest and Use Compost
- “Question-Answer”
- What materials are needed to make a DIY EM-Container?
- How does the EM-Container work?
- Where can I get EM-1 solution?
- How long does it take for the organic waste to turn into compost in the EM-Container?
- Can I use any type of organic waste in the EM-Container?
- What are the benefits of using a DIY EM-Container?
- “Video” How to start a compost bin
If you’re looking for a cost-effective way to compost your kitchen scraps and yard waste at home, an EM-container could be a great solution. EM, or effective microorganisms, are a combination of beneficial bacteria, yeasts, and fungi that help break down organic matter into nutrient-rich compost. Making your own EM-container is not only budget-friendly, but it also allows you to customize the size and design to fit your specific needs.
To create your EM-container, you’ll need some basic materials that you probably already have at home. This includes a sturdy plastic container or trash bin, a drill with various-sized drill bits, shredded newspaper or cardboard, kitchen scrap waste, dry leaves or grass clippings, and EM solution. By following a few simple steps, you can have your compost container up and running in no time.
The first step is to drill several small holes in the sides and bottom of the container. These holes will allow for proper air circulation and drainage, which are essential for creating the ideal composting environment. The size and number of holes will depend on the size of your container and personal preference, but be sure to space them evenly for uniform composting.
Next, create a layer of shredded newspaper or cardboard at the bottom of the container. This will act as a carbon-rich base for your compost. On top of the newspaper or cardboard, add a layer of kitchen scrap waste, such as fruit and vegetable scraps, coffee grounds, and eggshells. These organic materials will provide nitrogen for the composting process.
Finally, add a layer of dry leaves or grass clippings on top of the kitchen scrap waste. This will provide additional carbon and help balance the composting process. Repeat these layers until the container is full, making sure to moisten each layer with the EM solution. The EM solution will introduce beneficial microorganisms into the compost, aiding in the decomposition process.
With your EM-container set up, it’s important to regularly mix and moisten the contents to maintain optimal decomposition. Use a shovel or pitchfork to turn the compost every few weeks, ensuring that all the organic materials are evenly distributed and breaking down effectively. Additionally, keep the compost moist but not overly wet, as excessive moisture can lead to unpleasant odors and slow down the composting process.
By following these simple steps, you can easily create a cheap and effective compost container using EM. Not only will this help reduce waste and improve your garden’s soil, but it is also a sustainable way to turn your kitchen scraps into valuable resources for your plants. So why not give it a try and start composting at home today?
DIY EM-Container: A Step-by-Step Guide to Making a Cheap Compost Container at Home
Composting is a great way to reduce waste and create nutrient-rich soil for your plants. However, traditional compost containers can be expensive. Luckily, with a few materials and some basic tools, you can easily make your own cheap compost container at home.
Materials Needed:
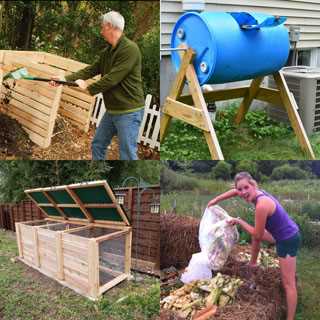
- Large plastic bin with a lid
- Drill
- 1/4 inch drill bit
- Green waste (vegetable scraps, coffee grounds, etc.)
- Brown waste (leaves, newspaper, cardboard, etc.)
- Garden soil
- Effective microorganisms (EM) solution
- Water
Steps:
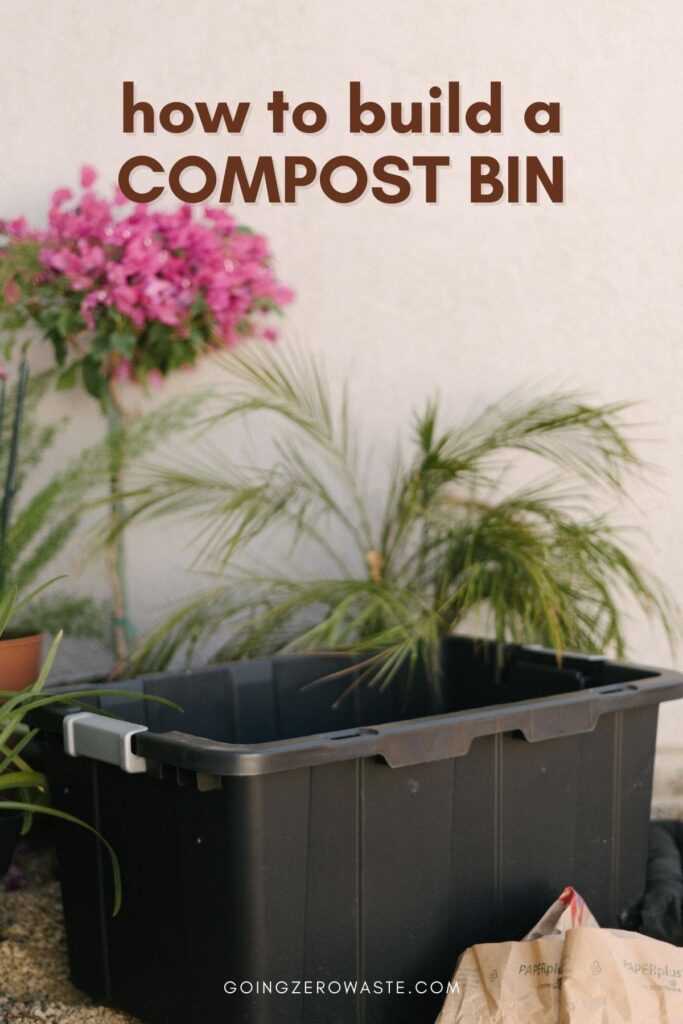
- Choose a suitable plastic bin to use as your compost container. It should be large enough to hold a significant amount of waste and have a lid to keep pests out.
- Drill several 1/4 inch holes in the sides and bottom of the bin for aeration and drainage.
- Place a layer of brown waste at the bottom of the bin. This will help with drainage and provide structure to the compost pile.
- Add a layer of green waste on top of the brown waste. Green waste provides nitrogen, which is essential for decomposition.
- Repeat steps 3 and 4 until the bin is about three-quarters full.
- Add a thin layer of garden soil to introduce beneficial microorganisms into the compost pile.
- Dilute the EM solution according to the instructions on the bottle.
- Pour the diluted EM solution over the compost pile to enhance decomposition and suppress odor.
- Use a pitchfork or shovel to mix the compost pile thoroughly.
- Place the lid on the bin to keep pests and rain out.
- Keep the compost moist by watering it regularly, but make sure it’s not too wet or dry.
- Turn the compost once a week to provide oxygen to the microorganisms and speed up decomposition.
- After a few weeks, your compost will start to break down into rich, dark soil.
Tips:
- Avoid adding meat, dairy, and oily foods to your compost pile, as they can attract pests.
- Chop large waste into smaller pieces to speed up decomposition.
- Cover new waste with a layer of soil or brown waste to prevent odor and fruit flies.
- Consider placing your compost container in a sunny spot to accelerate decomposition.
- Keep track of the temperature in your compost pile, as it should ideally reach between 120-160°F (49-71°C) for efficient decomposition.
With this easy DIY EM-container, you can create your own compost at home without breaking the bank. Enjoy the benefits of organic waste reduction, nutrient-rich soil, and happy, healthy plants!
Gather Materials
Before you begin making your own DIY EM-Container, you will need to gather a few materials. These materials can be easily found at your local home improvement store or even repurposed from items you may already have in your home.
Materials Needed:
- A plastic container with a lid
- Drill or a hot nail
- Compost starter
- Food scraps
- Straw or shredded newspaper
- A shovel or garden fork
- A spray bottle for water
Note: The size of the plastic container will depend on your available space and the amount of compost you plan to produce. It should be large enough to hold all your composting materials while still allowing for occasional stirring and air circulation.
Choosing the Right Container:
When selecting a container for your DIY EM-Container, look for one that is made of durable plastic and has a tight-fitting lid. This will help keep out pests and prevent unwanted odors. The size of the container will depend on your available space and the amount of compost you plan to produce.
Drilling or Creating Holes:
Once you have your plastic container, you will need to create holes for proper drainage and aeration. Use a drill or a hot nail to make several holes in the bottom and sides of the container. These holes will allow excess water to drain out and air to circulate, preventing your compost from becoming waterlogged or anaerobic.
Compost Starter:
A compost starter is an optional but beneficial addition to your DIY EM-Container. It helps speed up the decomposition process and can be easily purchased from a garden supply store or online. Follow the instructions on the package for the correct amount to add to your compost.
Food Scraps:
Collecting food scraps is an essential part of composting. These include fruit and vegetable peels, coffee grounds, tea leaves, eggshells, and other organic kitchen waste. Be sure to avoid adding animal products, oily foods, and anything that could attract pests or create unpleasant smells.
Straw or Shredded Newspaper:
Adding a layer of straw or shredded newspaper to your compost container helps create airflow and prevents the materials from becoming too compacted. This layer also helps to absorb excess moisture and balance the carbon-to-nitrogen ratio in your compost.
Shovel or Garden Fork:
A shovel or garden fork will be needed to turn and mix the compost materials periodically. This helps aerate the compost and speeds up the decomposition process.
Spray Bottle for Water:
Lastly, you’ll need a spray bottle filled with water to keep your compost moist. The compost should be slightly damp, resembling a wrung-out sponge. Regularly mist the compost with water to maintain the proper moisture level.
Choose the Right Location
When setting up your DIY EM-Container composting system, it is crucial to choose the right location. The success of your composting efforts largely depends on the conditions in which it is placed. Here are a few factors to consider when selecting a location:
Sunlight
Find a spot in your backyard or garden that receives a good amount of sunlight. Compost requires warmth to break down organic matter effectively. The heat generated by sunlight will help accelerate the decomposition process and kill off weed seeds and pathogens.
Drainage
Ensure that the location you choose has good drainage. If the area tends to hold water or gets flooded easily, it may not be suitable for composting. Excessive moisture can lead to the creation of anaerobic conditions, which can slow down the decomposition process and cause unpleasant odors.
Accessibility
Consider the accessibility of the compost container. Choose a location that is convenient for you to add materials and retrieve the finished compost. It should be easily accessible for turning the compost, monitoring its progress, and adding new materials as needed.
Away from Structures
Place the compost container at a safe distance from structures like buildings, fences, or walls. Composting can generate heat, and placing it too close to these structures may cause damage due to the increased temperatures. Additionally, it is important to have proper air circulation around the container to ensure optimum decomposition.
Odor and Aesthetics
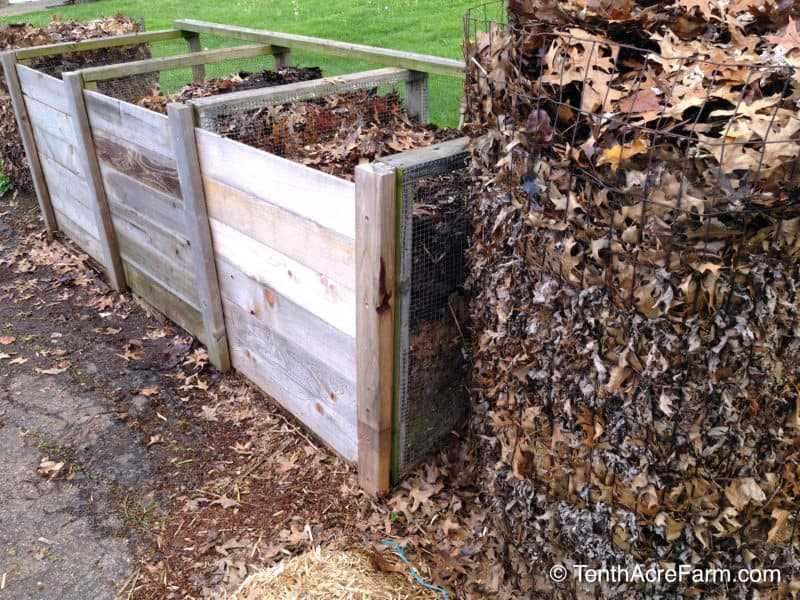
Consider any potential odor issues and the visual impact of the compost container. While composting should not produce strong odors if done correctly, it’s still a good idea to place the container away from windows or outdoor sitting areas. Additionally, if you’re concerned about the visual aspect, choose a location where the compost container is not highly visible from the main areas of your yard.
By considering these factors, you can select the perfect location for your DIY EM-Container composting system. This will help ensure that your composting efforts are successful and make it easier for you to maintain and enjoy the benefits of homemade compost.
Build the Frame
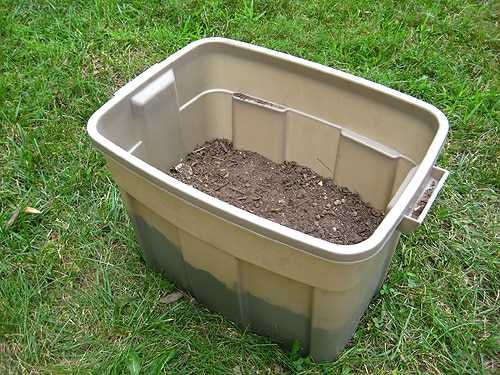
The first step in making a DIY EM-Container compost container is to build the frame. The frame will provide support for the container and ensure that it remains stable and in place while composting.
Materials Needed:
- Four wooden boards (2×4 inches)
- Screws
- Drill
Instructions:
- Measure and cut the wooden boards to the desired length for your compost container. The size of the frame will depend on the amount of compost you plan to produce.
- Arrange the boards in a square or rectangular shape, with each corner overlapping.
- Use the drill and screws to secure the corners of the frame. Make sure the screws are tight to ensure stability.
- Double-check that the frame is level and sturdy. Adjust as necessary.
Tips:
- Consider treating the wooden boards with a waterproof sealant to protect them from moisture and extend their lifespan.
- If you prefer a taller compost container, you can stack two frames on top of each other and secure them using screws.
- Make sure to choose screws that are appropriate for outdoor use and can withstand exposure to moisture and temperature changes.
Once the frame is built, you can move on to the next step of constructing the DIY EM-Container compost container.
Add Pallets for Airflow
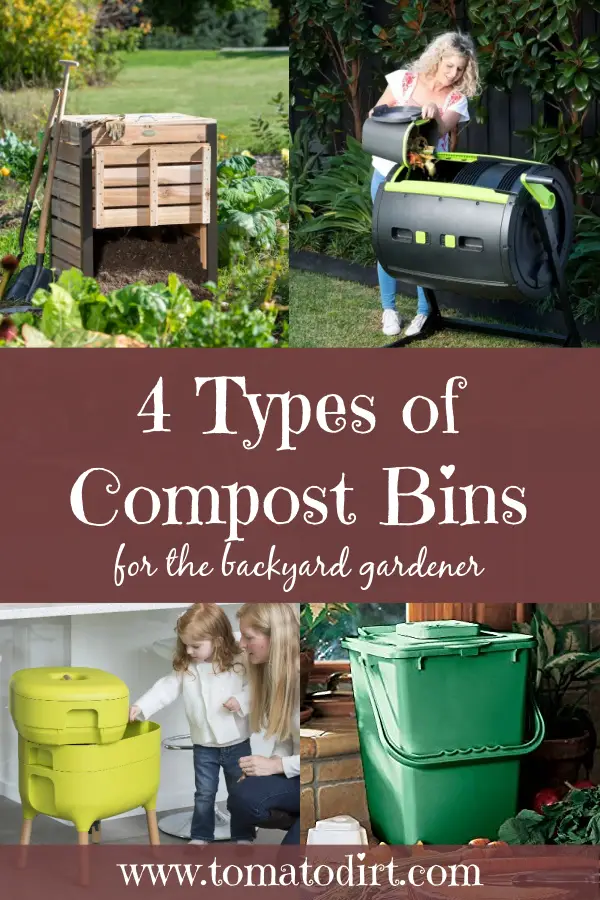
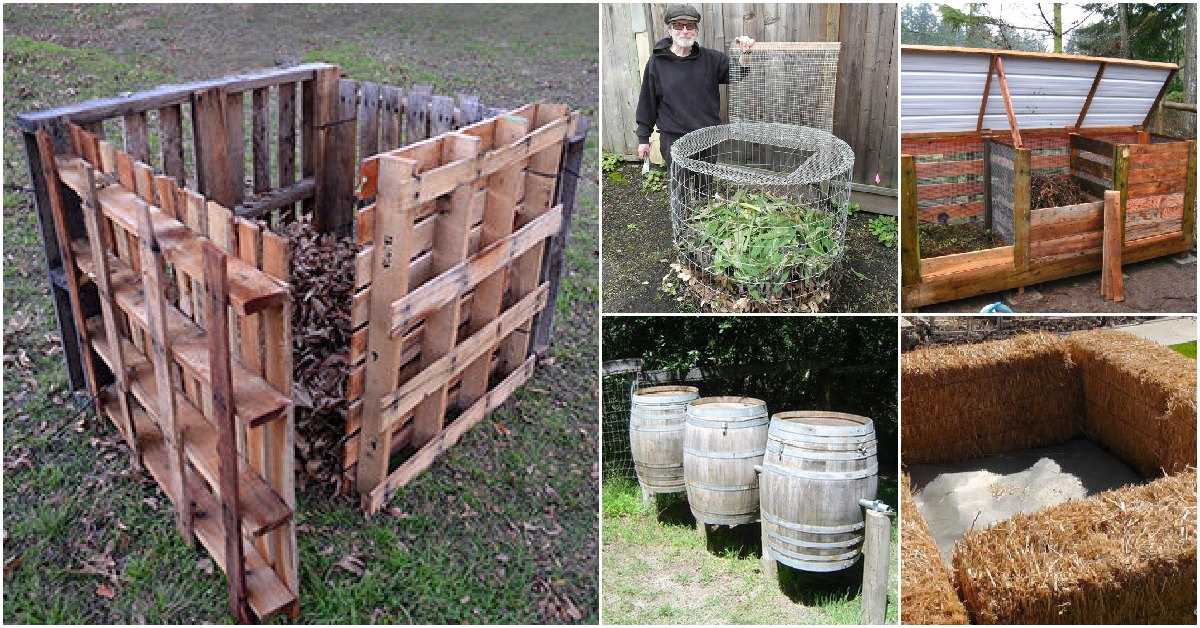
To ensure proper airflow in your DIY EM-Container compost bin, you can add pallets to the bottom and sides of the container. Pallets are an inexpensive and readily available option that will allow air to circulate freely through your compost.
Start by placing a layer of pallets on the ground where you plan to set up your compost bin. This will elevate the container and create space for air to flow underneath. Make sure the pallets are level and stable to prevent any imbalance or tipping of the container.
Next, stack additional pallets on either side of the container. These should be positioned vertically and placed securely against the sides of the bin. The pallets will act as a barrier, ensuring that air can penetrate into the compost from the sides.
It’s important to leave some space between the pallets so that air can freely circulate. Ideally, the gaps between the slats of the pallets should be at least 1-2 inches wide. This will allow for easy airflow while still providing enough support to hold the compost in place.
By adding pallets for airflow, you’re creating an environment that promotes decomposition and prevents the compost from becoming compacted. Proper airflow will also help to prevent odors and keep the composting process running smoothly.
Line the Container
The next step in creating a DIY EM-container is to line the container. Lining the container with a material that allows air to circulate while keeping the compost contained is essential for successful composting.
There are several options for lining the container:
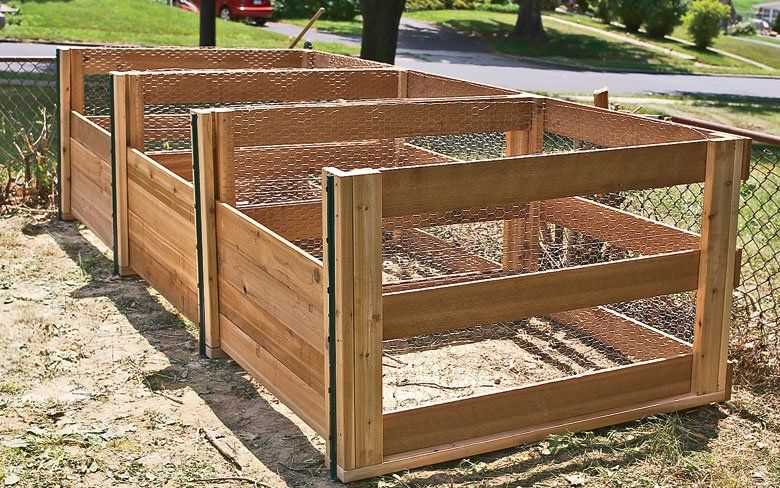
- Wire Mesh: Using wire mesh as a lining material can provide excellent ventilation while keeping the compost contained. Cut a piece of wire mesh to fit the bottom and sides of the container, and secure it in place using wire or zip ties.
- Plastic Mesh: Plastic mesh can also be used as a lining material, providing good ventilation and keeping the compost contained. Cut a piece of plastic mesh to fit the bottom and sides of the container, and secure it in place using zip ties or strong tape.
- Hardware Cloth: Hardware cloth, which is a type of stiff wire mesh, can be an effective lining material. Cut a piece of hardware cloth to fit the bottom and sides of the container, and secure it in place using wire or zip ties.
Before securing the lining material, make sure to leave a small gap at the bottom for drainage. This will allow excess moisture to escape and prevent waterlogging the compost.
Once the lining material is in place, double-check that it covers the entire interior of the container, leaving no gaps or openings where compost could escape.
By lining the container, you ensure that the compost remains contained while still being able to receive the necessary airflow for optimal decomposition.
Start Composting
Composting is a simple and sustainable way to recycle organic materials and create nutrient-rich soil for your plants. Here are the basic steps to get started:
- Choose a composting container: You can purchase a compost bin or make your own DIY EM-container using affordable or recycled materials. The choice of container will depend on your space, budget, and the amount of compost you plan to make.
- Find a suitable location: Place your compost container in a convenient spot in your yard, preferably in a shaded area. Make sure the location provides good airflow and drainage.
- Collect organic materials: Start collecting organic waste such as kitchen scraps (fruit and vegetable peels, coffee grounds, eggshells), yard trimmings (grass clippings, leaves), and yard waste (small branches, dried flowers). Avoid adding meats, dairy products, oils, and pet waste as they can attract pests or create an unpleasant odor.
- Layer the materials: Layer your organic materials in your compost container. Aim for a balance of “green” (nitrogen-rich) and “brown” (carbon-rich) materials. Greens include fresh grass clippings, fruit scraps, and coffee grounds, while browns include dried leaves, twigs, and paper. Alternate the layers to create a good mix.
- Moisten the pile: Water the compost pile to achieve a damp, but not soggy consistency. The moisture helps to break down the materials and promotes the growth of beneficial microorganisms.
- Aerate the compost: Every few weeks, use a pitchfork or shovel to turn the compost. This helps to aerate the pile, mix the materials, and speed up decomposition.
- Patience and monitoring: Composting is a slow process, so it requires patience. Monitor the compost pile regularly to ensure it remains moist and well-aerated. You may need to add water or adjust the balance of materials if needed.
- Harvest the compost: After several months to a year, your compost will transform into dark, crumbly soil-like material. This is a sign that the compost is ready to use. Use it in your garden beds or containers to improve soil fertility and promote plant growth.
Composting is a rewarding way to reduce waste, save money, and improve your garden. Enjoy the process and experiment with different materials to find what works best for your composting needs!
Maintain Your EM-Container
Proper maintenance is important to ensure the effectiveness and longevity of your EM-Container. Follow these tips to maintain your DIY compost container at home:
Regular Inspection
Regularly inspect your EM-Container for any signs of damage, such as cracks or leaks. Address these issues promptly to prevent the escape of compost and the entry of pests.
Turning the Compost
Turn the compost inside the container every few weeks to promote proper decomposition and prevent foul odors. Use a garden fork or shovel to mix the materials thoroughly.
Monitoring Moisture Levels
Check the moisture levels inside the container regularly. The compost should be moist, similar to a damp sponge. If it’s too dry, add some water, and if it’s too wet, add dry materials like shredded newspaper or leaves.
Controlling Temperature
Keep an eye on the temperature inside the container. The ideal temperature range for composting is between 135-160°F (55-71°C). If the compost is too hot, it may kill off beneficial microorganisms. If it’s too cold, decomposition will be slow. Adjust the temperature by adding or removing insulation or adjusting the airflow.
Avoiding Non-Compostable Materials
Make sure you only add compostable materials to the EM-Container. Avoid items like meat, dairy products, oils, and bones as they can attract pests and create foul odors. Stick to plant-based materials such as fruit and vegetable scraps, coffee grounds, and yard waste.
Harvesting the Compost
Once your compost has fully decomposed, it’s time to harvest it. Remove the finished compost from the bottom of the container, leaving any unfinished materials at the top to continue decomposing. Use the harvested compost in your garden as a nutrient-rich soil amendment.
Keeping a Record
Maintain a record of what materials you add to your EM-Container and when. This will help you track the progress of your compost and adjust your composting practices if needed.
By following these maintenance tips, you can ensure that your DIY EM-Container remains a successful and sustainable composting solution for your home. Happy composting!
Harvest and Use Compost
Once your compost has finished decomposing, it is ready to be harvested and used in your garden. Harvesting compost is a straightforward process that requires a few simple steps:
- Carefully remove the top layer of unfinished compost, which may contain un-decomposed materials. Set this aside for further decomposition.
- Using a garden fork or shovel, start loosening the compost from the sides and bottom of the container. Gradually work your way towards the center, turning the compost as you go.
- Once you have loosened all the compost, use a rake or a screen to remove any large debris or sticks from the mixture.
- You can use a compost screen to sift the finished compost, separating it from any remaining larger particles.
- The sifted compost is now ready to be used in your garden. Spread it around your plants as a rich, organic fertilizer and soil conditioner.
Compost can provide numerous benefits to your garden, including:
- Improved soil structure and drainage.
- Increased soil fertility.
- Enhanced moisture retention.
- Reduced soil erosion.
- Suppression of plant diseases and pests.
- Promotion of beneficial soil organisms.
There are several ways to use compost in your garden:
- Spread a layer of compost around the base of plants, known as top-dressing.
- Mix compost into the soil before planting to improve its quality.
- Create a compost tea by steeping compost in water. Use this liquid fertilizer to give your plants a nutrient boost.
- Make compost mulch by spreading a layer of compost on the soil surface to help preserve soil moisture and reduce weed growth.
Remember to replenish your compost container with new organic materials to continue the cycle of decomposition and ensure a steady supply of fresh compost.
“Question-Answer”
What materials are needed to make a DIY EM-Container?
To make a DIY EM-Container, you will need a plastic container with a lid, some organic waste, EM-1 solution, a small piece of cloth, and a rubber band.
How does the EM-Container work?
The EM-Container works by using Effective Microorganisms (EM), which are beneficial bacteria that break down organic waste into compost. The EM solution is added to the container along with the organic waste, and the bacteria work to decompose the waste and create compost.
Where can I get EM-1 solution?
EM-1 solution can be purchased from garden supply stores or online. Some people also make their own EM solution using bacteria culture starters and molasses.
How long does it take for the organic waste to turn into compost in the EM-Container?
The time it takes for the organic waste to turn into compost in the EM-Container can vary, but usually it takes about 2-4 weeks. Factors such as temperature and the types of organic waste used can affect the composting process.
Can I use any type of organic waste in the EM-Container?
Most types of organic waste can be used in the EM-Container, including fruit and vegetable scraps, coffee grounds, eggshells, and yard waste. However, it’s best to avoid meat, dairy products, and oily foods, as they can attract pests and slow down the composting process.
What are the benefits of using a DIY EM-Container?
Using a DIY EM-Container has several benefits. It allows you to easily compost your organic waste at home, reducing the amount of waste sent to landfills. It also produces nutrient-rich compost that can be used to fertilize plants and improve soil health. Additionally, making a DIY EM-Container is a cost-effective option compared to buying a pre-made compost container.


