- Tips for Growing Peanuts from Experts
- Best Varieties for Growing Peanuts
- 1. Virginia Peanuts
- 2. Spanish Peanuts
- 3. Valencia Peanuts
- The Importance of Soil Preparation for Peanut Cultivation
- Why is soil preparation important for peanut cultivation?
- Steps for soil preparation:
- Conclusion
- How to Plant Peanuts in the Vegetable Garden
- Watering and Fertilizing Peanuts for Optimal Growth
- Watering
- Fertilizing
- Common Pests and Diseases Affecting Peanuts
- Pests
- Diseases
- Harvesting and Storing Peanut Crop
- 1. Timing
- 2. Digging up the plants
- 3. Drying
- 4. Threshing
- 5. Curing
- 6. Storing
- 7. Checking for spoilage
- Delicious Peanut Recipes to Try
- Peanut Butter Banana Smoothie
- Thai Peanut Noodles
- Crunchy Peanut Butter Cookies
- Spicy Peanut-Sesame Slaw
- Peanut Butter Chocolate Fudge
- Spicy Peanut Chicken Stir-Fry
- “Question-Answer”
- Can I grow peanuts in my vegetable garden?
- What are the different varieties of peanuts?
- How do I plant peanuts in my garden?
- How long does it take for peanuts to grow?
- What are the common pests and diseases that affect peanuts?
- Can I save the seeds from my peanut plants for next year?
- “Video” Growing Peanuts | Volunteer Gardener
When it comes to growing nuts in the vegetable garden, peanuts are an excellent choice. Not only are they delicious and versatile, but they are also surprisingly easy to grow. With their unique ability to produce pods underground, peanuts can be a fascinating addition to your gardening experience.
There are several varieties of peanuts to choose from, each with its own unique characteristics. The most popular variety is the Virginia peanut, which is known for its large size and high yield. Another popular variety is the Spanish peanut, which has a smaller size but a rich, nutty flavor. The Valencia peanut is prized for its sweet taste and reddish skin. No matter which variety you choose, growing peanuts can be a rewarding and enjoyable endeavor.
To get started with growing peanuts in your vegetable garden, you will need to prepare the soil properly. Peanuts prefer well-draining soil with a pH level between 5.5 and 7.0. Before planting, it is a good idea to amend the soil with organic matter, such as compost or aged manure, to improve its fertility and drainage.
Planting peanuts is a unique process, as they need to be buried in the ground to develop their pods. Begin by planting the seeds about 2 inches deep and 6 inches apart. It is important to ensure that the peanuts are placed with the pointed end facing down to encourage proper growth. Once planted, it is crucial to ensure that the soil stays consistently moist throughout the growing season.
Pro tip: Peanuts require a long growing season, typically around 120 to 140 days. Make sure to select a variety and start planting early enough to allow for the necessary growing time.
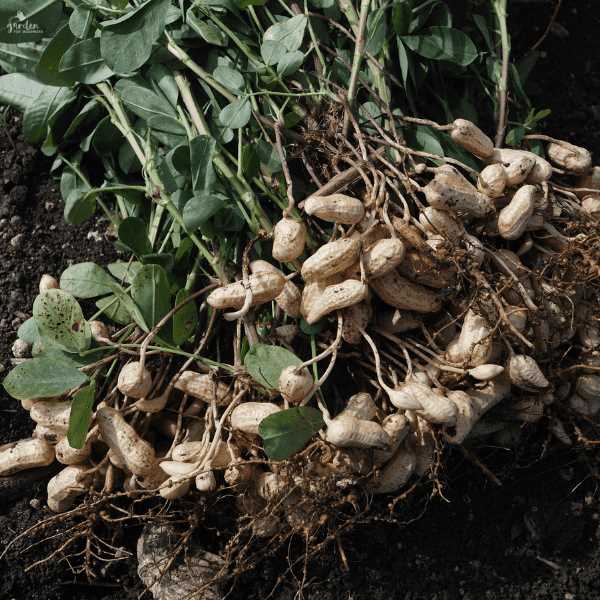
As the peanuts grow, you may notice yellow flowers appearing on the plant. These flowers eventually develop into the familiar peanut pods that grow underground. When the plants begin to yellow and wither, it is a sign that the peanuts are ready for harvesting. Carefully dig up the plants, being sure to handle the delicate pods with care.
After harvesting, allow the peanuts to dry for a few weeks in a warm, well-ventilated area. Once dried, you can enjoy your homegrown peanuts by roasting them or using them in a variety of culinary creations. Growing peanuts in your vegetable garden is not only a fun and interesting experience but also a great way to enjoy fresh, quality nuts right from your own backyard.
Tips for Growing Peanuts from Experts
- Choose the Right Variety: Select peanut varieties that are well-suited for your growing zone and climate. Some popular varieties include Virginia, Valencia, Spanish, and Runner peanuts.
- Prepare the Soil: Peanuts prefer well-draining soil with a pH between 5.8 and 6.2. Before planting, amend the soil with organic matter like compost and ensure it is loose and friable.
- Planting: Plant peanuts after the last frost date when the soil temperature reaches at least 65°F (18°C). Sow the peanuts 2 inches deep and 6 to 8 inches apart, leaving 2-3 feet between rows.
- Watering: Peanuts require consistent moisture, especially during the first few weeks after planting. However, be careful not to overwater, as excess water can lead to rot and disease.
- Fertilizing: Peanuts have high nutrient requirements. Apply a balanced fertilizer with a ratio of 10-10-10 before planting and side-dress with additional nitrogen fertilizer during the growing season.
- Weed Control: Keep the peanut beds weed-free by regularly cultivating the soil or mulching around the plants. Weeds can compete with peanuts for nutrients and sunlight.
- Pest and Disease Management: Monitor the plants regularly for common pests like aphids, thrips, and nematodes. Use organic pest control methods whenever possible and ensure proper crop rotation to prevent diseases.
- Harvesting: Peanuts mature in about 120 to 150 days. When the plants start to yellow and the leaves begin to dry, it is a sign that the peanuts are ready for harvest. Carefully dig up the plants and allow the peanuts to dry before storing.
- Storing: After drying, remove any excess dirt from the peanuts and store them in a cool, dry place. Properly cured peanuts can last for several months.
Best Varieties for Growing Peanuts
Growing peanuts in your vegetable garden can be a rewarding experience, but choosing the right variety is essential for success. Here are some of the best peanut varieties you can consider for your garden:
1. Virginia Peanuts
- One of the most popular peanut varieties for home gardeners.
- Produces large, uniform nuts with a rich flavor.
- Well-suited for roasting or making peanut butter.
2. Spanish Peanuts
- Often used for making peanut butter and candies.
- Has a smaller kernel size compared to other varieties.
- Thrives in warm climates and requires less water.
3. Valencia Peanuts
- Known for their sweet taste and crunchy texture.
- Produces smaller-sized nuts compared to Virginia peanuts.
- Excellent choice for snacking and adding to recipes.
When selecting peanut varieties, consider the growing conditions in your area and your specific preferences for taste and usage. It’s also important to choose disease-resistant varieties to minimize the risk of pest and disease problems.
The Importance of Soil Preparation for Peanut Cultivation
Peanuts are a popular and nutritious crop that can be grown in vegetable gardens. To ensure a successful peanut harvest, it is crucial to properly prepare the soil before planting. Soil preparation plays a vital role in providing an optimal growing environment for peanuts.
Why is soil preparation important for peanut cultivation?
Soil preparation is essential for peanut cultivation due to several reasons:
- Optimal Nutrient Availability: Proper soil preparation helps create an environment with sufficient nutrients for peanut plants to grow. Adequate nutrient levels ensure healthy plant development, leading to higher crop yields.
- Improved Drainage: Peanuts thrive in well-drained soil. By loosening the soil and improving its structure, water can penetrate and drain efficiently, preventing waterlogged conditions that can harm peanut plants.
- Reduced Weed Competition: Weeds compete with peanut plants for water, nutrients, and sunlight. Adequate soil preparation can help suppress weed growth, reducing competition and improving the growth and yield of peanuts.
- Optimal Soil pH: Peanuts prefer slightly acidic soil, with a pH range of 5.8 to 6.2. Soil preparation can help adjust the pH level, ensuring that it falls within the ideal range for peanut cultivation.
Steps for soil preparation:
Here are some steps to follow for effective soil preparation:
- Clear the Area: Remove any existing vegetation, rocks, or debris from the planting area. This will provide a clean space for planting peanuts.
- Loosen the Soil: Use a garden fork or tiller to loosen the soil to a depth of at least 6 to 8 inches. This will help improve soil aeration and root penetration.
- Remove Weeds: Pull out any weeds or grass roots that may still be present in the soil. This will help prevent weed competition during peanut growth.
- Add Organic Matter: Incorporate well-rotted compost or aged manure into the soil. This will improve soil fertility and enhance its ability to hold moisture.
- Test Soil pH: Use a soil testing kit to determine the pH level of the soil. If necessary, apply lime to raise the pH or sulfur to lower it, aiming for the optimal range for peanuts.
Conclusion
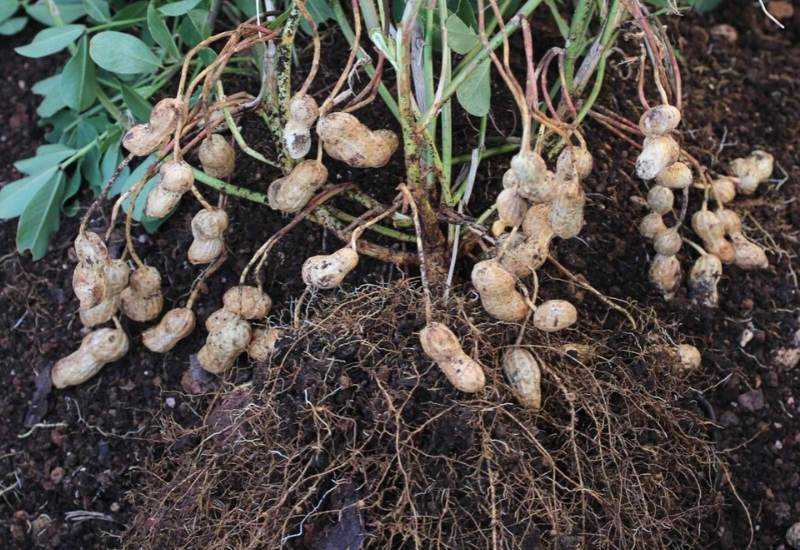
Proper soil preparation is essential for successful peanut cultivation. By following the steps mentioned above, gardeners can create an optimal growing environment for peanuts, resulting in healthier plants and higher crop yields.
How to Plant Peanuts in the Vegetable Garden
Planting peanuts in your vegetable garden can be a rewarding experience. Here are some steps to help you successfully grow peanuts:
Choose the right peanut variety: There are different varieties of peanuts available, so it’s important to choose the one that is best suited for your climate and growing conditions. Some popular peanut varieties include Valencia, Virginia, and Spanish.
Prepare the soil: Peanuts prefer sandy loam soil that is well-draining and rich in organic matter. Before planting, loosen the soil and remove any rocks, weeds, or debris. Amend the soil with compost or well-rotted manure to improve its fertility.
Plan the spacing: Peanuts require adequate spacing to grow properly. Leave about 8-12 inches between each peanut plant and maintain rows that are 24-36 inches apart.
Plant the peanuts: Plant the peanuts in the prepared soil, placing them about 2 inches deep with the pointed side facing downwards. Space the peanut seeds about 4-6 inches apart. Cover the seeds with soil and gently pat it down.
Water regularly: Peanuts require consistent moisture to grow well. Water the plants regularly, keeping the soil evenly moist throughout the growing season. Avoid overwatering as it can lead to rot or disease.
Provide support (optional): If you live in an area with strong winds or heavy rainfall, it may be helpful to provide support to the peanut plants. You can use stakes or trellises to keep the plants upright.
Control weeds: Keep the area around the peanut plants free from weeds. Weeds can compete with peanuts for nutrients and water, so regular weeding is essential.
Fertilize as needed: Peanuts are moderate feeders and may benefit from occasional fertilization. Use a balanced fertilizer according to the manufacturer’s instructions or perform a soil test to determine any nutrient deficiencies.
Harvest the peanuts: Peanuts are ready to be harvested when the leaves turn yellow and the plants begin to dry out. Dig up the entire plant, carefully remove the peanuts from the roots, and allow them to dry in a well-ventilated area before storing.
By following these steps, you can successfully plant peanuts in your vegetable garden and enjoy a bountiful harvest of this nutritious and delicious legume.
Watering and Fertilizing Peanuts for Optimal Growth
Watering and fertilizing are two crucial factors in ensuring optimal growth and yield of peanuts. Proper watering techniques and the right balance of nutrients provided through fertilization can significantly impact the health and productivity of peanut plants.
Watering
Peanuts require regular and consistent watering throughout their growing season. Adequate moisture is essential for their development, especially during flowering and pod filling stages. However, overwatering can lead to waterlogging, which can be detrimental to the plants.
Here are some watering tips for peanuts:
- Water the plants deeply, ensuring that the soil is moist up to a depth of at least 6 inches.
- Watering should be done in the early morning or evening to minimize water loss due to evaporation.
- Use drip irrigation or soaker hoses to deliver water directly to the plant roots and reduce water wastage.
- Monitor soil moisture levels regularly and adjust the watering schedule accordingly. Peanuts prefer slightly moist soil but not overly saturated conditions.
Fertilizing
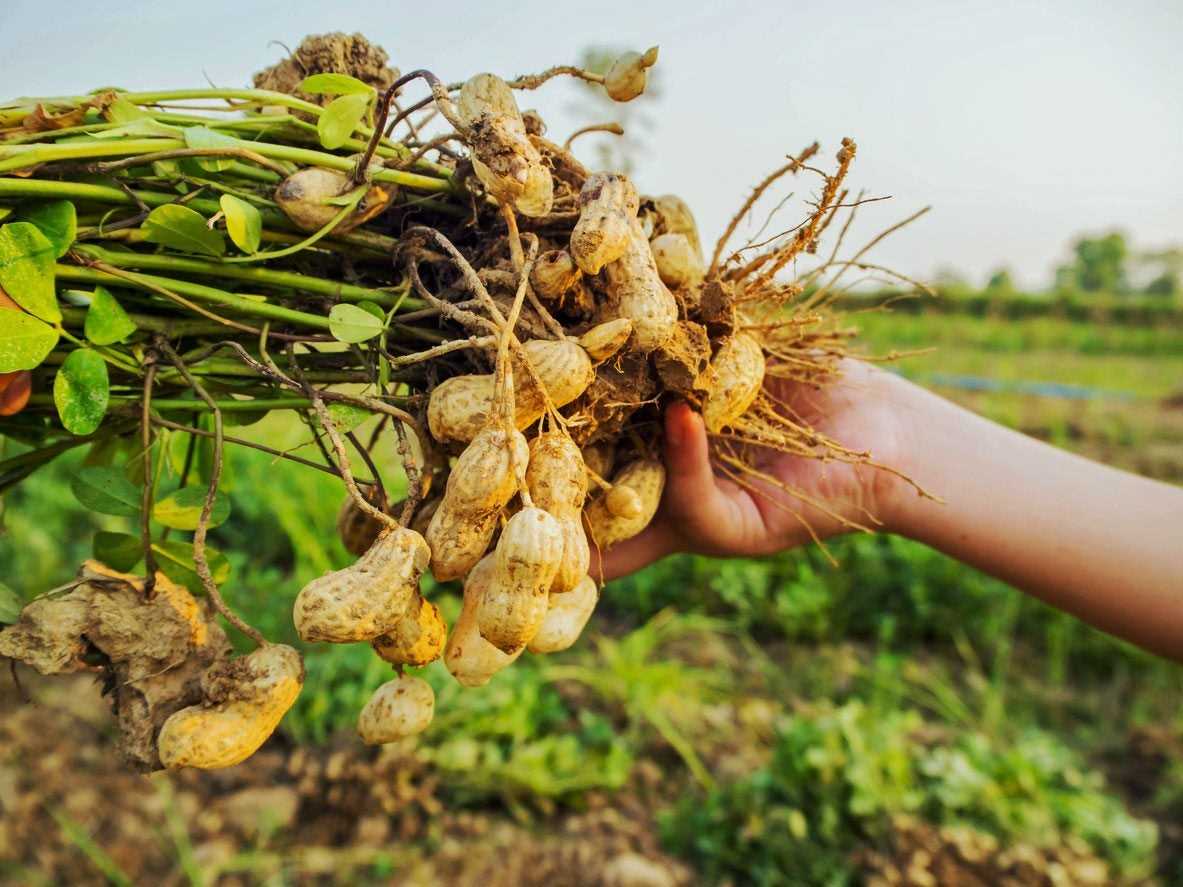
Providing the right nutrients to peanut plants is essential for their growth, development, and overall health. Peanut plants have moderate nutrient requirements, and a balanced fertilizer can help meet these needs.
Here are some fertilizer recommendations for peanuts:
- Before planting, incorporate a balanced granular fertilizer into the soil according to the soil test recommendations.
- Aim for a fertilizer ratio with equal proportions of nitrogen (N), phosphorus (P), and potassium (K), such as 10-10-10 or 14-14-14.
- Apply fertilizer in a band along the rows, avoiding direct contact with the peanut seedlings to prevent burn injury.
- Top-dress the plants with a nitrogen-rich fertilizer, such as ammonium nitrate or urea, during the flowering stage to support pod development.
- Monitor the plant’s growth and leaf color to determine if additional fertilizer applications are needed throughout the growing season.
It is crucial to follow the recommended watering and fertilizing practices to ensure optimal growth and yield of peanuts. By providing adequate moisture and nutrients, you can support the plants’ development and maximize their potential for producing healthy and abundant peanut pods.
Common Pests and Diseases Affecting Peanuts
Peanuts are susceptible to various pests and diseases that can affect their growth and yield. Being aware of these common problems can help you take preventive measures and ensure the health and productivity of your peanut plants.
Pests
- Aphids: These small insects feed on the sap of peanut plants, causing yellowing and curling of leaves. Regular monitoring and the use of insecticidal soaps or oils can help control infestations.
- Cutworms: Cutworms are caterpillars that feed on young peanut plants, cutting them off at the base. Protective barriers and biological controls can be used to prevent damage.
- Wireworms: Wireworms are the larvae of click beetles and can cause damage to peanut seeds and young plants. Crop rotation and soil insecticides can help manage wireworm populations.
- Flea beetles: These small beetles feed on peanut leaves, resulting in small holes and stippling. Insecticides and row covers can be used for control.
- Caterpillars: Various caterpillar species, such as armyworms and loopers, can feed on peanut plants, causing defoliation. Bt-based insecticides and biological controls are effective in managing caterpillar infestations.
Diseases
- Leaf spot: Leaf spot is a common fungal disease that causes small, dark spots on peanut leaves. Regular fungicide applications and good sanitation practices can help control leaf spot.
- Early and late leaf spot: These fungal diseases are similar to leaf spot but can cause more severe damage. Crop rotation, resistant varieties, and timely fungicide applications are effective control measures.
- White mold: Also known as Sclerotinia blight, white mold affects the stems and pods of peanut plants. Good airflow, proper plant spacing, and fungicide treatments can help manage white mold.
- Root-knot nematodes: These microscopic worms infest peanut roots, causing swollen galls and stunted growth. Crop rotation, resistant varieties, and soil fumigation can help control root-knot nematodes.
- Tomato spotted wilt virus: This viral disease is transmitted by thrips and affects the growth and yield of peanut plants. Planting virus-free seed, using reflective mulches, and managing thrips populations can help prevent the spread of the disease.
By properly identifying and managing pests and diseases, you can ensure the successful cultivation of peanuts in your vegetable garden. Regular monitoring, timely treatments, and preventive measures are key to maintaining the health of your peanut plants.
Harvesting and Storing Peanut Crop
Harvesting peanuts is an important step in the growing process, as it determines the quality and yield of the crop. Here are some guidelines to help you harvest and store your peanut crop:
1. Timing
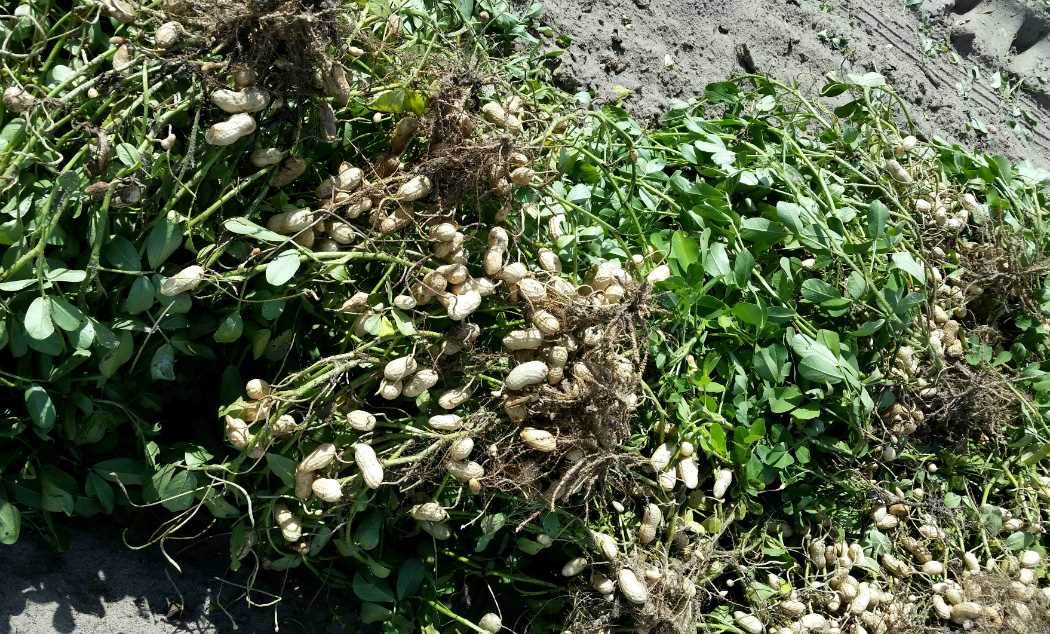
The timing of peanut harvest is crucial. Peanuts are usually ready for harvest when the plants have turned yellow and the leaves begin to fall off. To confirm the readiness, dig up a few plants and check if the pods are fully mature and the nuts inside have formed. This usually occurs 120 to 160 days after planting.
2. Digging up the plants
To harvest peanuts, begin by carefully digging up the peanut plants. Use a garden fork or shovel to loosen the soil around the plants, taking care not to damage the pods. Gently lift the plants from the ground, shaking off excess dirt.
3. Drying
After harvesting, it’s important to dry the peanuts to prevent mold or rot. Lay the plants on a flat surface, such as a tarp or screen, in a well-ventilated area. Let them dry for about 2 to 3 weeks or until the plants are completely dry.
4. Threshing
To separate the peanuts from the plants, you can thresh them by hand or use a mechanical thresher. By hand, gently rub the plants to remove the peanuts. For larger quantities, a mechanical thresher can be more efficient.
5. Curing

After threshing, cure the peanuts by placing them in a well-ventilated area for about 2 to 3 weeks. This allows the peanuts’ skin to dry and harden, enhancing their flavor and improving their shelf life.
6. Storing
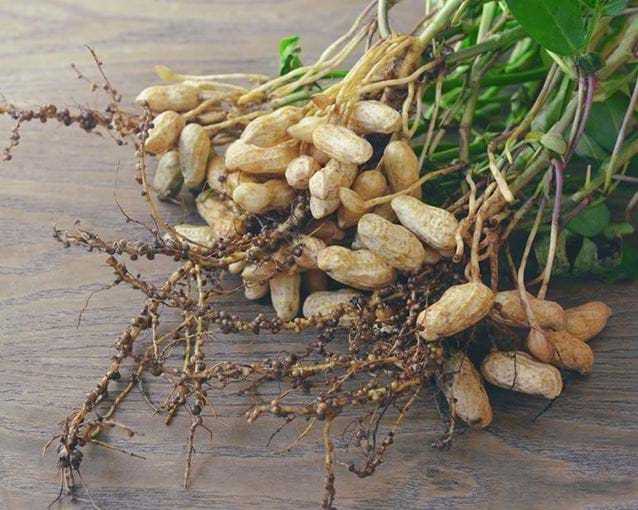
Store cured peanuts in a cool, dry place that is free from moisture. You can use breathable bags, mesh bags, or glass jars to store the peanuts. Avoid storing them in plastic bags or containers, as they can trap moisture and promote spoilage.
7. Checking for spoilage
Regularly check your stored peanuts for any signs of spoilage, such as mold, unusual odor, or discoloration. If you notice any of these signs, discard the affected peanuts to prevent contamination of the entire batch.
By following these guidelines, you can ensure a successful harvest and enjoy the delicious taste of homegrown peanuts for months to come!
Delicious Peanut Recipes to Try
Peanut Butter Banana Smoothie
Start your day with a delicious and nutritious peanut butter banana smoothie. This creamy smoothie combines the rich flavors of peanut butter and the sweetness of bananas for a tasty treat.
Thai Peanut Noodles
Indulge in the flavors of Thailand with this mouthwatering recipe for Thai peanut noodles. The combination of peanut butter, soy sauce, and spices creates a deliciously savory sauce that coats the noodles perfectly.
Crunchy Peanut Butter Cookies
Enjoy a classic treat with a twist with these crunchy peanut butter cookies. The addition of peanuts adds an extra layer of crunch and flavor to these already delicious cookies.
Spicy Peanut-Sesame Slaw
Give your coleslaw a flavorful and spicy kick with this recipe for peanut-sesame slaw. The combination of peanuts, sesame oil, and hot sauce adds a unique twist to this refreshing and crunchy salad.
Peanut Butter Chocolate Fudge
Satisfy your sweet tooth with this indulgent recipe for peanut butter chocolate fudge. The combination of creamy peanut butter and rich chocolate creates a decadent treat that is sure to impress.
Spicy Peanut Chicken Stir-Fry
Add a little spice to your dinner routine with this recipe for spicy peanut chicken stir-fry. The combination of tender chicken, crunchy vegetables, and spicy peanut sauce creates a delicious and satisfying meal.
- Peanut Butter Banana Smoothie
- Thai Peanut Noodles
- Crunchy Peanut Butter Cookies
- Spicy Peanut-Sesame Slaw
- Peanut Butter Chocolate Fudge
- Spicy Peanut Chicken Stir-Fry
These delicious peanut recipes are sure to please your taste buds and impress your friends and family. Give them a try and enjoy the delightful flavors of peanuts in a variety of dishes.
“Question-Answer”
Can I grow peanuts in my vegetable garden?
Yes, you can grow peanuts in your vegetable garden. They are a great addition to the garden as they fix nitrogen in the soil and have a high protein content.
What are the different varieties of peanuts?
There are several different varieties of peanuts including Virginia, Spanish, Valencia, and Runner. Each variety has its own unique characteristics and flavor.
How do I plant peanuts in my garden?
To plant peanuts in your garden, you will need to prepare the soil by loosening it and adding compost. Plant the peanuts about 2 inches deep and 6 inches apart. Make sure to water them regularly and keep the area weed-free.
How long does it take for peanuts to grow?
Peanuts take about 4 to 5 months to grow from planting to harvest. The exact time may vary depending on the variety and growing conditions.
What are the common pests and diseases that affect peanuts?
Common pests that affect peanuts include aphids, caterpillars, and nematodes. Diseases such as leaf spot, stem rot, and peanut smut can also affect peanut plants.
Can I save the seeds from my peanut plants for next year?
No, peanuts do not produce true seeds. Instead, they produce pods that contain the peanut seeds. These seeds can be saved and planted for the next growing season.


