- Planting Spring Garlic
- Choosing the Right Location
- Preparing the Soil
- 1. Clear the area
- 2. Loosen the soil
- 3. Add organic matter
- 4. Adjust the pH
- 5. Level the soil
- 6. Test for drainage
- 7. Mulch the soil
- Selecting Garlic Bulbs
- 1. Type of Garlic
- 2. Size of Bulbs
- 3. Clove Separation
- 4. Disease Resistance
- 5. Source of Bulbs
- Purchasing Garlic Bulbs
- 1. Choose a Reliable Supplier
- 2. Select the Right Variety
- 3. Inspect the Bulbs
- 4. Size Matters
- 5. Consider Organic Options
- 6. Buy Fresh Bulbs
- Inspecting the Bulbs
- Timing and Planting
- Planting in Early Spring
- Planting in Late Fall
- Determining the Right Time
- Factors to Consider
- Recommended Planting Dates
- Planting Techniques
- Watering and Mulching
- “Question-Answer”
- When is the best time to plant spring garlic?
- Can I plant spring garlic in containers?
- How deep should I plant spring garlic cloves?
- What kind of soil does spring garlic prefer?
- How often should I water spring garlic?
- “Video” Garlic: Growing from Spring Time to Summer Harvest!
Spring garlic, also known as green garlic or fresh garlic, is a flavorful and versatile vegetable that is a staple in many culinary traditions. Unlike regular garlic, which is harvested after the bulbs have fully matured, spring garlic is harvested while the plant is still young and tender. This gives it a milder, more subtle flavor that is perfect for use in a variety of dishes.
Planting spring garlic is a relatively simple process that can be done in early spring as soon as the soil is workable. Simply separate the cloves from a head of garlic and plant them about two inches deep, spaced six inches apart. Choose a location in your vegetable garden that receives full sun and has well-drained soil.
Once planted, spring garlic requires careful maintenance to ensure a successful harvest. Water the plants regularly, keeping the soil evenly moist but not overly saturated. Mulching around the plants can help retain moisture and suppress weed growth. Additionally, it is important to regularly remove any weeds that may compete with the garlic for nutrients.
In terms of harvesting spring garlic, there are a few different methods you can use. If you want to enjoy the mild flavor of the garlic in its entirety, you can harvest the entire plant when the cloves have formed but are still small and tender. Alternatively, you can harvest individual cloves as needed, leaving the rest of the plant in the ground to continue growing. No matter which method you choose, it is important to carefully dig up the plants, being mindful not to damage the bulbs.
With its delicate flavor and ease of cultivation, spring garlic is a wonderful addition to any vegetable garden. Whether used in soups, stir-fries, or as a flavorful garnish, this versatile vegetable is sure to enhance the taste of any dish.
Planting Spring Garlic
Spring garlic is a versatile plant that can be easily grown in the vegetable garden. Here are some steps to follow when planting spring garlic:
- Selecting the right cloves: Choose healthy and disease-free garlic cloves for planting. Look for large, firm cloves with intact papery skins.
- Preparing the soil: Garlic prefers well-draining soil with a pH level between 6.0 and 7.0. Add organic matter, such as compost or well-rotted manure, to improve soil fertility and drainage.
- Planting depth and spacing: Plant the garlic cloves about 2 inches deep into the soil, with the pointed end facing upwards. Space the cloves about 4 to 6 inches apart in rows that are spaced 12 inches apart.
- Watering: After planting, water the garlic cloves thoroughly to ensure good root establishment. Maintain soil moisture throughout the growing season, but be careful not to overwater as garlic plants don’t tolerate waterlogged soil.
- Mulching: Apply a layer of mulch, such as straw or dried leaves, around the garlic plants to conserve moisture, suppress weed growth, and regulate soil temperature.
- Fertilizing: Garlic is a moderate feeder and benefits from a balanced fertilizer application. Apply a slow-release organic fertilizer at planting time and a top-dressing of compost or aged manure during the growing season.
- Weed control: Regular weeding is essential to keep the area around the garlic plants free from competing plants. Be gentle when weeding to avoid damaging the garlic bulbs.
- Harvesting: Spring garlic can be harvested when the leaves start to turn yellow and dry out. Carefully dig up the bulbs using a garden fork or trowel, being careful not to bruise or damage them.
- Storing: After harvesting, allow the garlic bulbs to dry in a warm, well-ventilated area for a few weeks. Once dry, trim the roots and foliage, and store the bulbs in a cool and dry place.
By following these steps, you can successfully plant and grow spring garlic in your vegetable garden. Enjoy the flavors and health benefits of this delicious herb!
Choosing the Right Location
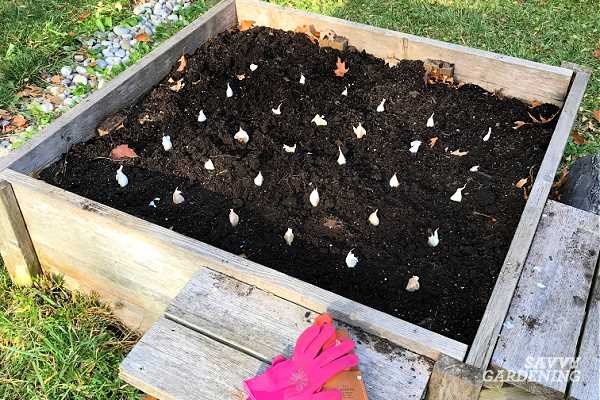
When planting spring garlic in your vegetable garden, it is important to choose the right location. Here are some factors to consider:
- Sunlight: Spring garlic prefers a sunny location with at least 6 hours of direct sunlight each day. Choose a spot that receives ample sunlight and avoid areas that are heavily shaded.
- Soil: The soil should be well-drained and loamy, with a pH level between 6.0 and 7.0. Avoid planting spring garlic in heavy clay or sandy soils, as these can lead to poor growth and development. If your soil is not ideal, you can amend it with organic matter, such as compost or well-rotted manure, to improve its texture and fertility.
- Watering: Spring garlic requires regular watering, especially during dry periods. Choose a location where you can easily provide water to the plants, either through a drip irrigation system or by hand watering.
- Companion plants: Consider the companion plants that you have in your vegetable garden. Spring garlic grows well with a variety of vegetables, such as lettuce, tomatoes, and beans. Avoid planting it near plants that have similar pests or diseases, as this can increase the risk of contamination.
By choosing the right location for your spring garlic, you can ensure optimal growth and a bountiful harvest. Take the time to assess your garden and make any necessary adjustments before planting.
Preparing the Soil
Before planting spring garlic in your vegetable garden, it is important to prepare the soil properly. Here are some steps to follow:
1. Clear the area
Start by clearing the area where you plan to plant the spring garlic. Remove any weeds, rocks, or debris that may interfere with the growth of your plants.
2. Loosen the soil
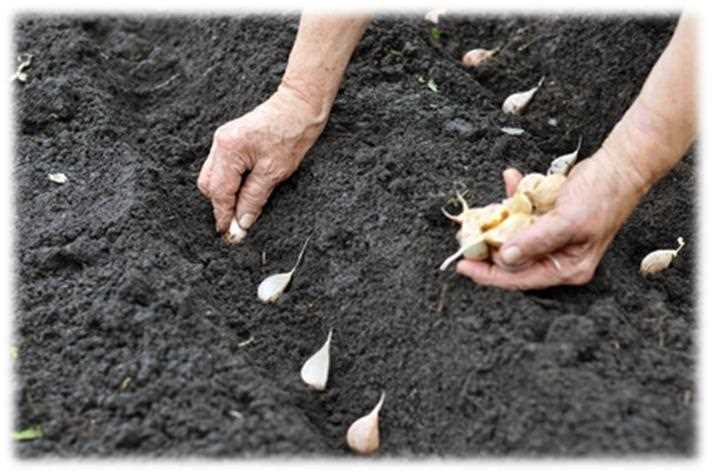
Using a garden fork or a tiller, loosen the soil to a depth of about 6-8 inches. This will help improve drainage and allow the roots of the spring garlic to penetrate the soil easily.
3. Add organic matter
Next, enrich the soil by adding organic matter such as compost, well-rotted manure, or leaf mold. This will help improve the soil’s fertility, structure, and moisture-holding capacity. Spread a layer of organic matter evenly over the planting area and mix it into the soil.
4. Adjust the pH
Check the pH level of the soil and adjust it if necessary. Spring garlic prefers a pH range of 6.0 to 7.5. If the soil is too acidic, add lime to increase the pH. If the soil is too alkaline, add sulfur or peat moss to lower the pH.
5. Level the soil
After adding organic matter and adjusting the pH, rake the soil to level the surface. This will provide a smooth and even bed for planting the spring garlic.
6. Test for drainage
Before planting, perform a drainage test to ensure that the soil drains well and does not become waterlogged. Dig a hole approximately 1 foot deep, fill it with water, and observe how quickly the water drains. If the water drains slowly, you may need to improve drainage by amending the soil with sand or gravel.
7. Mulch the soil
Finally, apply a layer of mulch over the prepared soil. This will help suppress weeds, conserve moisture, and regulate soil temperature.
By following these steps to prepare the soil, you will create an optimal environment for the growth and development of your spring garlic plants.
Selecting Garlic Bulbs
When selecting garlic bulbs for planting in your vegetable garden, there are a few key factors to consider. These factors will ensure that you choose the best garlic bulbs for a successful crop.
1. Type of Garlic
There are two main types of garlic: hardneck and softneck. Hardneck varieties are known for their strong flavor and are typically more suitable for colder climates. Softneck varieties, on the other hand, have a milder flavor and are better suited for warmer regions.
2. Size of Bulbs
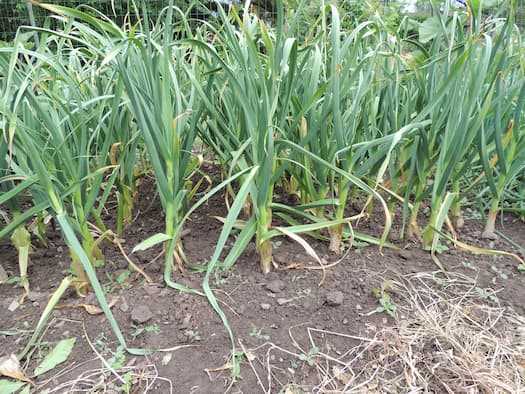
Choose garlic bulbs that are large and firm. Avoid bulbs that are small or soft, as these may not produce as well. The size of the bulb is a good indicator of the size of the cloves inside, which will eventually form individual garlic plants.
3. Clove Separation
Before planting, gently separate the cloves from the bulb. Each clove will develop into a separate garlic plant. It is important to choose bulbs that have well-formed and undamaged cloves for optimal growth.
4. Disease Resistance
Look for garlic bulbs that are disease-resistant. This will help prevent common garlic diseases, such as white rot or rust, from affecting your crop. Disease-resistant varieties are often labeled or indicated by the supplier.
5. Source of Bulbs
It is recommended to purchase garlic bulbs from a reputable source, such as a local farmer or a trusted seed supplier. This ensures that you are getting high-quality bulbs that are suitable for planting in your area.
By considering these factors when selecting garlic bulbs, you can increase the chances of a successful harvest and enjoy delicious homegrown garlic in your meals.
Purchasing Garlic Bulbs
When purchasing garlic bulbs for planting in your vegetable garden, there are a few key factors to consider to ensure you choose the best bulbs for successful growth. Here are some tips to help you make the right selection:
1. Choose a Reliable Supplier
Look for a reputable supplier or nursery that specializes in garlic bulbs. This will ensure that you are getting high-quality bulbs that have been properly grown and stored.
2. Select the Right Variety
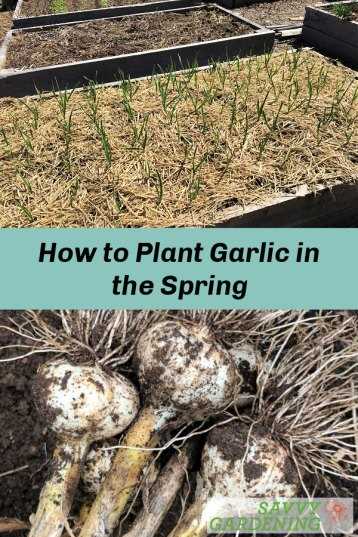
There are many different varieties of garlic available, each with its own unique flavor and characteristics. Research the different varieties and choose one that suits your preferences and growing conditions.
3. Inspect the Bulbs
Before purchasing, carefully examine each garlic bulb to ensure that it is firm and free of any soft spots or mold. Avoid bulbs that show signs of damage or disease.
4. Size Matters
When it comes to garlic bulbs, bigger is usually better. Larger bulbs tend to produce larger cloves, which will result in more robust garlic plants and a better harvest.
5. Consider Organic Options
If possible, choose organic garlic bulbs. Organic garlic is grown without the use of synthetic pesticides and fertilizers, making it a healthier and more environmentally friendly choice.
6. Buy Fresh Bulbs
Garlic bulbs are best planted soon after harvest, so try to purchase bulbs that are as fresh as possible. Look for bulbs with a dry outer skin and plump cloves.
By considering these factors and following these tips, you can ensure that you are purchasing high-quality garlic bulbs that will thrive in your vegetable garden.
Inspecting the Bulbs
Before planting spring garlic bulbs in your vegetable garden, it is important to inspect them. This will help you ensure that the bulbs are healthy and free from any diseases or damage. Here are some steps to follow when inspecting the bulbs:
- Check for firmness: Gently squeeze the bulbs to see if they are firm. Soft bulbs may indicate rot or disease, and should be discarded.
- Examine the skin: Inspect the outer skin of the bulbs for any blemishes, spots, or discoloration. Healthy bulbs should have a clean, smooth skin without any damage.
- Inspect the roots: Carefully examine the roots of the bulbs. They should be white, firm, and free from any signs of decay or damage.
- Look for signs of sprouting: If the bulbs have started to sprout, it is an indication that they are healthy and ready to be planted.
- Check for mold or fungus: Mold or fungus on the bulbs can indicate disease or poor storage conditions. Avoid using bulbs that show any signs of mold or fungus growth.
If you notice any issues during the inspection process, it is best to discard those bulbs to prevent any potential problems in your garden. It is always better to start with healthy bulbs to ensure a successful crop of spring garlic.
Timing and Planting
Spring garlic can be planted in both early spring and late fall, depending on your climate and growing season. It is important to choose the right planting time to ensure the best growth and development of the garlic bulbs.
Planting in Early Spring
If you live in an area with mild winters and early springs, you can plant spring garlic as soon as the ground can be worked in early spring. This is usually when the soil temperature reaches around 40°F (4°C).
Before planting, prepare the soil by removing any weeds or debris and loosening the soil. You can also add some compost or well-rotted manure to improve the soil fertility.
Plant individual cloves about 2-4 inches (5-10 cm) deep and 4-6 inches (10-15 cm) apart in rows or beds. Ensure that the pointed end of the clove is facing upwards.
Water the garlic after planting to settle the soil around the cloves. Keep the soil evenly moist throughout the growing season, but be careful not to overwater, as garlic doesn’t like wet feet.
Planting in Late Fall
In areas with colder winters, it is best to plant spring garlic in late fall. This allows the cloves to establish roots before the ground freezes.
Clean and prepare the planting area in late summer or early fall. Remove any weeds and debris, and amend the soil if necessary. Garlic prefers a well-draining soil with a pH between 6.0 and 7.0.
Plant the cloves about 2-4 inches (5-10 cm) deep and 4-6 inches (10-15 cm) apart, with the pointed end facing upwards. Cover the cloves with soil and water them thoroughly.
Once planted, mulch the area with a layer of straw or leaves to insulate the soil and protect the cloves from freezing temperatures. The mulch should be about 4-6 inches (10-15 cm) thick.
During the winter, keep an eye on the garlic bed and remove any weeds that may emerge. In early spring, remove the mulch to allow the garlic to emerge and grow.
By planting at the right time and providing proper care, you can enjoy a bountiful harvest of spring garlic in your vegetable garden.
Determining the Right Time
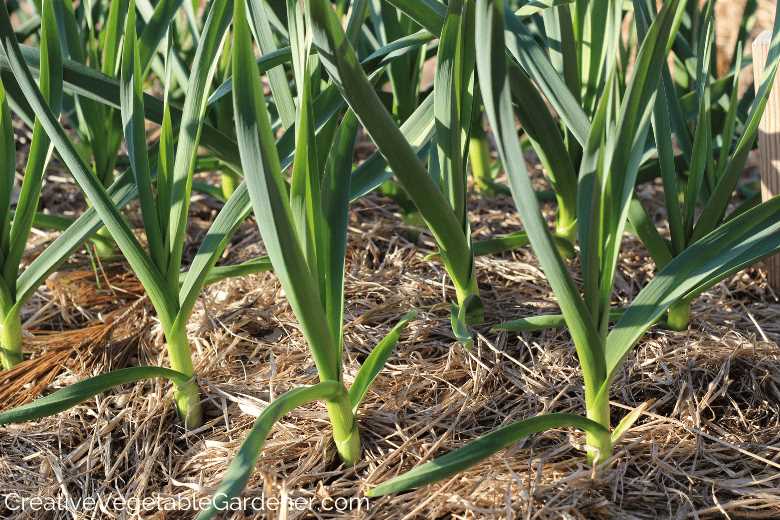
The right time to plant spring garlic depends on your climate and the specific variety of garlic you are planting. Spring garlic is typically planted in the fall or winter, allowing it to establish roots before the cold weather hits.
Factors to Consider
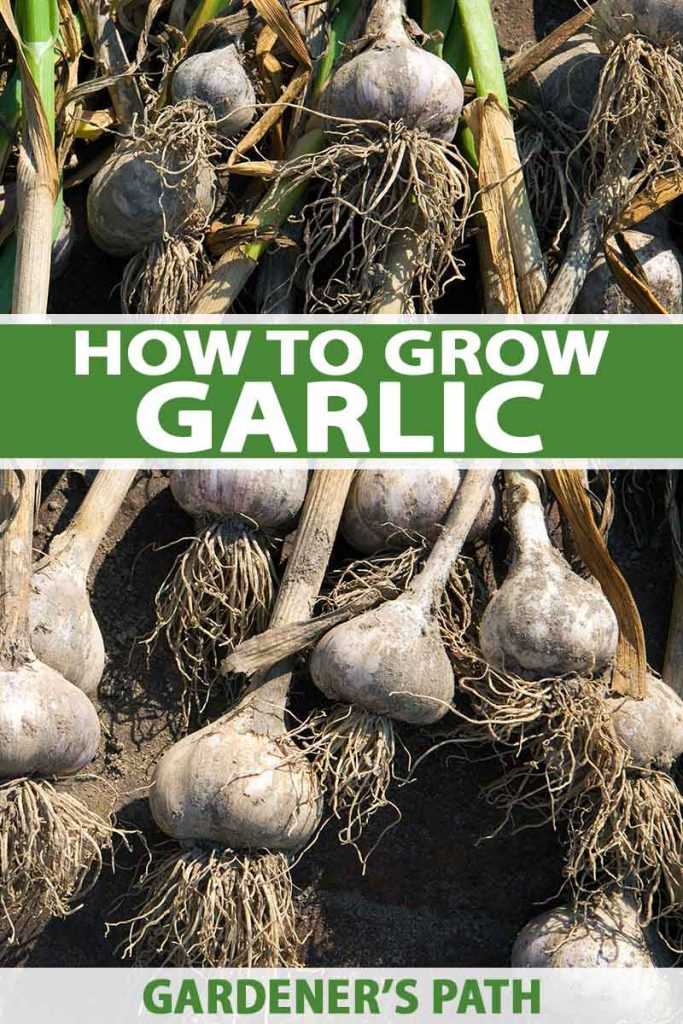
- Climate: Garlic needs a period of cold temperatures to vernalize, which is necessary for bulb development. Planting too early in a mild climate may result in poor bulb formation.
- Soil Temperature: The optimal soil temperature for planting garlic is around 50°F (10°C). Avoid planting when the soil is too warm, as this can cause premature sprouting and weak bulb formation.
- Planting Zone: Different garlic varieties have different planting zone requirements. Check the recommended planting zones for the specific variety of garlic you are planting.
Recommended Planting Dates
Here are some general guidelines for planting spring garlic:
| Planting Zone | Recommended Planting Time |
|---|---|
| Zones 1-3 | Mid-September to early October |
| Zones 4-6 | Late September to mid-October |
| Zones 7-9 | Early to mid-November |
Note that these dates are just general recommendations and can vary depending on the specific garlic variety and your local climate. It’s always best to consult with a local gardening expert or consult the planting guidelines provided by the seed supplier.
Planting Techniques
Planting spring garlic in your vegetable garden is a straightforward process. Follow these steps to ensure successful growth:
- Choose the Right Time: Spring garlic is typically planted in early spring, after the soil temperature reaches around 50°F (10°C). Avoid planting in late spring or summer, as the garlic may not develop its full potential.
- Prepare the Soil: Spring garlic prefers well-drained, loamy soil with a pH level between 6 and 7. Prepare the soil by removing any weeds and adding organic matter, such as compost, to improve its fertility and drainage.
- Select Healthy Garlic Bulbs: Choose large, firm garlic bulbs from a reputable source. Look for bulbs with undamaged cloves and no signs of disease or pests.
- Break the Bulbs into Cloves: Carefully separate the cloves from the garlic bulb, ensuring that each clove is intact and healthy. Avoid breaking or damaging the cloves during this process.
- Plant the Cloves: Dig small holes in the prepared soil, spacing them about 4 to 6 inches (10 to 15 cm) apart. Place one clove in each hole, with the pointed side facing upwards and the flat side downwards. Ensure that the cloves are planted about 2 inches (5 cm) deep.
- Water and Mulch: After planting, water the cloves thoroughly to ensure good soil contact and encourage root growth. Apply a layer of mulch, such as straw or dried grass clippings, to help retain moisture and suppress weed growth.
- Provide Regular Care: Throughout the growing season, water the plants regularly to keep the soil moist but not waterlogged. Monitor for pests and diseases, and take appropriate measures to control them if necessary.
- Harvesting: Spring garlic is typically ready for harvest in late spring or early summer, when the leaves turn yellow and begin to dry out. Gently loosen the soil around the bulbs and carefully lift them from the ground using a garden fork or shovel.
By following these planting techniques and providing proper care, you can enjoy a bountiful harvest of flavorful spring garlic in your vegetable garden.
Watering and Mulching

Proper watering is essential for the growth and development of spring garlic. The plants need a consistent moisture level, but over-watering should be avoided as it can lead to root rot and other diseases. Here are some guidelines for watering spring garlic:
- Water the plants deeply, making sure that the soil is moist to a depth of 6-8 inches.
- Avoid over-watering, as this can cause the roots to become waterlogged, leading to rot.
- Check the moisture level of the soil regularly by sticking your finger into the soil. If it feels dry, it’s time to water.
- Water the plants early in the morning or late in the evening to minimize evaporation.
In addition to proper watering, mulching can also help to maintain moisture levels in the soil and suppress weeds. Here are some tips for mulching spring garlic:
- Apply a layer of organic mulch, such as straw or compost, around the plants.
- The mulch should be about 2-3 inches thick.
- Make sure the mulch is not piled directly against the plants, as this can create a favorable environment for pests and diseases.
- Mulching will help to retain moisture in the soil, reduce weed competition, and provide insulation to the plants.
By following these watering and mulching practices, you can ensure optimal growth and yield of spring garlic in your vegetable garden.
“Question-Answer”
When is the best time to plant spring garlic?
The best time to plant spring garlic is in the fall, about four to six weeks before the first expected frost date.
Can I plant spring garlic in containers?
Yes, you can plant spring garlic in containers. Use a pot that is at least 6 inches deep and has drainage holes to allow excess water to escape.
How deep should I plant spring garlic cloves?
Spring garlic cloves should be planted about 2 inches deep in the soil.
What kind of soil does spring garlic prefer?
Spring garlic prefers well-draining soil that is rich in organic matter. It is also important to ensure that the soil has a pH level between 6 and 7.
How often should I water spring garlic?
Spring garlic should be watered regularly, keeping the soil moist but not oversaturated. Watering once or twice a week should be sufficient, depending on the weather conditions.


